Table of Contents
Alright, it's that time of year again. The air gets crisp, the leaves turn colors, and suddenly, pumpkins are everywhere. You see those elaborate carvings online, the ones that look like they took a week and maybe a degree in sculpture, and think, "Yeah, right. Not happening." Maybe you've tried before, ended up with a lopsided mess, and swore off pumpkin guts forever. We get it. Carving a pumpkin can feel like a daunting task, especially when you just want something cool for the porch without needing a toolbox full of specialized gadgets or the patience of a saint.
Getting Started: Picking Your Pumpkin and Essential Tools
Getting Started: Picking Your Pumpkin and Essential Tools
Alright, first things first: you need a pumpkin. Don't just grab the biggest one you see. Look for a medium to large pumpkin with smooth skin – this makes drawing and cutting much easier. Give it a good tap; it should sound hollow. Check the bottom to make sure it sits flat and won't roll away mid-carve. And the stem? It should be firm and securely attached. A wobbly stem can mean the pumpkin is starting to rot. Now, about tools. Forget those flimsy plastic sets that snap on the first tough spot. You really only need a few solid items. A sturdy, serrated knife works wonders for cutting the top off (or bottom, more on that later). A large scoop or spoon is essential for clearing out the guts and seeds. And for the actual carving? A small, serrated saw-like tool (often found in decent carving kits, but you can find similar small craft saws) gives you control for detail work without the danger of a sharp kitchen knife slipping.
Simple Techniques for Fun Pumpkin Carving Ideas Easy

Simple Techniques for Fun Pumpkin Carving Ideas Easy
Hollowing Out Without the Hassle
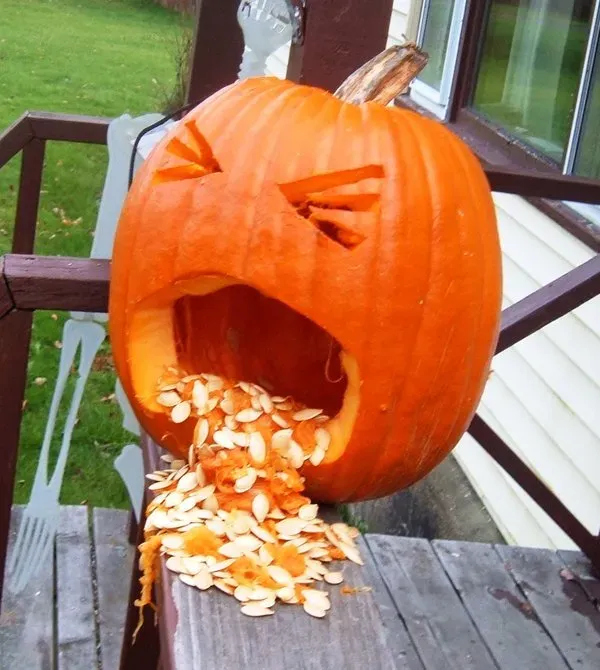
so you've got your pumpkin and your tools. The first big step is getting the guts out. Most people cut a circle around the stem at the top. That works, sure, but try cutting a circle on the *bottom* instead. It makes the pumpkin sit flatter, and it's way easier to slide it over a light source later. Use your sturdy serrated knife for this cut, angling it slightly inward so the "lid" (or base, in this case) doesn't fall inside. Once that's off, grab your scoop. Don't just scrape the sides; really dig in and thin out the walls a bit, maybe to about an inch thick. This makes carving much easier later. Get rid of all the seeds and stringy bits. It's messy, embrace it. Think of it as a necessary evil before the fun starts.
Basic Cuts and Simple Shapes
Now for the actual carving, where the *fun pumpkin carving ideas easy* really come to life. Forget intricate patterns for now. We're focusing on simple shapes. Think triangles for eyes and jagged lines for a mouth. The small serrated carving saw is your best friend here. Don't try to push it straight through; use a gentle back-and-forth sawing motion. Keep the blade perpendicular to the pumpkin surface for clean cuts. If you're doing multiple shapes, start with the smallest or most central one first. Don't be afraid to practice on a scrap piece of pumpkin skin if you're nervous. Remember, a simple shape, cut cleanly, looks way better than a complicated one done poorly. Sometimes, less is definitely more when you're aiming for easy and effective.
- Cut from the bottom instead of the top for a flat base.
- Use a scoop to thin the pumpkin walls to about 1 inch.
- Employ a back-and-forth sawing motion with your tool.
- Keep cuts perpendicular for cleaner edges.
- Practice simple shapes like triangles and squares first.
More Fun Pumpkin Carving Ideas Easy to Bring Your Pumpkin to Life
More Fun Pumpkin Carving Ideas Easy to Bring Your Pumpkin to Life
Beyond the Basic Triangle Face: Getting Creative Simply
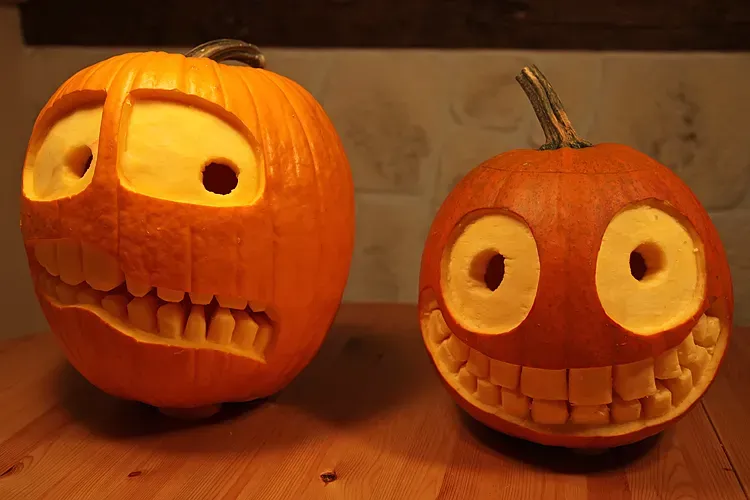
you've mastered the basic cuts. Now, let's move beyond the classic jack-o'-lantern face, while still keeping things firmly in the *fun pumpkin carving ideas easy* zone. Instead of just two eyes and a mouth, think about expressions. A wide, goofy grin with uneven teeth is simple but effective. How about one eye winking, or maybe two different-sized eyes? You can also play with shapes – stars, moons, or even just abstract holes cut randomly can look surprisingly cool, especially when lit up. Don't feel pressured to make it look perfect; slightly wonky adds character. Remember that small carving saw? It's great for cutting out simple shapes you've drawn on with a marker.
Using Stencils and Simple Tools for Impact
Feeling a bit more ambitious but still want easy? Stencils are your best friend. You can print simple shapes like cats, bats, or ghosts, tape them onto the pumpkin, and then use a tool to poke holes along the outline. You don't even have to cut the whole shape out; just the outline of dots can look really effective. Or, for something different, grab a potato peeler. You can use it to shave away the top layer of skin without cutting all the way through. This creates areas that glow differently when lit. Think stripes, swirls, or even just shaving off the skin around your carved shapes to make them pop. Cookie cutters aren't just for cookies either; firmly press metal ones into the pumpkin for perfect circles, stars, or other simple shapes, then just pop the piece out.
- Use stencils for simple animal shapes or outlines.
- Poke holes along stencil lines instead of full cuts.
- Shave off skin with a potato peeler for texture and varied glow.
- Press metal cookie cutters into the pumpkin flesh.
- Combine carved shapes with shaved areas for depth.
Ideas That Don't Require Intricate Cutting
Who says carving means cutting all the way through? Some of the most *fun pumpkin carving ideas easy* involve minimal actual carving. Consider just carving out a simple, large shape – like a big circle or a square – and then using that opening as a frame for something else. Maybe place a spooky spider web inside, or have a plastic skeleton hand reaching out. You can also get creative with painting on the pumpkin first and then only carving a few key areas, like the eyes or mouth. This adds color and dimension without needing complex knife skills. Another easy trick is to carve just the outline of a shape, leaving the center piece attached but slightly pushed in, creating a cool, recessed effect.
Lighting, Longevity, and FAQs for Your Fun Pumpkin Carving Ideas
Lighting, Longevity, and FAQs for Your Fun Pumpkin Carving Ideas
Bringing Your Creation to Light: Lighting Up the Fun
So you've put in the work, followed some of these *fun pumpkin carving ideas easy* steps, and now you've got a carved masterpiece (or at least, something recognizable). How do you make it glow? The classic is a real candle, of course. They give that warm, flickering light everyone loves. Just make sure to cut a vent hole in the top (or bottom, if you cut it that way) so the heat can escape and the flame gets enough oxygen. Position the candle in the center, light it carefully with a long match or lighter, and pop the lid back on. If you're worried about fire hazards, especially with kids or pets around, LED tea lights are a fantastic alternative. They're bright, safe, and last a long time on a set of batteries. You can even find ones that flicker like real candles. Some folks use small battery-powered string lights inside for a different effect, especially if they've done a design with lots of small holes.
Keeping Your Spooky Friend Fresher, Longer
It's a sad truth: carved pumpkins don't last forever. Once you cut into them, they start to decompose. Usually, you get maybe three to five days before things start looking a bit... saggy and moldy. But you can buy yourself a little extra time. One simple trick is to rub petroleum jelly (like Vaseline) on all the cut edges. This seals in moisture and helps prevent drying out, which is a big reason they collapse. Another method is to give your pumpkin a "bath." Submerge the whole carved pumpkin in a bucket of cold water for a few hours every day or two, especially if it's starting to look dry. The pumpkin absorbs the water and firms up. If you're not displaying it constantly, store it in a cool, dry place, or even the refrigerator if you have space. Direct sunlight and warm temperatures are the enemy of a fresh carved pumpkin. A little care can help your *fun pumpkin carving ideas easy* creation last through Halloween night.
- Use real candles with a vent hole for classic flicker.
- Opt for LED tea lights for safety and longevity.
- Rub petroleum jelly on cut edges to seal in moisture.
- Submerge the pumpkin in cold water periodically to rehydrate.
- Store in a cool, dry place, away from direct sun.
Time to Get Carving
So there you have it. Turns out, you don't need to be Michelangelo to carve a pumpkin that looks decent, maybe even great. We've covered the basics, shared some genuinely *fun pumpkin carving ideas easy* enough not to make you weep with frustration, and even dropped some tips to keep your creation looking fresh for a bit longer. The point is, it should be fun, a bit messy, and result in something you're not embarrassed to put on your porch. Grab a pumpkin, grab a cheap kit, pick an idea that doesn't look like a geometry problem, and give it a shot. Worst case? You have a slightly deformed squash. Best case? You've got a cool, glowing jack-o'-lantern and maybe even enjoyed the process. Happy carving.