Table of Contents
Let's be honest. Pumpkin carving? It's a mess. Guts everywhere, slippery knives, and let's not even talk about the potential for sliced fingers. Plus, those carved masterpieces tend to get a bit…sad-looking after a few days. If the thought of scooping slimy seeds sends a shiver down your spine, or you're just short on time (and maybe patience), you're in the right place. Forget the traditional, messy route. We're diving headfirst into the world ofeasy pumpkin decorating ideas no carve.
Why Skip the Knife? The Appeal of Easy Pumpkin Decorating Ideas No Carve
Why Skip the Knife? The Appeal of Easy Pumpkin Decorating Ideas No Carve
Avoiding the Gory Details (and the Mess)
Let's face it, carving pumpkins is often less about artistic expression and more about wrestling a slippery gourd while trying not to lose a finger. The sheer volume of slimy, stringy guts that erupt from inside is enough to make anyone reconsider. And the mess? It gets everywhere. Countertops, floors, clothes, somehow even the ceiling. Opting foreasy pumpkin decorating ideas no carveimmediately eliminates the sharp objects and the biohazard cleanup. You get to enjoy the creative part without the dread of the aftermath. It's a win-win, unless you *really* enjoy scraping dried pumpkin pulp off your kitchen table.
Durability and Design Freedom
Carved pumpkins are on borrowed time from the moment you make that first cut. They start to wilt, mold, and generally look sad within days, especially here in the often-too-warm fall climate. No-carve methods, on the other hand, preserve the pumpkin's integrity. You can paint, glue, glitter, or decoupage your way to a design that lasts for weeks, sometimes even months, depending on the technique and how you store it. This opens up a massive world of creative possibilities that go way beyond spooky faces. Plus, it makes decorating with younger kids much safer and more enjoyable for everyone involved.
- No sharp knives needed – safer for everyone.
- Significantly less mess and easier cleanup.
- Decorations last much longer than carved pumpkins.
- Opens up a wider range of design techniques (paint, glue, fabric, etc.).
- Easier to involve young children in the decorating process.
- Pumpkins remain intact and can be reused or displayed longer.
Brush Strokes & Bold Colors: PaintBased Easy Pumpkin Decorating Ideas No Carve
Brush Strokes & Bold Colors: PaintBased Easy Pumpkin Decorating Ideas No Carve
Starting with a Clean Slate (and the Right Paint)
Alright, so you've ditched the carving knife. Good call. Now comes the fun part: color. Painting is probably the most straightforward way to get intoeasy pumpkin decorating ideas no carve. But don't just grab any old paint. Acrylic craft paints are your best friend here. They dry fast, clean up with water (usually), and stick pretty well to that slightly waxy pumpkin surface. Before you start slathering, give your pumpkin a quick wipe-down with a damp cloth to get rid of any dirt. A clean surface means the paint sticks better. Sometimes, a base coat of white or black helps vibrant colors pop, especially on a deep orange pumpkin. Think of it like priming a wall before painting – makes a big difference in the final look.
Getting Creative with Techniques
Once you have your base coat (or if you're going straight onto the orange), the possibilities really open up. You can go simple and paint solid colors – maybe a matte black for spooky sophistication, or bright pastels for a whimsical look. Stripes, polka dots, or freehand designs are easy enough with a steady hand and some different brush sizes. For something a bit more textured, try dabbing the paint with a sponge for a mottled effect. Or, if you're feeling fancy, use painter's tape to create crisp geometric patterns. I once tried a drip effect by pouring thinned paint over the top; it looked messy initially, but dried into this cool, organic pattern.
Technique | Supplies Needed | Effort Level |
|---|---|---|
Solid Color | Paint, brush | Easy |
Stripes/Dots | Paint, brushes, painter's tape (optional) | Medium |
Sponge Dabbing | Paint, sponge | Easy |
Geometric Patterns | Paint, brushes, painter's tape | Medium to Hard |
Sealing the Deal (and Your Design)
You've put in the work, the paint looks fantastic, and youreasy pumpkin decorating ideas no carveare coming to life. Now, how do you make sure it stays that way? A clear sealant is key, especially if your pumpkin will be living outside. A spray-on acrylic sealant works wonders. It protects the paint from rain, dew, and general wear and tear. Just make sure the paint is completely dry before you spray, or you'll end up with a smudged mess. A couple of light coats are better than one heavy one. This final step ensures your painted masterpiece lasts through the season, looking fresh and vibrant, unlike those sad, sagging carved pumpkins down the street.
Stick, Sprinkle, & Shine: Textured Easy Pumpkin Decorating Ideas No Carve
Stick, Sprinkle, & Shine: Textured Easy Pumpkin Decorating Ideas No Carve
Getting Sticky: The Wonders of Glue
Once you move beyond paint, glue becomes your best friend foreasy pumpkin decorating ideas no carve. White craft glue, spray adhesive, hot glue – they all have their place. White craft glue is great for lighter materials like paper, fabric scraps, or tissue paper for a decoupage effect. Just brush it on, smooth your material over it, and add another coat on top. Spray adhesive is fantastic for covering a large area quickly with something like glitter or fake snow. Hot glue is the heavyweight champion for attaching bulkier items like buttons, googly eyes (a classic!), or even small toys. Just be careful with hot glue; it lives up to its name and can melt delicate materials or, you know, burn you.
Adding Sparkle and Texture: From Glitter to Grains
Want a pumpkin that catches the light or feels interesting to the touch? Texture is your answer. Glitter is the obvious choice for shine, and a little goes a long way (though somehow it still ends up *everywhere* for weeks). Apply glue in a pattern or over the whole pumpkin, then sprinkle generously. Shake off the excess onto a piece of paper so you can funnel it back into the container. But don't stop at glitter. Think about dried beans, rice, popcorn kernels, or even small pasta shapes for a rustic or quirky look. Sand or fine gravel can create a rough, earthy texture. These textural elements add a whole new dimension to youreasy pumpkin decorating ideas no carve.
- Glitter: For maximum sparkle. Use spray adhesive or craft glue.
- Dried Beans/Grains: Creates interesting patterns and textures. Hot glue works well for individual pieces, craft glue for covering areas.
- Sand/Gravel: Gives a rough, natural feel. Apply glue and roll the pumpkin in the material.
- Fabric Scraps/Ribbon: Can be glued on in strips or patterns. Craft glue or fabric glue is best.
- Buttons/Sequins: Adds individual pops of color and texture. Hot glue is usually required.
Beyond the Basics: Using Fabric, Paper, and More
Don't limit yourself to just paint and sprinkles. Fabric is surprisingly versatile foreasy pumpkin decorating ideas no carve. You can wrap a pumpkin in a cool patterned cloth, securing it with glue at the top and bottom. Burlap gives a nice rustic feel. Old sweaters or felt can be cut and glued to make faces or other shapes. Paper, too, offers endless possibilities. Decoupage with patterned napkins or old book pages for a vintage look. Cut out shapes from cardstock or construction paper. Even yarn can be wrapped around a pumpkin, secured with dots of glue as you go, for a cozy, textured effect. Look around your house; you probably have materials perfect for pumpkin transformation.
Bringing Characters to Life: Creative Easy Pumpkin Decorating Ideas No Carve
Bringing Characters to Life: Creative Easy Pumpkin Decorating Ideas No Carve
Painting and Accessorizing Your Way to Popular Faces
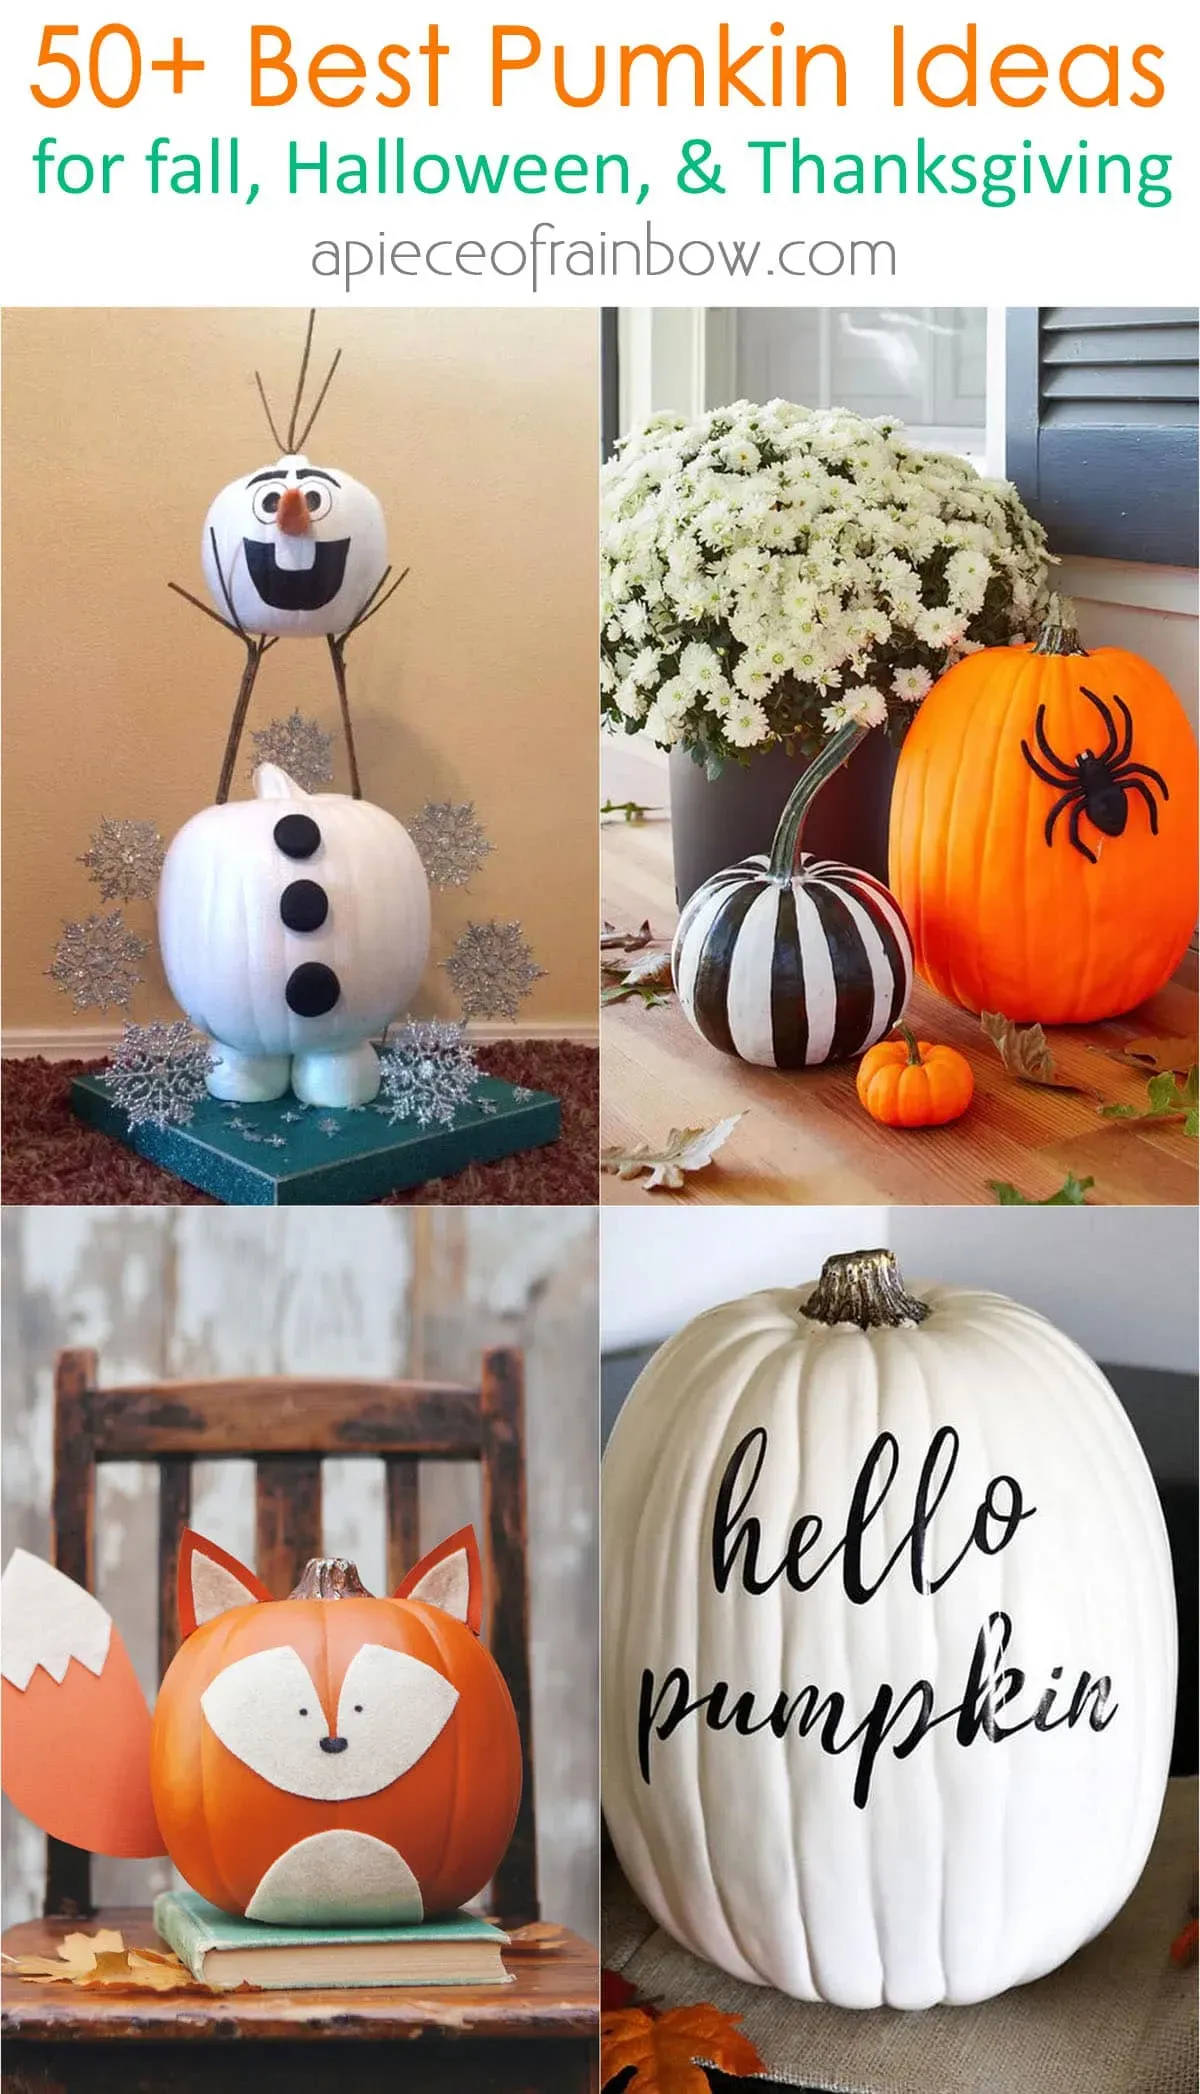
One of the most fun ways to tackleeasy pumpkin decorating ideas no carveis by turning those round orange canvases into familiar faces. Think beyond just spooky eyes and a jagged mouth. With paint and a few simple accessories, you can bring beloved characters to life. Grab some acrylics and start with a base color if needed – maybe green for Yoda, yellow for a Minion, or even white for a ghost. Then, carefully paint on the features. Don't worry about perfection; sometimes a slightly wonky eye makes it even better. Hot glue is your friend for adding things like felt ears, pipe cleaner glasses, or yarn hair. I saw someone turn a tall, skinny pumpkin into Olaf from Frozen using white paint, some twig arms, and a carrot nose – surprisingly effective and zero carving required.
Using Found Objects and Craft Supplies for Unique Personalities
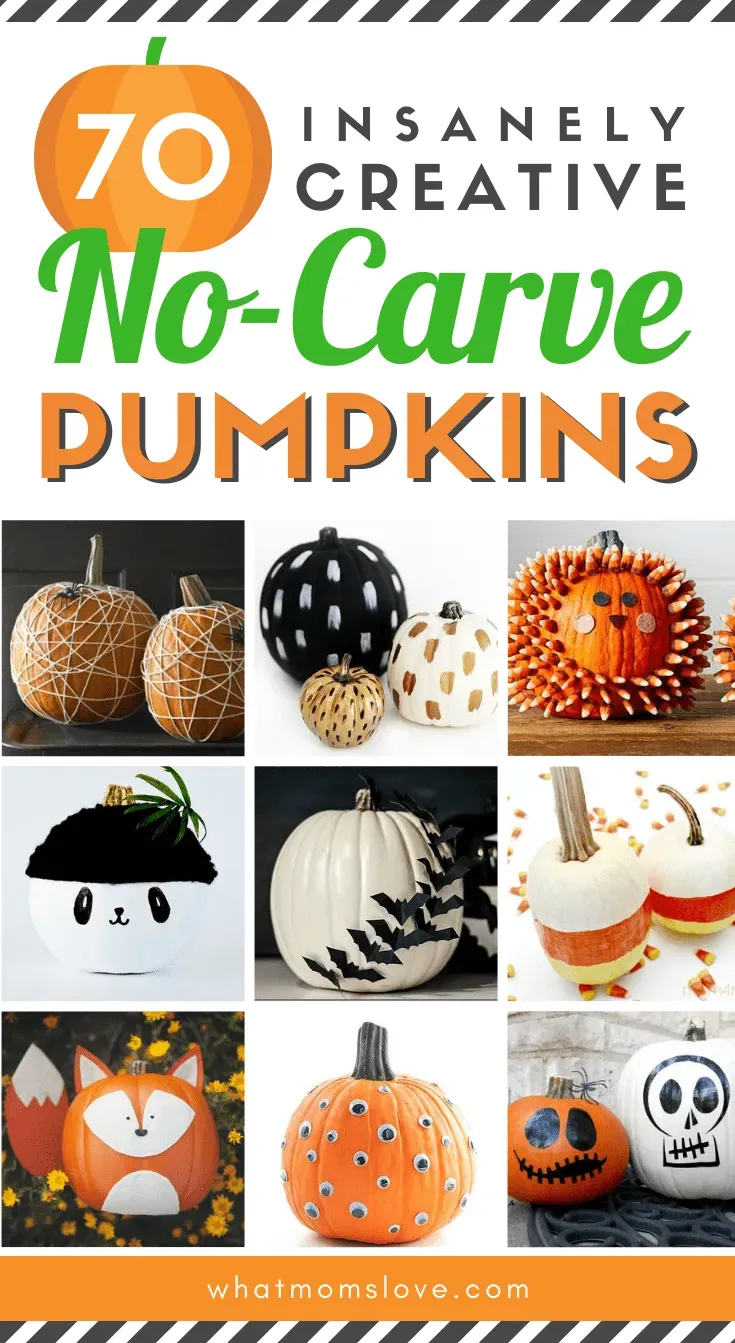
Beyond just painting, scavenging your craft bin or even the recycling bin can yield amazing results for creativeeasy pumpkin decorating ideas no carve. Bottle caps make great robot eyes. Old buttons can become quirky freckles or part of a costume. Fabric scraps can be fashioned into capes, hats, or clothing. Consider wrapping a pumpkin in gauze for a mummy, securing it with glue and adding googly eyes peeking out. Pipe cleaners bend into all sorts of shapes for limbs, antennae, or halos. The trick is to look at everyday objects and think, "How could this become part of a pumpkin's personality?" It's like giving your gourd a tiny, non-perishable costume party.
- Minions: Yellow paint, painted overalls, googly eyes (hot glued).
- Ghosts: White paint, black felt eyes and mouth (glued).
- Mummies: White gauze strips wrapped and glued, googly eyes.
- Robots: Paint any color, use bottle caps, nuts, or bolts for features (hot glued).
- Animals: Paint base color, add felt ears, pipe cleaner whiskers, button eyes.
LastMinute Magic: Super Quick Easy Pumpkin Decorating Ideas No Carve
LastMinute Magic: Super Quick Easy Pumpkin Decorating Ideas No Carve
When Time is Short and Creativity Calls
Sometimes Halloween sneaks up on you, or you suddenly realize you need a festive touch *right now* without committing to a whole afternoon project. This is where the truly last-minuteeasy pumpkin decorating ideas no carveshine. Forget intricate designs or multiple paint layers. Think instant gratification. Grab some temporary tattoos (yes, the kind for skin!), stickers, or even just some markers. Metallic markers on a dark pumpkin look surprisingly chic. You can wrap them in colorful yarn or ribbon in minutes, securing with a dot of hot glue. Raid your junk drawer for old keys, buttons, or coins and hot glue them on for a steampunk vibe. The goal is speed and simplicity, proving you don't need hours to make a pumpkin look festive.
Wrap Up: Easy Wins with No-Carve Pumpkins
So there you have it. Ditching the carving knife isn't just about avoiding sticky hands and potential ER visits; it opens up a whole world of creative possibilities. From sleek painted designs to whimsical characters brought to life with glue and glitter, theseeasy pumpkin decorating ideas no carveprove you don't need advanced knife skills to create impressive autumn decor. They last longer, are safer for everyone involved, and honestly, often look sharper. Give one of these methods a shot this season. Your fingers (and your kitchen counter) will thank you.