Table of Contents
Halloween is creeping closer, and what's a spooktacular celebration without a grinning, ghoulish Jack-O'-Lantern guarding your doorstep? Forget the complicated tutorials and hours of painstaking effort. We're diving headfirst into the realm of easy pumpkin carving ideas scary enough to make the neighbors jump! Whether you're a complete novice wielding a plastic knife or a seasoned pro looking for some quick thrills, there's a terrifyingly terrific design waiting for you.
Simple Tools for Scary Pumpkin Carving Success
Simple Tools for Scary Pumpkin Carving Success
The Essential Arsenal
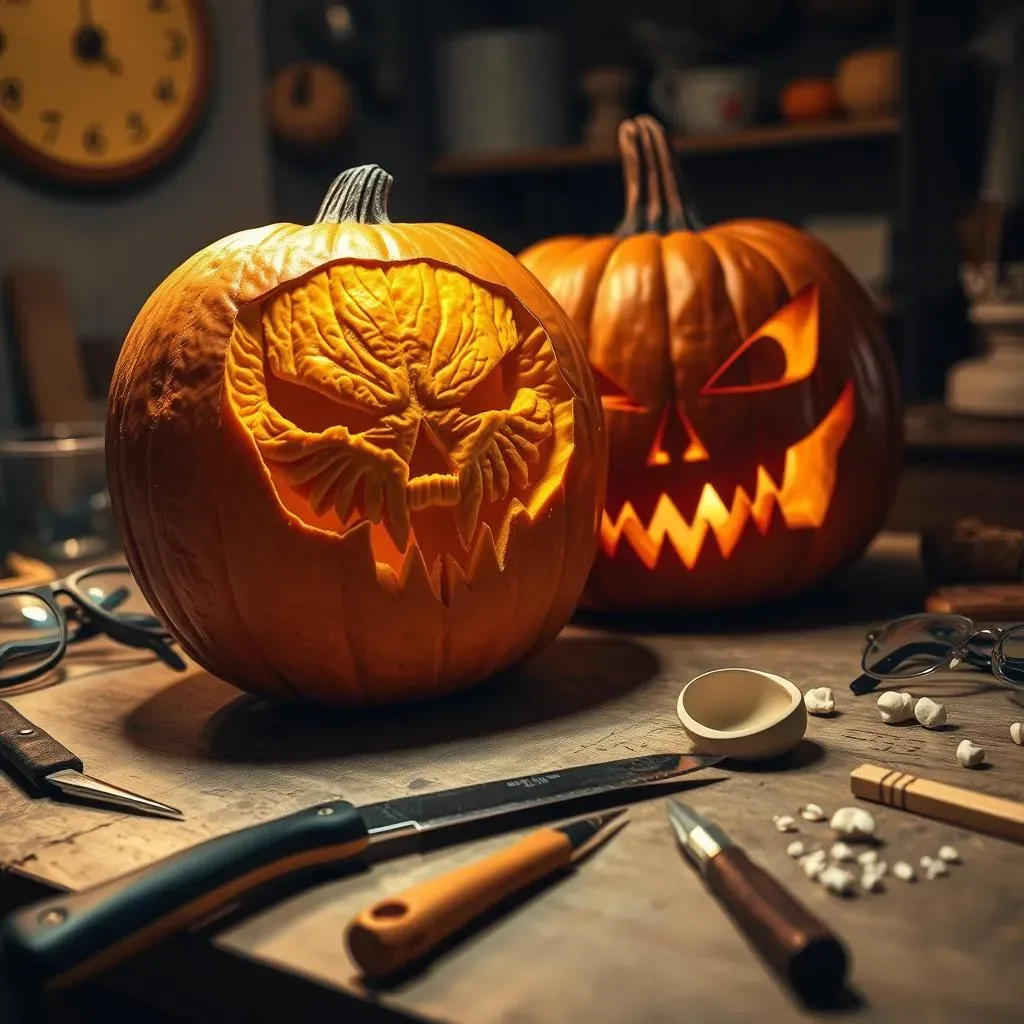
Before you unleash your inner monster, you'll need the right tools. Forget those flimsy plastic kits – we're aiming for scary, not frustrating! A good serrated knife (think bread knife, but shorter) is your primary weapon for carving larger features. A smaller paring knife or detail knife will help you with intricate designs. And don't forget a sturdy spoon or scoop for gutting the pumpkin – nobody wants a soggy Jack-O'-Lantern!
Pro-tip: Look for pumpkin carving kits with saws and gouges. These are great for more detailed work and can make cleaner cuts. Also, consider investing in a drill with various sized bits. Drilling holes can create cool lighting effects or add texture to your design. A simple template can also come in handy, especially if you're attempting a more complex design.
Beyond the Basics: Level Up Your Carving Game
Once you've mastered the essentials, it's time to explore some advanced tools. Clay sculpting tools are fantastic for fine details and creating smooth curves. Linoleum cutters can also be used for intricate patterns. If you're feeling really adventurous, try using a rotary tool (like a Dremel) with various attachments for carving, sanding, and engraving. Just remember to wear safety glasses!
Safety first, always! Carving pumpkins can be slippery and require some force. Make sure your workspace is well-lit and stable. Use a cutting board to protect your work surface and keep your pumpkin from rolling around. And most importantly, take your time! Rushing can lead to mistakes (or worse, injuries). Slow and steady wins the scary race.
Tool | Use | Why It's Awesome |
|---|---|---|
Serrated Knife | Cutting large features | Easy to control, creates clean cuts |
Detail Knife | Intricate designs, fine details | Allows for precision and accuracy |
Pumpkin Scoop | Removing pumpkin guts | Gets the job done quickly and efficiently |
Clay Sculpting Tools | Fine details and smooth curves | Adds texture and dimension |
Safety First: Carving Like a Pro (Without Losing a Finger)
Before you even think about picking up a knife, let's talk safety. Pumpkin carving is fun, but it can also be a little risky. First and foremost, always carve in a well-lit area. You need to see what you're doing! Secondly, make sure your pumpkin is stable. A wobbly pumpkin is a recipe for disaster. Place it on a non-slip surface or use a towel to keep it in place.
Never, ever carve towards yourself. Always cut away from your body. And if you're using a saw, use a sawing motion, not a stabbing motion. If you're working with kids, supervise them closely and consider letting them use kid-safe carving tools. Remember, a little caution goes a long way in ensuring a safe and fun pumpkin carving experience. If you're not use, there are a ton of no-carve easy pumpkin carving ideas scary.
From Goofy to Ghastly: Easy Scary Pumpkin Face Ideas
From Goofy to Ghastly: Easy Scary Pumpkin Face Ideas
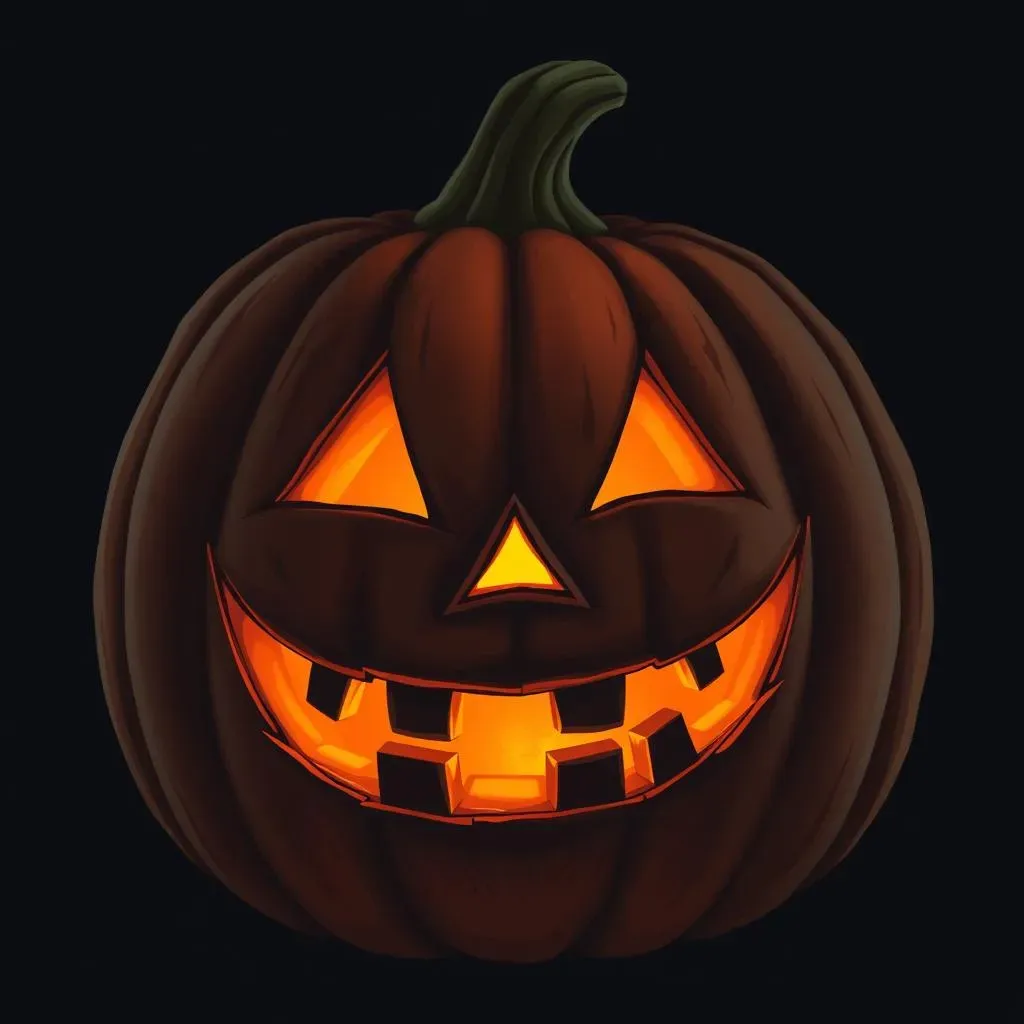
Classic Creepy: The Timeless Triangle Eyes
Let's start with the basics, the bread and butter of easy scary pumpkin carving ideas: the classic scary face. Think jagged triangle eyes, a crooked nose, and a wide, toothy grin. It's simple, effective, and instantly recognizable. The key here is asymmetry. Don't make the eyes perfectly identical; give them a slight tilt or different sizes for a more unsettling look. The same goes for the mouth – a few missing teeth or a jagged edge will amplify the creep factor.
To elevate this classic, try using different sized knives for the different features. Use a larger knife for the overall shapes and a smaller detail knife for adding those extra creepy touches, like lines around the eyes or cracks in the mouth. You can also use a stencil for the basic shapes if you're feeling unsure, but don't be afraid to freehand it and embrace the imperfections. After all, what's scarier than something slightly off?
Silhouette Screams: Simple Shapes, Maximum Impact
Another fantastic option for easy scary pumpkin carving is to focus on silhouettes. Instead of carving out the entire face, try carving out negative space to create a spooky outline. Think of a menacing cat with arched back and pointy ears, a creepy spider dangling from a web, or a gnarled tree with twisted branches. These designs are surprisingly simple to execute, but they pack a serious visual punch.
To make a silhouette really stand out, place a light inside the pumpkin and carve out a small hole in the back for ventilation. This will create a dramatic effect, especially when placed in a dark area. You can also experiment with different colored lights to create a variety of moods. A red light will give your pumpkin a devilish glow, while a green light will create an eerie, otherworldly atmosphere.
Design Idea | Difficulty | Scare Factor |
|---|---|---|
Classic Triangle Face | Easy | Medium |
Menacing Cat Silhouette | Easy | Medium |
Gnarled Tree Silhouette | Easy | High |
Witch's Hat Silhouette | Easy | Low-Medium |
Monstrous Mix-and-Match: Eyes, Noses, and Mouths Gone Wild
Want to get really creative with your easy scary pumpkin carving ideas? Try mixing and matching different facial features to create a truly unique and unsettling monster. Think mismatched eyes, a crooked nose that's way too big, and a mouth full of jagged, uneven teeth. The more bizarre and asymmetrical, the better!
This is a great way to use up leftover pumpkin scraps from other carvings. You can even glue or pin extra pieces of pumpkin onto the face to create protruding features like horns, warts, or extra eyes. Just make sure to secure them well so they don't fall off in the middle of the night and scare trick-or-treaters!
Level Up Your JackO'Lantern: Intermediate Scary Pumpkin Carving
Level Up Your JackO'Lantern: Intermediate Scary Pumpkin Carving
Adding Depth with Shading and Texture
Ready to move beyond basic shapes? Let's talk about adding depth and dimension to your scary pumpkin carvings. Shading is your secret weapon here. Instead of carving all the way through the pumpkin, experiment with carving at different depths to create lighter and darker areas. This adds a realistic, three-dimensional effect that will make your Jack-O'-Lantern truly pop.
To achieve this, use your detail knife or clay sculpting tools to carefully shave away layers of pumpkin flesh. The thinner the layer, the more light will shine through, creating a lighter area. For darker areas, leave the pumpkin flesh thicker. You can also use different carving techniques to create texture. Try stippling (poking small holes) to create a rough, bumpy texture, or use a linoleum cutter to carve fine lines and patterns.
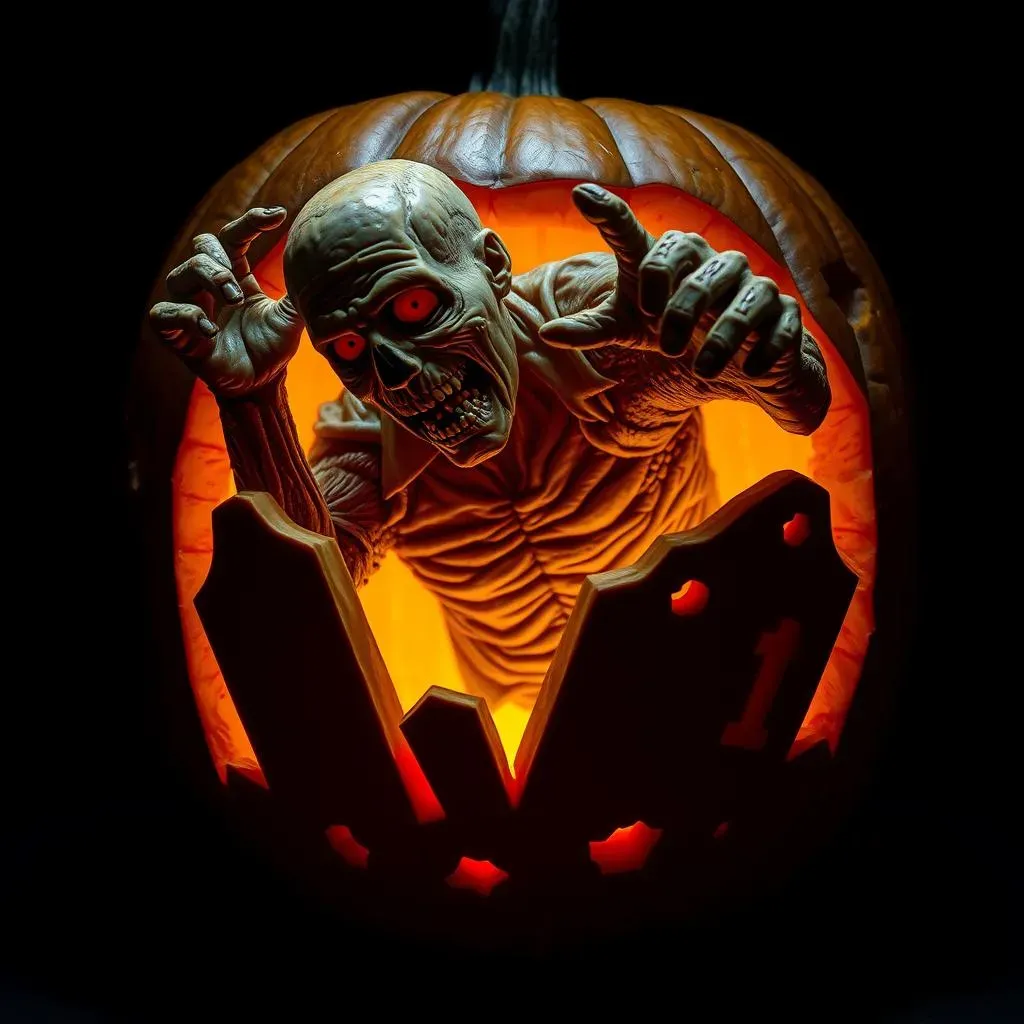
Monster Mashups: Combining Multiple Elements
Now that you've mastered shading and texture, it's time to get really creative by combining multiple elements into a single, terrifying design. Think a zombie bursting out of a graveyard, a vampire lurking in a haunted house, or a creepy clown juggling eyeballs. The possibilities are endless!
Start by sketching out your design on paper. This will help you visualize the different elements and how they fit together. Then, transfer your design to the pumpkin using a stencil or freehand drawing. Remember to work in layers, starting with the background elements and gradually adding the foreground details. And don't be afraid to experiment with different carving techniques and tools to create a truly unique and terrifying masterpiece.
Technique | Description | Scare Factor |
|---|---|---|
Shading | Carving at different depths to create light and dark areas | Medium-High |
Stippling | Poking small holes to create a rough texture | Medium |
Layering | Combining multiple elements to create a complex design | High |
NoCarve Scary Pumpkin Ideas: Spooky Decor Without the Mess
NoCarve Scary Pumpkin Ideas: Spooky Decor Without the Mess
Wicked Webbing: Yarn and Glue Gone Ghastly
Alright, so you're looking for No-Carve Scary Pumpkin Ideas: Spooky Decor Without the Mess? Perfect! Let's kick things off with a super simple, yet incredibly effective technique: wicked webbing. All you need is some yarn (black or white works best), glue (hot glue is fastest, but craft glue works too), and some plastic spiders. Simply create a web-like design on your pumpkin using the glue, then press the yarn into the glue. Once it's dry, attach the plastic spiders for a creepy-crawly effect. You can even add some glitter for a touch of spooky sparkle!
This is a fantastic option for those who want to involve younger kids in the decorating process, as it eliminates the need for sharp tools. Plus, it's a great way to use up leftover yarn scraps. Get creative with the web design – make it symmetrical or asymmetrical, dense or sparse. The more unique, the better!
Melting Crayon Masterpiece: A Rainbow of Horror
Next up, let's get a little more colorful (but still scary, of course!) with a melting crayon masterpiece. For this, you'll need a box of crayons (black, red, and purple are great for a spooky vibe), a hot glue gun, and a hairdryer. Simply glue the crayons around the stem of the pumpkin, then use the hairdryer to melt the crayons, allowing the wax to drip down the sides. The result is a vibrant, yet unsettling, display that's sure to turn heads.
Be careful when using the hairdryer, as the wax can get hot and splatter. It's best to do this project outside or in a well-ventilated area. You can also experiment with different crayon colors and arrangements to create a variety of effects. Try using glow-in-the-dark crayons for an extra spooky touch! And remember, safety first – supervise children closely when using hot glue and hairdryers.
Material | Instructions | Scare Factor |
|---|---|---|
Yarn, Glue, Spiders | Glue yarn in a web pattern, attach spiders | Medium |
Crayons, Glue, Hairdryer | Glue crayons around stem, melt with hairdryer | Medium-High |
Paint, Stencils | Paint scary designs using stencils | Variable |
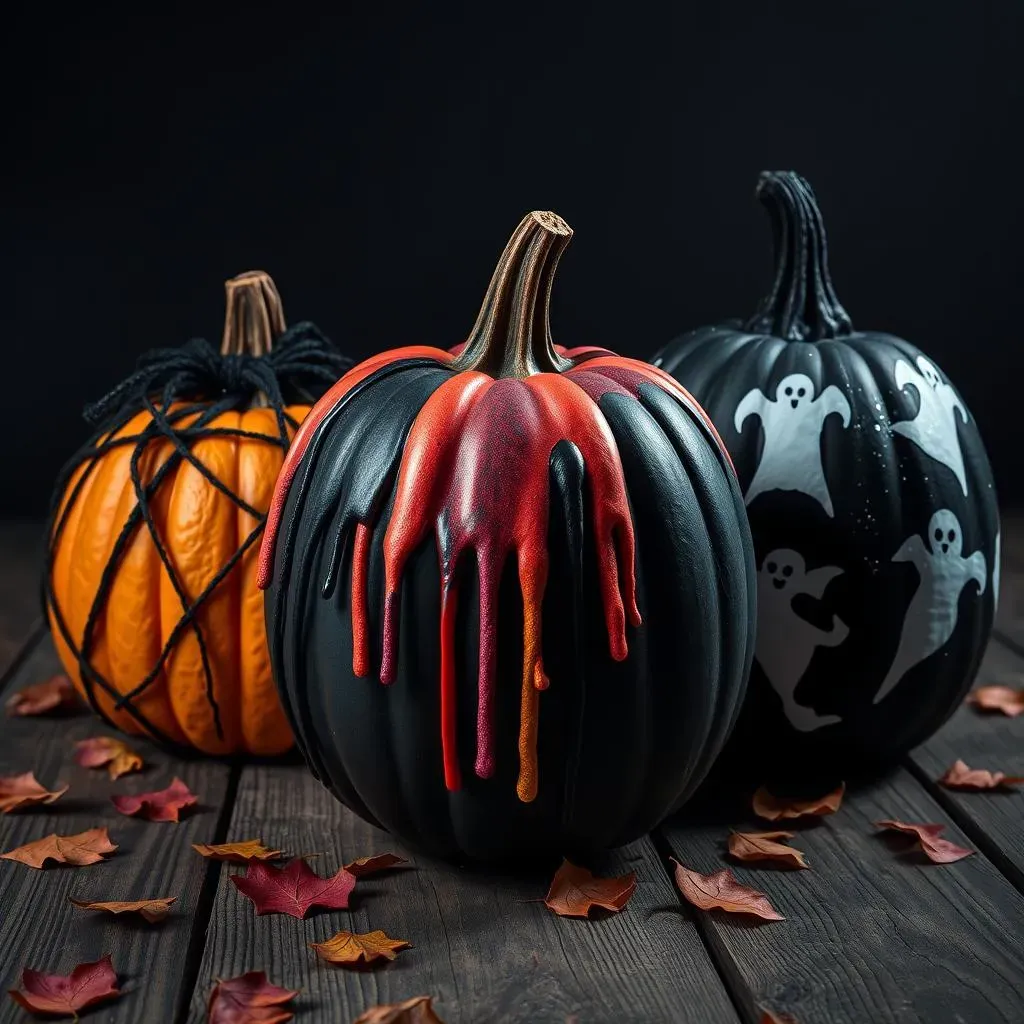
Painted Nightmares: Stencils and Spooky Silhouettes
If you're more of a painter than a carver, then this one's for you! Grab some acrylic paints (black, white, and orange are always good choices), some stencils (or get creative and make your own!), and get ready to create some painted nightmares. Simply use the stencils to paint spooky designs onto your pumpkin. Think bats, ghosts, skulls, or creepy messages. You can also freehand your designs if you're feeling confident.
For a more dramatic effect, paint the entire pumpkin black and then use white paint to create the designs. This will create a stark contrast that's sure to grab attention. You can also add some glitter or glow-in-the-dark paint for an extra touch of spookiness. And don't be afraid to get messy – a little splatter and drips can add to the overall creepy vibe. With paint, stencils, you will have unlimited No-Carve Scary Pumpkin Ideas: Spooky Decor Without the Mess.
Light It Up: Displaying Your Easy Scary Pumpkin Masterpiece
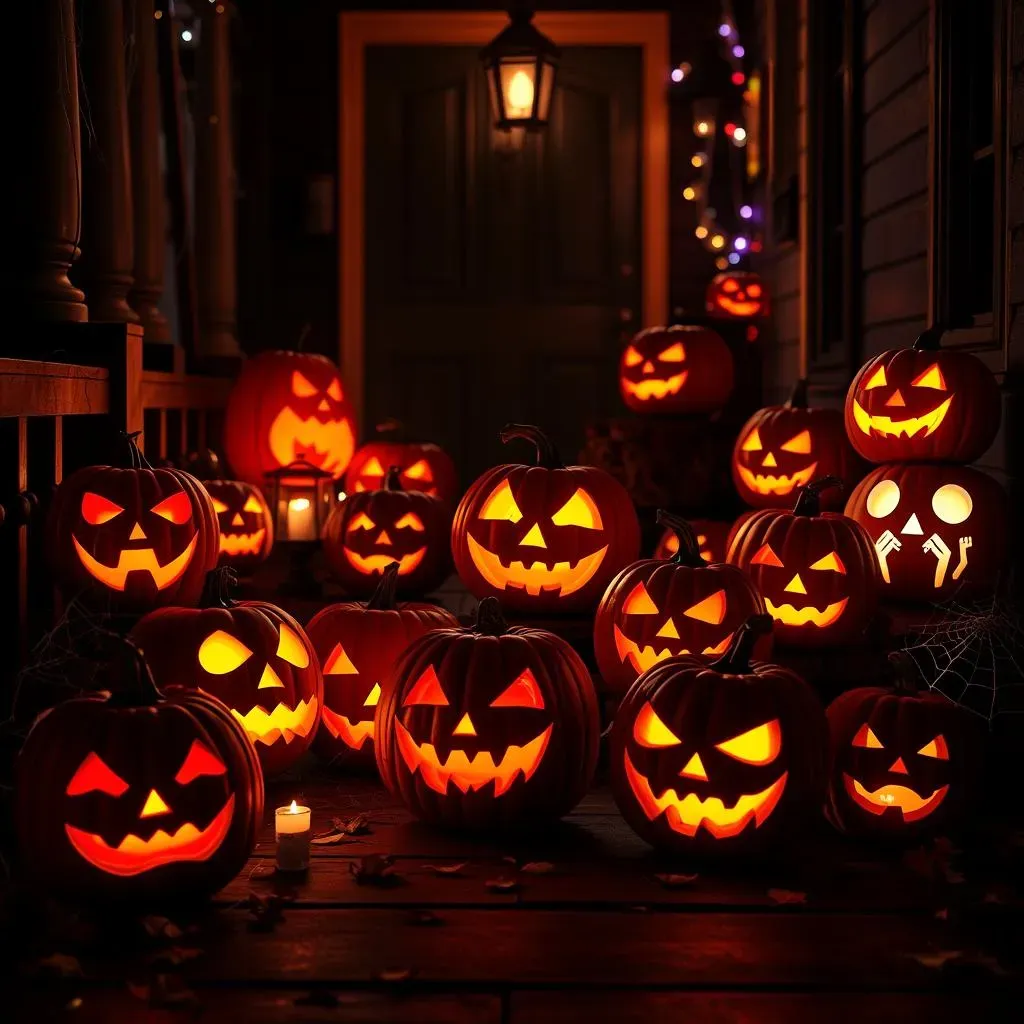
Light It Up: Displaying Your Easy Scary Pumpkin Masterpiece
The Classic Candlelight Glow
you've poured your heart and soul (and pumpkin guts) into creating a masterpiece of spooky artistry. Now, it's time to show it off! The most classic way to illuminate your Jack-O'-Lantern is with a simple candle. A tea light or votive candle placed inside the pumpkin will cast a warm, flickering glow that's perfect for creating a creepy ambiance. For safety, use a battery-operated LED candle instead of a real flame. They're just as effective and eliminate the risk of fire.
Want to take it up a notch? Sprinkle some cinnamon or pumpkin spice inside the lid of your pumpkin before you light the candle. As the candle warms up, it will release a delicious aroma that will fill the air with the scent of fall. Just be careful not to get any spices on the candle itself, as this could create a fire hazard.
Lighting Option | Pros | Cons | Scare Factor |
|---|---|---|---|
Candle | Classic, warm glow, adds aroma | Fire hazard, needs supervision | Medium |
LED Candle | Safe, long-lasting, various colors | Less authentic look | Medium |
String Lights | Bright, festive, covers a larger area | Can be too bright, less focused | Variable |
String Lights and Spooky Silhouettes
For a more festive and eye-catching display, try using string lights. Simply stuff a string of battery-operated LED lights inside your pumpkin and let them shine through your carved design. This is a great way to illuminate larger pumpkins or create a more vibrant display. You can also use different colored lights to create a variety of moods. Orange lights will give your pumpkin a traditional Halloween glow, while purple or green lights will create a more eerie and unsettling atmosphere.
If you've carved a silhouette design, try placing the string lights behind the pumpkin to create a dramatic backlighting effect. This will make the silhouette really stand out and create a spooky shadow on the wall behind it. You can also experiment with different types of string lights, such as fairy lights or globe lights, to create a unique and interesting effect.
Setting the Scene: Placement and Ambiance
The final touch is all about placement and ambiance. Where you place your Jack-O'-Lantern can make a big difference in its overall impact. Place it on your porch, doorstep, or windowsill to welcome trick-or-treaters. You can also create a spooky graveyard scene in your front yard and place your Jack-O'-Lantern among the tombstones for an extra creepy effect.
Consider adding other spooky decorations to enhance the ambiance. Hang cobwebs, drape black fabric, or scatter fake leaves around your pumpkin to create a more immersive Halloween display. You can also play spooky sound effects or music to add to the atmosphere. The goal is to create a scene that's both visually appealing and terrifyingly fun! With the right lighting, setting, you will have a great easy scary pumpkin masterpiece.
Unleash Your Inner Pumpkin Picasso: The Final Slice
So, there you have it – a treasure trove of easy pumpkin carving ideas scary enough to make this Halloween unforgettable! From mastering the basic tools to unleashing your creativity with spooky faces and no-carve designs, you're now equipped to transform ordinary pumpkins into chilling masterpieces. Don't be afraid to experiment, mix and match ideas, and most importantly, have fun! After all, Halloween is about letting loose, embracing the spooky spirit, and maybe, just maybe, scaring a few trick-or-treaters along the way. Now go forth and carve – your neighborhood awaits its dose of pumpkin-powered terror!