Table of Contents
Alright, let's be honest. Halloween rolls around, and you see all those ridiculously intricate pumpkin carvings online. You think, "Yeah, I could totally do that!" Then you buy a pumpkin, grab a dull kitchen knife, and end up with something that looks less like a masterpiece and more like a sad, lopsided mess. Sound familiar? You're not alone. But what if there was a way to get a genuinely cool result without needing the steady hand of a brain surgeon? That's where easy pumpkin carving ideas for an owl come in. An owl looks impressive, but it’s surprisingly manageable if you know a few tricks. Forget the frustration; we're going to walk you through picking the right pumpkin, getting the simple tools you actually need (not a whole craft store), prepping that gourd without making a huge sticky mess, getting your design on there even if you can't draw a straight line, and carving out those crucial details like the eyes and feathers. We’ll show you how to create an owl that looks fantastic, especially glowing on your porch, and doesn't require you to sacrifice your sanity or a finger. Ready to ditch the sad pumpkin failures and actually enjoy carving this year?
Choosing the Best Pumpkin for Easy Owl Carving
Choosing the Best Pumpkin for Easy Owl Carving
Size and Shape Matter for Your Owl
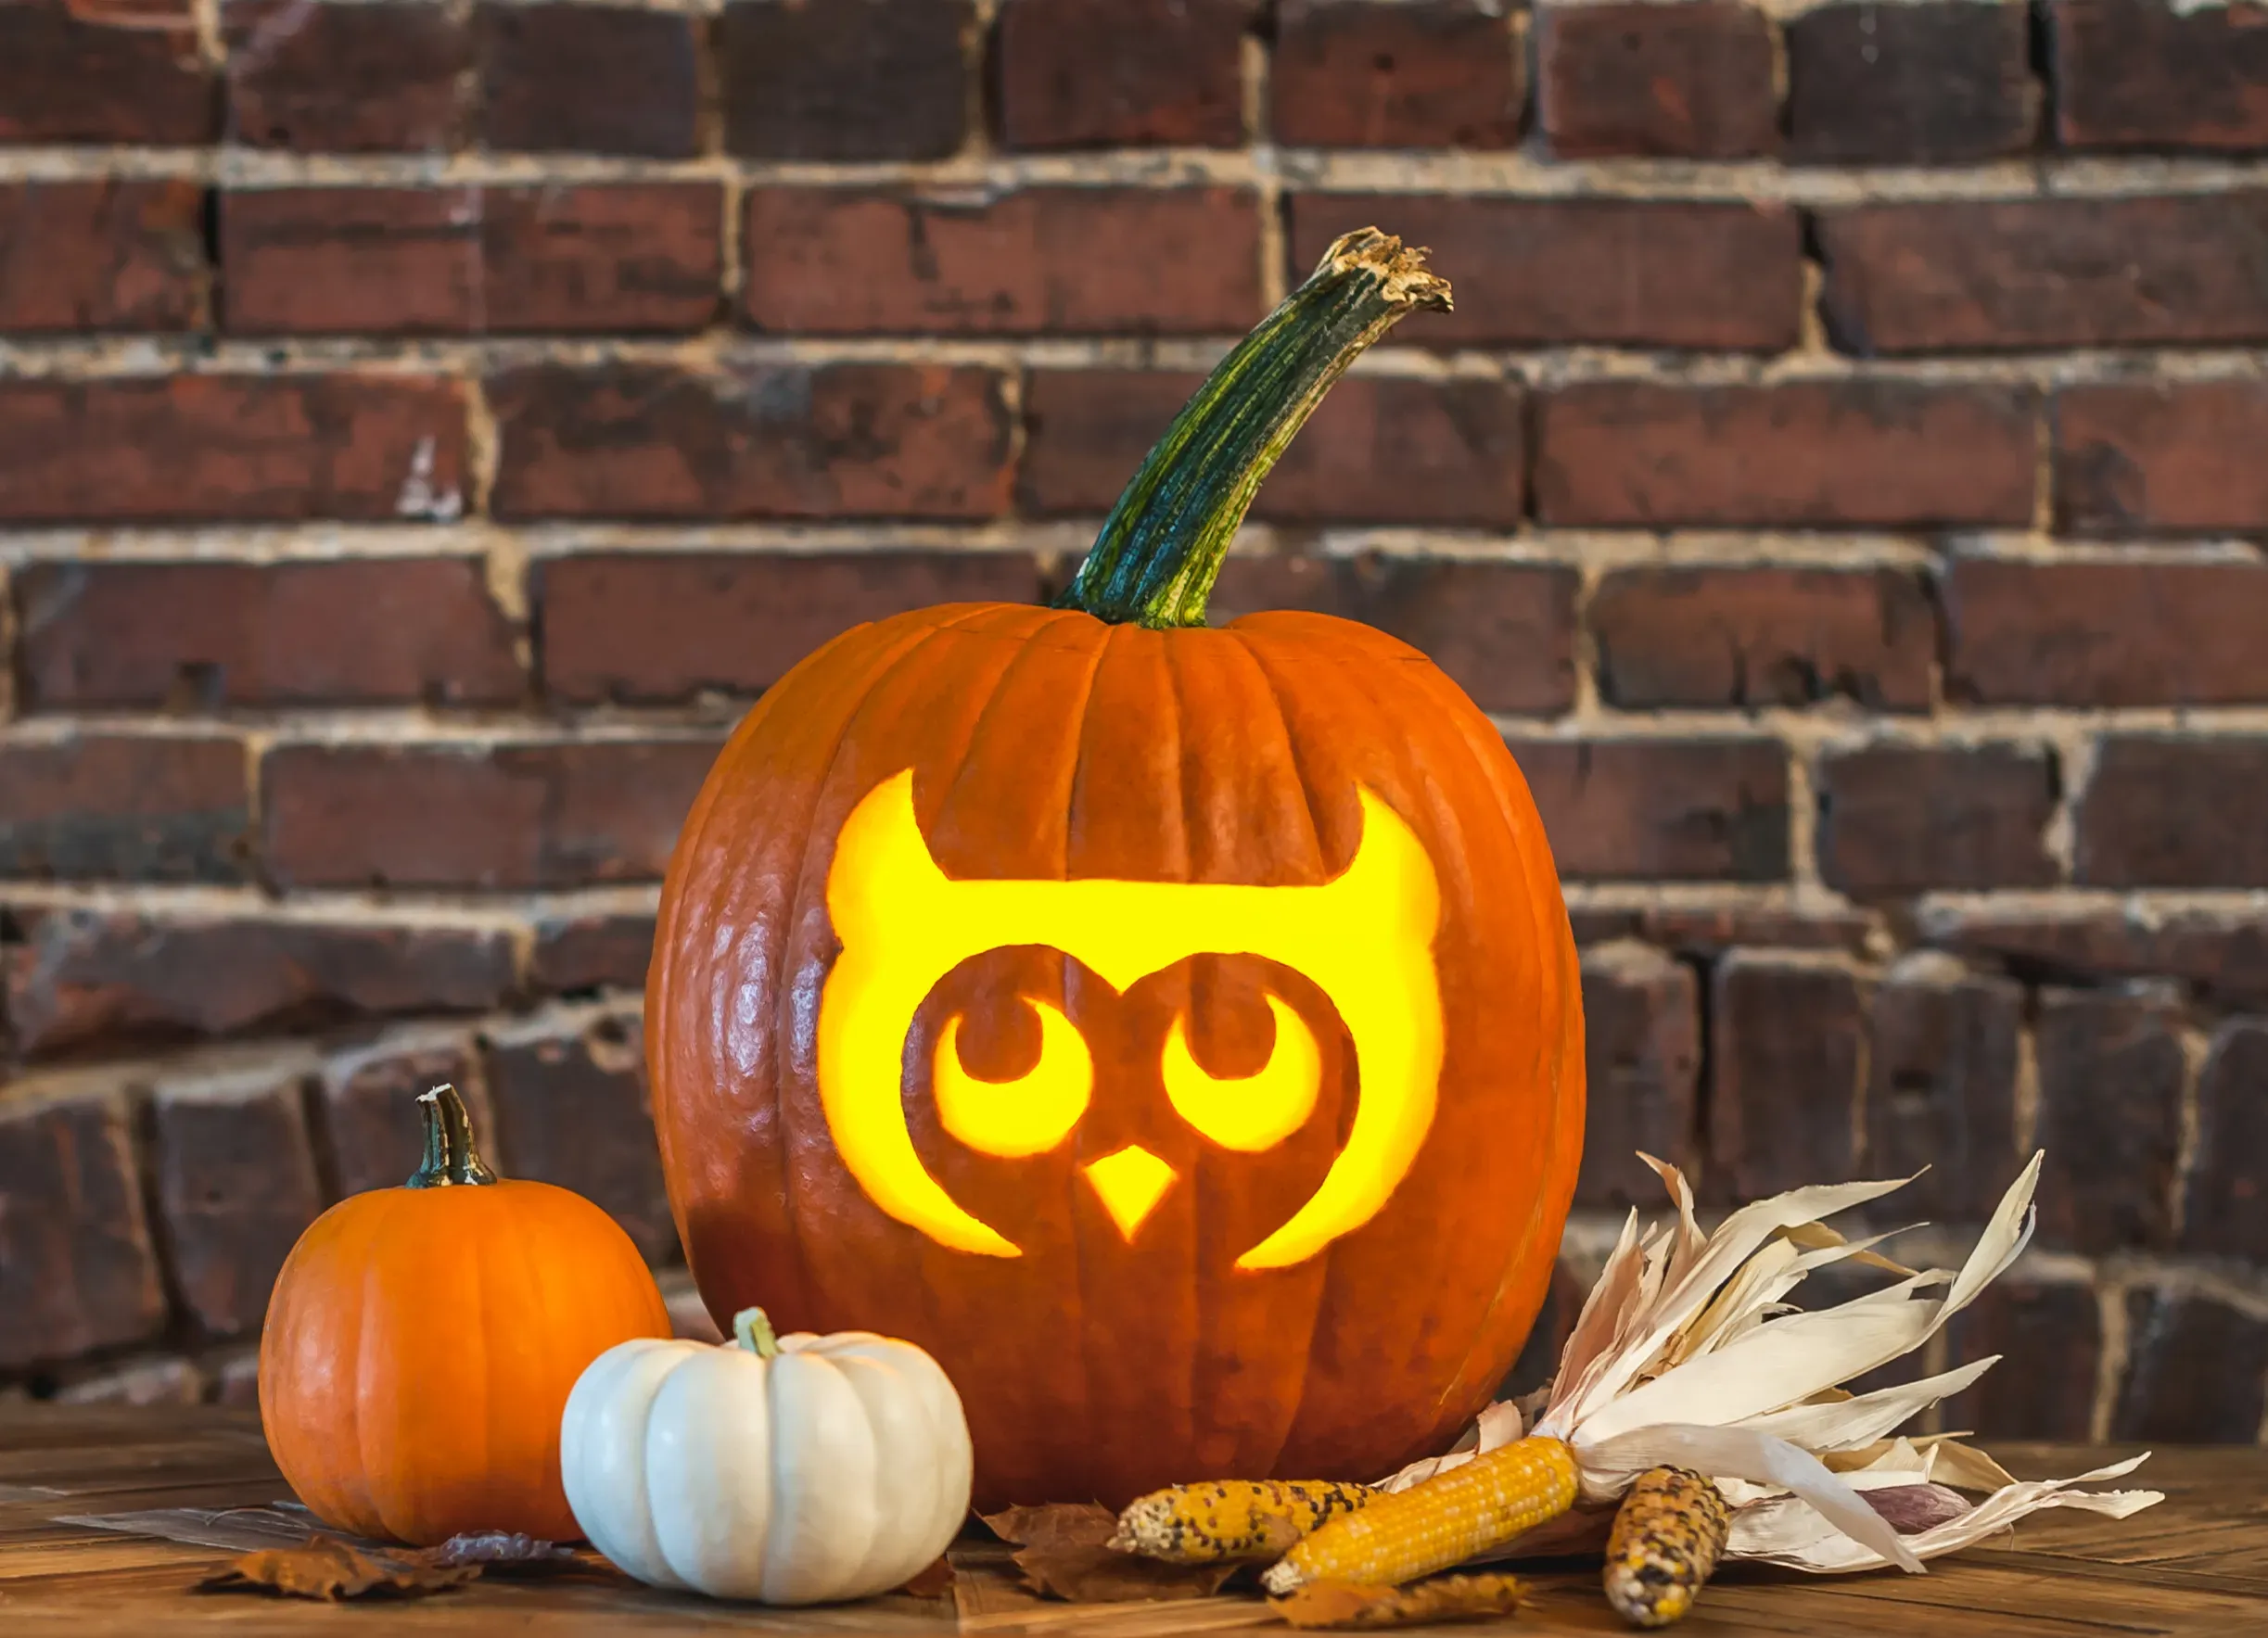
Picking the right pumpkin is honestly half the battle when you're going for easy pumpkin carving ideas owl style. Don't just grab the first orange orb you see. Think about your owl design. A taller, slightly oval pumpkin often works better for that classic owl shape, giving you more vertical space for the body and feathers. If you pick something too squat or perfectly round, your owl might end up looking a bit... well, like a very round bird. Size-wise, a medium to large pumpkin gives you enough real estate to work comfortably without feeling cramped, which is key for keeping it easy. Avoid anything tiny unless you have surgical precision and enjoy squinting. Also, check the surface; you want it relatively smooth, without huge bumps or deep gashes that will mess with your design later.
Inspect for Flaws and a Sturdy Base
Before you commit, give that pumpkin a good once-over. You're looking for firmness. Give it a tap; it should sound hollow, not dull or squishy. Soft spots are a no-go; they mean it's already starting to rot, and carving that is just asking for trouble (and possibly attracting fruit flies before Halloween). Check the bottom to make sure it sits relatively flat without wobbling like crazy. A stable base is crucial so your finished owl doesn't tip over on your porch. The stem should be firmly attached, not loose or wobbly. A healthy stem usually means a healthier pumpkin overall. Don't worry too much about slight imperfections; a little character can actually make your owl more unique, but avoid anything truly damaged or soft.
What to Look For in a Great Owl Pumpkin:
- Relatively tall and oval shape for a classic look
- Smooth surface without major bumps
- Firm flesh with no soft spots
- Sits stably on its base
- Healthy, firmly attached stem
Essential Tools for Your Owl Pumpkin Project

Essential Tools for Your Owl Pumpkin Project
Gathering Your Basic Carving Gear
let's talk tools. You don't need a fancy, expensive pumpkin carving kit that looks like something out of a dentist's office for easy pumpkin carving ideas owl style. You probably have most of what you need right in your kitchen drawers. A sturdy kitchen knife, something with a decent-sized blade, is essential for cutting off the top (or bottom, more on that later) and making initial cuts. You'll also need a big spoon or scoop for getting all that gooey stuff out – the seeds and stringy bits. A small, sharp knife is also super helpful for finer details. Think paring knife size. That's really the bare minimum to get started.
Adding a Few Extra Helpers for Detail
To make those easy pumpkin carving ideas owl eyes and feathers really pop, a couple of extra tools can make a big difference. An apple corer is surprisingly useful for making perfect circular centers for the owl's eyes. It pops right through the rind, giving you a clean hole. For the detailed lines and smaller cuts, a small craft knife or scalpel is a game-changer. It gives you much more control than a kitchen knife and lets you shave away layers or make precise cuts for feathers without hacking away at the pumpkin. Having a few different sizes of these smaller blades can be helpful too.
- Sturdy kitchen knife for the lid
- Large scoop or spoon for guts
- Small, sharp paring knife
- Apple corer for eye centers
- Craft knife or scalpel for details
Prepping Your Pumpkin: The First Steps to Your Easy Owl
Prepping Your Pumpkin: The First Steps to Your Easy Owl
Cutting the Lid (Maybe the Bottom Instead?)
you've got your perfect owl-shaped pumpkin. Now for the messy part, but we can make it less messy. Traditionally, everyone cuts a lid around the stem. That's fine, but it can sometimes make the top unstable, especially if you're planning to light it with a real candle (though battery-operated lights are much safer and easier). A slick trick for easy pumpkin carving ideas owl projects is cutting the hole from the bottom instead. This leaves the top of your pumpkin completely intact and looking cleaner. Whichever end you choose, use that sturdy kitchen knife. Angle the blade inward as you cut around, creating a cone shape. This bevel helps the lid (or bottom piece) sit back in place without falling inside.
Scooping Out the Guts and Thinning Walls
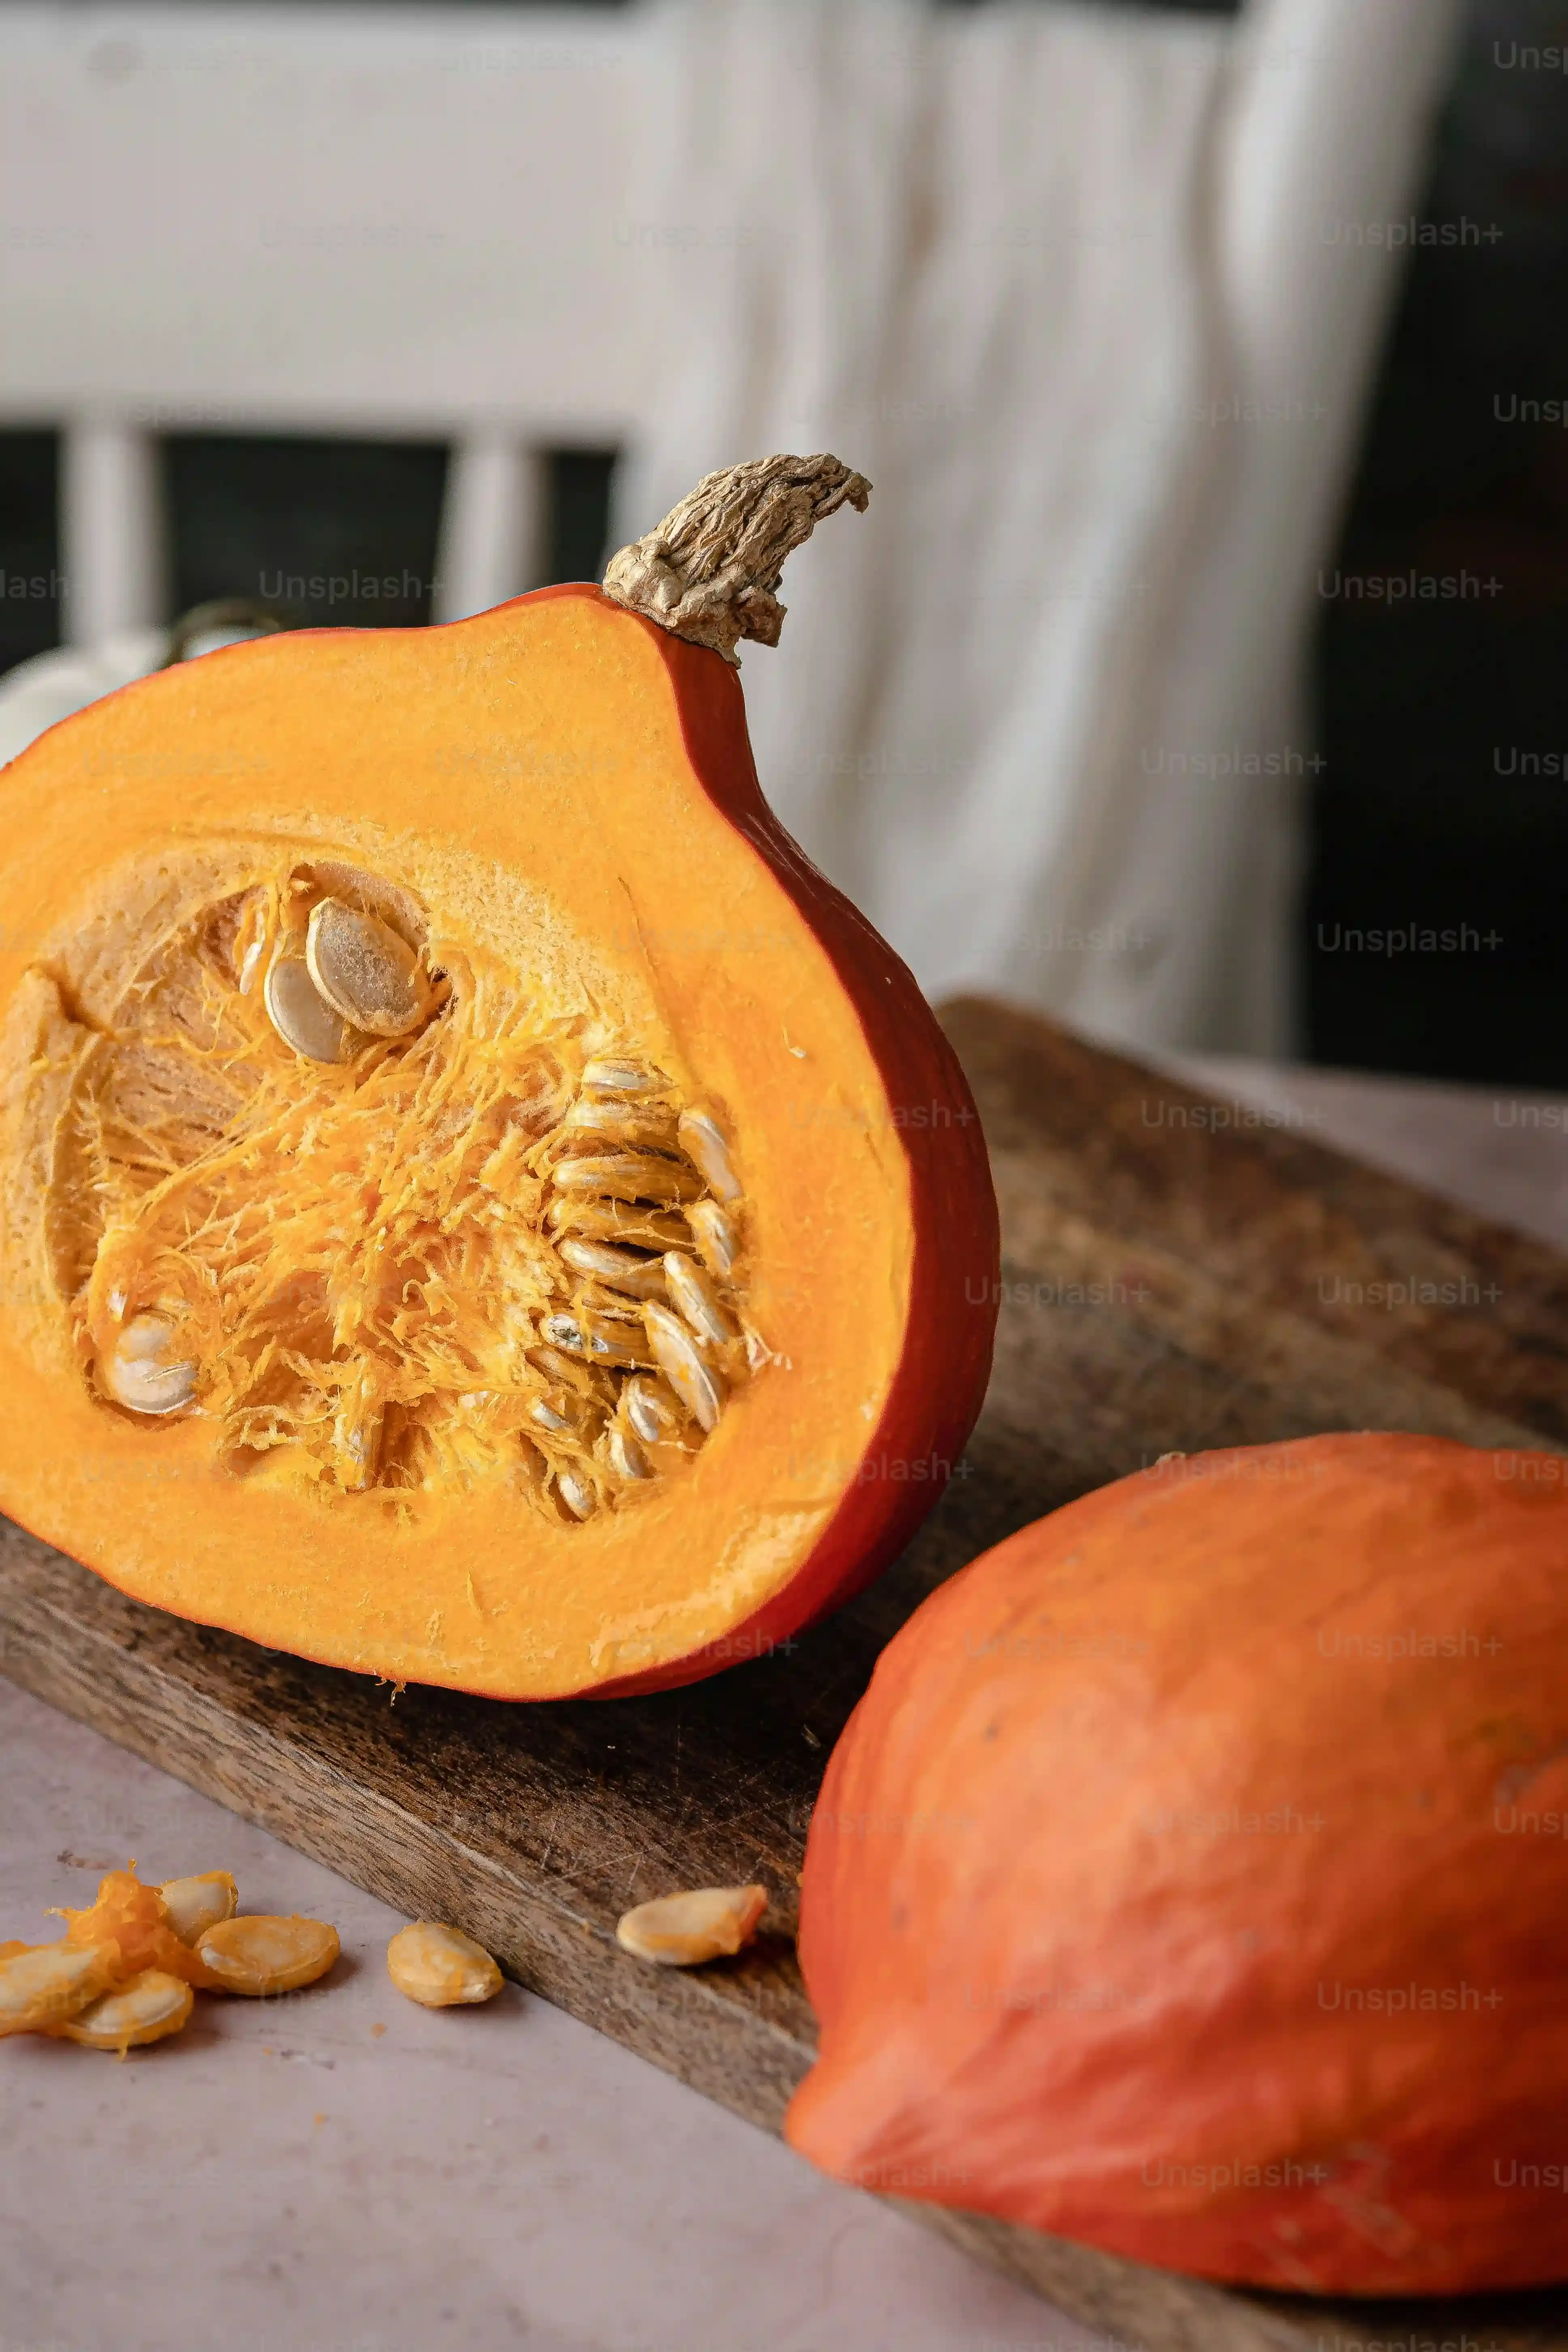
Now, brace yourself. This is where things get stringy and potentially gross, but it's essential. Grab your big spoon or scoop. Get in there and scrape out all the seeds and fibrous strands. Don't be shy; you want to get it as clean as possible. Once the initial mess is out, use the edge of your scoop or a metal spoon to scrape down the inside walls of the pumpkin. You're aiming to thin the walls a bit, especially where your design will go. Thinner walls (think about an inch or less) make carving significantly easier and allow light to shine through better. Thick walls are the enemy of easy pumpkin carving ideas owl success; they make your knife work harder and your details look muddy.
- Cut your opening (top or bottom) at an inward angle.
- Scrape out all seeds and strings thoroughly.
- Thin the pumpkin walls where your design will be.
- Aim for walls about an inch thick for easier carving.
Applying Your Easy Pumpkin Carving Ideas Owl Design
Applying Your Easy Pumpkin Carving Ideas Owl Design
Transferring Your Owl Masterpiece (No Art Degree Required)
pumpkin is prepped, guts are gone (mostly). Now for the fun part: getting your owl design onto the surface. Don't panic if you think you can't draw. For easy pumpkin carving ideas owl projects, you have options. You can go freehand if you feel brave, maybe just sketching out the basic shapes – big circles for eyes, a triangle beak, some wavy lines for feathers – directly onto the pumpkin rind with a dry-erase marker. The beauty of dry-erase is you can wipe it off and try again. If freehand gives you hives, stencils are your best friend. Find a simple owl stencil online, print it out, tape it to your pumpkin, and then use a poking tool (like a thumbtack or a specialized pumpkin poking tool) to make small dots along the lines of the stencil. These dots create a connect-the-dots guide for your carving knife. Peel off the stencil, and you'll have a dotted outline of your owl.
Making Your Carving Lines Clear and Ready
Once your design is on the pumpkin, either freehand or via stencil dots, you need to make those lines easy to follow when you start cutting. If you used a dry-erase marker, you're pretty much good to go. Just make sure the lines are clear. If you used the poking method with a stencil, you now have a series of tiny holes. You can leave them as is and try to connect the dots with your knife, or you can use a marker (dry-erase or even a regular fine-tip marker if you're confident) to draw solid lines connecting those dots. This gives you a continuous guide to follow with your carving tools. The goal here is clarity. You want to see exactly where your knife needs to go without guessing. This step is crucial for keeping your easy pumpkin carving ideas owl project, well, easy. Rushing this part leads to wobbly lines and unintended cuts.
Methods for Getting Your Owl Design Onto the Pumpkin:
- Freehand sketch with a dry-erase marker (easy to correct).
- Print and tape a simple stencil, then poke dots along the lines.
- Use a permanent marker to draw directly onto the pumpkin surface (less forgiving).
- Sketch lightly with a pencil first, then trace with a marker.
Carving the Details: Eyes, Feathers, and Feet
Carving the Details: Eyes, Feathers, and Feet
Making Those Big, Wise Owl Eyes
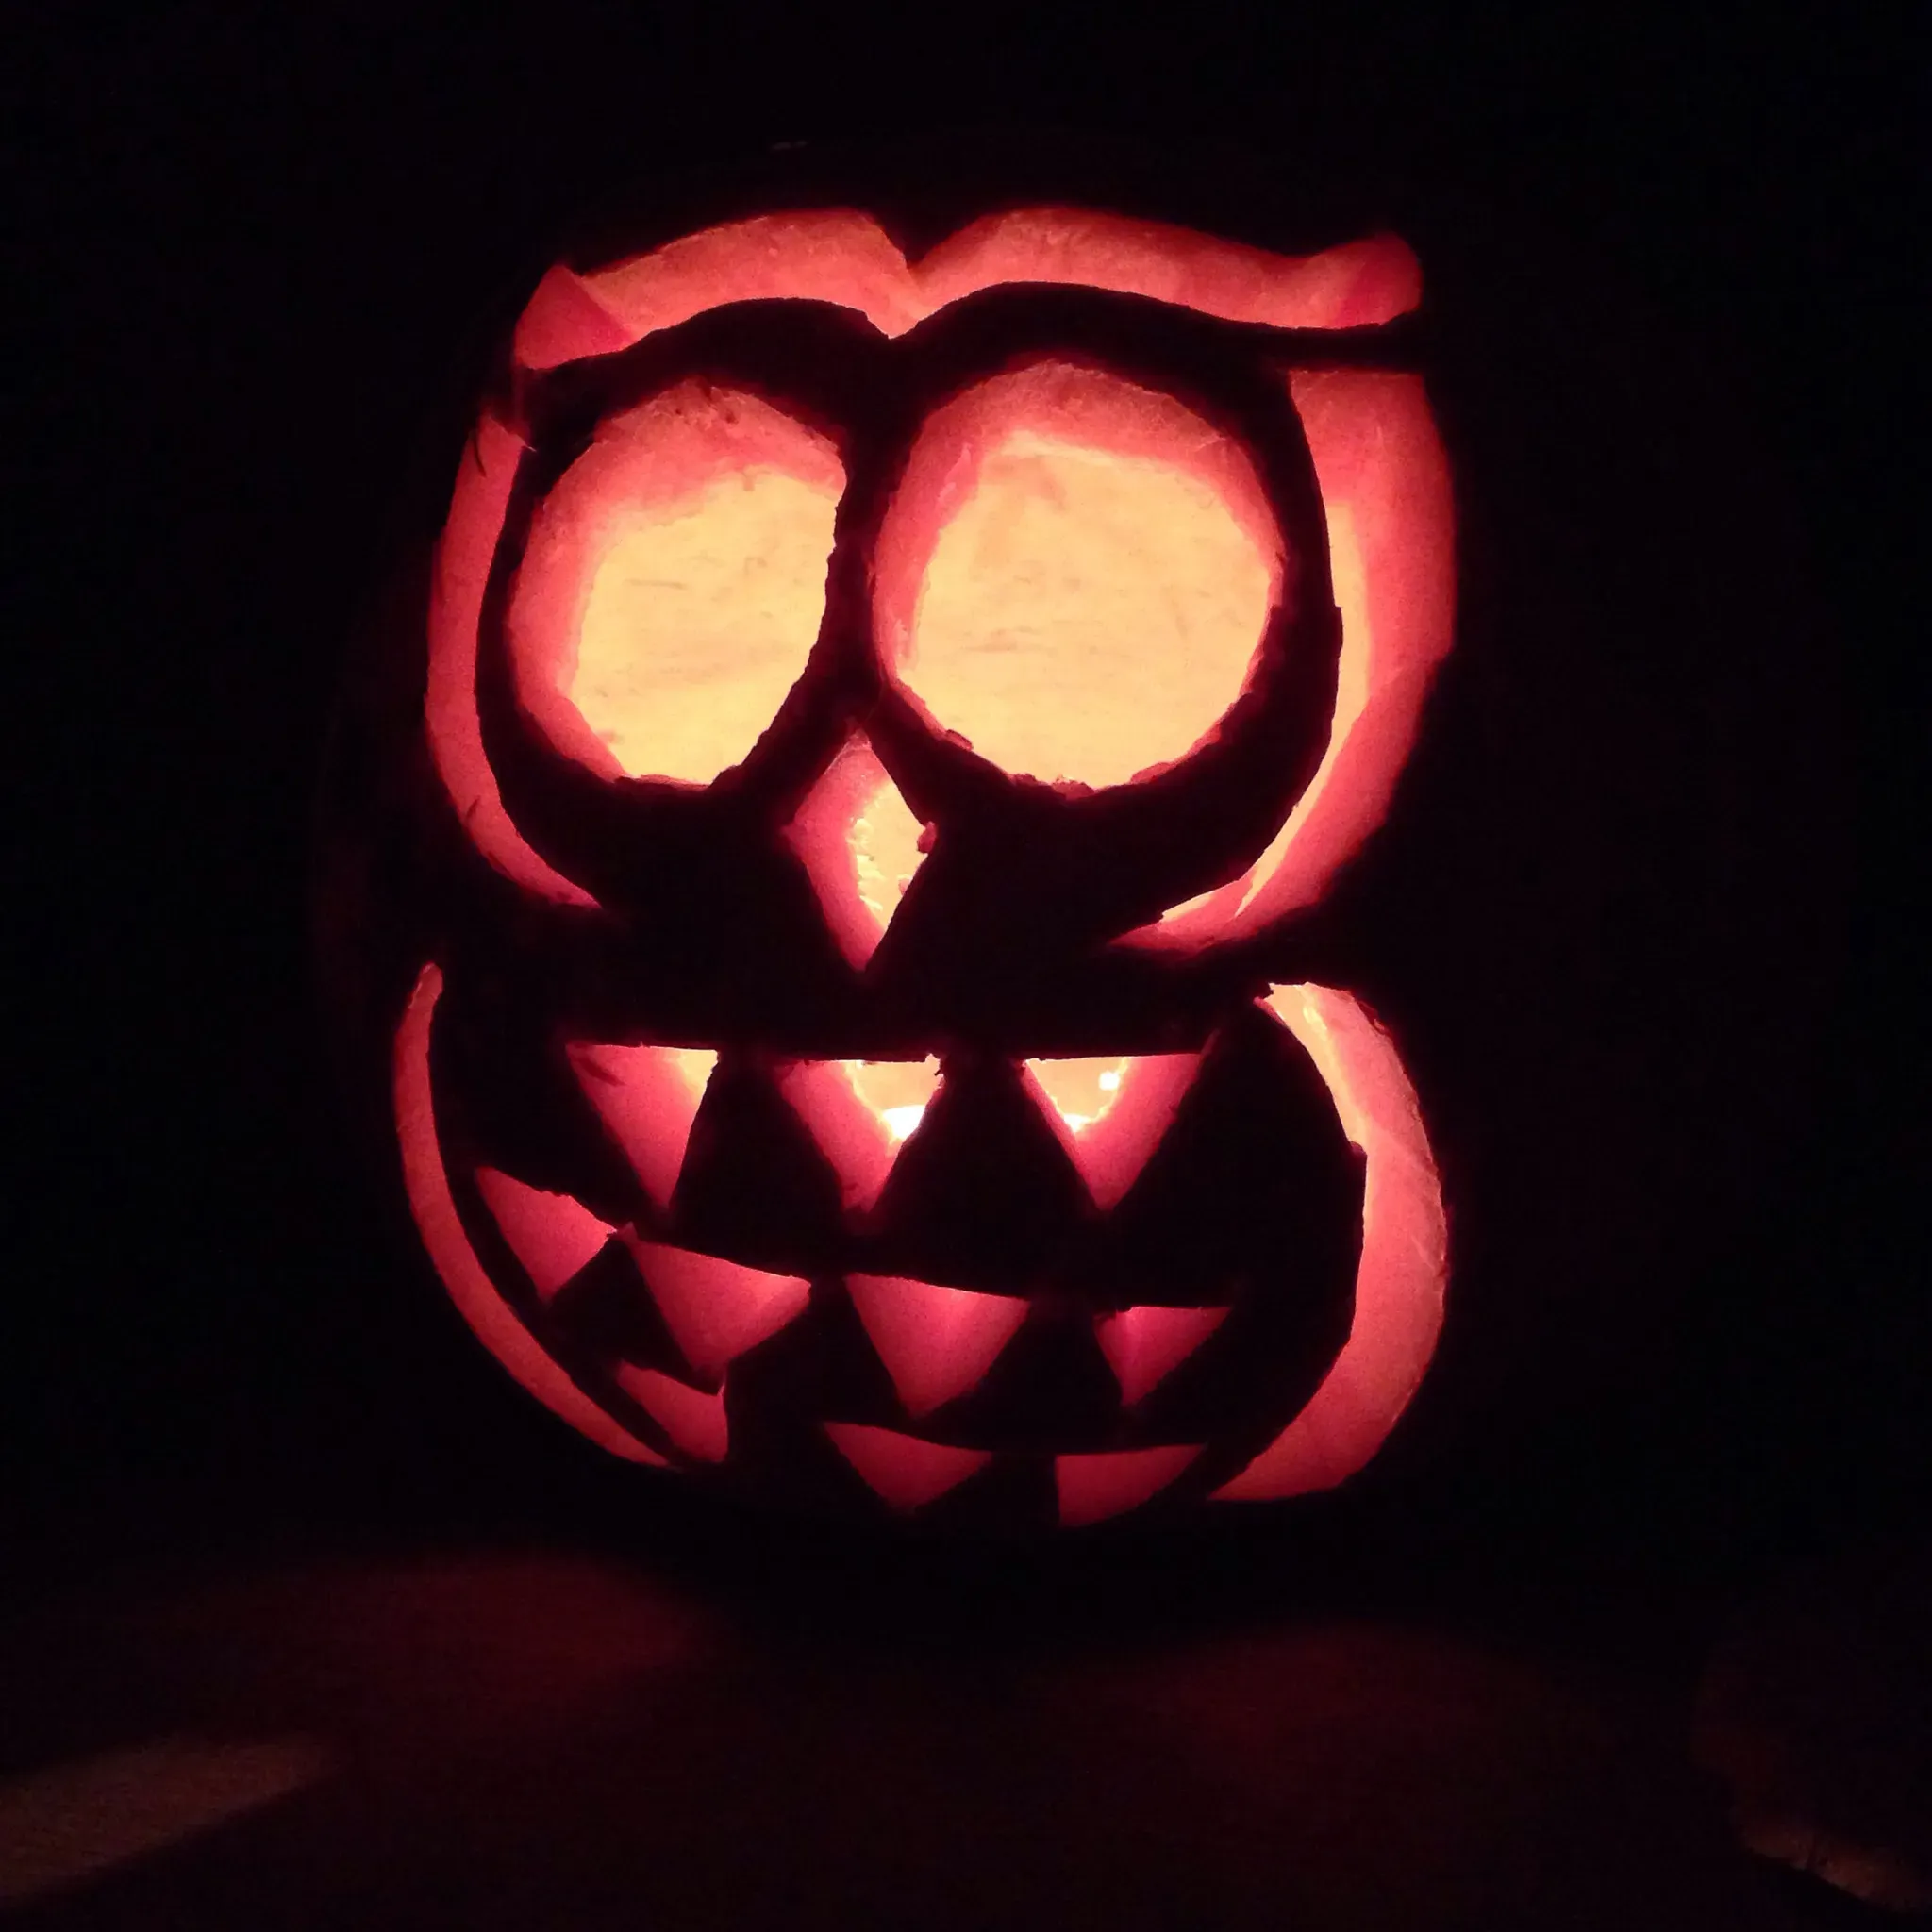
the outline is on the pumpkin. Now for the part that really brings your easy pumpkin carving ideas owl to life: the eyes. Owls are all about those big, captivating peepers. Remember that apple corer we talked about? This is where it shines. Use it to punch out the center circle of each eye. Just line it up with your marked center point, twist, and push straight through. You'll get a perfect little cylinder of pumpkin flesh you can pop out. This gives you a clean starting point. Now, grab your small craft knife or scalpel. Use it to carefully cut along the outer lines you marked for the eyes. Take your time here. Short, controlled cuts are better than trying to slice through in one go. You can either cut the entire eye shape out or, for a slightly different look (and sometimes easier), just carve away the top layer of rind within the eye shape, leaving the lighter flesh exposed. This makes the eyes glow differently when lit.
Adding Feathery Texture and Little Feet
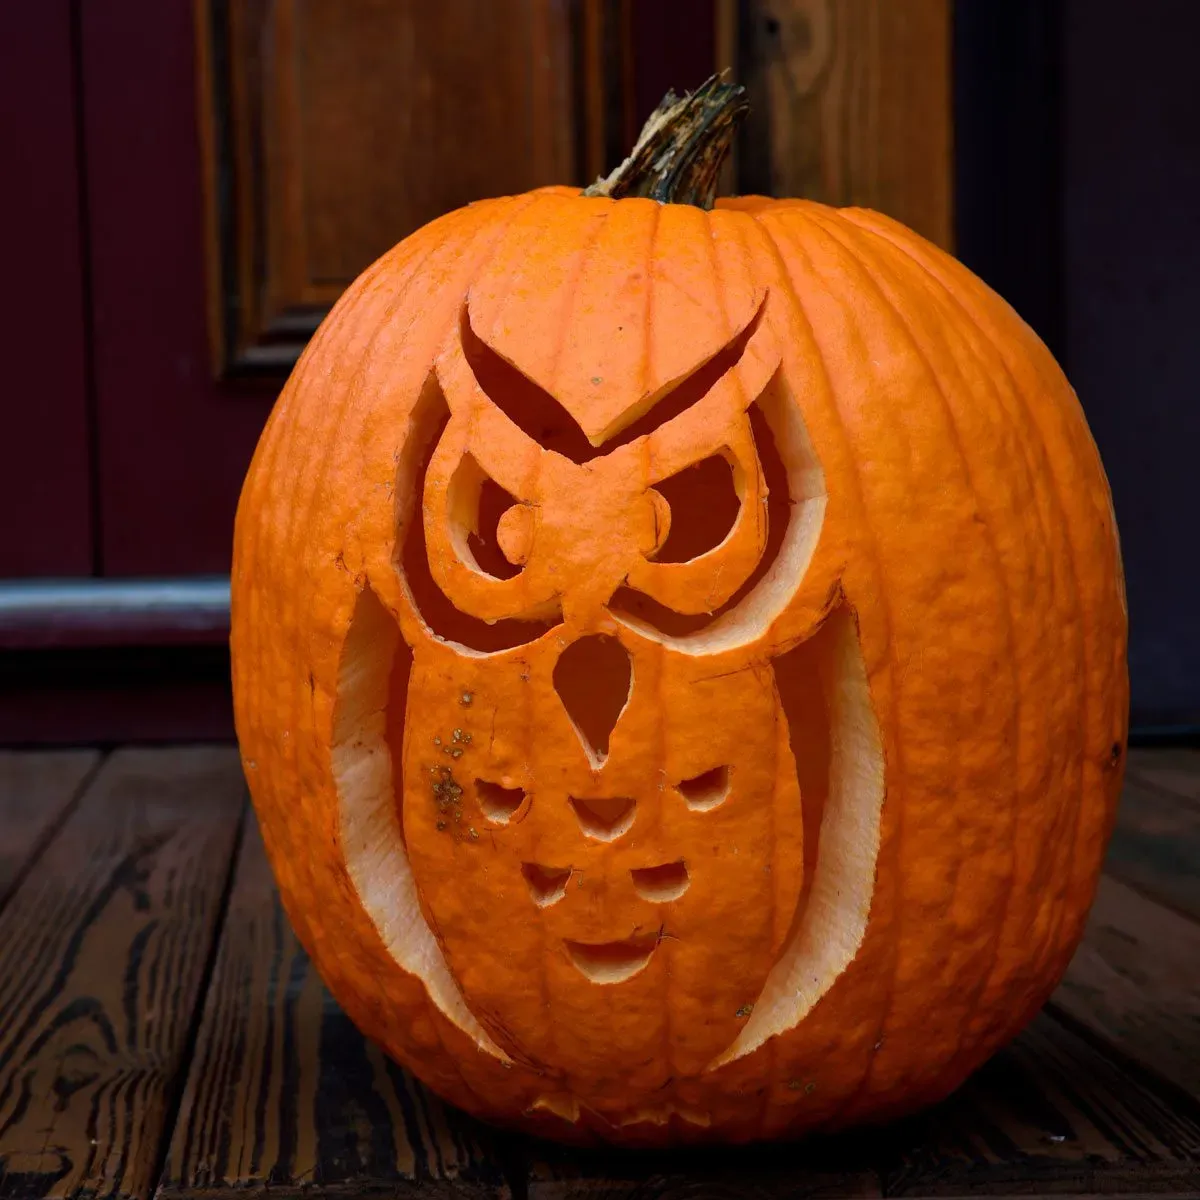
With the eyes done, let's move onto the body and those signature owl feathers. For easy pumpkin carving ideas owl style, you don't need to carve out every single feather shape. A simpler, effective method is to use your craft knife to *shave* away the top layer of rind in feather-like shapes. Think of making overlapping "U" or "V" shapes on the owl's body and wings. You're not cutting all the way through, just removing that tough orange skin to expose the lighter layer underneath. This creates texture and contrast without complicated cutouts. It's much faster and less likely to cause structural issues. For the feet, keep it simple. Just two small, triangular or claw-like shapes carved near the bottom of the pumpkin. Again, you can either cut them out or just shave the rind away. Don't overthink the feet; they're just a small detail to complete the look.
Tips for Carving Owl Details:
- Use an apple corer for perfect eye centers.
- Make short, controlled cuts with a craft knife for eye outlines.
- Consider shaving the rind instead of cutting through for details like eyes and feathers.
- Shave "U" or "V" shapes for easy feather texture.
- Keep feet shapes simple – triangles or small claws.
- Always cut away from yourself.
- Go slow, you can always remove more pumpkin, but you can't put it back.
Your Owl Takes Flight (Sort Of)
So, there you have it. You've navigated the sometimes-sticky, sometimes-messy world of pumpkin guts and sharp objects, and you've ended up with an owl. It might not be a photorealistic sculpture, but it's yours, and it looks like an owl. More importantly, it looks like an owl *you* carved without wanting to throw the whole thing across the yard. Pop a light inside, set it out, and watch it do its job – looking pretty decent in the dark. Maybe next year you'll try a whole parliament. Or maybe you'll just stick with this one. Either way, you got the job done.