Table of Contents
let's be honest. Staring at a big, round pumpkin with a sharp knife in your hand can feel less like festive fun and more like a high-stakes surgery. Maybe your past attempts resulted in lopsided smiles or abstract art that looked suspiciously like a deflated football. You're not alone. Lots of folks feel intimidated by the whole process, picturing intricate designs from contests they saw on TV. But what if it didn't have to be that complicated? What if there were genuinelyeasy pumpkin carving ideas for beginnersthat actually work?
Getting Started: Tools and Prep for Easy Pumpkin Carving
Getting Started: Tools and Prep for Easy Pumpkin Carving
Picking Your Perfect Beginner Pumpkin
first things first. Don't grab the biggest, most lopsided gourd you can find and expect magic. Foreasy pumpkin carving for beginners, choose a pumpkin that's medium-sized, firm all around, and has a relatively smooth surface. Think basketball or soccer ball size. Avoid soft spots, bruises, or deep ridges, as these make cutting much harder. Look for one with a sturdy stem – it's a good sign of a healthy pumpkin. A flat bottom is also a plus; it won't roll away while you're working.
Essential Gear for Simple Carving Success
Forget those fancy 50-piece carving kits that look like surgical instruments. You seriously don't need them. Foreasy pumpkin carving, you just need a few key items. A sturdy, serrated knife (like a small kitchen paring knife or the little saw from a cheap kit) is crucial for cutting the lid and larger shapes. You'll definitely want a big spoon or a dedicated scoop tool to get all the gunk out. A smaller, sharper tool is helpful for details, but even a basic poker or drill bit can work for simple holes. And please, protect your surface – newspaper or a plastic tablecloth is your friend.
- Medium-sized, firm pumpkin
- Serrated knife (small kitchen knife or carving saw)
- Large spoon or pumpkin scoop
- Small, sharp detail tool (optional, for simple shapes)
- Newspaper or drop cloth
- Bowl for seeds and guts
- Markers or templates (optional)
Opening Up and Cleaning House
Now, the messy part. Decide if you want to cut the lid from the top or the bottom. Cutting the bottom is often easier for beginners because the pumpkin sits flat and you can drop a light inside later without fiddling with the stem. Whichever end you choose, angle your knife inward as you cut. This creates a ledge for the lid to sit on, preventing it from falling inside. Once the lid is off, grab your spoon or scoop and get to work. Scrape down the inside walls until they are smooth and about an inch thick. Don't leave too much flesh; it makes carving harder and your pumpkin will rot faster. Save those seeds if you want to roast 'em!
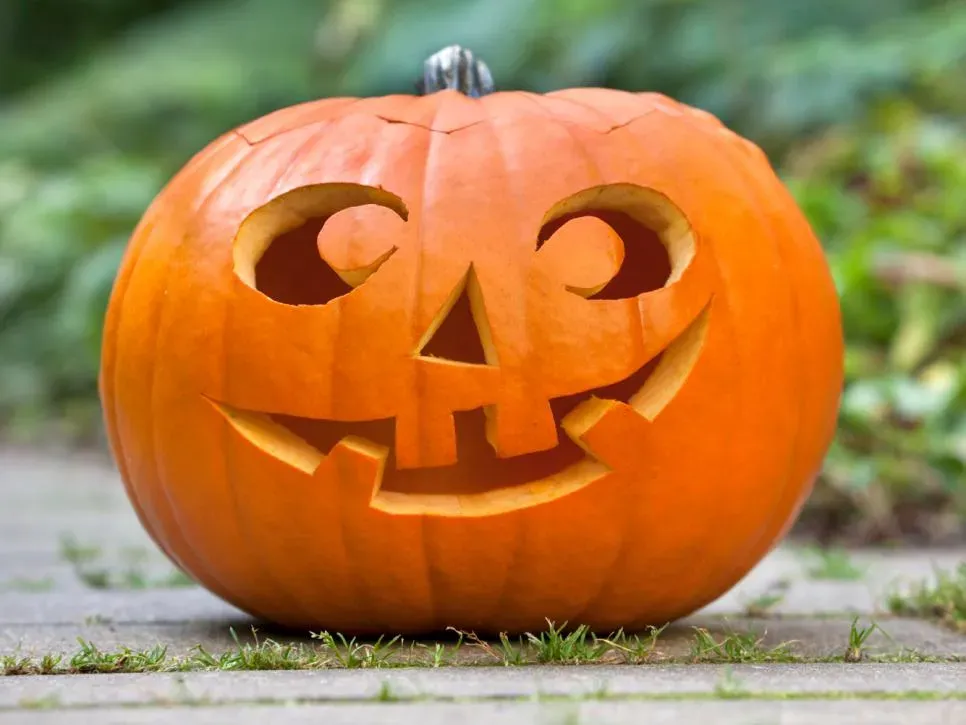
Seriously Simple Designs: Your First Easy Pumpkin Carving Ideas
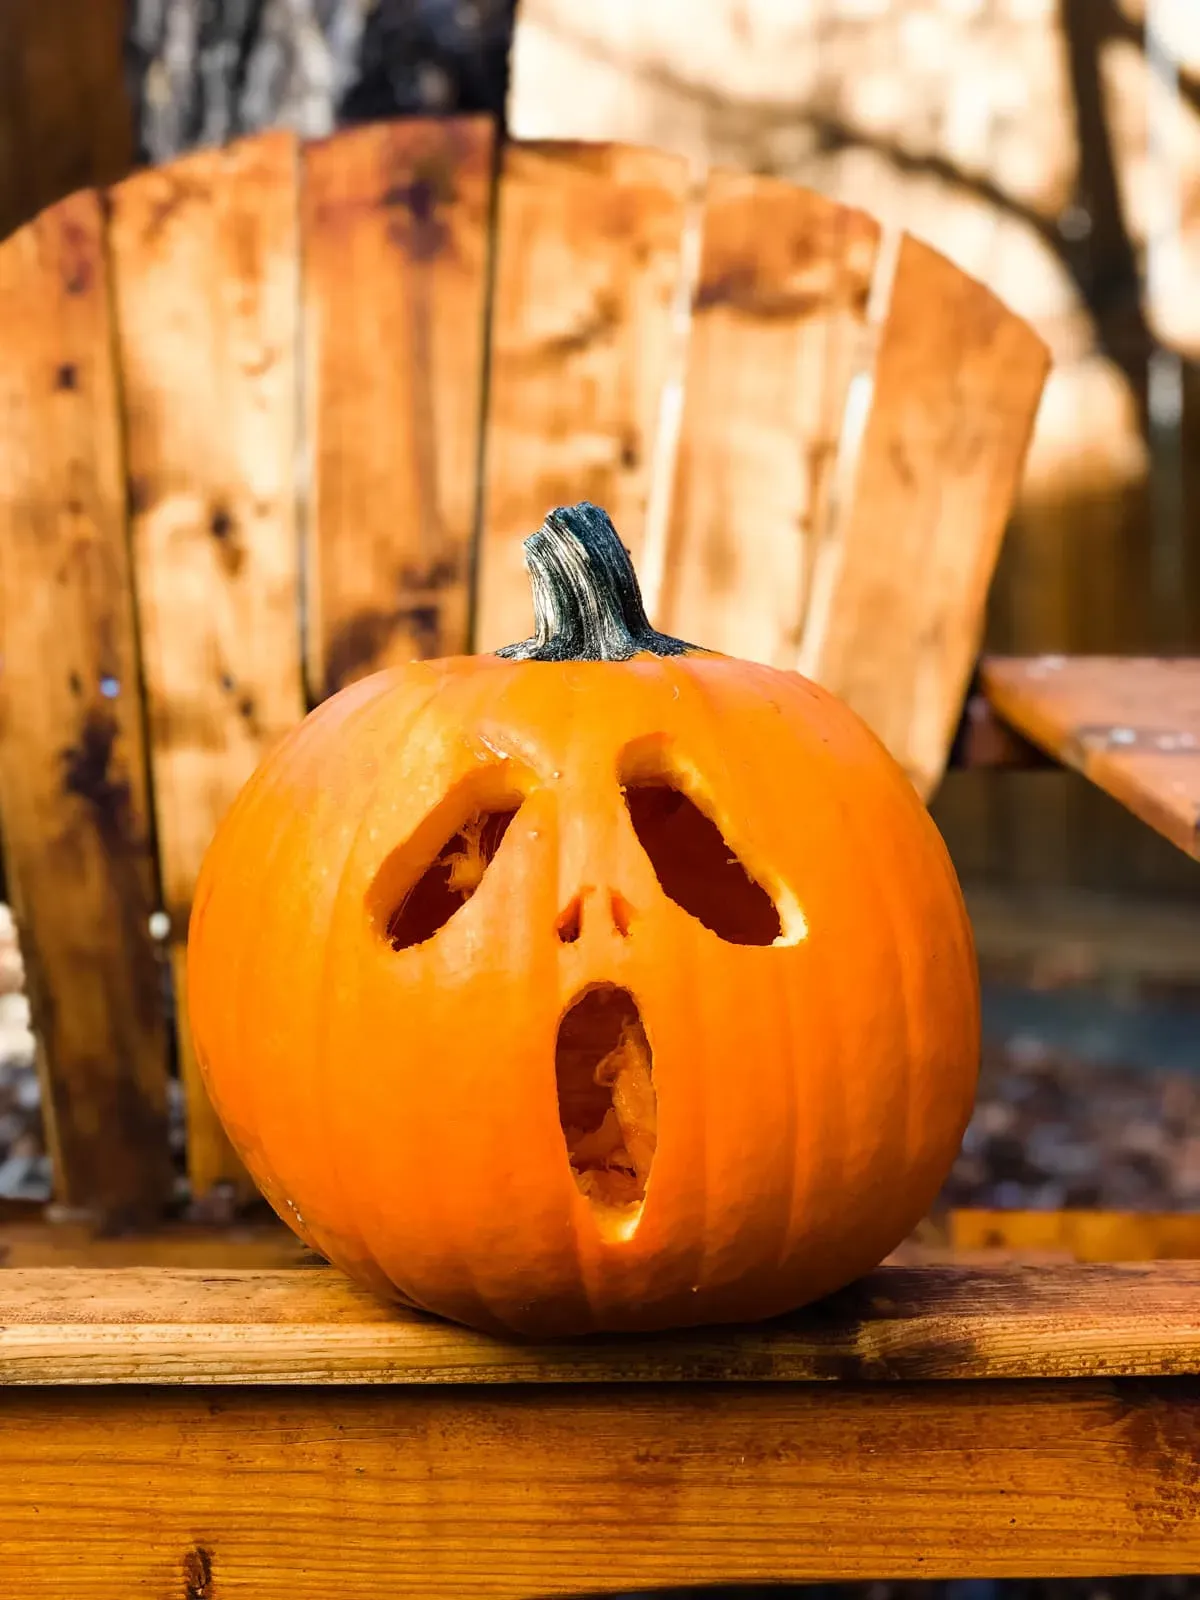
Seriously Simple Designs: Your First Easy Pumpkin Carving Ideas
Alright, you've got your pumpkin cleaned out and your basic tools ready. Now for the fun part: giving this gourd some personality. Forget those intricate spiderwebs or detailed portraits you see online; those are for folks with way too much free time and probably a Dremel tool. For genuineeasy pumpkin carving ideas for beginners, we're talking simple, bold shapes. Think classic geometric cuts, basic facial features that don't require perfect symmetry, or maybe just some scattered holes. The goal here isn't to win a carving contest, it's to create something recognizable and cool without wanting to throw your knife across the yard in frustration.
Beyond the Knife: Painting and Decorating for Beginners
Beyond the Knife: Painting and Decorating for Beginners
Why Skip the Knife Sometimes?
maybe the sharp objects still give you the jitters. Or maybe you tried carving, and your simple circle ended up looking like a deformed potato. That's perfectly fine. Carving isn't the only way to give a pumpkin personality. In fact, for genuinelyeasy pumpkin decorating ideas for beginners, sometimes putting the knife down is the smartest move you can make. Painting and decorating offer a whole different playground, often less messy and with a lower risk of losing a finger.
It's a fantastic alternative, especially if you're working with younger kids or if you just want a quicker, less stressful project. You can still achieve some seriously cool looks without ever touching a saw. Think of it as giving your pumpkin a costume instead of surgery. Plus, painted pumpkins tend to last longer than carved ones, which is a definite bonus.
Simple Paint Jobs That Look Great
So, you're leaning towards paint? Excellent choice. You don't need to be Picasso. Acrylic paints are your best friend here – they stick well to pumpkin surfaces and clean up with water while they're wet. Start by wiping your pumpkin clean and making sure it's dry. For a base color, you can paint the whole thing black, white, gold, or even a spooky neon green. A single solid color can look surprisingly chic.
Once the base is dry, you can add simple designs. Polka dots are ridiculously easy – just use the eraser end of a pencil dipped in paint. Stripes? Use masking tape to create clean lines. You can freehand simple shapes like stars, moons, or even just squiggles. Don't worry about perfection; a little wobbly line adds character. Remember, the goal is easy and fun, not gallery-worthy.
Here are a few basic painting supplies to get you started:
- Acrylic paints (various colors)
- Paintbrushes (different sizes for base coats and details)
- Palette (or just an old plate)
- Cup of water for rinsing brushes
- Paper towels
- Newspaper or drop cloth
- Optional: Masking tape, stencils, pencil eraser for dots
Adding Flair Without Cutting
Beyond just paint, there's a whole world of stuff you can glue, stick, or attach to your pumpkin. This is where you can get really creative with minimal effort. Googly eyes are a classic for a reason – they instantly give a pumpkin a goofy or spooky vibe. You can use yarn or felt for hair, buttons for eyes or noses, or even craft foam cutouts for shapes like bats or stars.
Glitter glue can add some sparkle, just maybe don't cover the *entire* pumpkin unless you want glitter tracking through your house until next Halloween. Ribbons, pipe cleaners, or even small twigs can be attached with hot glue (adult supervision required, obviously) to add texture and dimension. Think of your pumpkin as a blank canvas for collage – gather some craft supplies and see what happens. It's often the simplest combinations that end up being the most charming.
Making It Last: Simple Tips After Your Easy Carving Project
Making It Last: Simple Tips After Your Easy Carving Project
Making It Last: Simple Tips After Your Easy Carving Project
you did it! You tackled aneasy pumpkin carving projectand have something cool sitting there. Now, the sad reality: carved pumpkins don't last forever. They're organic matter, and they will start to break down. The good news is, you can take a few simple steps to slow down the inevitable decay and keep your masterpiece looking decent for a bit longer than just a day or two. Think of it less like preservation and more like delaying the inevitable. Nobody wants a saggy, moldy mess on their porch before Halloween even arrives.
Your First Carved Creation Awaits
See? It wasn't so scary after all. You've now got the lowdown on the gear that matters, a few solid,easy pumpkin carving ideas for beginnersthat won't make you cry, and even some backup plans if wielding a sharp object isn't your favorite pastime. Your first carved pumpkin might not win any national awards, and that's perfectly fine. The point is you made something cool with your own hands, adding a bit of your own brand of spooky (or goofy) to the season. Now go forth, pick your pumpkin, and make some gourd-geous art.