Table of Contents
Alright, let's be real. The idea of carving pumpkins sounds great until you're elbow-deep in slimy guts, wrestling with a dull knife, and questioning every life choice that led you to this messy situation. The picture-perfect jack-o'-lantern you envisioned? Suddenly looks more like a slightly disgruntled, melting blob. But what if I told you it doesn't have to be a horror show of epic proportions? What if you could actually enjoy the process and end up with something genuinely cool?
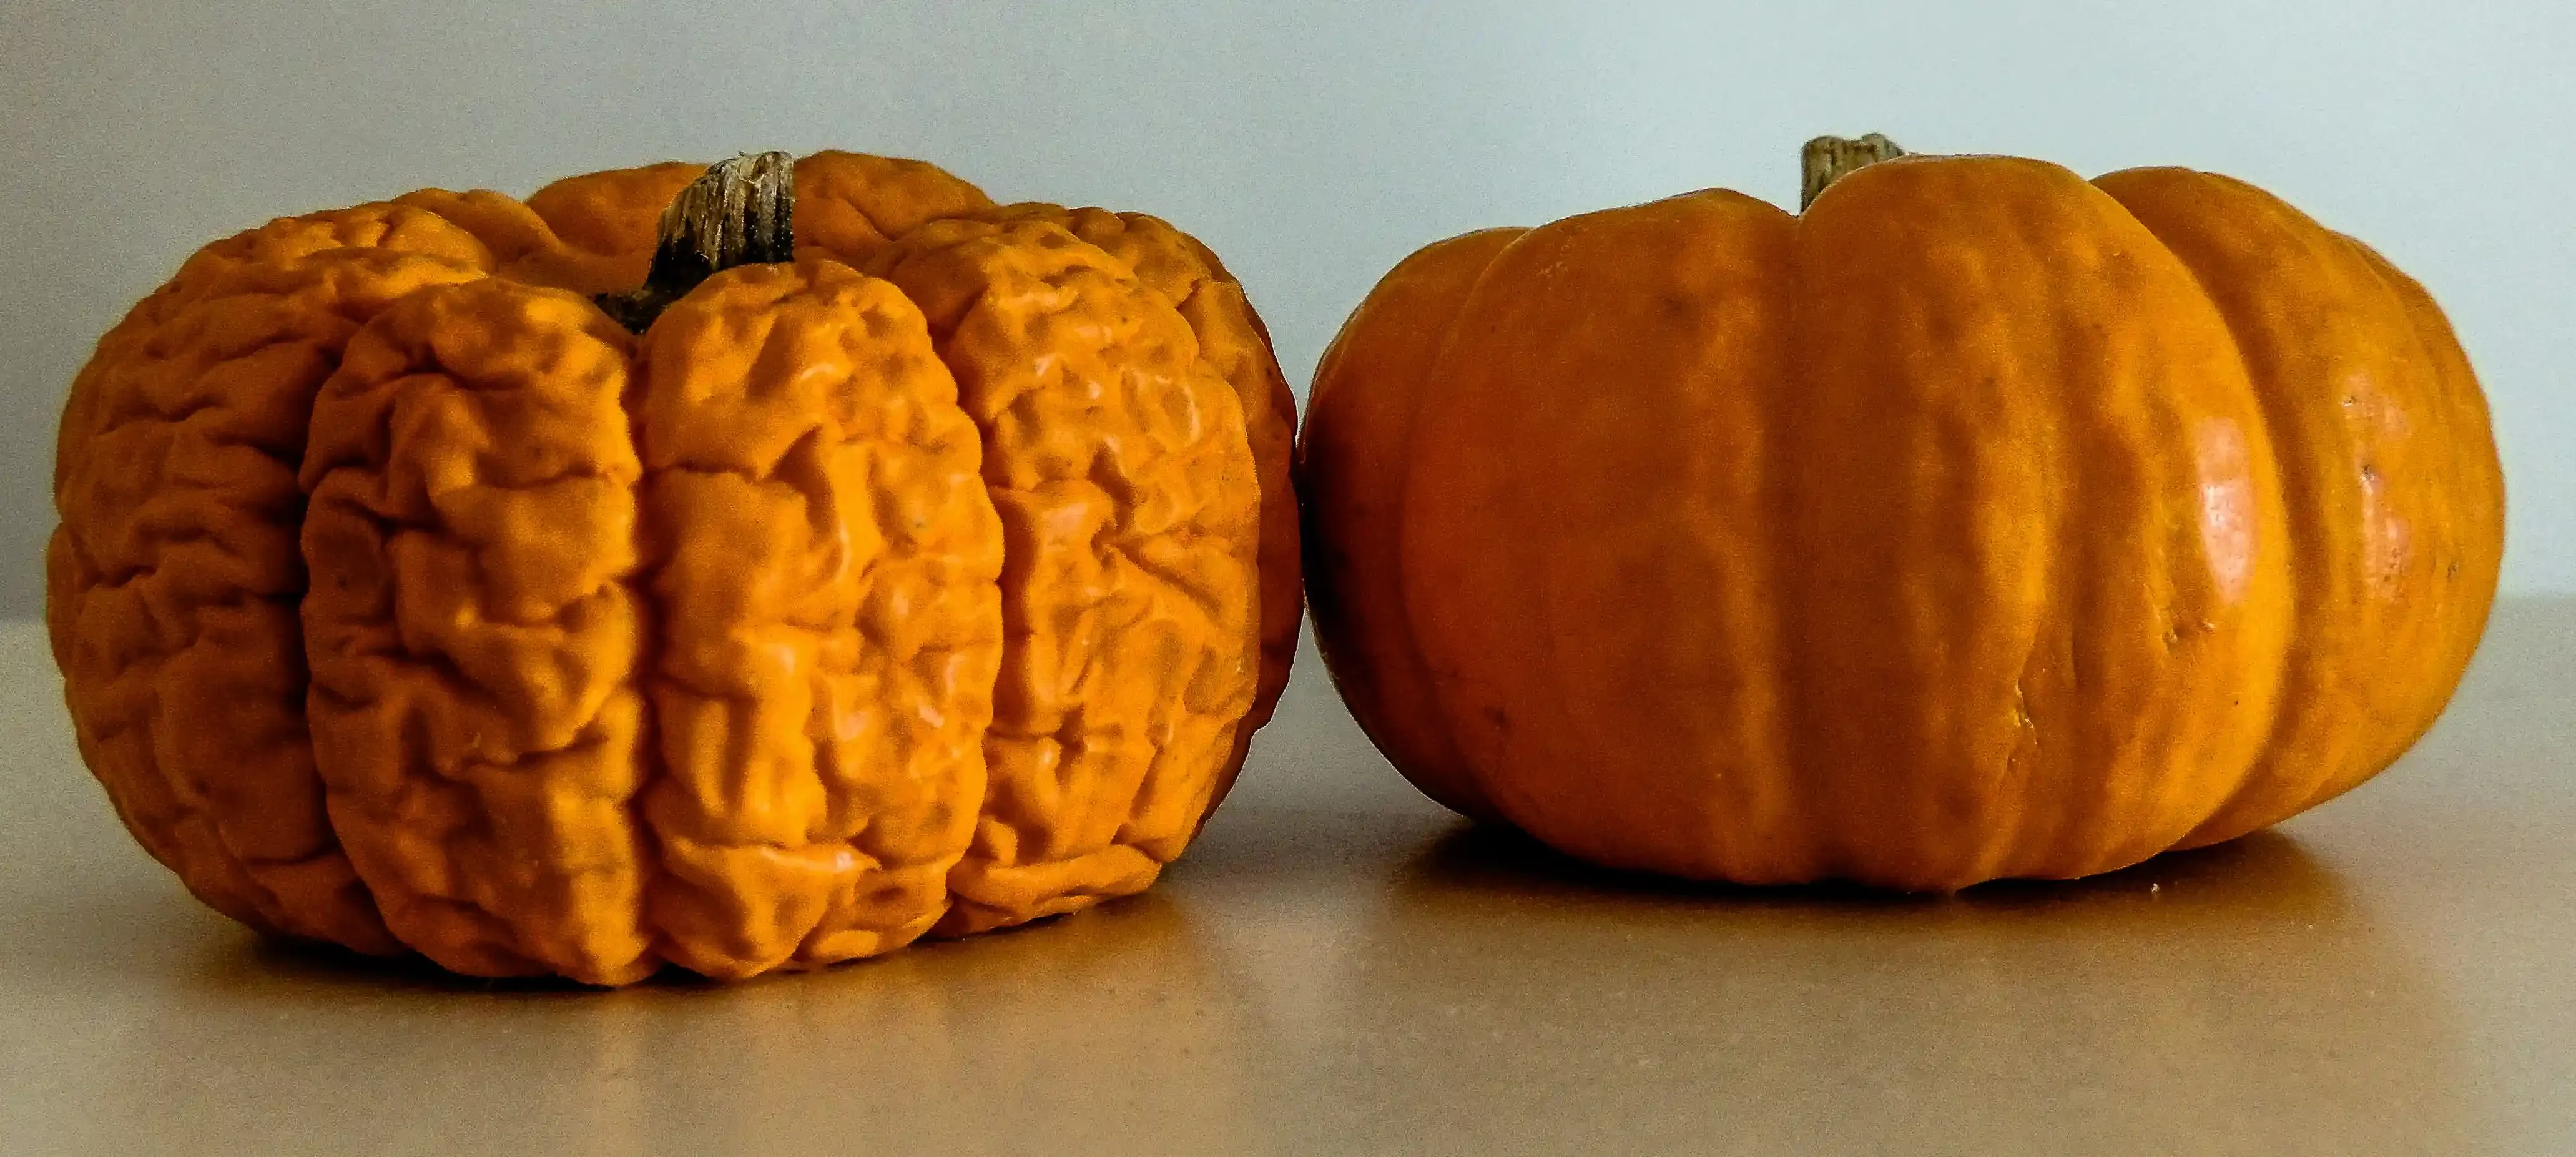
Choosing Your Canvas: Finding the Right Pumpkin for Easy Carving
Choosing Your Canvas: Finding the Right Pumpkin for Easy Carving
before you even think about grabbing a knife, you need the right pumpkin. This isn't just picking the biggest one at the patch; it's about finding a solid foundation for your easy pumpkin carving ideas. Look for a pumpkin with smooth skin. Bumps and ridges are a nightmare when you're trying to make clean cuts, especially for simpler designs. Give it a tap; it should sound hollow, not dense and sad. Check the bottom to make sure it sits flat without wobbling – crucial if you're planning to light it up later. And the stem? It should be firm and firmly attached. A wobbly or missing stem often means the pumpkin isn't fresh and will likely turn mushy faster than you can say "boo." Trust me, starting with a good pumpkin makes the whole process significantly less frustrating.
Here’s a quick checklist for picking your carving pumpkin:
- Smooth skin, fewer bumps.
- Feels firm, no soft spots.
- Sounds hollow when tapped.
- Sits flat on its base.
- Has a sturdy, attached stem.
- Size that matches your design ambition (smaller is often easier).
The Right Tools Make It Easy: Prepping for Pumpkin Carving

The Right Tools Make It Easy: Prepping for Pumpkin Carving
you've picked your pumpkin, a solid, smooth specimen ready for its transformation. Now, let's talk tools. Forget those flimsy plastic kits that bend the moment they touch the rind. You don't need a workshop full of specialized gadgets for easy pumpkin carving ideas. What you *do* need are a few reliable items that make the job less of a struggle and more of a smooth operation. Think sharp, sturdy, and designed for more than just this one seasonal task. A small, sharp serrated knife (like a paring knife or a small utility knife) is way better for cutting than most kit saws. An ice cream scoop or a sturdy metal spoon is your best friend for scraping out those goopy insides – way faster and cleaner than your hands. A drill with different sized bits can create perfect polka-dot eyes or starry patterns in seconds. Even simple cookie cutters and a rubber mallet can make quick work of shapes.
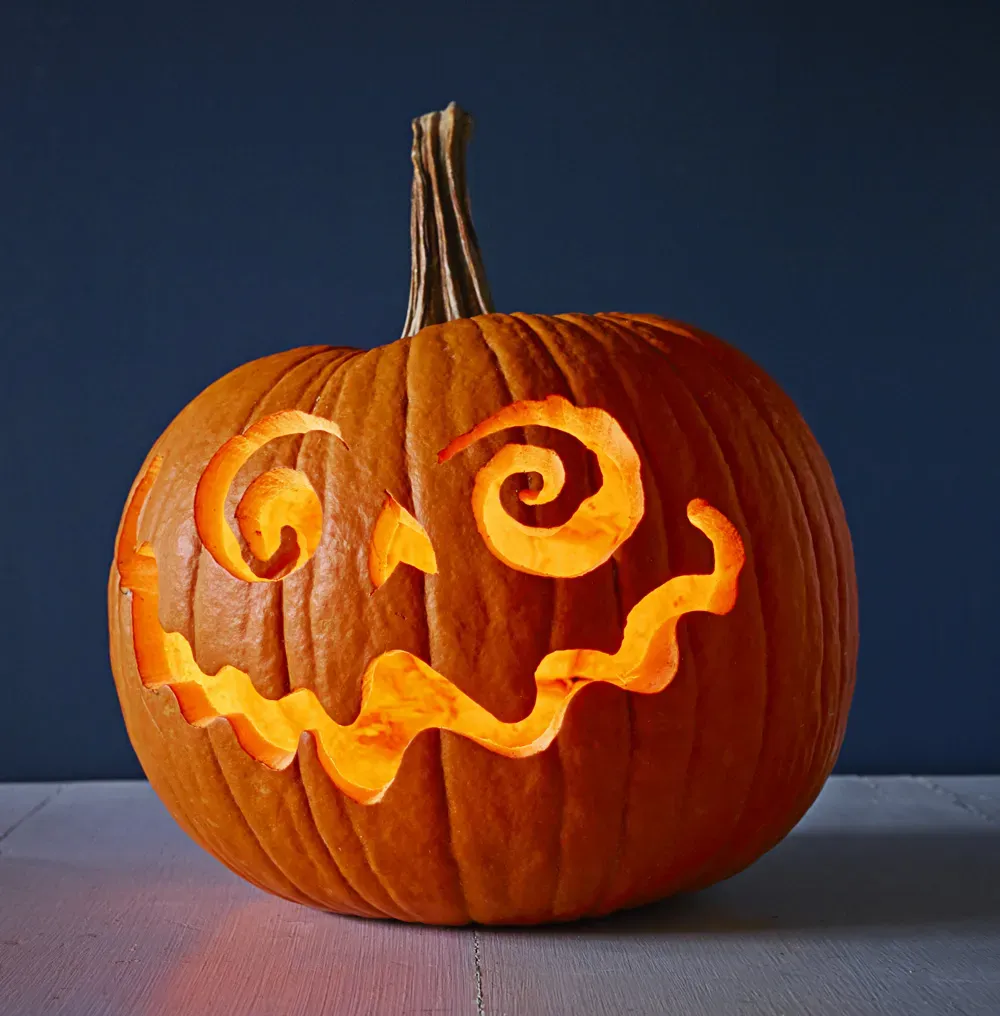
Unlock Creativity: Simple & Easy Pumpkin Carving Ideas
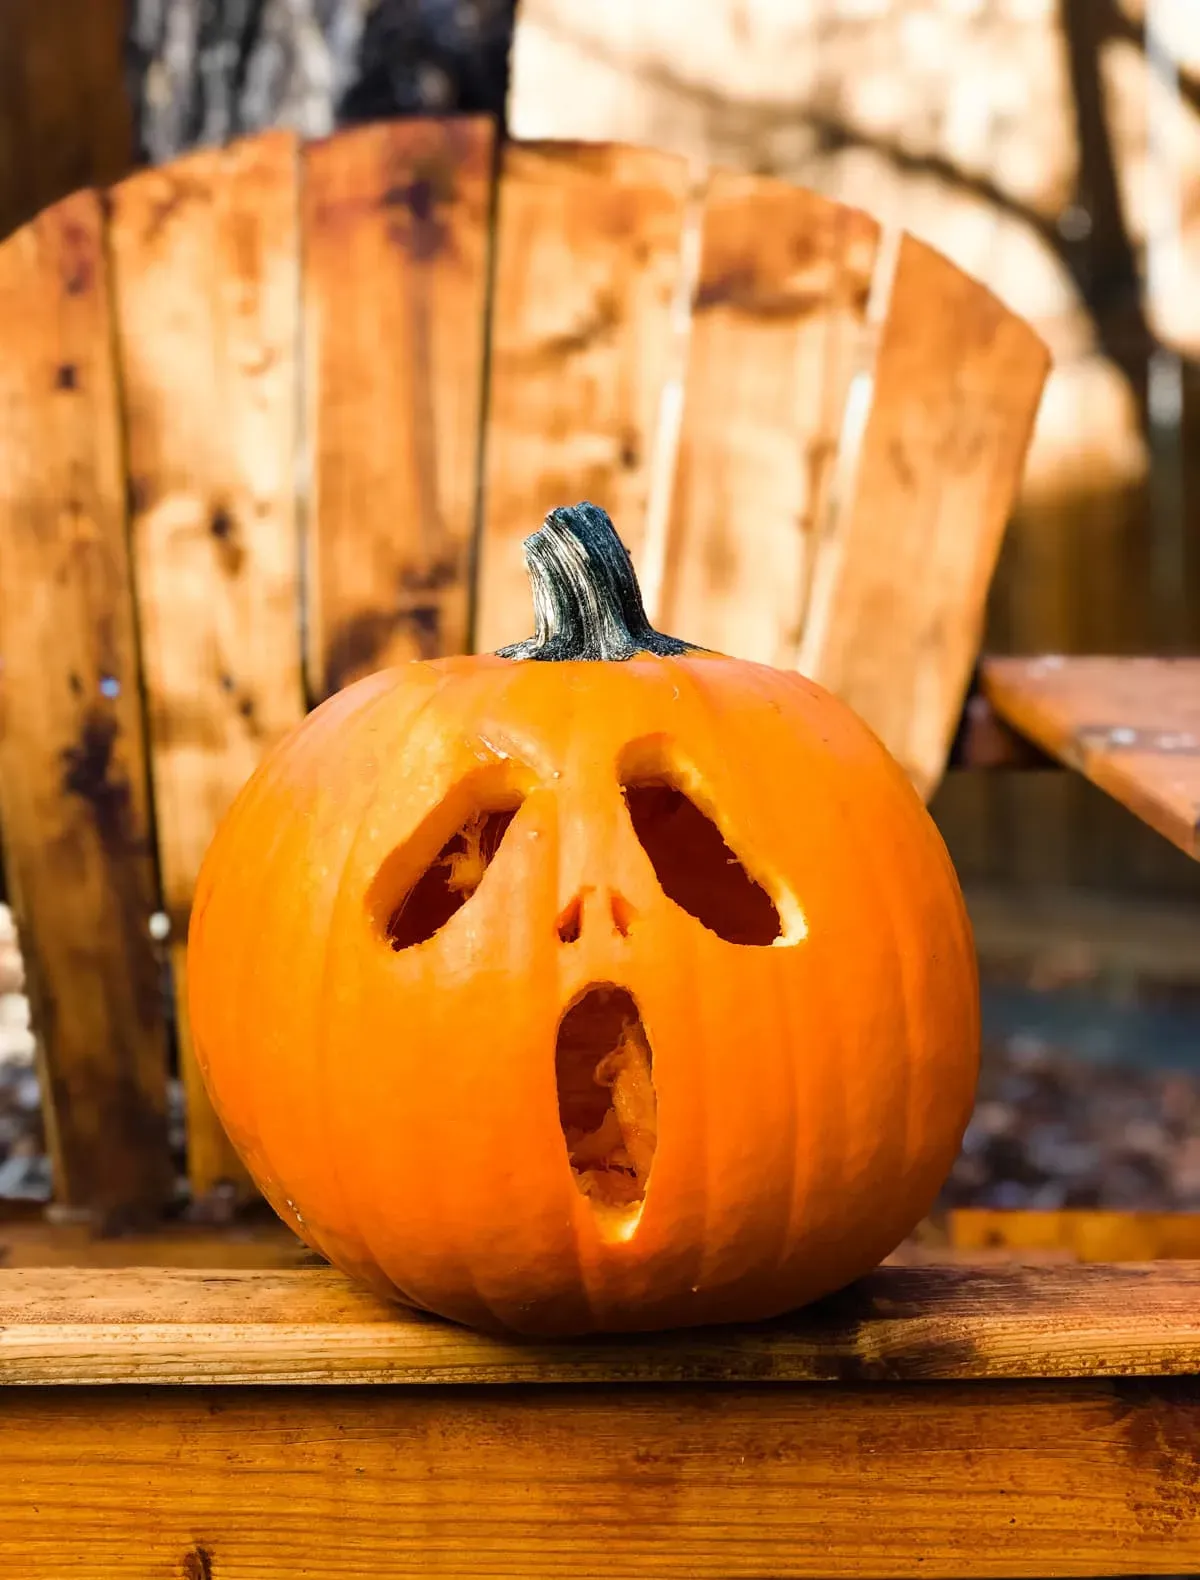
Unlock Creativity: Simple & Easy Pumpkin Carving Ideas
you've got your perfectly picked pumpkin and the right tools ready to go. Now for the fun part: bringing it to life with some genuinely easy pumpkin carving ideas. This is where we ditch the complicated stencils that look like architectural blueprints and focus on simple shapes and techniques that still make your pumpkin pop. Think bold geometric cuts, simple expressive faces, or even using negative space effectively. You don't need to recreate a famous painting; you just need to make a cool, spooky, or funny statement with minimal effort. The goal here is to have fun and create something you're proud of without needing a nap afterward.
Bringing Your Jacko'Lantern to Life: Safe Lighting Tips
Bringing Your Jacko'Lantern to Life: Safe Lighting Tips
Candles: The Classic, But Tricky Choice
Alright, you've got your spooky (or silly) face carved, your easy pumpkin carving ideas are looking sharp, and now you want to make it glow. The first thing most people think of is a good old candle. It gives that flickering, classic vibe, right? But let's not kid ourselves, open flames inside a hollow, dry pumpkin are a fire hazard waiting for a gust of wind or an unsupervised pet. You need to use sturdy votive candles, placed on a stable surface, and trim the wick so it doesn't smoke up the inside too much. And for the love of all that's spooky, never leave a lit candle pumpkin unattended. It's a quick way to turn your festive decoration into a bonfire.
Safer, Saner Lighting Solutions
Honestly, if you want to avoid the constant anxiety of your jack-o'-lantern going up in flames, there are much better options for bringing your jack-o'-lantern to life. LED lights are a game-changer. You can get small, battery-operated tea lights that flicker just like a real candle, but they produce zero heat and are totally safe to leave on all night. They come in various colors now too, so you can give your creation an eerie green or purple glow. Mini string lights work great for larger pumpkins, creating a more even light distribution and highlighting your easy pumpkin carving ideas beautifully. Pop a few inside, thread the wire out the back or bottom, and flick the switch. Simple, safe, and effective.
Here's a quick comparison:
- Real Candles: Classic look, potential fire hazard, needs constant supervision, uneven light.
- LED Tea Lights: Safe, no heat, long-lasting batteries, variety of colors, good flicker effect.
- LED String Lights: Safe, good for larger pumpkins, even light distribution, requires battery pack placement.
Placement and Vigilance
So you've chosen your lighting method for bringing your jack-o'-lantern to life. Now, where do you put the glowing masterpiece? Placement is key, especially if you opted for candles. Keep it away from flammable materials like dry leaves, curtains, or anything else that could catch fire. If you have kids or pets, place it somewhere they can admire it without knocking it over. Even with LEDs, placing your pumpkin on a porch or steps means it's exposed to the elements and potential mischief. Consider putting it on a stable table or ledge. And regardless of the light source, a quick check now and then isn't a bad idea. You spent time on those easy pumpkin carving ideas; protect your work!
Making Your Easy Pumpkin Carving Last Longer
Making Your Easy Pumpkin Carving Last Longer
Stopping the Rot Before It Starts
You put in the effort, followed the steps for your easy pumpkin carving ideas, and now you want that spooky masterpiece to last longer than a sad, sagging week. The enemy? Mold and dehydration. Once you cut into a pumpkin, you've basically opened it up to the elements and every tiny spore floating in the air. The key is to treat those cut surfaces. A thin layer of petroleum jelly (like Vaseline) applied to all the cut edges creates a barrier, slowing down moisture loss and keeping those nasty mold spores from setting up shop. You can also use a vegetable oil spray, though it might attract bugs. The goal is to seal the raw flesh.
Hydration is Key (Sort Of)
Beyond sealing the cuts, you need to think about keeping the pumpkin from drying out entirely, which is another fast track to saggy despair. While you don't want it soaking wet, a little moisture helps. Some people swear by giving their carved pumpkin a quick dunk in a bleach solution (about a teaspoon of bleach per gallon of water) for a few minutes. This kills surface bacteria and mold spores. Let it air dry completely after the bleach bath before applying your sealant. Another trick is misting the inside of the pumpkin with water daily, but be careful not to overdo it and create a swamp.
- Apply petroleum jelly or vegetable oil to all cut edges.
- Consider a quick bleach bath (1 tsp bleach per gallon water).
- Let it dry fully after any liquid treatment.
- Mist the inside lightly with water daily.
- Avoid direct sunlight or extreme heat.
Picking the Right Spot and Protecting Your Work
Where you put your carved pumpkin makes a huge difference in Making Your Easy Pumpkin Carving Last Longer. Hot, sunny spots are the enemy; they dry out the pumpkin and encourage rot at warp speed. A cool, shady spot on your porch or even indoors (if you don't mind the smell) is ideal. If you live in a humid area, the sealing step is even more critical. For colder climates, freezing is a concern; a garage or covered porch is better than leaving it exposed. Think of it like a perishable item – treat it with a little care, and you'll get more mileage out of your hard work.
Carve On, Without the Stress
So there you have it. Turns out, you don't need to be a master sculptor or possess supernatural patience to create a decent jack-o'-lantern. Focusing on easy pumpkin carving ideas, using the right basic tools, and picking a good pumpkin from the start makes a world of difference. You can skip the frustration, the elaborate stencils, and the questionable carving kits that snap after two cuts. Just grab a sturdy pumpkin, a sharp knife, maybe a scoop, and try out some of these simpler approaches. You might actually find yourself enjoying the process, and hey, you'll have a spooky, or silly, or just plain cool looking pumpkin to show for it. Go ahead, give it a shot.