Table of Contents
Alright, let's be real. You see those elaborate pumpkin carvings online, and maybe you feel a tiny pang of dread. Or maybe a huge wave of "nope." The idea of wrestling with a giant gourd, sharp tools, and ending up with something that looks less like a spooky masterpiece and more like a melted alien is… off-putting. But what if it didn't have to be a whole production? What if you could actually pull off some cool-looking jack-o'-lanterns without needing an art degree or risking a trip to the emergency room?
Why Fret? Simple Starts for Easy Pumpkin Faces
Why Fret? Simple Starts for Easy Pumpkin Faces
Ditching the Dread: Embracing the Basic Gourd Grin
Let's just admit it. The pressure is real. Every October, social media fills with images of pumpkins carved with intricate scenes, pop culture icons, or terrifyingly realistic monsters. It makes the humble triangle-eyed, jagged-mouthed jack-o'-lantern feel, well, a bit inadequate. This feeling of needing to create a masterpiece is exactly what trips people up and makes the whole process feel overwhelming. But the point of carving isn't to win an award; it's about getting a bit messy, maybe sharing a laugh, and having something festive on your porch. Focusing on genuinely easy pumpkin carving faces ideas strips away that pressure. It allows you to actually enjoy the process instead of stressing over perfecting a vampire fang or a superhero logo.
Why Simple is Smart (and Less Likely to End in Tears)
Think about it. Complex designs require precision, patience, and often, specialized tools. They demand a steady hand and the ability to translate a complex image onto a curved, unpredictable surface. Simple faces, on the other hand, are forgiving. A wobbly line on a basic grin looks quirky, maybe even adds character. A mistake on a detailed portrait? That often means starting over. Opting for easy pumpkin carving faces ideas means you spend less time frustrated and more time with a knife in your hand, actually cutting, which is the fun part anyway. It's about getting a win, a completed project you can light up and display proudly, without the drama.
Here are a few reasons to stick to the basics:
- Less risk of cracking the pumpkin wall.
- Faster completion time – more pumpkins, less agony.
- Requires minimal tools, usually just the standard kit or even kitchen knives (carefully!).
- Mistakes are often easily incorporated or less noticeable.
- Great for involving kids without needing a neurosurgeon's precision.
Your Starting Line: Classic Shapes and Minimal Cuts
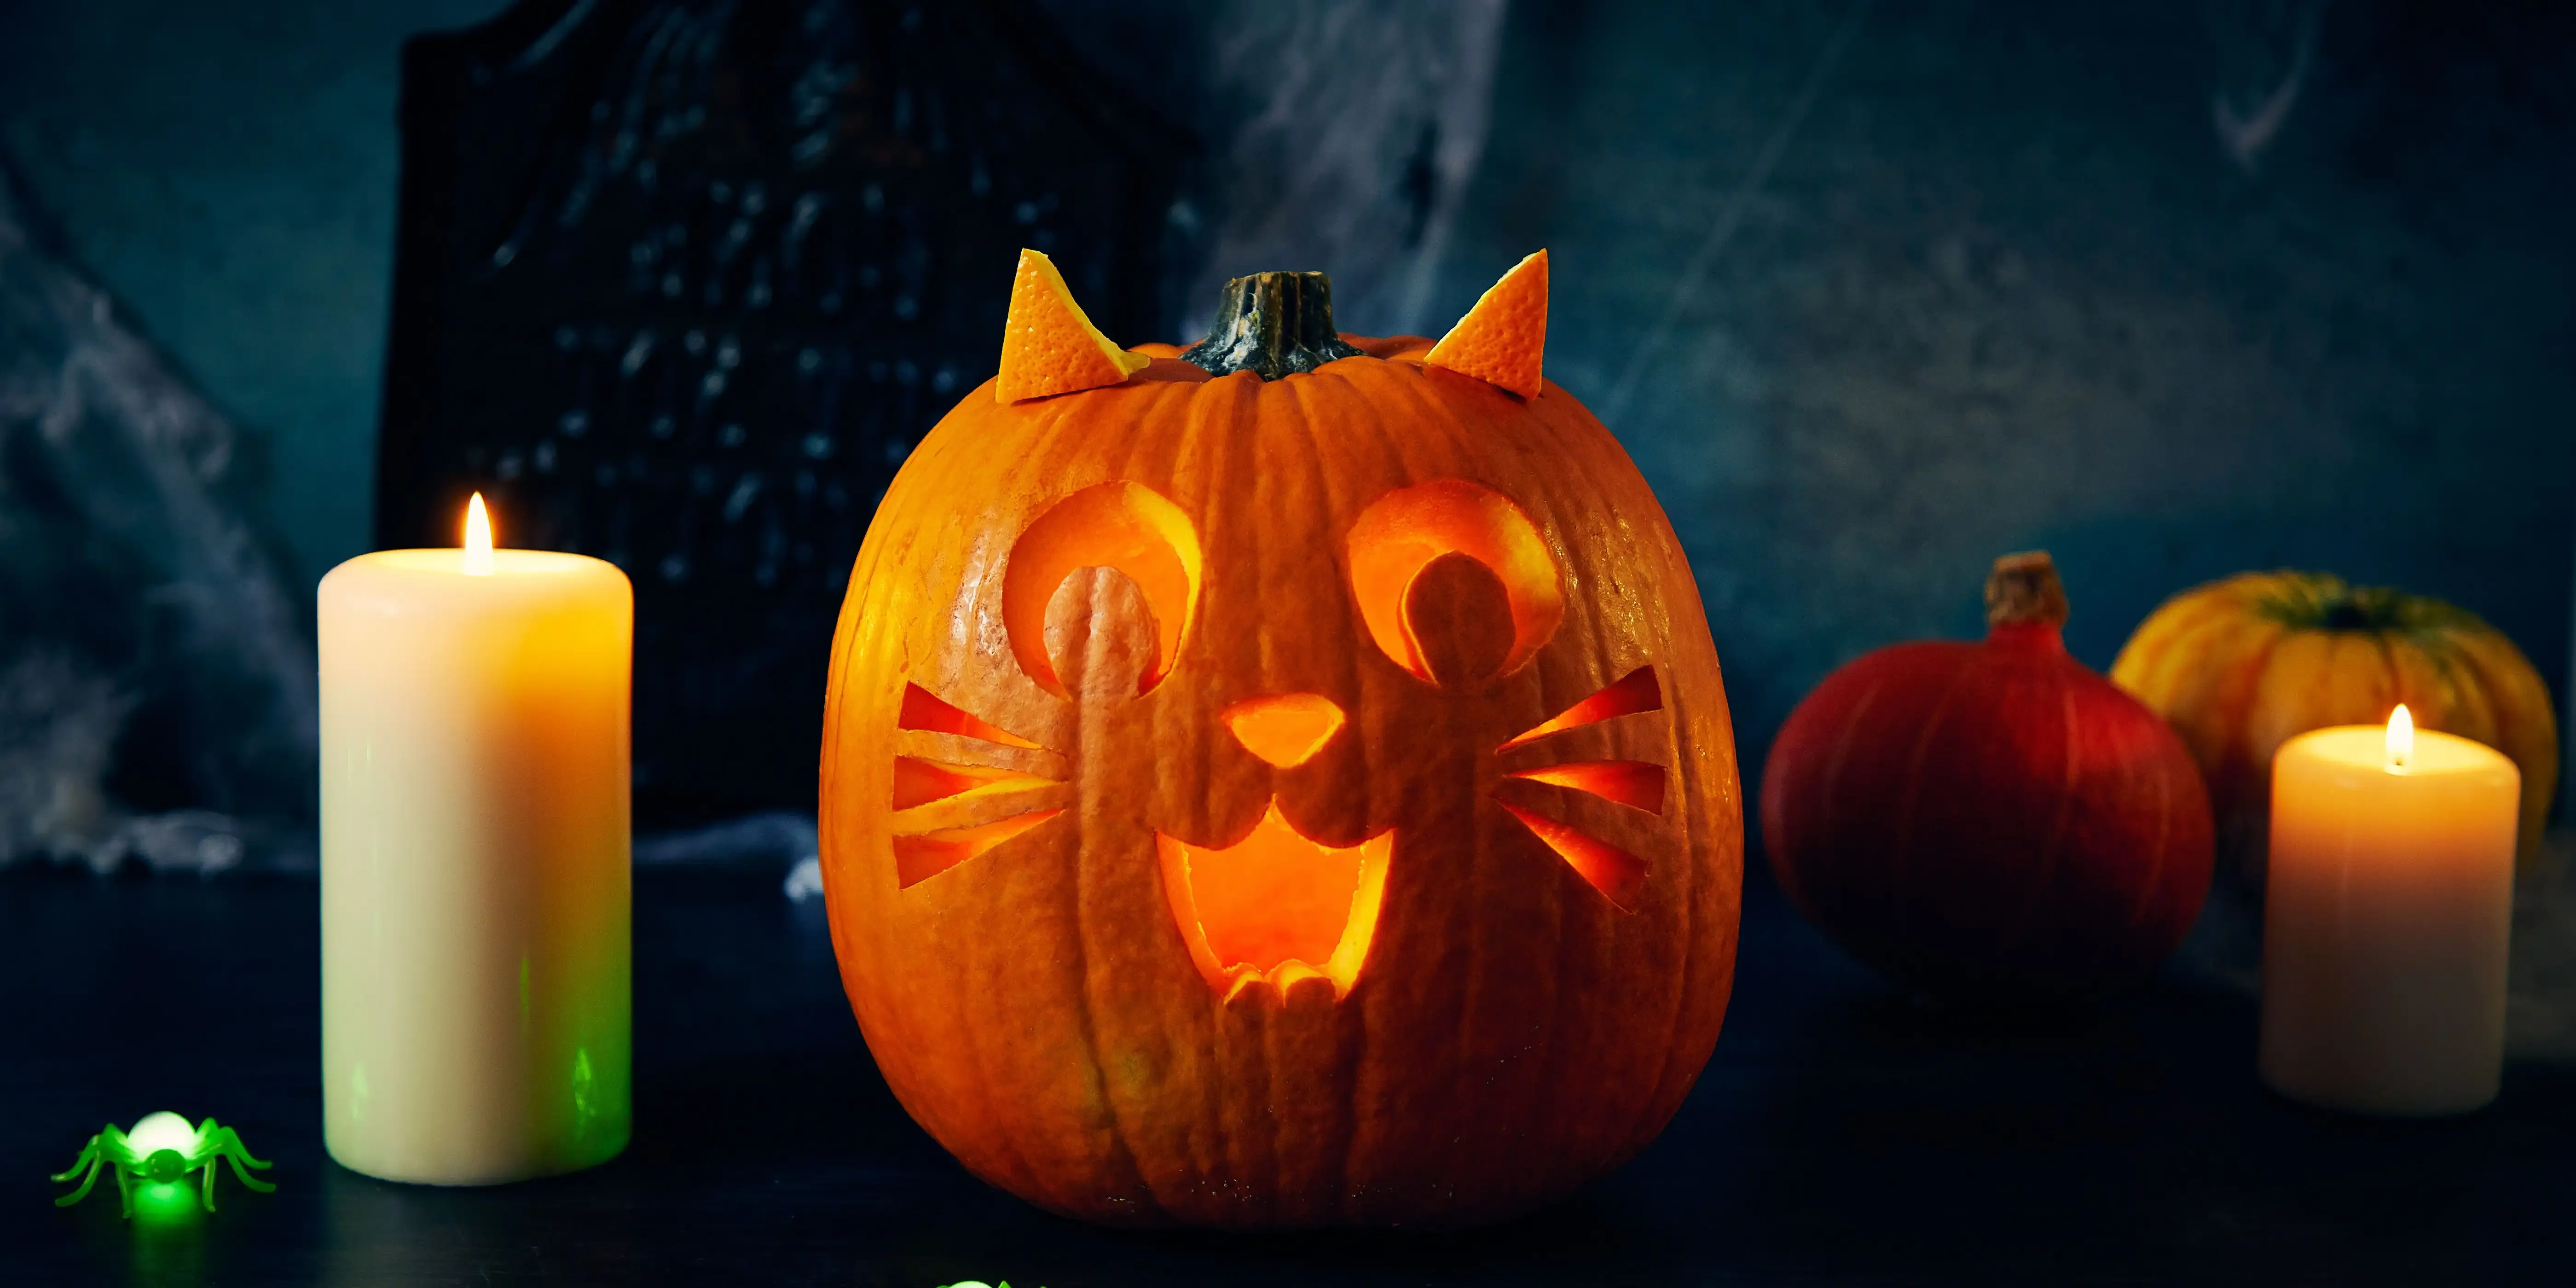
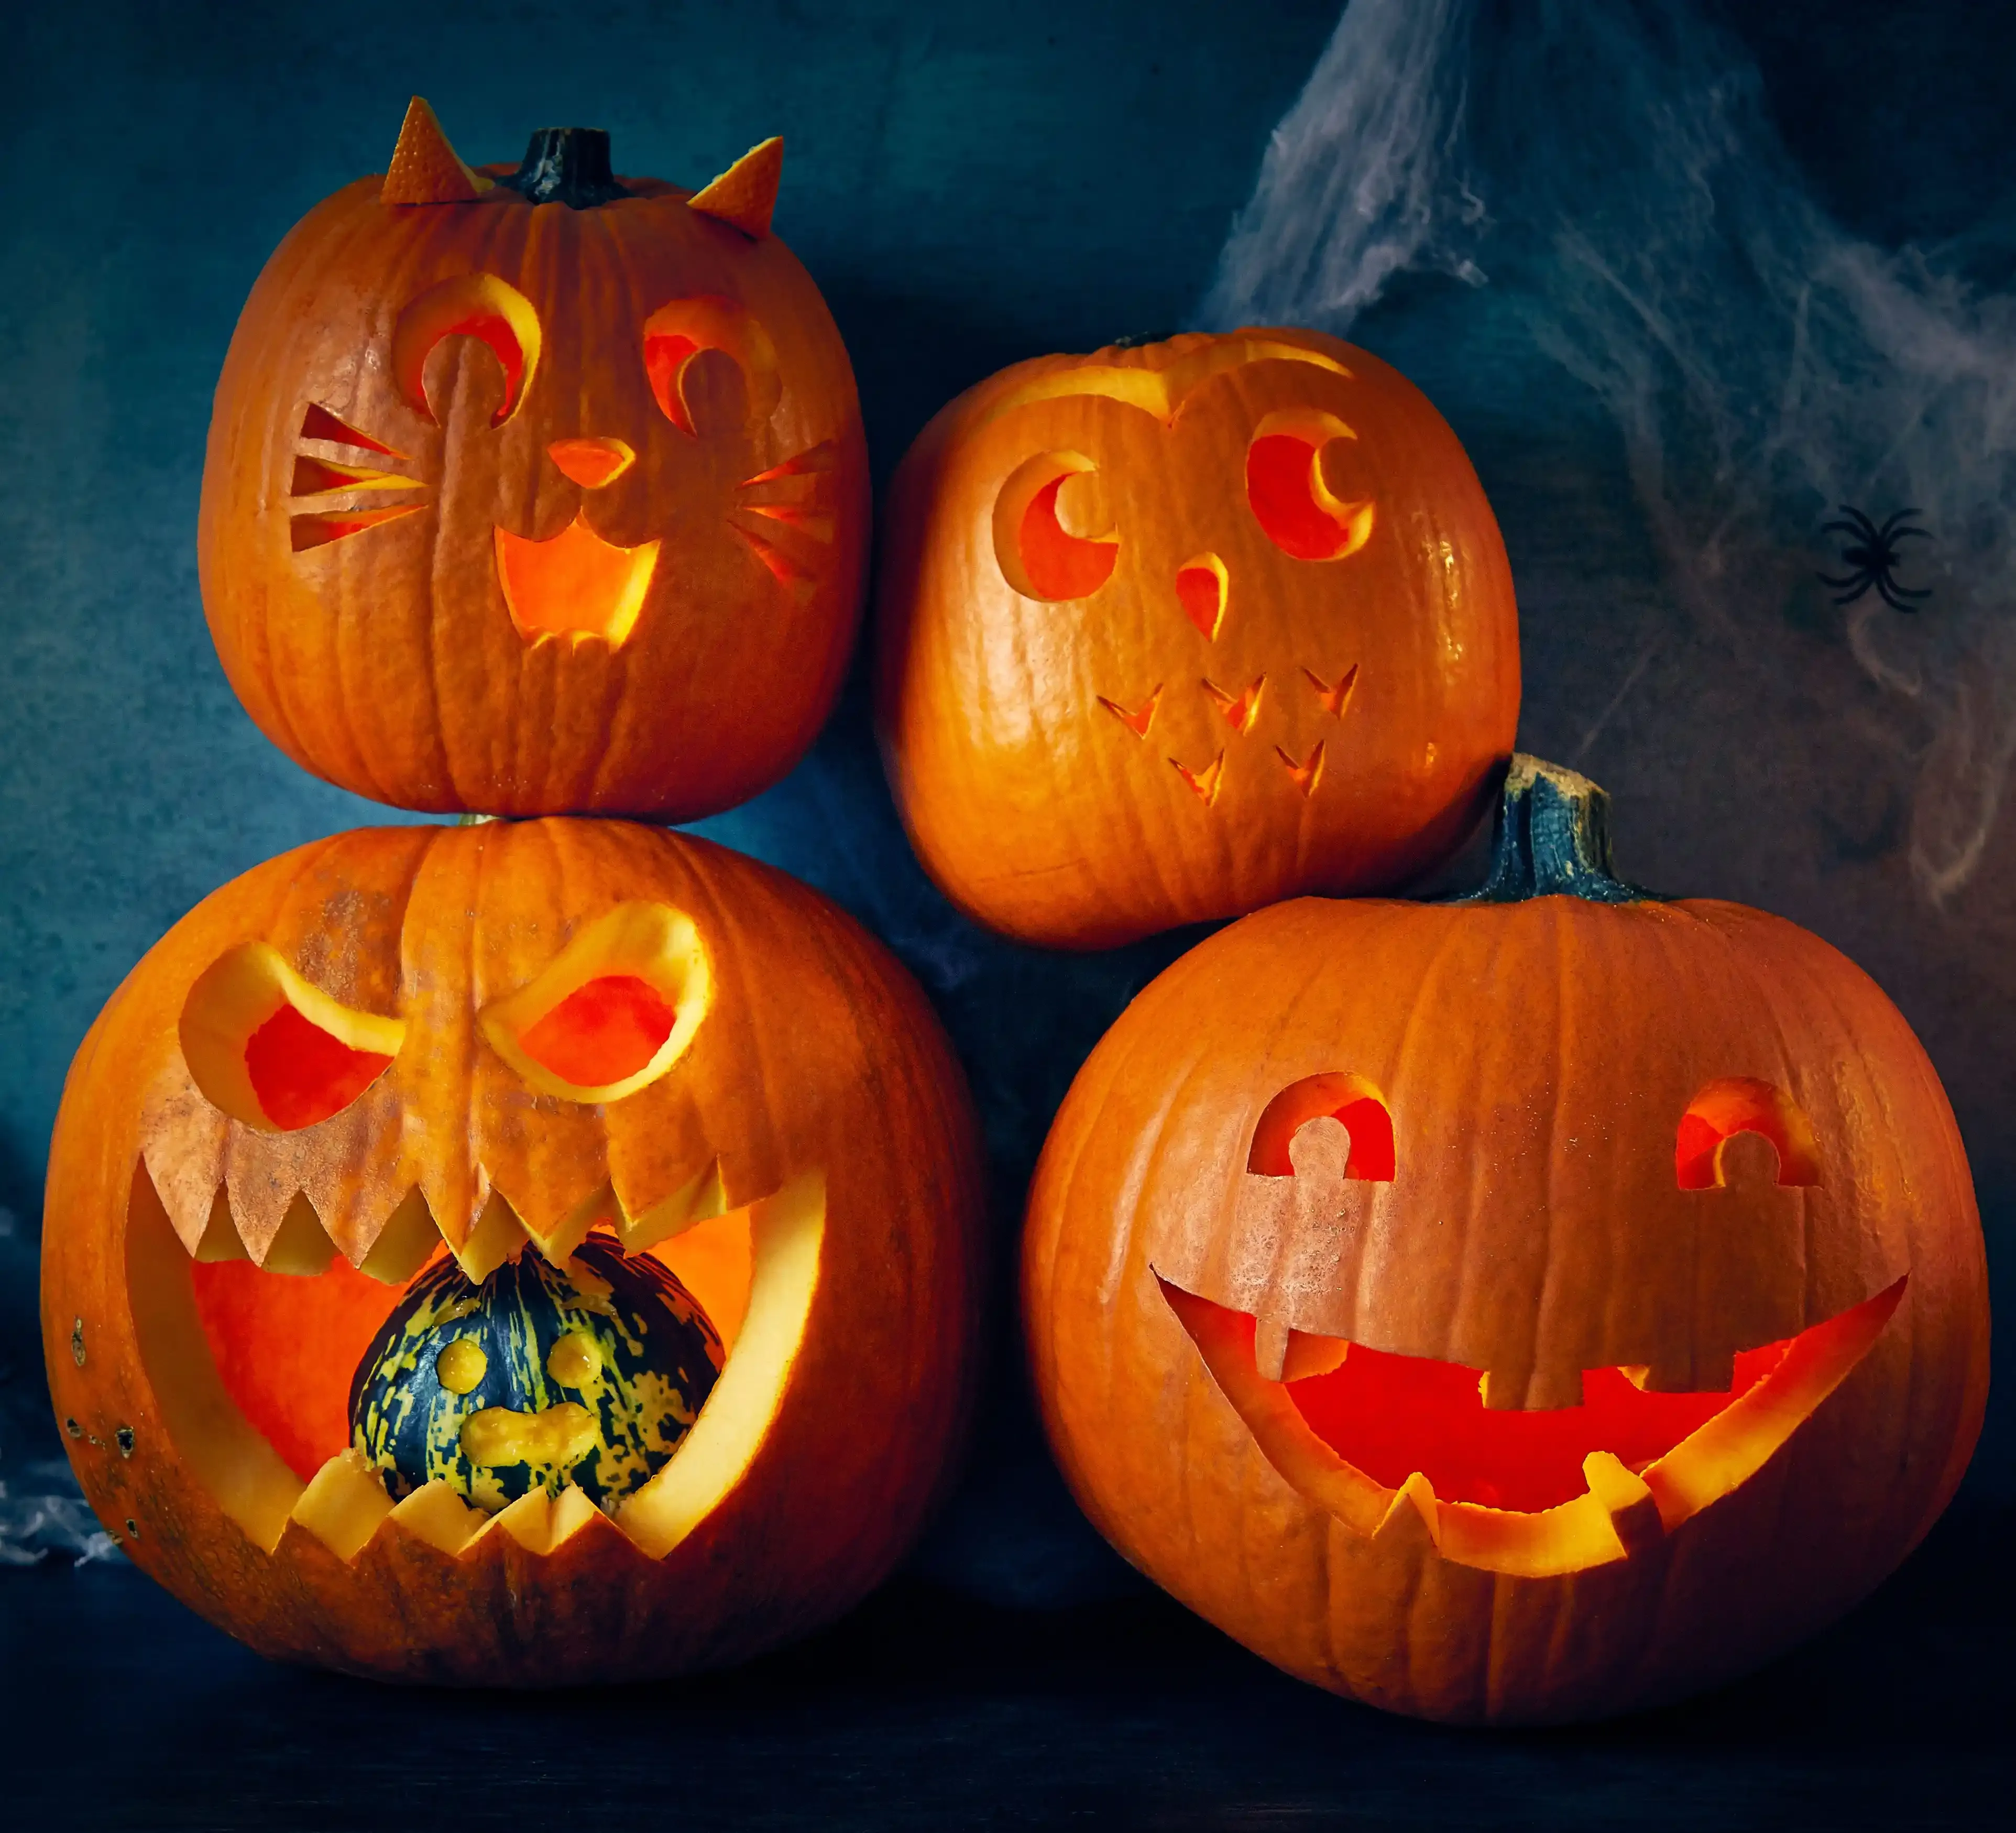
So, where do you begin with these easy pumpkin carving faces ideas? Start with the absolute fundamentals: shapes. Triangles for eyes and noses are the classic for a reason – they're simple geometric forms that are easy to cut and instantly read as facial features. Rectangles or simple curved lines work for mouths. Don't feel compelled to add teeth or complex expressions right away. A wide, simple smile or a surprised O-shape is perfectly effective. Consider focusing on just two or three main elements. Two eyes and a mouth? Done. One big eye and a crooked grin? Also done. The fewer cuts you make, the less chance there is for something to go wrong, and the quicker you get to the satisfying moment of popping out the pieces and lighting it up.
Tools & Tricks for Seriously Easy Pumpkin Carving Faces

Tools & Tricks for Seriously Easy Pumpkin Carving Faces
Forget the Fancy Gadgets: What You Actually Need
let's talk gear. You don't need a surgeon's toolkit or a set of professional sculpting chisels to create easy pumpkin carving faces ideas. Most of those elaborate kits you see in seasonal aisles? Overkill for simple shapes. What you actually need is pretty basic, and you might even have most of it kicking around your kitchen drawers. A sturdy, sharp knife (like a chef's knife or a serrated utility knife) for cutting the top off, a scoop or large spoon for gutting the thing, and then something smaller and sharper for the actual face cuts. Those little saw-like tools in the cheap pumpkin kits are surprisingly effective for navigating curves and corners without getting stuck. Don't overthink it; simple tools make for simple, and therefore easy, pumpkin carving faces ideas.
Beyond Basic: Fun and Easy Pumpkin Face Styles
Beyond Basic: Fun and Easy Pumpkin Face Styles
so you've mastered the triangle-eyed classic. Feeling bold? Want to spice things up without spending hours hunched over a gourd like a mad scientist? This is where we venture slightly beyond the absolute basics while keeping firmly in the realm of easy pumpkin carving faces ideas. We're talking about adding a little personality, a bit of flair, without introducing complex curves or tiny, breakable details. Think crooked smiles, goofy eyes that aren't perfectly symmetrical, or maybe adding a single, dramatic eyebrow. You can achieve a surprising range of expressions – scared, surprised, angry, utterly ridiculous – just by tweaking the size, angle, or shape of those simple elements. It's about embracing imperfection; sometimes, a slightly off-kilter eye makes the face even better. Don't aim for perfection; aim for character. That's where the real fun is, and it's much less stressful.
Keeping Your Easy Pumpkin Faces Looking Fresh
Keeping Your Easy Pumpkin Faces Looking Fresh
Battling the inevitable: Slowing Down the Sag
You nailed it. You followed the easy pumpkin carving faces ideas, you got a cool-looking gourd on your porch, and you're feeling pretty good about yourself. Then, maybe a day or two later, you notice it. A little wrinkle near the eye. A slight sag in the mouth. The dreaded decay is setting in, determined to turn your masterpiece into a moldy mess faster than you can say "Boo!" It's frustrating, absolutely. Your pumpkin is a living thing, or well, a recently deceased thing, and it's going to break down. But there are simple steps you can take to slow down this sad, inevitable process and keep your easy pumpkin carving faces looking presentable for as long as possible. Think of it as basic pumpkin life support.
The main enemies are dehydration and mold. Preventing them is key. You need to keep the carved surfaces from drying out and becoming brittle, which leads to shrinking and collapsing. You also need to fight off the microscopic invaders that want to turn your festive decoration into fuzzy green and white science experiment. It’s not about stopping decay entirely, because you can't, but it is about buying yourself some extra time so your hard work doesn't disappear overnight. These methods aren't perfect, but they make a noticeable difference.
- Give it a bleach bath: Submerge the whole carved pumpkin in a tub of water with about a teaspoon of bleach per gallon for a few hours. This kills surface mold spores.
- Spray daily: Keep a spray bottle handy with a diluted bleach solution (again, about 1 tsp per gallon) or even just plain water and mist the cut surfaces daily.
- Seal the edges: Rub petroleum jelly (like Vaseline) or even vegetable oil onto all the cut edges. This creates a barrier to slow down moisture loss.
- Keep it cool: If possible, bring your pumpkin inside at night or during warm spells. Cooler temperatures significantly slow decay.
When Mold Strikes: Damage Control and Alternatives
you did your best, but maybe a little fuzz is starting to appear around the edges, or a soft spot is developing. Don't panic immediately. For small spots of mold, you can sometimes carefully trim them away with a sharp knife. You can also wipe down the affected areas with a paper towel soaked in that diluted bleach solution. It's a bit like pumpkin first aid. If the decay is widespread or the pumpkin is getting really soft and mushy, it might be time to admit defeat and retire it. Sometimes, you just can't win the battle against nature, especially if you carved it early in the season or the weather has been warm and humid.
If the idea of battling rot every year sounds like too much hassle, or if you live somewhere with particularly brutal pumpkin-decaying weather, consider alternatives. Craft pumpkins made of foam or plastic are reusable year after year and never rot. While they don't have the same charm or smell as a real pumpkin, they are a zero-maintenance option for displaying your easy pumpkin carving faces ideas indefinitely. You can carve them with special foam tools, and they light up just the same. It takes the pressure off the clock and lets you display your creation for weeks, not just days.
Done and Dusted: Your Easy Pumpkin Face Awaits
See? Not so terrifying after all. You've got the pumpkin, a few basic tools, and some straightforward ideas for easy pumpkin carving faces. Forget the pressure to create a museum piece. The goal here is a recognizable face that glows spookily on your porch, makes a kid giggle, or just doesn't look like you tried to fight the pumpkin and lost. You've avoided the overly ambitious pitfalls and stuck to the simple stuff that actually works. Now, step back, admire your handiwork (even if it's slightly lopsided), and maybe go wash the pumpkin guts off your hands. You earned it.