Table of Contents
Alright, let's talk pumpkins. Halloween rolls around, and suddenly everyone's got gourds on the brain. You picture those perfect, glowing jack-o'-lanterns, maybe even a spooky scene carved by a master hand. Then you remember you've got actual, small humans who want in on the action, and the dream quickly devolves into a vision of sticky guts, dull knives, and potential emergency room visits. The idea of tackling pumpkin carving with kids can frankly feel less like festive fun and more like a chaotic mess waiting to happen.
Why Bother? The Lowdown on Easy Kid Pumpkin Carving
Why Bother? The Lowdown on Easy Kid Pumpkin Carving
The Annual Pumpkin Predicament
October rolls around, and suddenly every grocery store and farm stand is overflowing with orange globes. The kids are buzzing about Halloween, and the inevitable question pops up: "Can we carve pumpkins?" Your mind immediately flashes to Pinterest-perfect designs you saw online, followed quickly by the memory of last year's attempt – a chaotic scene involving wobbling knives, tearful frustration, and a pumpkin that looked less like a spooky face and more like it had a run-in with a badger. It's easy to think, "Maybe we just *decorate* them this year?" But there's something about the glowing jack-o'-lantern that feels essential to the holiday vibe.
This is precisely why focusing on *easy kid pumpkin carving ideas* isn't just a good idea; it's a survival strategy. Trying to replicate intricate patterns with a wobbly, plastic carving tool is a recipe for tears (yours or theirs, maybe both). Shifting the goal from 'masterpiece' to 'memorable activity' changes the entire dynamic. Kids get to participate in a classic tradition, exercise some creativity (even if it's just drawing on the pumpkin before you make the cuts), and feel a sense of accomplishment when their creation lights up the porch.
Keeping Your Sanity (and Fingers) Intact
Let's be honest, the biggest beneficiaries of *easy kid pumpkin carving ideas* might just be the adults supervising the operation. Simple designs mean less time wrestling with tough rinds and tiny saws. It means less potential for slips and cuts. It means you might actually finish the project before bedtime, instead of still scraping out guts while watching the late-night news. Embracing "easy" doesn't mean "boring." It means choosing designs and techniques that are achievable for small hands and limited attention spans, leaving you with more energy to actually enjoy the spooky season instead of recovering from a pumpkin-related ordeal.
Safety First, Pumpkins Second: Prepping for Easy Kid Pumpkin Carving
Safety First, Pumpkins Second: Prepping for Easy Kid Pumpkin Carving
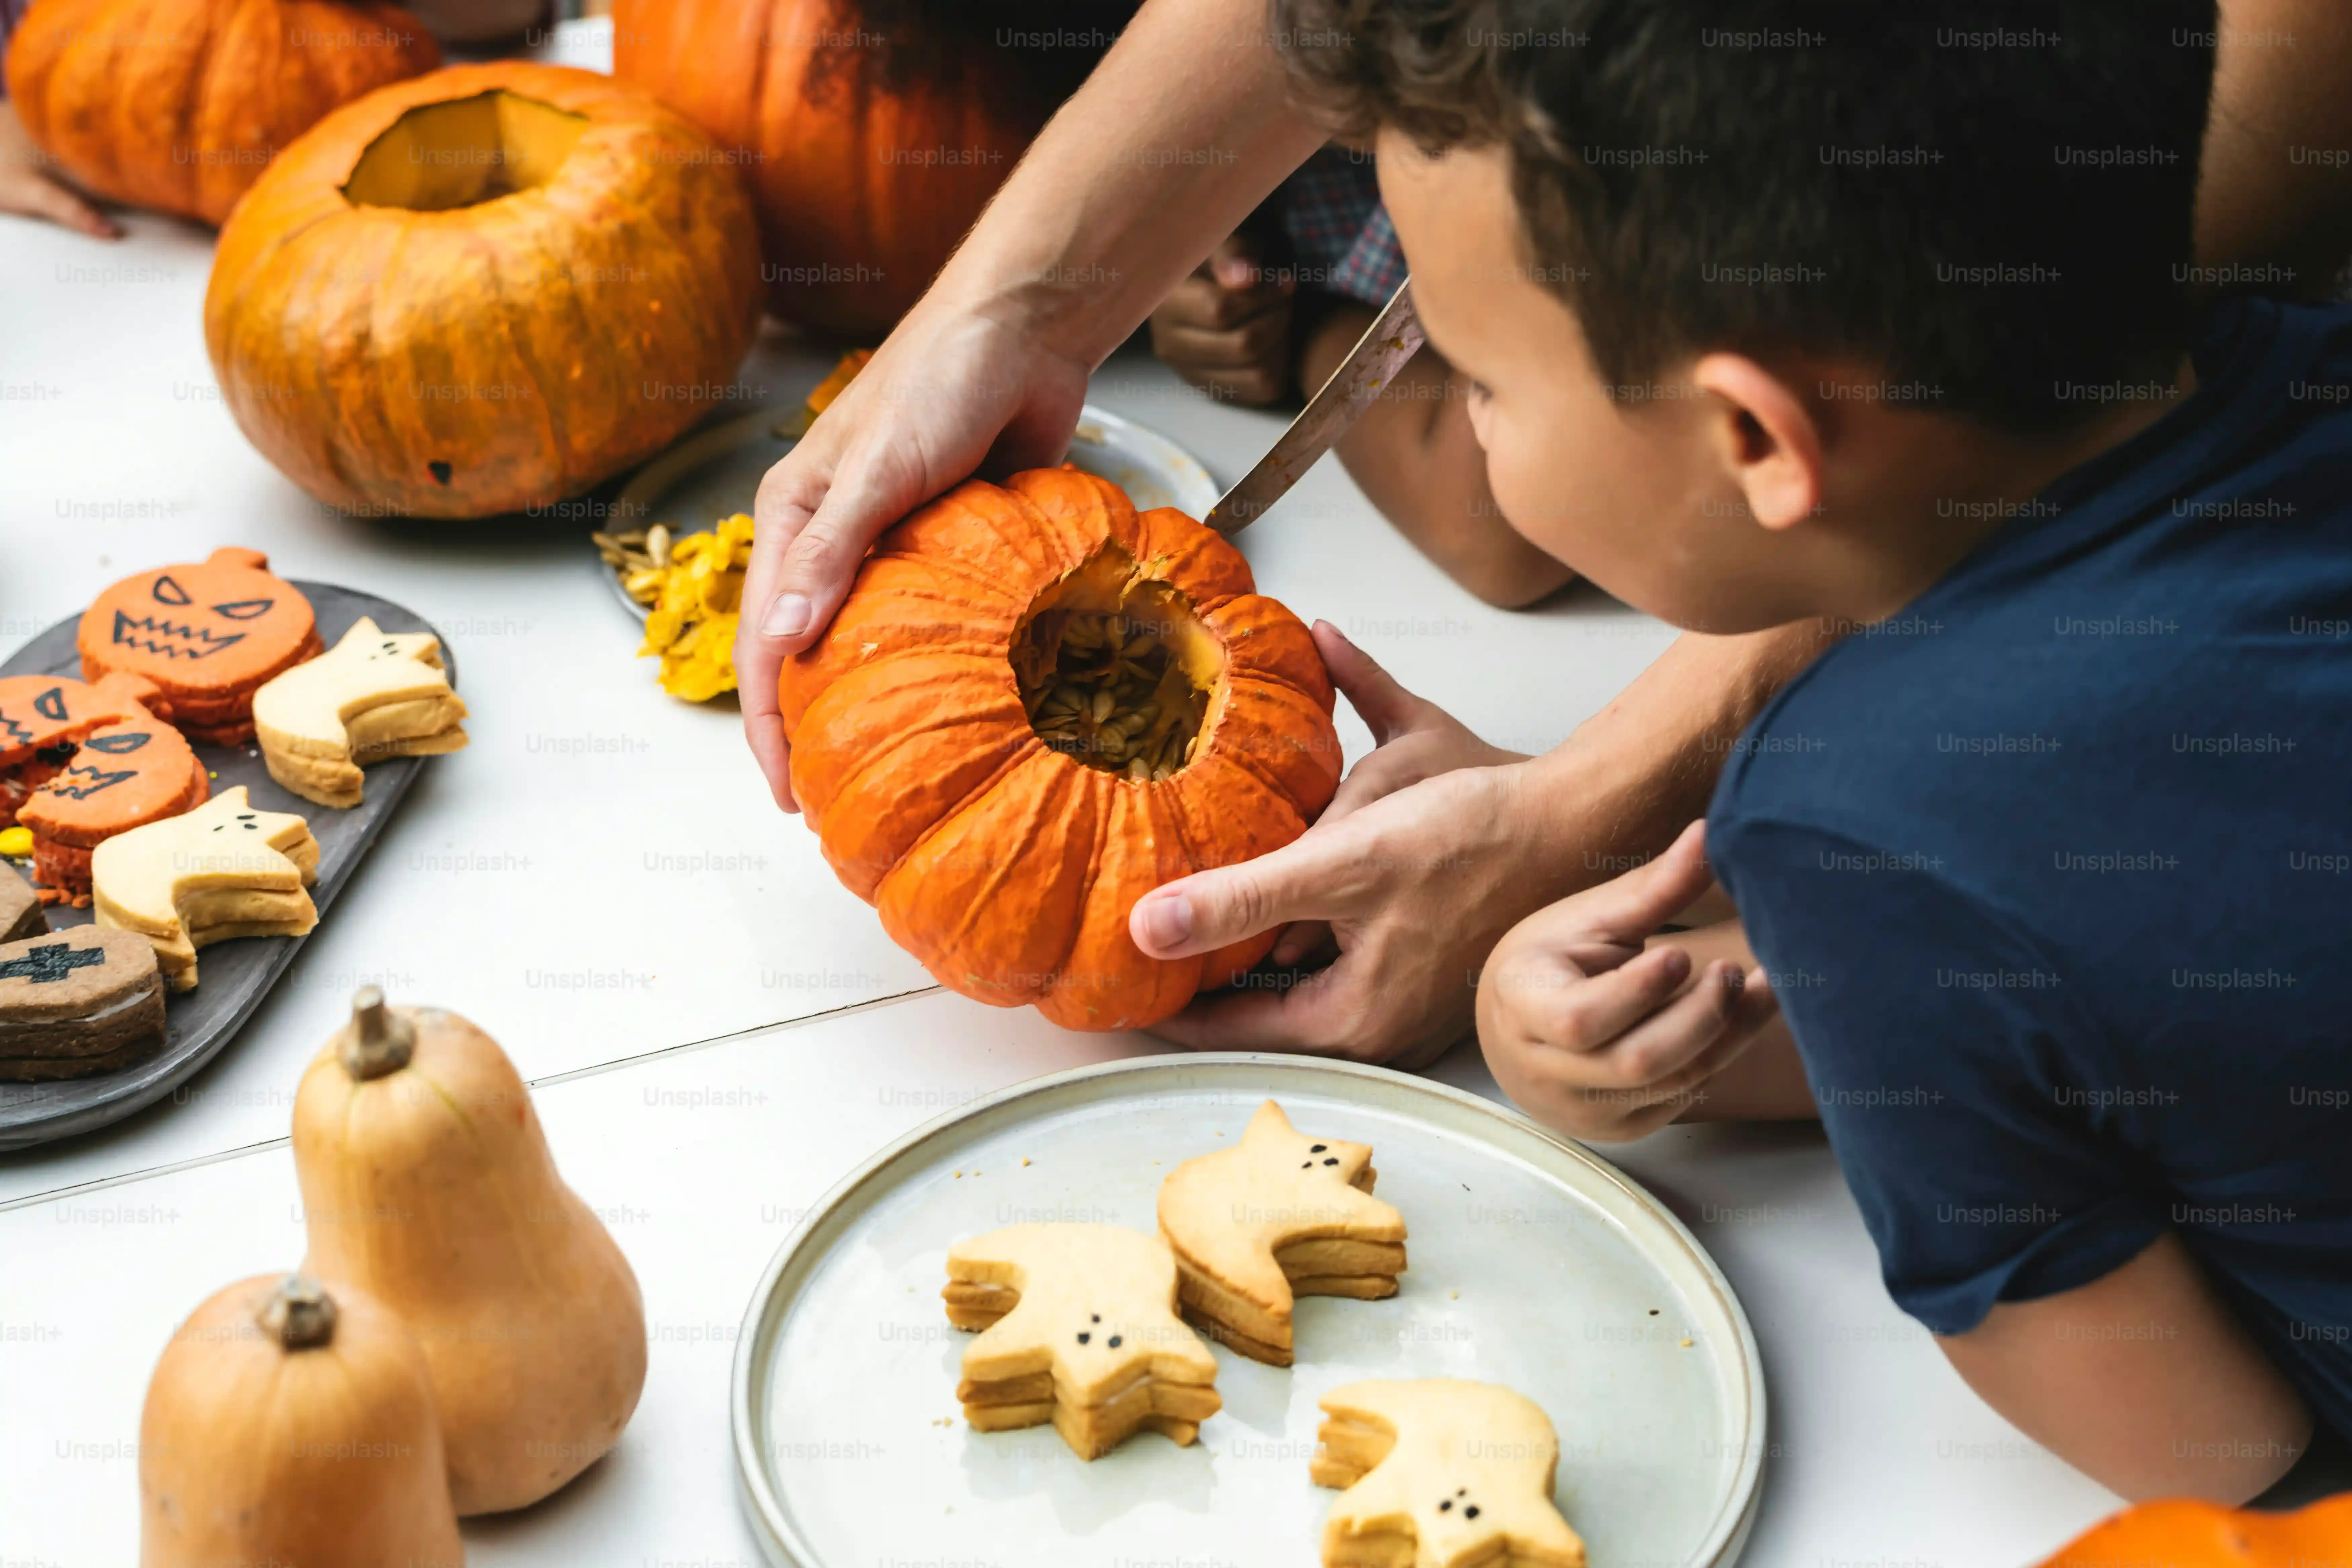
Alright, before we even think about drawing a single face or picking up a tool, let's talk logistics and, more importantly, not losing a digit. Prepping your space for *easy kid pumpkin carving ideas* is non-negotiable if you want this to be fun instead of frightening. Think of it like setting up a mini, messy operating room – containment is key. Cover your workspace, whether it's the kitchen table or a spot outside, with a heavy-duty plastic tablecloth or plenty of old newspapers. Pumpkin guts and slime have a remarkable ability to adhere to surfaces you didn't even know existed. Gather all your supplies *before* the kids descend, because scrambling for a scoop or a marker mid-gunk-extraction is a recipe for impatience and potential accidents. And speaking of supplies, ditch the standard kitchen knives; invest in actual pumpkin carving kits designed for this, or better yet, focus on tools that minimize sharp edges for the kids themselves.
KnifeFree Fun: Seriously Easy Kid Pumpkin Ideas (No Carving Required)
KnifeFree Fun: Seriously Easy Kid Pumpkin Ideas (No Carving Required)
Ditch the Knife, Keep the Fun
Let's get real for a second. Not every kid is ready for a sharp object, no matter how 'kid-friendly' the marketing claims. Sometimes the absolute easiest route to *easy kid pumpkin carving ideas* (or rather, *decorating* ideas) is to skip the carving knife altogether. This isn't cheating; it's smart parenting. Think paint, stickers, googly eyes, yarn, markers, glitter (use at your own risk on that last one – it multiplies). Kids can create monsters, silly faces, abstract art, or even transform a pumpkin into their favorite character using craft supplies. It's less messy than scooping guts for some, eliminates the safety hazard completely, and lets even the tiniest hands get involved from start to finish. Plus, these no-carve pumpkins often last much longer, looking cheerful on your porch well past Halloween night. It's a solid win-win.
Simple Cuts, Big Grins: Easy Kid Pumpkin Carving Ideas That Work

Simple Cuts, Big Grins: Easy Kid Pumpkin Carving Ideas That Work
The Classic Face: Simple Shapes Are Your Friend
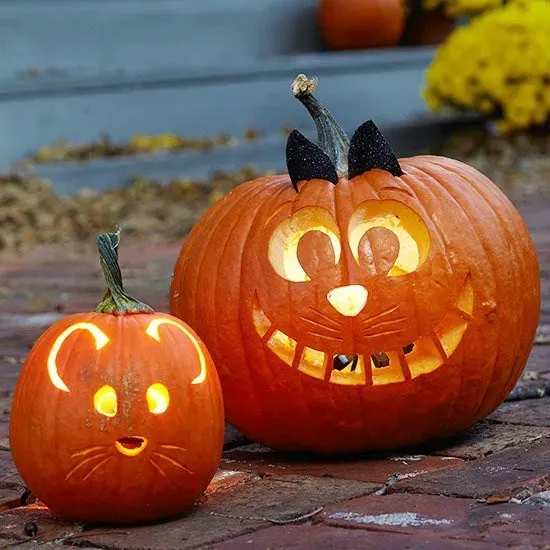
if you're ready to introduce a carving tool (under strict supervision, naturally), the absolute bedrock of *easy kid pumpkin carving ideas* is the classic, simple face. Forget intricate teeth or elaborate eyebrows. We're talking basic shapes here. Triangles for eyes (maybe one big one and one small one if they're feeling wild), a triangle or square for the nose, and a simple, smiling crescent moon for the mouth. That's it. You can draw these shapes on the pumpkin first with a marker, letting the kid design their own simple face. Then, *you* (the adult) do the actual cutting. This gives them ownership of the design without putting a sharp blade in their hands. It's the foundation, the gateway drug to slightly more complex pumpkin projects down the line.
Templates and Cookie Cutters: Cheating? No, Efficient.
Want to step it up slightly but still keep it firmly in the *easy kid pumpkin carving ideas* zone? Stencils and cookie cutters are your secret weapon. You can buy cheap pumpkin carving stencils online or print free ones. Simple shapes like stars, moons, bats, or even basic letters work great. Tape the stencil onto the pumpkin, use a poker tool (usually comes in carving kits, looks like a tiny ice pick) to make holes along the lines, creating a dotted outline. Again, the kid can do the poking – they love making the holes – and then the adult connects the dots with the carving tool. For really small, simple shapes, metal cookie cutters can be hammered gently into the pumpkin skin (use a rubber mallet, not your hand!) to make an impression or even cut all the way through thin areas. It feels fancy, but it's deceptively simple.
Think about the shapes that work best:
- Basic triangles
- Simple circles
- Squares or rectangles
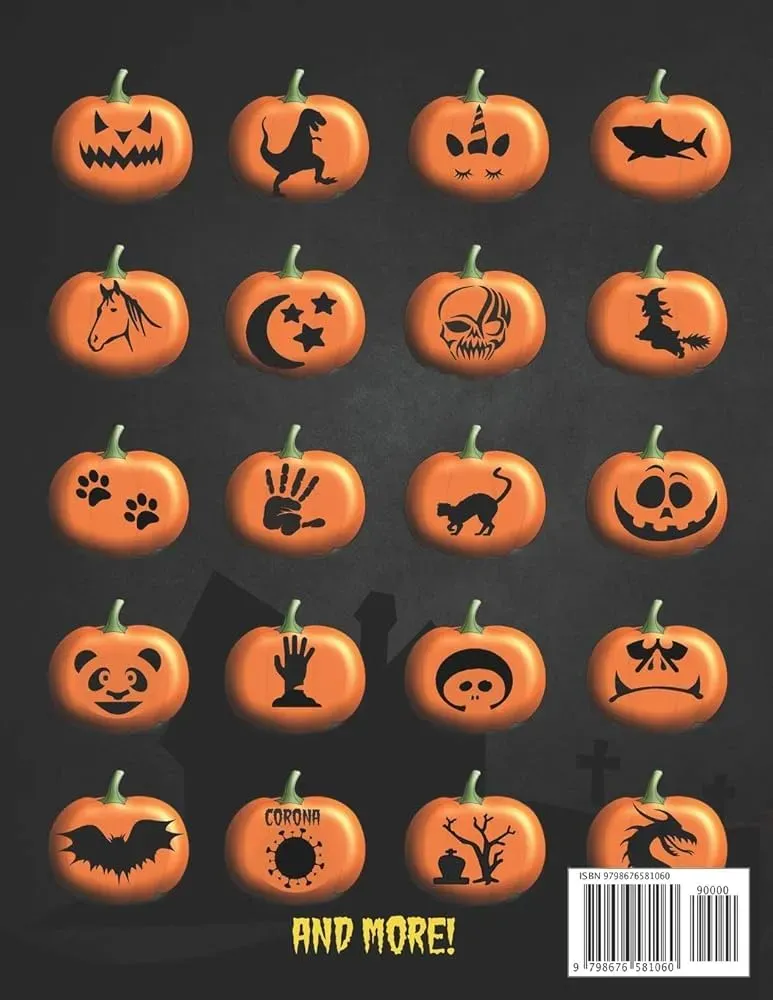
- Stars (with not too many points)
- Moons
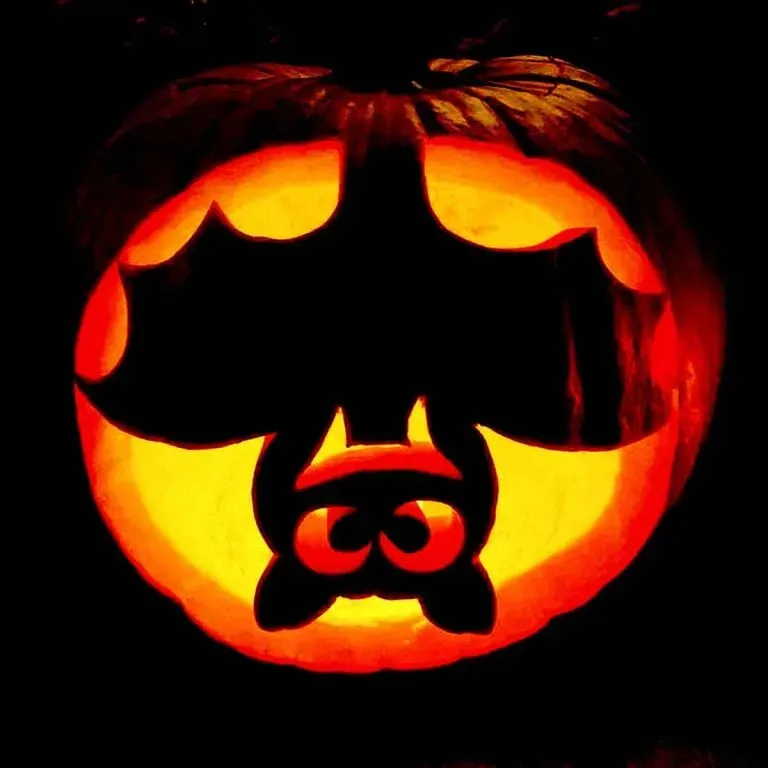
- Simple animal silhouettes (like a bat or cat head)
Beyond the Face: Simple Scenes and Silhouettes
Once you've mastered the basic shapes, you can explore slightly more ambitious *easy kid pumpkin carving ideas* that still don't require an art degree. Instead of just a face, consider a simple scene. A single, large spooky tree silhouette. A row of small bats flying across the pumpkin. A lone ghost shape. These often involve larger, less intricate cuts than a detailed face, which can actually be easier for the adult doing the carving. The key is simplicity in the design. A bold, clear shape is much easier to cut than something with lots of tiny corners or curves. It makes a strong visual impact, looks more complex than it is, and keeps the frustration level low for everyone involved. My neighbor once did a whole series of pumpkins with just crescent moons and scattered stars – looked fantastic, took maybe 10 minutes per pumpkin.
Wrapping Up the Guts and Glory: PostCarving Tips for Easy Kid Pumpkins
Wrapping Up the Guts and Glory: PostCarving Tips for Easy Kid Pumpkins
The Glorious Gunk Cleanup
the carving (or decorating) is done. You've successfully navigated the world of *easy kid pumpkin carving ideas* and emerged mostly unscathed. Now comes the less glamorous part: dealing with the aftermath. Pumpkin guts have a stickiness factor previously unknown to science, and they will be everywhere. The first step is containment and removal. Get a big bowl for the seeds and stringy bits – roasting the seeds later is a classic move, don't skip it. Scrape out as much as you can from the pumpkin itself and dump the workspace covering (newspapers or tablecloth) carefully into a trash bag. Then, tackle the surfaces. A damp cloth with a little soap usually works, but be prepared for some scrubbing. Little hands will also need a good wash; that pumpkin slime clings like a second skin.
What you'll definitely need for the cleanup:
- Large bowl for seeds/guts
- Trash bags
- Damp cloths
- All-purpose cleaner (optional, but helpful)
- A designated "mess" shirt for everyone involved
- Plenty of paper towels
Keeping Your Creation Alive (Sort Of) and Lit Safely
You put in the work (or rather, the kids put in the design ideas and you did the cutting), now you want that jack-o'-lantern to last longer than a single night. Carved pumpkins are essentially dying vegetables, so managing that is key. One old trick is soaking the carved pumpkin in a bleach solution (about a teaspoon of bleach per gallon of water) for a few hours or spraying the cut edges daily with a bleach-water mix. This helps kill mold and bacteria. Another method is rubbing petroleum jelly on all the cut surfaces to seal in moisture. It won't last forever, but these steps can buy you a few extra days on the porch.
And finally, let's talk lights. Forget the fire hazard of real candles, especially with kids around. Battery-powered LED lights designed for pumpkins are cheap, safe, and provide a surprisingly good flicker effect. They don't produce heat, so no worries about scorching the pumpkin or, you know, setting anything ablaze. Just pop one in, maybe two for a bigger pumpkin, and your *easy kid pumpkin carving ideas* are ready to glow spooky all night.
So, You Survived the Great Pumpkin Guts Incident
Look, let's be real. Pumpkin carving with kids, even with the *easy kid pumpkin carving ideas* we talked about, is probably never going to be a perfectly clean, Pinterest-ready event. There will be seeds everywhere, questionable knife handling attempts, and possibly a minor meltdown (theirs or yours). But that's kind of the point, isn't it? You didn't sign up for a sterile crafting session; you signed up for a memory. You navigated the sharp bits, embraced the goo, and somehow, likely, ended up with something vaguely pumpkin-shaped and lit from within. That's a win. These aren't museum pieces; they're temporary, slightly messy monuments to a shared autumn afternoon. So, wipe the pulp off your hands, admire your slightly-less-than-perfect creation, and maybe keep a broom handy. You did it.