Table of Contents
Fall’s here, the air’s crisp, and pumpkins are everywhere. You see all those elaborate carvings and think, "Man, I wish I could do something cool like that, maybe even for my dog?" Then reality hits, and you recall your last attempt at pumpkin carving, which looked less like a spooky face and more like a crime scene. The good news? You don't need a sculptor's steady hand to show some seasonal love for your four-legged pal. Forget the intricate, frustrating designs. We're diving into genuinely easy dog pumpkin carving ideas. These methods are designed for the average human, the one who values fun over finesse and sanity over perfect symmetry. We'll explore simple techniques, from foolproof stencils that do the heavy lifting to skipping the carving mess entirely and opting for paint. Stick around, and you might just surprise yourself – and definitely make your dog wag their tail (even if they're just hoping you drop a piece of pumpkin).
Gathering Your Gear for Easy Dog Pumpkin Carving Ideas
Gathering Your Gear for Easy Dog Pumpkin Carving Ideas
Basic Tools for Pumpkin Pup Art
Alright, let's talk tools. You don't need a full-on woodcarving set, thank goodness. For genuinely easy dog pumpkin carving ideas, you're looking for simple stuff. Grab a sturdy, medium-sized pumpkin. Don't go for the prize-winner that weighs more than your dog; something manageable is key. You'll need a sharp knife, preferably one with a serrated edge, for cutting the top off (or bottom, if you're fancy). A smaller, pointed knife or even a craft knife (like an X-Acto) works well for more detailed cuts, though with *easy* ideas, you won't need much detail. Don't forget a big spoon or a scoop to get all that slimy, seedy goodness out. Trust me, scraping out pumpkin guts is the least glamorous part, but it's necessary.
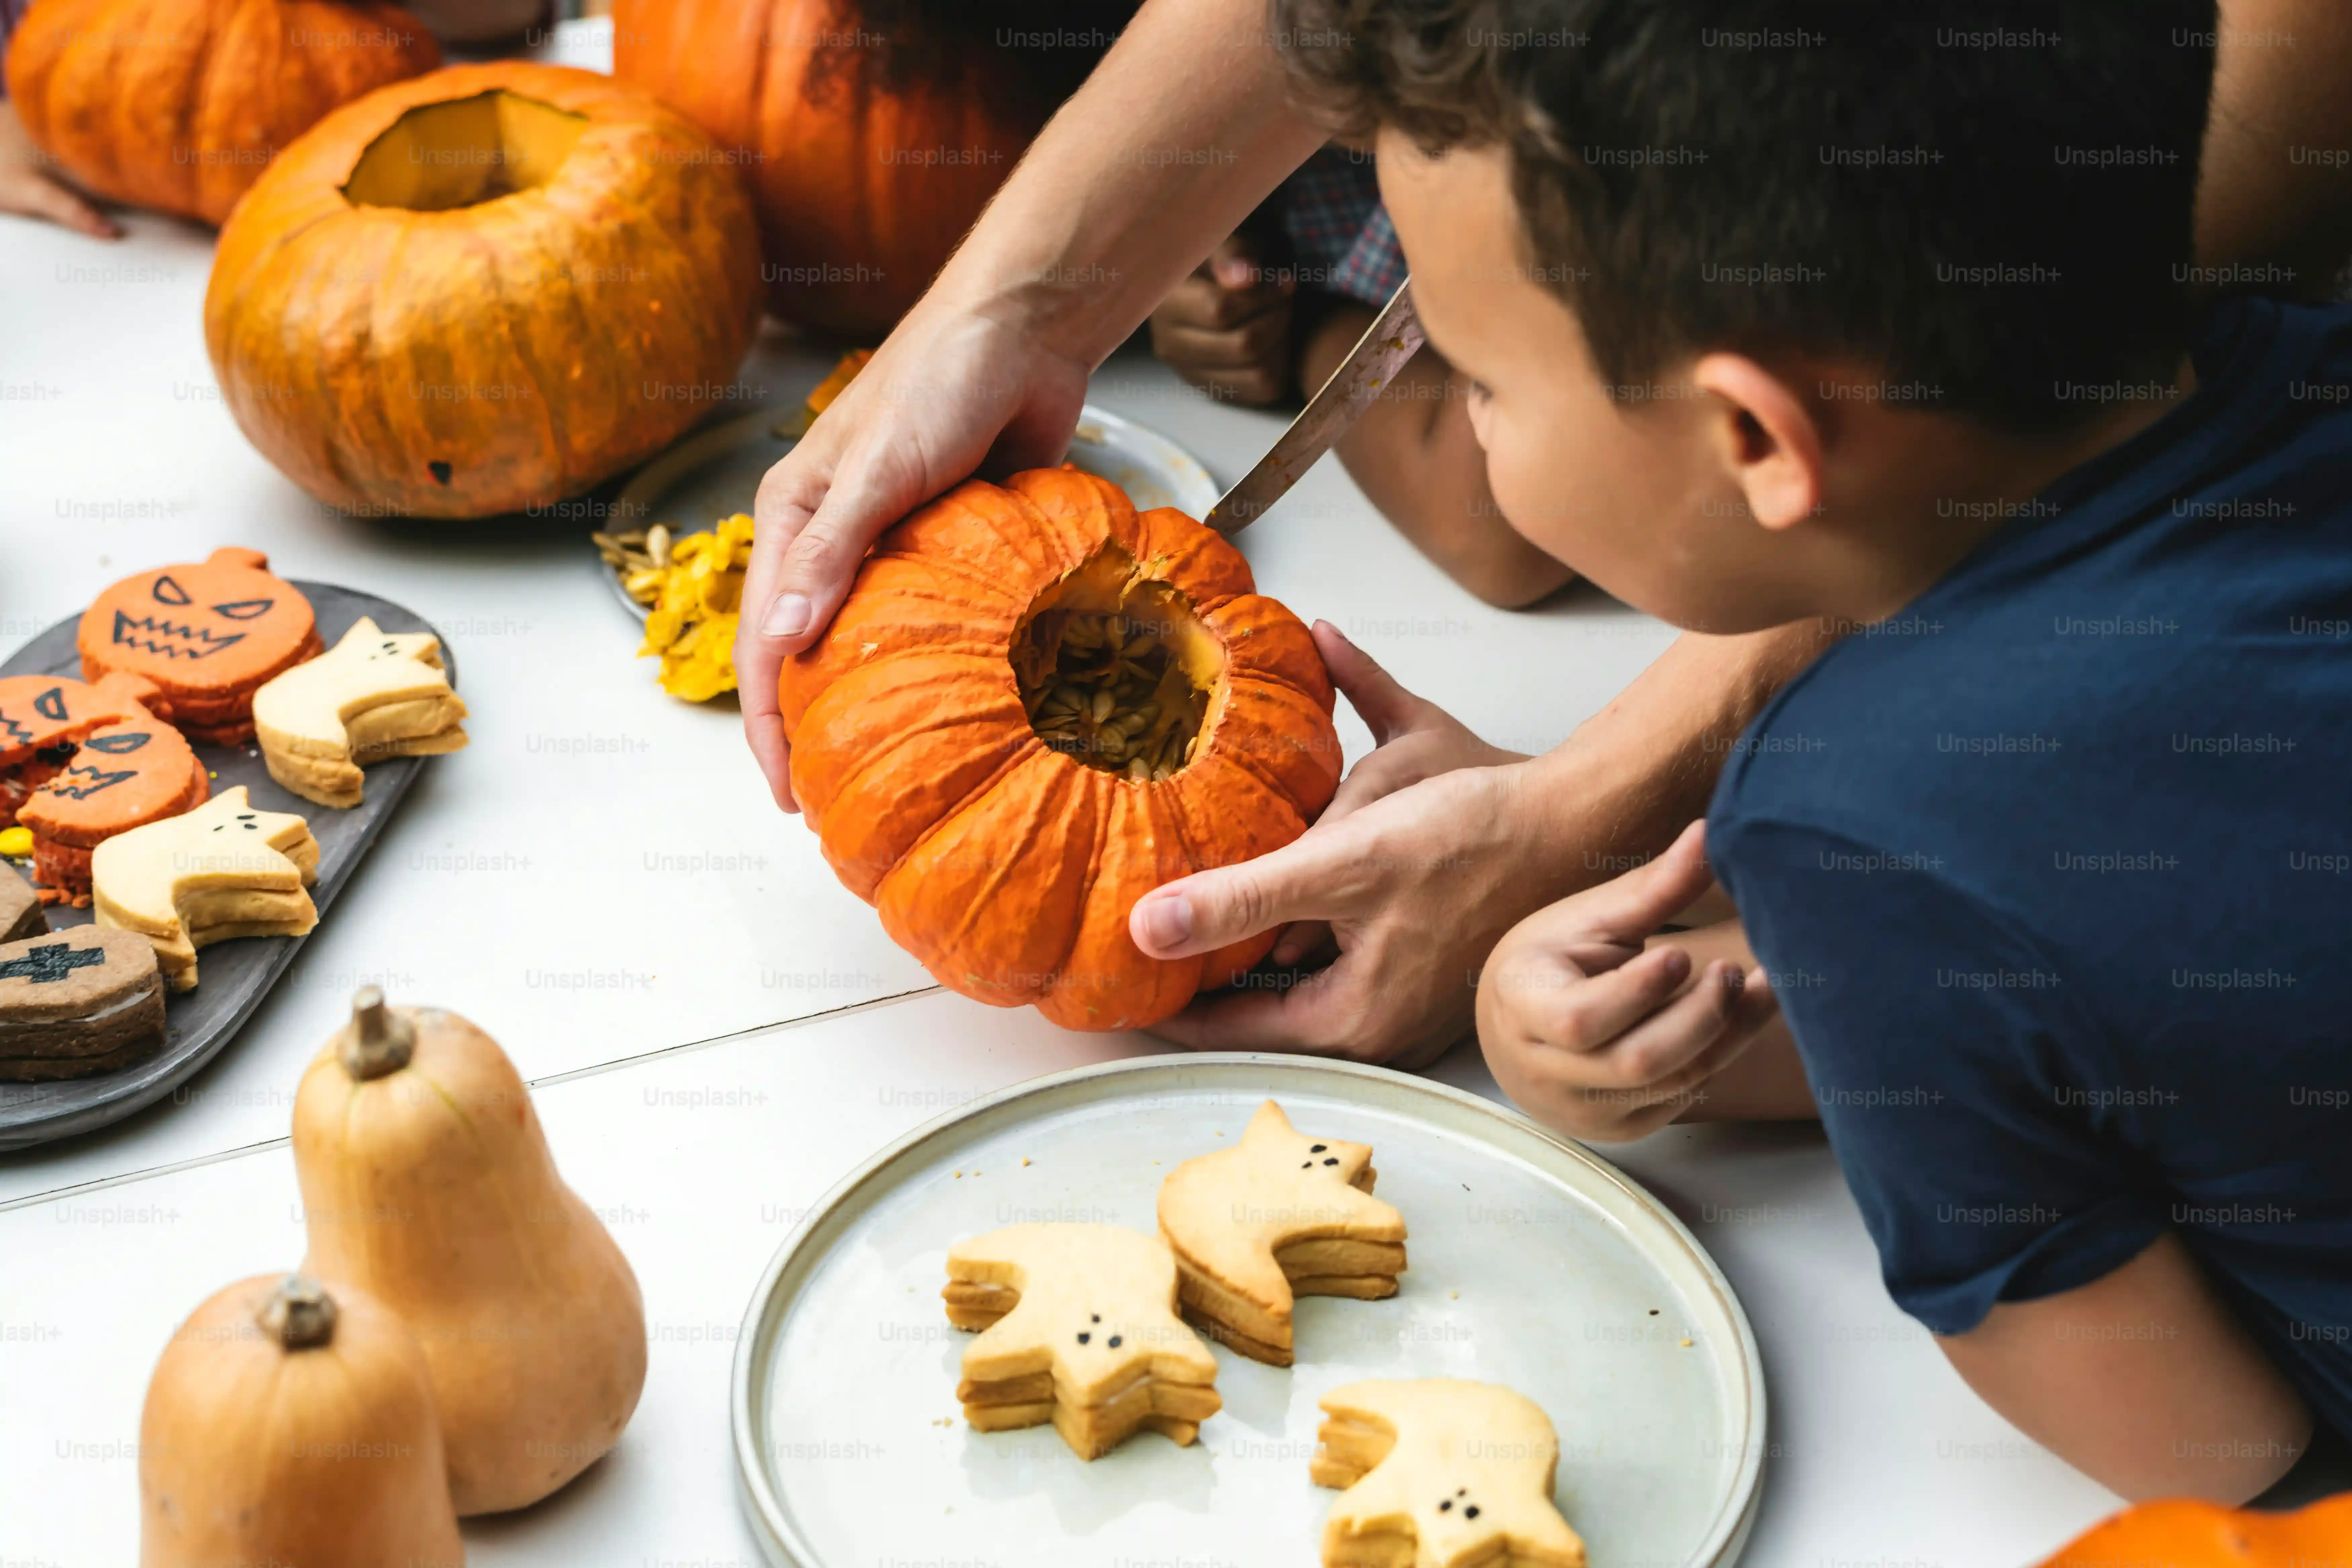
Safety First and Prep Work
Before you start hacking away, let's think about keeping all your fingers attached. Pumpkin carving can be surprisingly hazardous if you're not paying attention. A good pair of gloves can offer some grip and minor protection, though they aren't bulletproof. Always cut away from yourself, obviously. Lay down some newspaper or a plastic tablecloth; pumpkin guts and juice get everywhere, and you don't want to spend the next week scrubbing your counter. Having a bowl ready for the seeds (roast 'em later!) and another for the stringy pulp makes cleanup slightly less miserable. Getting your space ready means you can focus on bringing your easy dog pumpkin carving ideas to life without worrying about making a massive mess or needing a bandage.
- Sturdy pumpkin (medium size recommended)
- Sharp knife (serrated is helpful)
- Smaller pointed or craft knife
- Big spoon or scoop for cleaning
- Newspaper or plastic tablecloth
- Bowls for seeds and pulp
- Optional: Gloves for grip/protection
Stencils Are Your Best Friend: Super Easy Dog Pumpkin Carving Ideas
Stencils Are Your Best Friend: Super Easy Dog Pumpkin Carving Ideas
Stencils for the Win: Foolproof Doggy Designs
so you've prepped your pumpkin and somehow managed not to lose a digit. Now comes the fun part, and if carving freehand sounds like a recipe for disaster (it usually is for me), stencils are your absolute saviors for genuinely easy dog pumpkin carving ideas. Think of them as cheating, but in the best possible way. You find a design you like – a simple paw print, a bone, or even a basic outline of a dog's head – print it out, tape it to your pumpkin, and then you just follow the lines. No artistic talent required, just the ability to trace. You can use a poking tool (a thumbtack or a specialized pumpkin poker works) to transfer the outline onto the pumpkin's skin, making a dotted line guide. Then, you connect the dots with your carving tool. It’s like paint-by-numbers, but with sharp objects and squash.
- Look for simple, bold stencil designs.
- Print the stencil to fit your pumpkin size.
- Tape the stencil firmly to the pumpkin.
- Use a poking tool to transfer the design outline.
- Connect the dots carefully with your carving knife.
Skip the Mess: Painting Your Way to Easy Dog Pumpkin Designs
Skip the Mess: Painting Your Way to Easy Dog Pumpkin Designs
Why Painting Beats Carving for Easy Dog Designs
let's be real. Carving is messy. It involves sharp objects, slimy guts, and the high probability of your design looking nothing like you intended. If that sounds like a headache you'd rather skip, welcome to the wonderful world of painting your pumpkin. This is arguably the easiest route for any dog-themed creation. No need to scoop out insides or risk a trip to the emergency room. You just need a clean, dry pumpkin and some paint. Acrylic paints work great; they're opaque and dry relatively fast. You can use brushes, sponges, or even your fingers if you're feeling particularly artistic (or messy). The goal here is minimal fuss, maximum impact. Think bold colors, simple shapes, and designs that clearly scream "I love my dog!" without requiring intricate detail.
Simple Painting Techniques for Canine Creations
Now, how do you actually get a dog theme onto a pumpkin with paint? It's simpler than you think for truly easy dog pumpkin designs. One straightforward method is painting the entire pumpkin a base color (maybe brown, white, or black, depending on your dog's coat). Once dry, you can add simple features. Two circles for eyes, a triangle for a nose, and maybe some painted-on whiskers. You can use a smaller brush for these details or even paint pens for more control. Another easy idea is painting paw prints all over the pumpkin. Just dip a paw-shaped stencil (or even a small sponge cut into a paw shape) into paint and stamp it on. Or, if you're slightly more ambitious but still want easy, paint a large bone shape or a simple dog silhouette. The beauty of paint is you can layer it, correct mistakes (mostly), and achieve a clean look without the stress of carving.
Here are some simple paint ideas:
- Paint the pumpkin like a giant tennis ball. Add white lines.
- Base coat the pumpkin a solid color, then paint large, cartoonish dog eyes, nose, and mouth.
- Use stencils or freehand to paint multiple paw prints in different colors.
- Paint a simple dog bone shape on the front of the pumpkin.
- Try a two-tone effect: paint the top half one color, the bottom half another, like a dog's split face marking.
Simple Shapes and Silhouettes: Classic Easy Dog Pumpkin Carving Ideas
Simple Shapes and Silhouettes: Classic Easy Dog Pumpkin Carving Ideas
Why Simple Works Best for Canine Carvings
so maybe stencils feel *too* much like cheating, or maybe you just want to try your hand at carving without attempting a photorealistic portrait of your terrier. This is where simple shapes and silhouettes come in. Think kindergarten-level complexity, but applied to a gourd. This approach is the backbone of genuinely easy dog pumpkin carving ideas because it minimizes the fiddly bits and reduces the chances of your pumpkin collapsing into a sad, mushy mess. You’re not trying to recreate the Mona Lisa here; you're aiming for something immediately recognizable as dog-related. A clean shape is far more effective and less frustrating than a complex design that ends up looking like abstract art (and not the good kind).
What simple shapes are we talking about?
- Basic bone shapes (like the ones in cartoons)
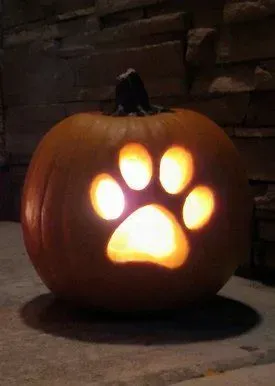
- Paw prints (just four small circles and a larger oval)
- Simple dog house outline
- Fire hydrant (a classic dog accessory)
- Dog bowl outline
Cutting Out Classic Canine Icons
Let's get specific with those simple shapes for your easy dog pumpkin carving ideas. The paw print is a perennial favorite for a reason. It’s universally understood, relatively easy to cut, and looks adorable. You just need to carve out four small circles and one slightly larger oval. Practice on paper first if you're nervous. The bone is another winner. It's basically a rectangle with rounded ends and indents on the sides. Again, draw it on the pumpkin first with a marker, then carefully carve along the lines. These shapes are forgiving. If your circle isn't perfectly round or your bone is a little wobbly, it still reads as a paw or a bone. Nobody's judging your pumpkin's anatomical accuracy.
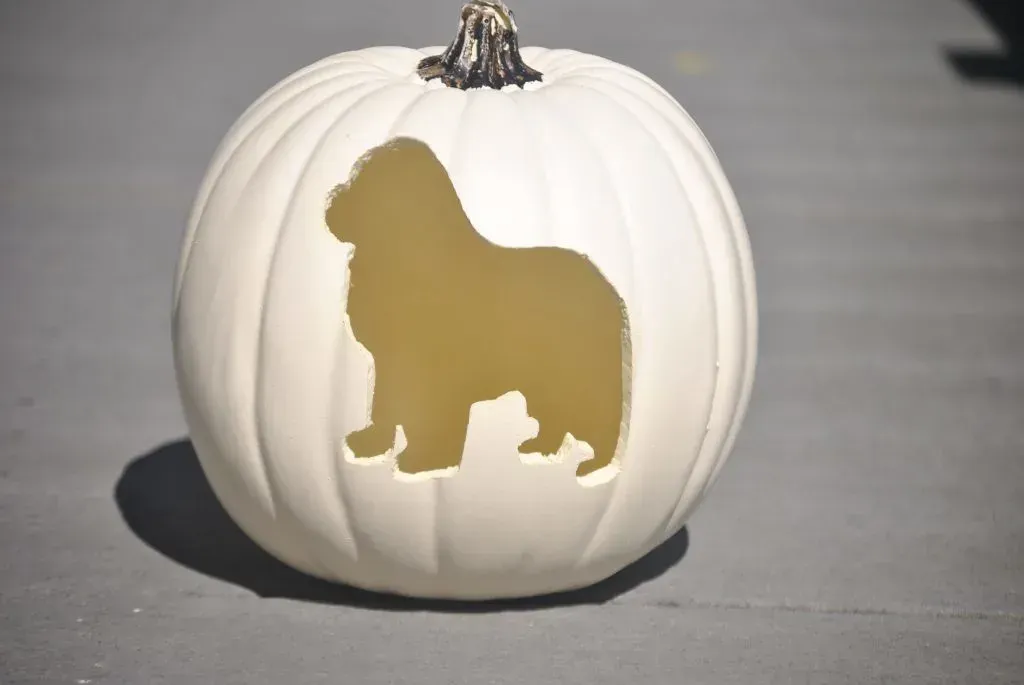
Silhouettes: Making a Statement with Minimal Detail
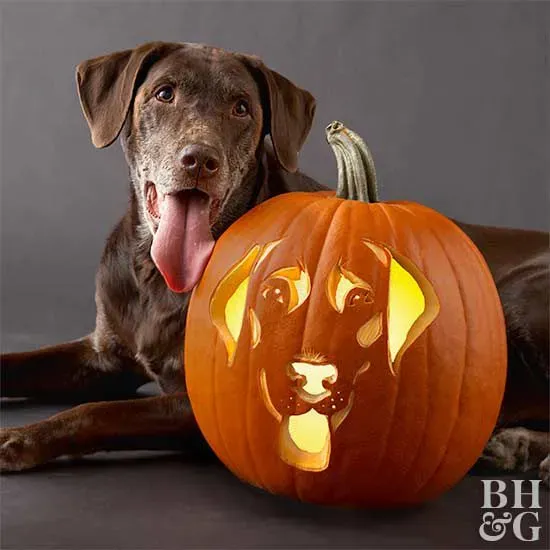
Beyond simple icons, silhouettes offer another fantastic avenue for easy dog pumpkin carving ideas. A silhouette is just the outline of something, carved out completely. Think of the classic side-profile of a dog's head, or the shape of a specific breed if they have a very distinct outline (like a Dachshund or a Poodle). You find a simple silhouette image online, scale it to your pumpkin, tape it on, and carve along the outer edge. You remove the entire area inside the outline. This creates a dramatic effect when lit from within, and crucially, it avoids all the tricky internal cuts required for more detailed images. It's bold, it's clear, and it's significantly less likely to end in tears than trying to carve individual whiskers.
Showcasing Your Creation: Displaying Easy Dog Pumpkins Safely
Showcasing Your Creation: Displaying Easy Dog Pumpkins Safely
Finding the Perfect Spot for Your Pumpkin Pup Art
you've successfully navigated the world of easy dog pumpkin carving ideas, or maybe you went the paint route. Either way, you've got a masterpiece (or something close enough) sitting on your workspace. Now, where do you put it? You want to show it off, right? The front porch is the obvious go-to. It gets visibility, and it’s outdoors, which helps with the whole "rotting vegetable" situation later. If placing it outside, make sure it's somewhere reasonably protected from squirrels, raccoons, and overly enthusiastic neighborhood dogs who might think it's a giant, weird chew toy. If displaying indoors, pick a spot away from direct heat sources like radiators, which will speed up the decay process. A windowsill or a side table works well. Just keep it out of reach of actual pets who might try to lick the paint off or, worse, knock it over.
Lighting Your Canine Creation (Without Burning Down the House)
A pumpkin isn't truly complete until it's lit from within, especially if you went the carving route. But let's be smart about it, especially with pets around. Traditional candles are charming, sure, but they are also open flames sitting inside a flammable gourd, often near flammable porch decorations, and potentially at tail-wagging height. It's a recipe for singed fur or worse. Ditch the fire hazard. Battery-operated LED lights are the way to go for easy dog pumpkin display safety. They come in various colors, flicker like real candles if you want, and produce no heat. You can drop a few small ones inside, or get a single larger LED puck light. Some even come with timers, so your doggy pumpkin automatically lights up at dusk. Simple, effective, and significantly less likely to require a call to the fire department.
- Avoid traditional candles; use LED lights.
- Choose battery-operated LEDs for safety.
- Place LEDs away from the pumpkin's "skin" if possible to prevent heat transfer (though LEDs produce very little).
- Consider LED lights with timers for automatic illumination.
- Ensure lighting is secure inside the pumpkin and won't fall out.
Keeping Your Pumpkin Pal Looking Fresh
Sadly, pumpkins don't last forever. They are, after all, organic matter destined to return to the earth. But you can extend the life of your easy dog pumpkin carving ideas display for a bit. If you carved it, the cut edges will start to dry out and shrivel. A thin layer of petroleum jelly rubbed on the cut surfaces can help seal in moisture. For both carved and painted pumpkins, keeping them in a cooler location helps. Direct sunlight is the enemy. If you live in a warm climate, your pumpkin's lifespan will be significantly shorter than in a cooler one. When it starts looking less "adorable dog" and more "sad, sagging squash," it's time to compost it. Don't feel bad; it had a good run, and you got some festive photos out of it.
Wrapping Up Your Easy Dog Pumpkin Fun
So there you have it. Proof that you don't need to be a master carver to create a cool pumpkin that celebrates your canine companion. Whether you went the stencil route, grabbed some paint, or stuck to simple shapes, you've added a personal, pet-centric touch to your fall decor. These easy dog pumpkin ideas are all about enjoying the process and the outcome, without the stress. Your dog might not appreciate the artistic merit, but they'll definitely feel the festive vibe (or just be curious about the big, round thing). Go ahead, show off your creation – you earned those bragging rights for tackling a pumpkin without losing a finger or your patience.