Table of Contents
Ah, pumpkin carving season. The crisp air, the changing leaves, and the inevitable moment you stare at a large orange gourd wondering how exactly you're supposed to turn it into something recognizable without losing a finger or ending up with a collapsed mess. Maybe you've tried before and ended up with a sad, lopsided grin that looks more like a cry for help than a festive decoration. You're not alone. The internet is full of impossibly intricate designs that require tools you don't own and patience you probably ran out of around mid-October.
Getting Started: Picking Your Pumpkin and Tools
Getting Started: Picking Your Pumpkin and Tools
Choosing Your Canvas: The Perfect Pumpkin
Alright, let's talk gourds. You can't carve a masterpiece, even an easy one, on a rotten or misshapen canvas. When you're out at the pumpkin patch or grocery store, don't just grab the first big orange thing you see. Feel it up. You want a pumpkin that feels firm all over, no soft spots or bruises. Those are signs of rot waiting to happen, and nobody wants their jack-o'-lantern to collapse into a sad, moldy heap within 48 hours.
Look for a relatively smooth surface. While some bumps add character, too many can make carving tricky, especially if you're using stencils. Check the bottom too; make sure it sits relatively flat so it doesn't wobble precariously on your porch. And give the stem a gentle tug – it should be firmly attached. A loose stem means the pumpkin is already starting to break down. Size matters too; a medium-sized pumpkin is often easier to handle than a giant one when you're just starting out.
Arming Yourself: Essential Carving Tools
Forget that flimsy, tiny saw that comes in those cheap kits. While they can work in a pinch, they often snap or get stuck. For genuinely easy carving, you need a few slightly better tools. A sturdy, serrated knife (like a small paring knife or a dedicated pumpkin saw) is essential for cutting open the top or bottom. An ice cream scoop or a large, strong spoon is perfect for scraping out the guts and seeds – the thinner you get the walls, the easier it is to carve.
For the actual carving, smaller, more precise tools make all the difference. Craft knives or linoleum cutters give you more control than a bulky kitchen knife. Even better are those small, specialized pumpkin carving tools with different blade shapes for detail work. Don't forget a dry-erase marker to draw your design first – mistakes wipe right off, unlike permanent marker which is just... permanent.
- Look for firm, blemish-free pumpkins.
- Choose a pumpkin that sits flat.
- Ensure the stem is firmly attached.
- Use a sturdy serrated knife for the lid.
- An ice cream scoop is your best friend for gutting.
- Invest in small, precise carving tools or craft knives.
- Always have a dry-erase marker handy for sketching.
Simple Techniques for Easy Pumpkin Carving
Simple Techniques for Easy Pumpkin Carving
Lid Logic: Top or Bottom?
pumpkin is picked, guts are scooped. Now you face the first real decision: cut the lid from the top or the bottom? Most folks instinctively go for the top, around the stem. It feels traditional, like the jack-o'-lanterns from your childhood. But honestly? Cutting the bottom is often way smarter, especially for easy designs to carve a pumpkin. Think about it. When you cut the bottom, you create a stable base. You can just lift the pumpkin off the light source (a candle or, preferably, an LED) instead of trying to awkwardly lower a candle into a top hole and fish it out later. Plus, the stem stays intact on top, looking more like a proper pumpkin head.
Whichever end you choose, cut at an angle, like 45 degrees, not straight down. This bevel means the lid won't just fall into the pumpkin later. Use that sturdy serrated knife here. Saw slowly and steadily. Once the lid is off, give it a good scrape too, removing any dangling strings or extra flesh that might catch fire if you use a real candle (don't use real candles, just use LEDs, seriously).
Transferring Your Masterpiece (Even If It's Simple)
Got your design sketched out on paper? Great. Now you need to get it onto the pumpkin. For simple shapes, you can often just draw directly onto the pumpkin with your dry-erase marker. If you mess up, wipe it off. Easy. For slightly more detailed, yet still easy designs to carve a pumpkin, pin your paper template onto the pumpkin. Use a pointy tool – a thumbtack, a skewer, or one of those pokey tools from a carving kit – to poke small holes along the lines of your design. Keep the holes close together.
Once you've traced the whole design with dots, remove the paper. You should see a dotted outline on the pumpkin skin. Now, connect the dots with your dry-erase marker. This gives you a clear line to follow with your carving tool. When you start cutting, don't saw back and forth wildly. Use a steady, controlled motion, pushing the carving tool along the line. Think of it like steering a tiny boat along a river. Take your time, especially around corners.
- Cut the lid at an angle to prevent it from falling in.
- Consider cutting the bottom for a more stable base and easier lighting.
- Transfer designs by poking holes along a paper template.
- Connect the dots with a dry-erase marker.
- Use a steady, pushing motion when carving, not sawing.
Cleaning Up and Lighting Up
You've cut out your shapes! Nice job. Now, look closely at the edges. Sometimes little bits of pumpkin flesh hang on, or the cut isn't perfectly clean. Use a smaller, sharper tool, like a craft knife or the detail tools in a carving kit, to trim away any ragged edges. This makes your design look much cleaner and more defined. Be careful here – these tools are sharp. Always cut away from yourself.
Once the carving is clean, it's time to light it up. As mentioned, skip the fire hazard of real candles. Battery-operated LED tea lights or small LED puck lights are cheap, safe, and last way longer. Pop one or two inside your pumpkin, put the lid back on (or place the pumpkin over the light if you cut the bottom), and step back to admire your work. See? You didn't need to be a professional sculptor. You just needed some easy techniques for easy designs to carve a pumpkin, and now you have a glowing creation.
15 Easy Designs to Carve a Pumpkin This Year
15 Easy Designs to Carve a Pumpkin This Year
Starting Simple: Classic Faces and Basic Shapes
you've got your pumpkin, your slightly-better-than-the-kit tools, and a vague sense of determination. Now comes the fun part: deciding what to actually put on the thing. Forget those elaborate dragon or character carvings you see online – those are for people with way too much free time and probably a workshop. We're here for easy designs to carve a pumpkin, the kind you can actually finish before Halloween night.
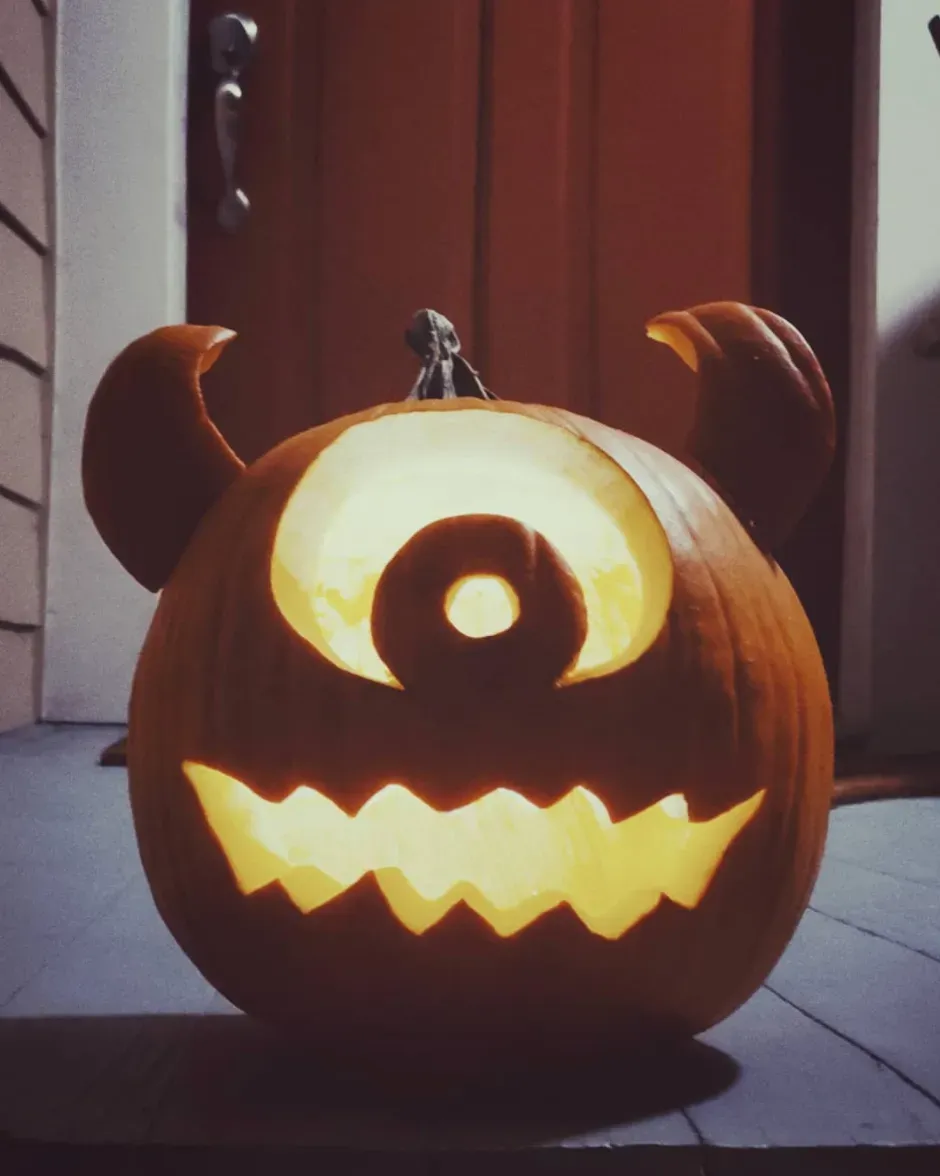
The simplest place to start is the classic jack-o'-lantern face. But you don't have to stick to two triangles and a jagged mouth. Play with shapes! Try circles for eyes and a wavy line for a mouth. Give it surprised eyes (big circles) and a tiny "o" mouth. Or go spooky with slanted rectangle eyes and a gap-toothed grin. Don't overthink it. Remember, the light inside does a lot of the heavy lifting, making even basic shapes look dramatic in the dark.
Three Classic Face Twists:
- The Goofy Grin: Round eyes, a slightly crooked smile with a few missing teeth. Looks friendly, not terrifying.
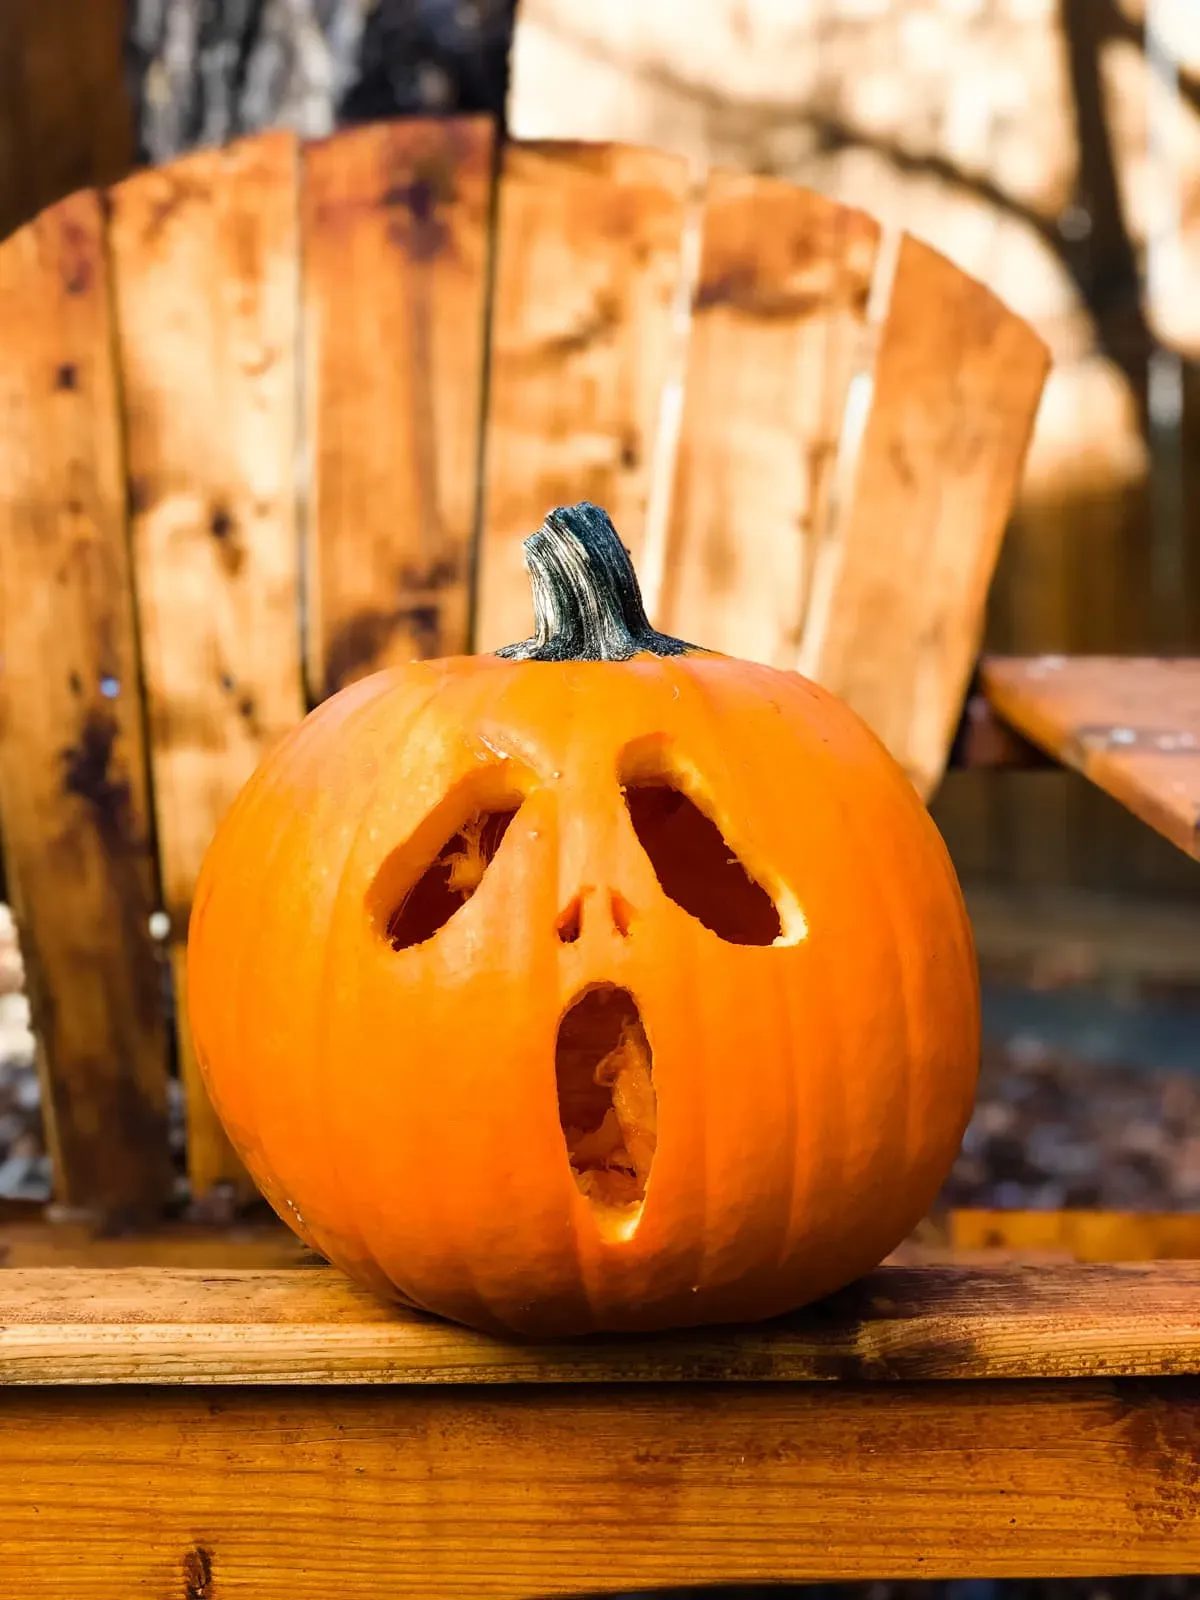
- The Spooked Look: Wide, startled oval eyes and a small, surprised "O" mouth. Easy to cut, effective impact.
- The Angry Glare: Slanted, narrow eyes and a sharp, downturned mouth. Simple angles convey attitude.
Beyond Faces: Patterns and Simple Silhouettes
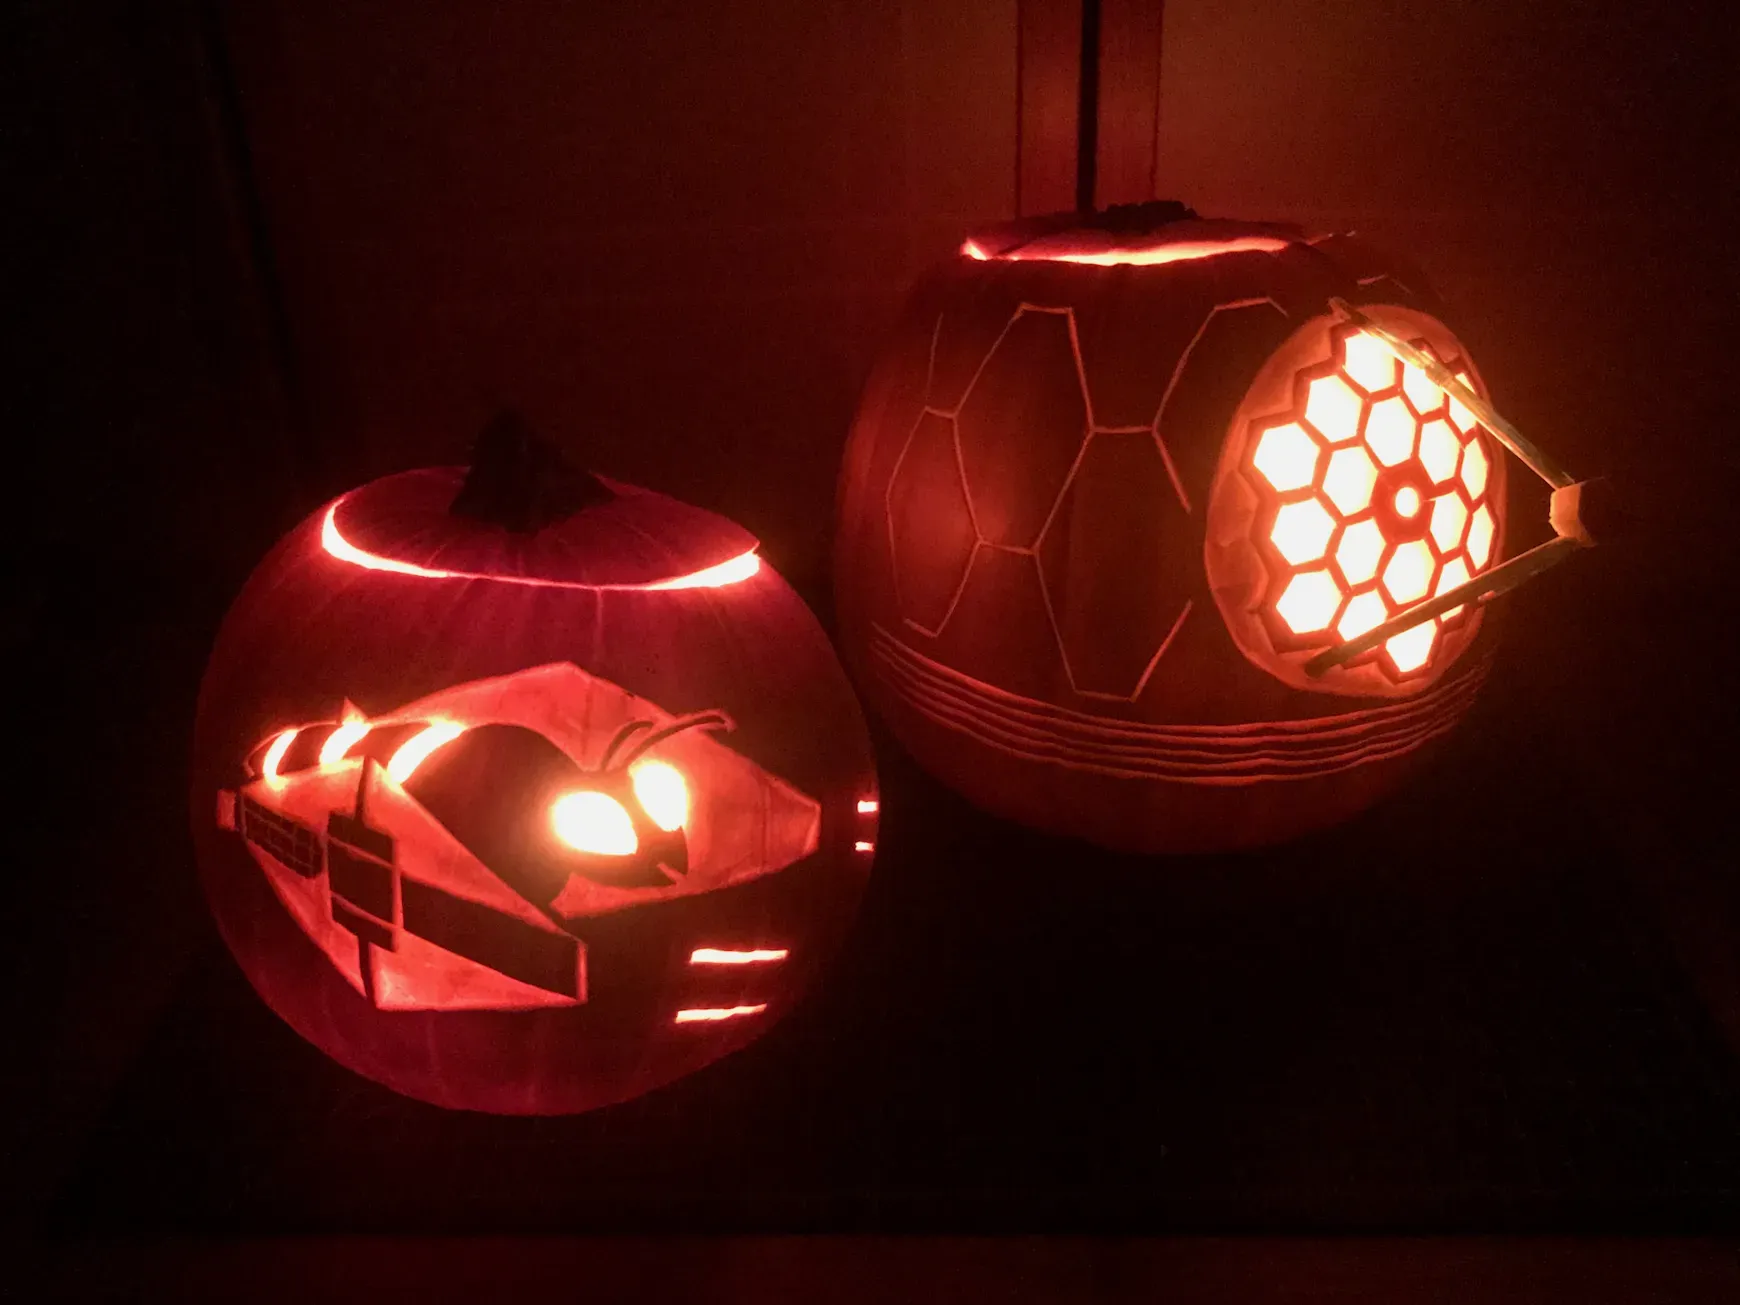
Who says a pumpkin needs a face anyway? Some of the most striking easy designs to carve a pumpkin don't involve eyes or mouths at all. Think about patterns. Simple polka dots of varying sizes look fantastic when lit up. You can use an apple corer or different sized drill bits (carefully!) to make perfect circles. Stars, moons, or simple geometric shapes like squares and triangles are also straightforward to cut out and create a cool, modern look.
Silhouettes are another easy win. A simple cat shape, a bat flying, or even just the outline of a single spooky tree branch can be transferred easily with the poke-hole method and carved out without needing intricate detail work. The key is keeping the shapes bold and the lines clean. Don't try to add tiny leaves to that tree branch; just the main lines are enough to get the idea across when it's glowing on your porch.
Easy Pattern & Silhouette Ideas:
- Random polka dots
- Rows of triangles
- A lone star or moon
- Simple bat outline
- Basic cat silhouette
Keeping Your Easy Designs to Carve a Pumpkin Looking Fresh
Keeping Your Easy Designs to Carve a Pumpkin Looking Fresh
Alright, you’ve done the work. You’ve crafted one of those easy designs to carve a pumpkin, and it looks fantastic glowing on your porch. Now comes the slightly depressing reality: carved pumpkins don't last forever. They are, after all, organic matter exposed to the elements. They will start to dry out, shrivel, and eventually succumb to mold and collapse. It’s the circle of life, but for gourds. However, you aren't entirely powerless against the forces of decay. There are a few simple tricks you can employ to squeeze a few extra days, maybe even a week, out of your illuminated artwork, keeping your easy designs to carve a pumpkin looking presentable for as long as possible before the inevitable mush.
So, You Carved a Pumpkin. Now What?
Alright, you’ve navigated the sticky mess, wrestled with the rind, and hopefully ended up with something resembling one of those easy designs to carve a pumpkin we talked about. Maybe it's a perfect spooky face, maybe it's an abstract masterpiece only you understand, or maybe it just looks like it got into a fight with a badger – hey, that's character! The point is, you did it. You took a humble gourd and gave it a little personality without needing an engineering degree or a trip to the emergency room. Pop in a light (LED is probably less of a fire hazard, just saying), set it on your porch, and enjoy the fleeting glory before the squirrels inevitably stage an invasion. It wasn't so terrifying, was it?