Table of Contents
Halloween is creeping up, and the pressure is on to display something appropriately spooky on your porch. Forget those overly complicated designs requiring specialized tools and the patience of a saint. Nobody wants to spend hours hacking away, only to end up with a sad, lopsided mess that looks more pathetic than terrifying.
Gather Your Guts: Prepping Your Pumpkin for Spooky Success
Gather Your Guts: Prepping Your Pumpkin for Spooky Success
Alright, before you even think about carving any easy creepy pumpkin carving ideas, you've gotta get the pumpkin ready. Think of it like prepping your canvas. First things first, you need a sturdy, sharp knife – not your dull butter knife, please. Cut a circle around the stem, making sure it's big enough for your hand to fit through. Some folks like cutting from the bottom, arguing it makes the pumpkin last longer and hides the lid, but cutting the top is traditional and, frankly, easier for getting at the good stuff inside. Once the lid is off, grab a strong spoon or a pumpkin scoop if you're feeling fancy, and get to work scraping out all the guts and seeds. You want the inside walls to be relatively smooth and about an inch thick – this makes carving much less of a nightmare and helps your light source shine through better.
Cutting Corners: Simple Techniques for Easy Creepy Pumpkin Carving Ideas
Cutting Corners: Simple Techniques for Easy Creepy Pumpkin Carving Ideas
Tools of the Trade (Without Breaking the Bank)
guts are out. Now comes the fun part: making this gourd look genuinely unsettling. You don't need a fancy 50-piece carving kit that looks like a surgeon's nightmare. For easy creepy pumpkin carving ideas, a few basic tools will do the trick. A small, sharp paring knife is essential for detail work. Those cheap, serrated pumpkin carving tools you find everywhere? They're actually decent for sawing through the thicker parts. A drill with various bit sizes can also be your best friend for quick, spooky holes (think eyes or patterns). Don't forget a dry-erase marker or pencil to sketch your design first – mistakes are a pain to fix.
- Small, sharp paring knife for details
- Serrated pumpkin carving saw (the standard kit kind)
- Drill with different bit sizes (optional, but effective)
- Dry-erase marker or pencil for sketching
- Something pointy (like a skewer) to transfer stencil points
Simple Cuts for Maximum Creep Factor
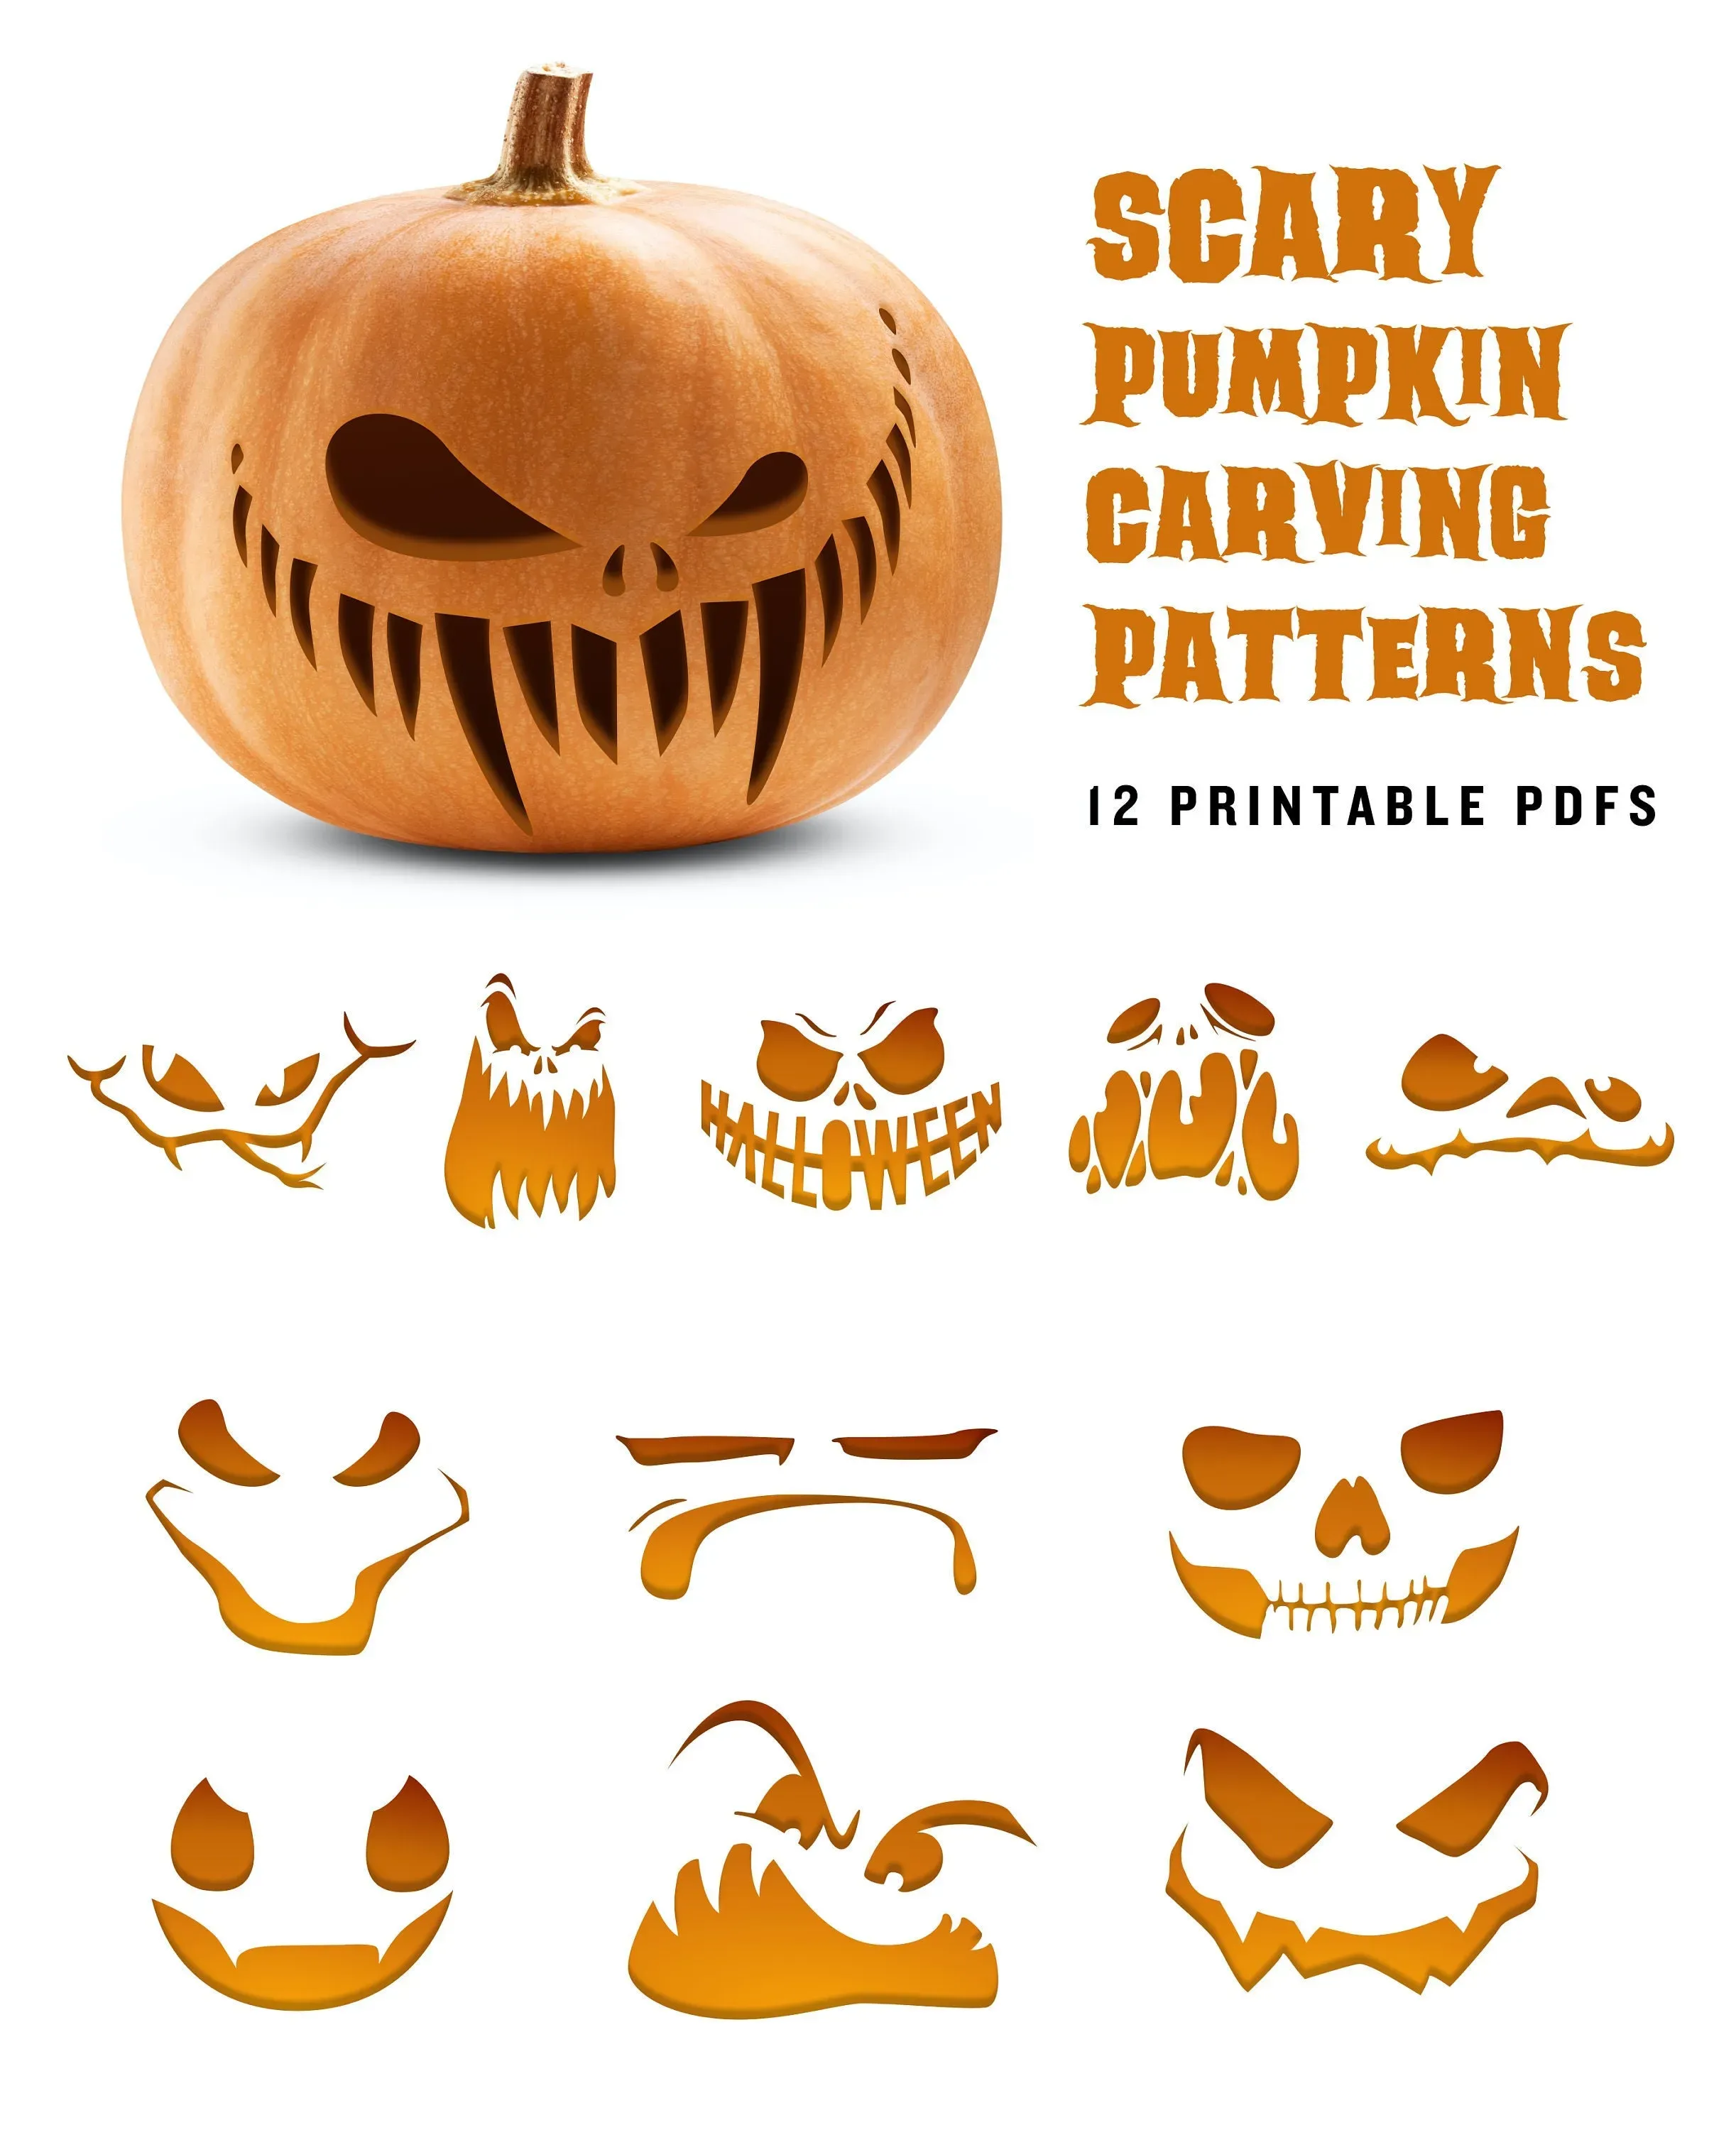
Forget intricate portraits. The best easy creepy pumpkin carving ideas rely on simple, effective cuts. Jagged teeth are way easier than perfect pearly whites and look far more menacing. Think triangles of varying sizes and angles for mouths and eyes. Don't be afraid to make them uneven or slightly off-kilter – asymmetry adds to the creepiness. For spooky eyes, simple circles or ovals work, but narrow, slanted slits can give a truly evil stare. Practice a few cuts on a scrap piece of pumpkin rind if you're nervous. Remember, slightly rough edges often enhance the scary look.
Sometimes, just a few well-placed holes are all you need. A drill can make quick work of creating patterns of small holes that look like bug eyes or strange constellations. Vary the size of the drill bits for added visual interest. A single large, gaping hole where a mouth should be, with some shadowy depth inside, can be far more unsettling than a detailed set of choppers. Minimalism can be terrifying.
Beyond the Face: Using Negative Space and Shadows
Who says creepy pumpkins need a traditional face? Some of the most effective easy creepy pumpkin carving ideas play with negative space or simple silhouettes. Carve out the shape of a crawling spider, a rat, or bare, spooky branches on the side of the pumpkin. When lit, these shapes cast eerie shadows on the wall behind them. You can also carve out words like "BOO" or "HELP" in a shaky, uneven font. These are often much quicker to execute than a full face and still deliver a good jolt.
Consider using different depths of carving too. Instead of cutting all the way through, you can just scrape away the outer layer of skin to let the light glow through the thinner flesh. This works great for creating glowing eyes or subtle patterns that appear when the pumpkin is lit in the dark. It adds another dimension without requiring complex cuts.
Beyond the Grin: More Easy Creepy Pumpkin Carving Ideas to Terrify
Beyond the Grin: More Easy Creepy Pumpkin Carving Ideas to Terrify
Beyond the Grin: More Easy Creepy Pumpkin Carving Ideas to Terrify
so you've mastered the jagged teeth and evil eye slits. But what if you want to freak people out without carving a single tooth? This is where you get creative with easy creepy pumpkin carving ideas that ditch the face entirely. Think unsettling textures, unexpected shapes, or just plain weirdness. You could carve a swarm of tiny spiders creeping across the surface, or perhaps just a single, massive, unsettling eye staring out from the void. Maybe carve a simple silhouette of a gnarled hand reaching from the inside, or just a series of random, deep gouges that look like something clawed its way out. The goal is to evoke a feeling of unease, and sometimes, less is definitely more when it comes to creepiness.
Light It Up: Making Your Creepy Creations Shine

Light It Up: Making Your Creepy Creations Shine
Alright, you've gutted it, you've carved it with some truly unsettling easy creepy pumpkin carving ideas, now it's time for the grand reveal. How you light this bad boy makes all the difference between "oh, that's cute" and "holy heck, what is that thing?". Forget those flimsy tea lights that flicker out in five minutes. For real impact, consider battery-operated LED candles. They last longer, are safer, and you can often find ones that flicker convincingly. For an even more dramatic effect, try a small LED spotlight placed strategically inside or behind the pumpkin to cast long, eerie shadows. Different colored lights can also change the mood entirely – a sickly green or an ominous red can make even a simple design look ten times more menacing. Experiment with placement; sometimes pointing the light up from the bottom or having it peek out from a carved hole creates an unexpectedly creepy glow.
Your Creepy Masterpiece Awaits
So there you have it. Crafting genuinely spooky pumpkins doesn't require an art degree or a workshop full of specialized tools. With a bit of common sense in the prep phase, a few basic cuts, and some slightly twisted ideas, you can transform a simple gourd into something that might just make trick-or-treaters think twice. Remember, the goal is creepy, not perfect. Embrace the imperfections; sometimes the messier, the better. Now go forth, select your pumpkin, and unleash a little bit of easy, carved terror on the world. Happy haunting.