Table of Contents
Ever stared at a plain pumpkin and wondered how to turn it into a jaw-dropping Halloween display? You're not alone! Carving pumpkins is a classic fall tradition, but creating a truly impressive display takes more than just a knife and some elbow grease. This isn't about basic jack-o'-lanterns; we're talking about taking your pumpkin game to the next level. Forget those wobbly smiles and uneven eyes. In this guide, we will show you how to choose the right pumpkin for your masterpiece. We'll explore the essential tools that will make carving easier and more precise. We'll also teach you some cool techniques to make your designs pop. We’ll look at how to preserve your work of art and how to light it up to make it shine. Plus, we will add some extra touches that will make your pumpkin display the envy of the neighborhood. So, grab your pumpkin and get ready to learn some fantastic display pumpkin carving tricks that will transform your Halloween décor from drab to fab!
Choosing the Perfect Pumpkin for Your Display
Choosing the Perfect Pumpkin for Your Display
The Foundation of a Great Carving
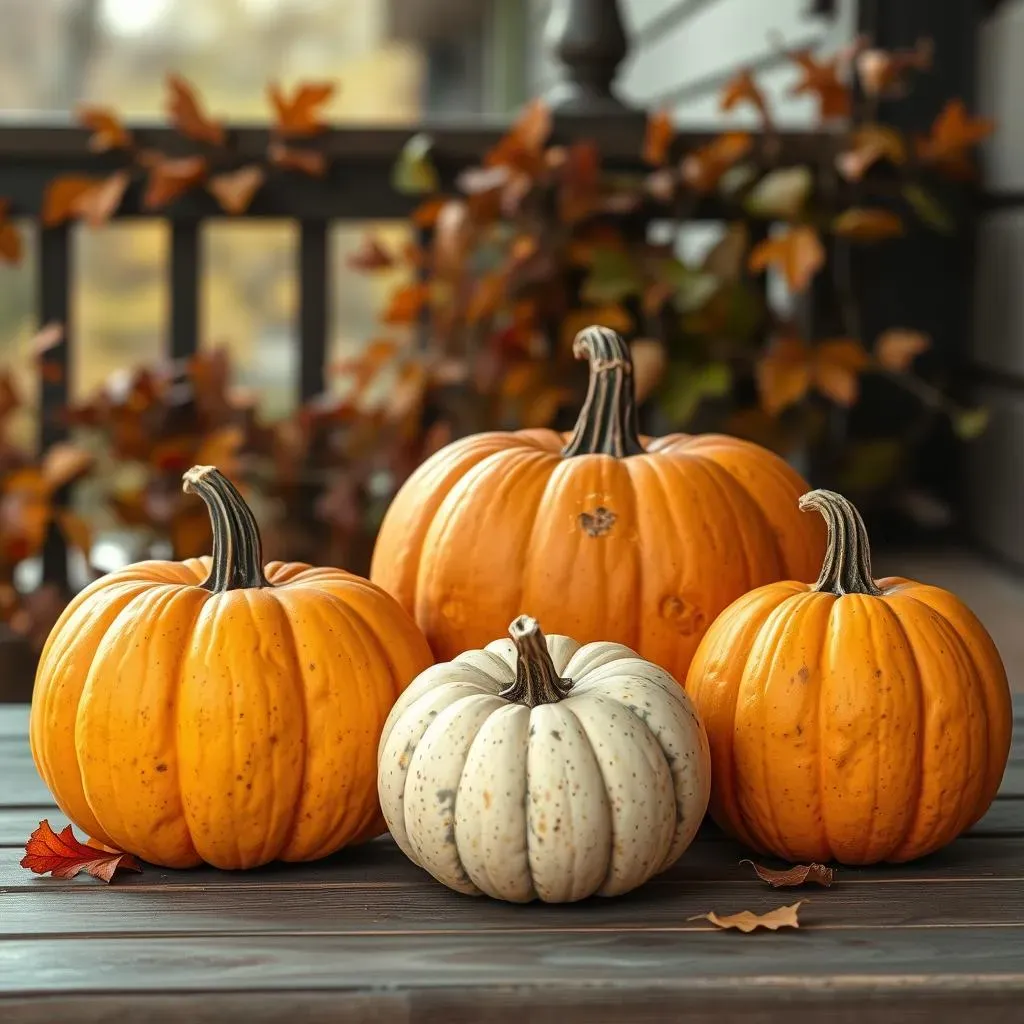
Okay, so you're ready to create a killer pumpkin display? Awesome! But before you even think about grabbing a knife, you've got to pick the right pumpkin. It’s like choosing the perfect canvas for a painting, you wouldn't want a lumpy, wobbly canvas right? The best pumpkins for carving aren't necessarily the biggest ones, it is about the quality. Look for one that's got a nice flat bottom, so it won’t wobble and fall over, ruining your hard work. You need a sturdy base for your masterpiece to stand tall and proud. The skin should be firm, not soft or mushy, that means it's fresh and ready to be carved. And of course, you’ll want a vibrant orange color, it just makes it look better, don't you think?
Size and Shape Matters
Now, let's talk size and shape. If you’re planning a multi-pumpkin display, think about how you want them to look together. You might want a mix of sizes and shapes for more visual interest. A tall, skinny pumpkin next to a round, squat one can look really cool. But if you’re going for a single, show-stopping pumpkin, pick one that fits your design. Got a spooky, tall ghost in mind? Go for a taller pumpkin! Want a chubby, smiling face? A round pumpkin is your best bet. Don't be afraid to get creative! Just remember, the bigger the pumpkin, the more surface area you have to work with, but it also means more work to hollow out. It's a trade-off, but a fun one.
Pumpkin Feature | What to Look For | Why it Matters |
|---|---|---|
Bottom | Flat | Prevents wobbling |
Skin | Firm | Indicates freshness |
Color | Vibrant Orange | Visually appealing |
Size and Shape | Matches your design | Enhances your carving |
The Final Check
Before you commit, give your chosen pumpkin a good once-over. Check for any soft spots or bruises, these can mean the pumpkin is starting to rot, and you don't want that. A little imperfection is okay, but major damage can cause problems later on. Also, give the stem a little wiggle, it should be firmly attached. A loose stem can be a sign that the pumpkin isn’t as fresh as it should be. And finally, try to picture your design on the pumpkin. Does it fit? Does the shape inspire you? If it does, then you have found the perfect pumpkin for your display. Now, let’s get carving!
Essential Tools and Techniques for Carving Display Pumpkins
Essential Tools and Techniques for Carving Display Pumpkins
Gathering Your Carving Arsenal
Alright, you've got your perfect pumpkin. Now, it's time to talk tools. Forget that flimsy kitchen knife, we need some serious gear for serious carving. A good pumpkin carving kit is your best friend here. It usually includes small, serrated knives that are perfect for making clean cuts, scoops for getting all the gunk out (and trust me, there's a lot of gunk), and some detailing tools for those intricate designs. These tools are designed to be safe and effective, so you're less likely to slip and end up with a pumpkin carving accident. Think of it like this, you wouldn't try to build a house with just a spoon, right? Same thing here, the right tools make all the difference.
Don’t skimp on quality either. Cheap tools can bend or break easily, and that’s just going to frustrate you. You want sharp, sturdy tools that will give you control and precision. Also, safety first! Always carve in a well-lit area and make sure your hands are dry. And if you're carving with kids, make sure they have supervision and age-appropriate tools. Remember, we want to create spooky displays, not spooky injuries. So, invest in a good kit, and treat it with respect, and it will be your ally in pumpkin carving for years to come.
Mastering the Carving Process
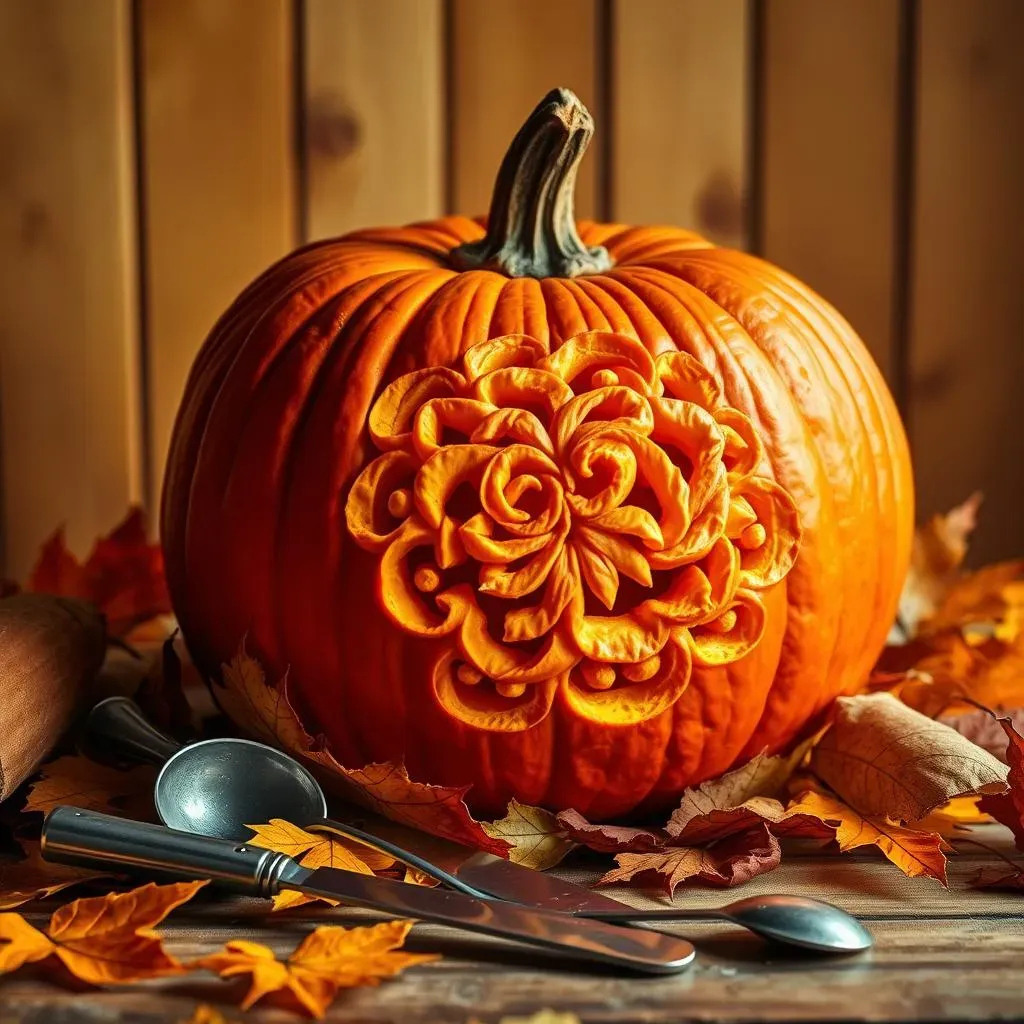
Okay, so you have the tools, now let’s get down to the nitty-gritty of carving. First things first, you're going to want to cut an opening, but not just any opening. Cut a circle on the top, but make sure to angle your knife inward. This way, the lid won't fall inside the pumpkin when you put it back on. Think of it like a hat that fits perfectly snug. Then, scoop out all the seeds and pulp. This is the messy part, but it's also kind of therapeutic, like digging for treasure. Make sure the inside is nice and smooth, so it’s easier to carve and will last longer. I like to use a metal spoon for this step, it’s sturdy and does the job well.
Now, for the actual carving, if you’re using a template, tape it to the pumpkin and use a poking tool to transfer the design. This is like tracing a picture, you're just making little dots that you'll connect with your knife. When you start cutting, use slow, controlled movements. Don’t try to rush it, just let the knife do the work. And remember, you can always remove more, but you can’t put it back, so start small and be patient. The key to good carving is precision, not speed. And if you mess up? It's okay, every pumpkin has its own personality, embrace the imperfections.
Tool | Purpose | Why it's Important |
|---|---|---|
Serrated Knives | Making clean cuts | Precision and safety |
Scoops | Removing pulp and seeds | Easier carving, longer lasting |
Detailing Tools | Intricate designs | Adding flair and complexity |
Poking Tool | Transferring templates | Accurate design transfer |
Displaying Your Carved Pumpkin: Illumination and Creative Touches
Displaying Your Carved Pumpkin: Illumination and Creative Touches
Lighting Up Your Masterpiece
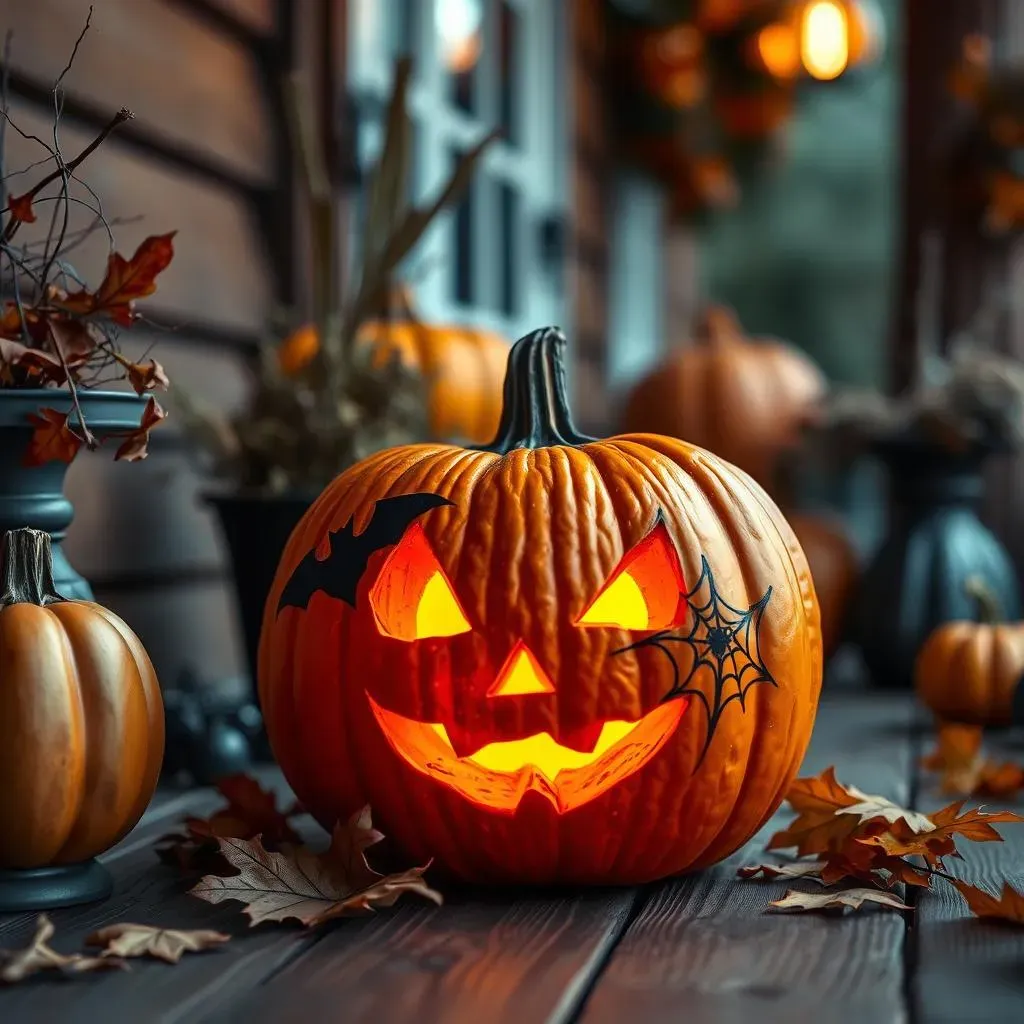
Okay, you've poured your heart and soul into carving this pumpkin, now it's time to make it glow! Forget those old-school candles, they're a fire hazard and a pain to deal with. Let's talk about some safer and cooler ways to illuminate your pumpkin. LED candles are your best friend here. They come in all sorts of colors and sizes, and they don't produce any heat, which means no burnt pumpkin or risk of a fire. Plus, they last way longer than regular candles, which is a win-win. You can even get battery-operated fairy lights, which create a magical effect, like tiny stars twinkling inside your pumpkin. They’re really easy to place and make your display look like something out of a fantasy movie.
If you're feeling adventurous, you could try using glow sticks. They come in vibrant colors and give your pumpkin a funky, neon vibe. Just crack them open and pop them inside, and you’ve got an instant party going on. However, keep in mind that they don't last as long as LED lights. And if you're going for a more subtle look, try using a small flashlight. Place it inside the pumpkin, facing outwards, and it will create a soft, warm glow. The key here is to experiment and find what lighting works best for your design. The right lighting can make all the difference in how your carving looks in the dark, it's like the final brushstroke on a painting, it makes everything come alive.
Adding Creative Flair
Alright, let’s talk about taking your pumpkin from "cool" to "whoa!" You can add all sorts of creative touches to make your pumpkin display truly stand out. Non-toxic acrylic paint is great for adding details that you can't carve. Think of painting little bats flying around the carved moon or adding some spooky spiderwebs. You can also use markers to draw on the pumpkin, but make sure they are waterproof, so they don’t smudge if it rains. Don’t be afraid to mix and match materials. You can glue on googly eyes for a silly look or use pieces of fabric to create a spooky costume for your pumpkin.
And let's not forget about props! You can add a hat to your pumpkin for a touch of whimsy or place it on a small stand to make it look like it’s on a pedestal. You can even use twigs and leaves to create a natural, rustic look. The possibilities are endless, it just depends on your imagination. Think of your pumpkin as a blank canvas, and let your creativity run wild. The goal is to create a display that is not only spooky but also reflects your personality and style. And, if you are going all out, why not consider creating a whole scene with multiple pumpkins? It's like building a miniature Halloween world, and it's a ton of fun.
Illumination Method | Pros | Cons |
|---|---|---|
LED Candles | Safe, long-lasting, various colors | May look less traditional |
Fairy Lights | Magical effect, easy to place | Requires batteries |
Glow Sticks | Vibrant colors, fun vibe | Don't last as long |
Flashlight | Soft, warm glow, simple | Can be bulky |
The Grand Finale: Display Tips
Now that your pumpkin is carved, lit up, and decked out, it's time to show it off! Think about where you place it, it's like staging a play, you need the right setting. If you are displaying it on a porch, make sure it's visible from the street. You can also place it near other Halloween decorations to create a spooky scene. Grouping multiple pumpkins together can create a more dramatic effect, it's like having a pumpkin party. And don't forget about the background! If you have a plain wall, you can put up a spooky backdrop, like a spiderweb or a creepy cloth.
Also, consider the time of day. A pumpkin looks different during the day than at night. You might need to adjust your lighting or add some extra decorations to make it look good both ways. And finally, don’t forget to take pictures. You put a lot of effort into your pumpkin display, you want to capture it for posterity. Share your creations with friends and family and let them be amazed by your artistic skills. Remember, displaying your pumpkin is not just about showing off your carving skills, it's about sharing the Halloween spirit with everyone. So, go ahead and create a display that is not only spooky but also fun and memorable. And most of all, have fun with it!