Table of Contents
Halloween is just around the corner, and what better way to get into the spooky spirit than with some awesome pumpkin carving? Forget those basic triangle eyes and jagged smiles; we're talking about taking your pumpkin game to the next level for some seriously eye-catching outdoor displays. This isn't just about making a jack-o'-lantern; it's about creating a whole vibe for your porch, garden, or even your whole yard. We'll explore cool carving techniques, from beginner-friendly to more advanced, that will make your pumpkins stand out. You'll learn how to arrange your carved masterpieces to create the perfect outdoor scene, and we will discuss some tricks to keep your pumpkin carvings looking fresh for longer. Whether you're a seasoned carver or a first-timer, this guide will give you ideas for incredible "display pumpkin carving for outdoor use". So, grab your tools, pick your pumpkins, and let's get carving!
Creative Carving Ideas for Outdoor Pumpkin Displays
Creative Carving Ideas for Outdoor Pumpkin Displays
Beyond the Basic Jack-o'-Lantern
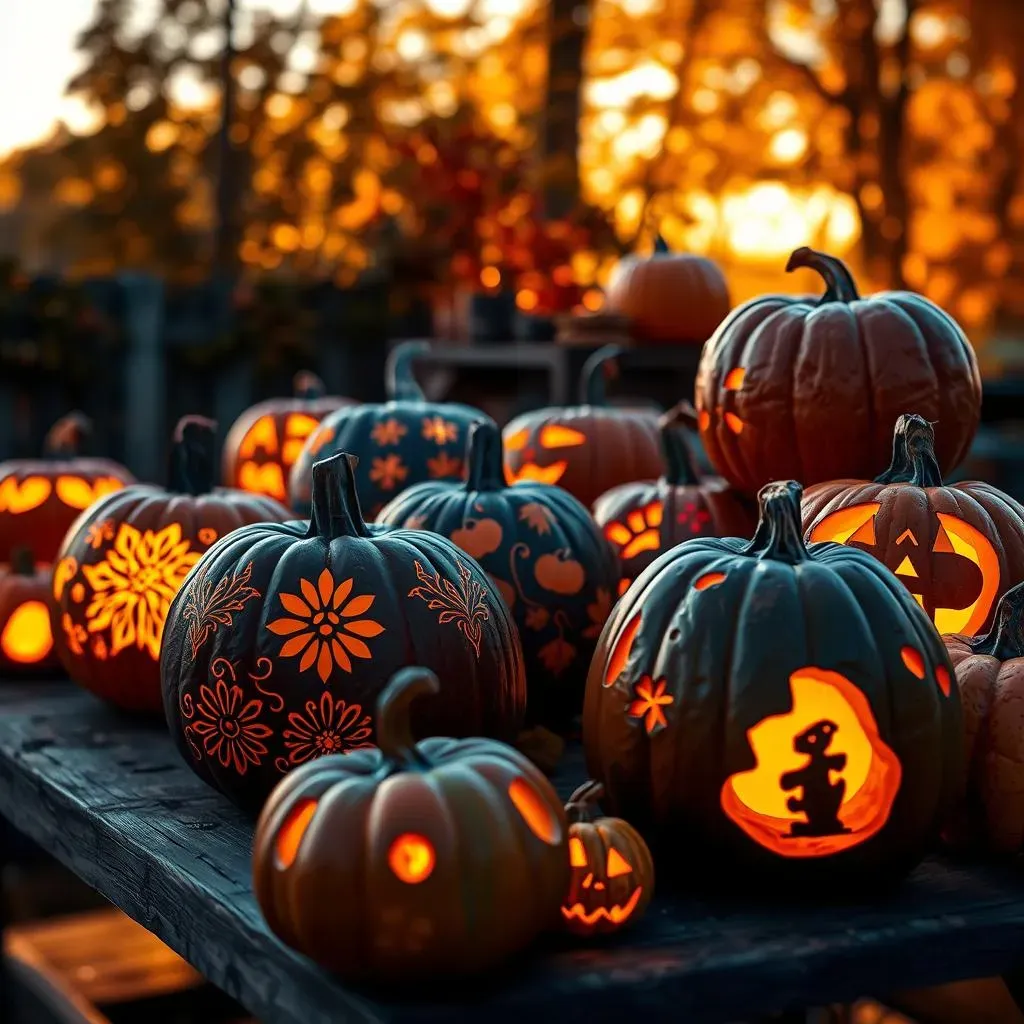
Okay, let's face it, those simple triangle eyes and goofy grins are kinda... well, boring. We can do better! Think about it, your pumpkin is a blank canvas just begging for some artistic flair. Instead of just cutting out shapes, why not try etching? You can use a linoleum cutter or a wood carving tool to scrape away the top layer of the pumpkin skin. This creates a really cool, almost 3D effect, especially when you put a light inside. You could do patterns, swirling designs, or even try to make it look like a spooky face by just etching the details instead of cutting all the way through.
Another thing I love is using cookie cutters. Press them firmly into the skin of the pumpkin, then carve around them. Boom! Instant shapes, and it’s a great way to get kids involved too. Imagine a whole pumpkin covered in stars, bats, or little ghosts – super cute and easy to do. Don't be afraid to think outside the box and mix and match techniques, it's all about having fun and making something unique.
Stencils and Freehand Magic
Now, if you're feeling a bit more adventurous, let's talk stencils. You can find tons of free stencils online – everything from simple spooky faces to intricate designs. Tape it to your pumpkin, poke holes along the lines with a pin, then use a small saw to cut out the design. It’s like paint-by-numbers, but with pumpkins! I like to sometimes use the stencil as a guide, but add my own little twists to make it my own.
And if you're feeling super confident, go freehand! It might sound scary, but just start with simple lines and shapes, and see where it takes you. You can do abstract patterns, geometric designs, or even try to carve your favorite animal or character. Remember, it doesn’t have to be perfect; it’s all about expressing yourself and having a good time. The best part? No two pumpkins will ever be the same.
Technique | Difficulty | Description |
|---|---|---|
Etching | Medium | Scrape away the top layer for a 3D effect. |
Cookie Cutters | Easy | Press and carve around for easy shapes. |
Stencils | Medium | Use patterns for precise designs. |
Freehand | Hard | Carve your own unique pattern. |
Tools of the Trade
Okay, so you've got your design ideas, now what about the tools? Don’t just grab a kitchen knife, please. There are actually some cool tools designed specifically for pumpkin carving, and they make life a whole lot easier. I’m a big fan of the small saws that come in those pumpkin carving kits. They’re perfect for cutting out shapes without slipping and hurting yourself. And those little scoops for getting the guts out? Total lifesavers.
But you don't need to go out and buy a whole new set of tools if you don't want to. You can use things you probably already have at home. A sturdy spoon works great for scooping out the insides, and a paring knife can be used for detail work. Just be careful, and always have an adult help if you’re a kid. Remember, it's not about having the fanciest gear, it’s about having fun and making something awesome with what you have.
Outdoor Display Ideas for Carved Pumpkins
Outdoor Display Ideas for Carved Pumpkins
Setting the Stage: Porches, Steps, and Gardens
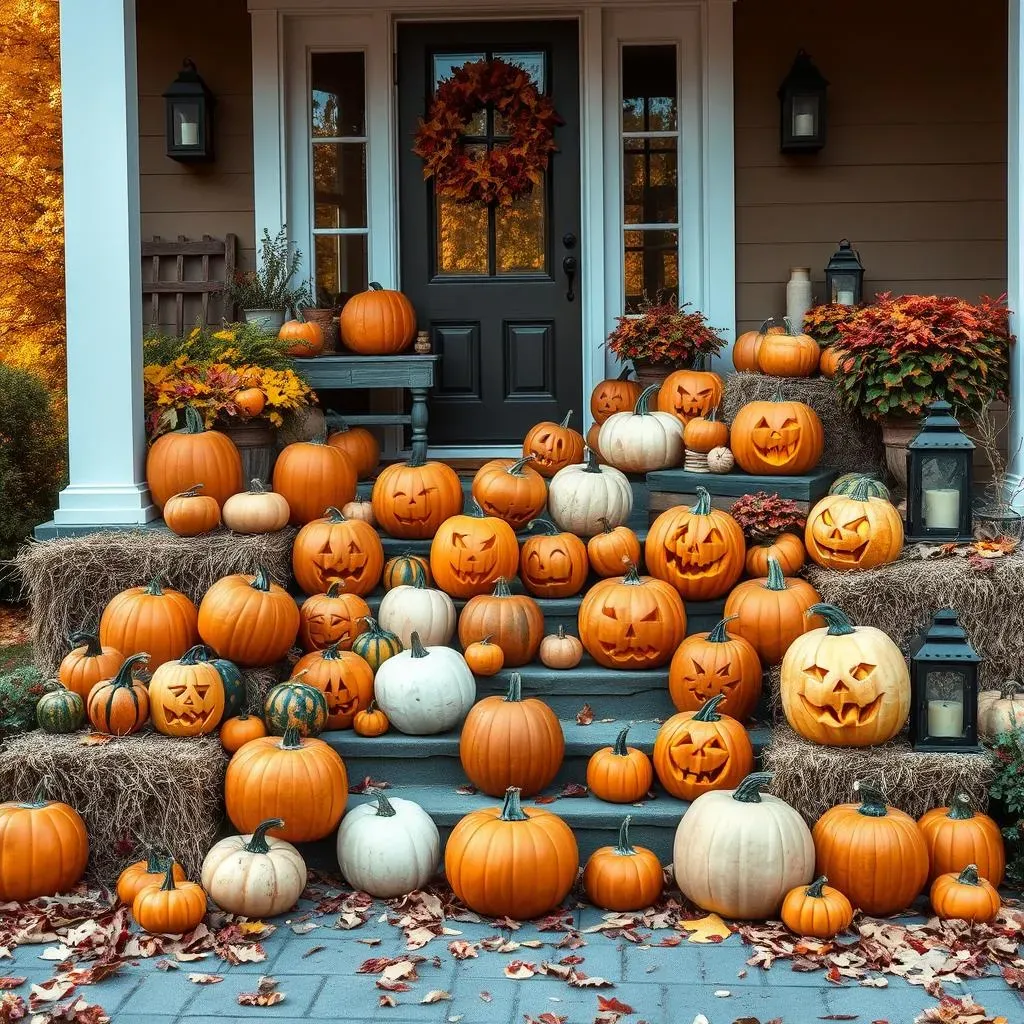
Okay, so you’ve got your amazing carved pumpkins, now where do they go? Don't just plop them down anywhere! Think of your outdoor space as a stage, and your pumpkins are the stars. Your porch is the perfect place to create a welcoming display. Line your steps with different sized pumpkins, maybe even mix in some gourds and colorful leaves for an extra fall touch. I like to use hay bales to add some height, stacking the pumpkins on top for a tiered effect. It's like a pumpkin pyramid, but way cooler. If you have a garden, scatter your pumpkins among your plants, creating a spooky scene that feels natural and organic. Don't be afraid to get creative, there are no rules here!
One thing I always do is consider the overall layout. I think about how the pumpkins will look from the street, from the sidewalk, and from my front door. I try to create a visual flow, leading the eye to different parts of the display. It’s not just about putting pumpkins out; it’s about creating an experience. Use different heights, sizes, and colors to make it visually interesting. And don't forget about the lighting – that's where the magic really happens at night.
Theme It Up: Fall, Spooky, and Everything In Between
Want to take your display to the next level? Think themes! You can create a classic fall scene with pumpkins, corn stalks, and mums. It’s like a little harvest festival on your porch. Or, if you're going for spooky, bring in some fake spiderwebs, plastic bats, and maybe even a creepy scarecrow. I once did a haunted graveyard theme with tombstones I made from cardboard and it was a huge hit. You can also do a more whimsical display with painted pumpkins, colorful lights, and cute characters. The options are endless, and it really comes down to your creativity and imagination.
Don't be afraid to mix different themes together. Maybe you can do a spooky haunted house on one side and a cute pumpkin patch on the other. The contrast can be really interesting and fun. And remember, it’s not just about the pumpkins. Incorporate other elements like string lights, lanterns, and even some spooky sound effects to create a truly immersive experience. It's your stage, so make it a show!
Display Area | Theme Ideas | Additional Elements |
|---|---|---|
Porch | Classic Fall, Spooky, Whimsical | Hay bales, gourds, fall leaves |
Steps | Tiered Pumpkin Display, Gradient Colors | String lights, lanterns |
Garden | Natural Spooky Scene, Pumpkin Patch | Fake spiderwebs, plastic bats |
General Outdoor | Haunted Graveyard, Whimsical Characters | Cardboard tombstones, colorful lights |
Tips and Tricks for LongLasting Outdoor Pumpkin Carvings
Tips and Tricks for LongLasting Outdoor Pumpkin Carvings
Selecting the Right Pumpkin
Alright, let's talk about picking the perfect pumpkin. Not all pumpkins are created equal, you know? You want one that's firm, with no soft spots or bruises. Those are signs that it's already starting to rot, and it won't last long outside. Give it a good tap; it should sound hollow. And don't just grab the first pumpkin you see. Look for one with a nice, sturdy stem – that's like its lifeline, and it helps keep it fresher longer. I always try to choose a pumpkin that has a flat bottom, so it doesn't wobble around when I put it on display. It's all about setting yourself up for success from the very start.
Also, consider the size and shape based on the design you have in mind. A tall, oblong pumpkin is great for vertical designs, while a round, squat one might be better for a more classic jack-o'-lantern face. And if you're planning a big outdoor display, think about getting a variety of sizes and shapes to create visual interest. It’s like putting together a puzzle; each piece (or pumpkin) plays its part. Don't underestimate the power of a good pumpkin selection – it can make all the difference in how long your carvings last.
Prep Work: Preventing Rotting
Okay, so you've got your perfect pumpkin, now what? The key to making your carving last is all in the prep work. First, you need to clean it out really well. Don’t just scoop out the seeds, scrape the insides until it’s nice and smooth. I like to use a large metal spoon for this, but those pumpkin carving tools work great too. The smoother the inside, the less surface area for mold to grow on. And here's a pro tip: give the inside a good wash with a bit of diluted bleach. It sounds harsh, but it kills any bacteria that might be hanging around, ready to spoil the party.
Once you've cleaned it all out, let it dry completely before you start carving. I usually leave mine upside down on some paper towels for a few hours. This will help prevent the pumpkin from getting too soggy and soft. And this might sound weird but if you have any petroleum jelly at home, rub a thin layer on all the cut surfaces. It acts like a barrier, preventing the pumpkin from drying out too quickly and also helps keep the nasty mold at bay. Think of it like sunscreen for your pumpkin, protecting it from the elements. It’s a bit of extra work, but trust me, it’s worth it.
Step | Description | Why it Helps |
|---|---|---|
Choose a firm pumpkin | Look for no soft spots or bruises | Prevents early rotting |
Clean the inside | Remove all seeds and stringy bits, scrape smooth | Reduces mold growth |
Wash with diluted bleach | A quick rinse with a bleach solution | Kills bacteria |
Dry completely | Let the pumpkin dry before carving | Prevents sogginess and softening |
Apply petroleum jelly | Rub a thin layer on cut surfaces | Prevents drying out and mold |