Table of Contents
Ever wondered how to make your Halloween porch the talk of the neighborhood? It's not just about having the biggest candy stash; it's about the artistry of pumpkin carving! Forget those simple triangle eyes; we're talking about taking your pumpkin game to the next level and creating a display that’s both spooky and spectacular. This isn't just about hacking away at a gourd; it’s about transforming it into a work of art that brings joy, frights, and maybe a little envy. We'll explore easy peasy carving techniques to make your pumpkins pop, learn some seriously cool display hacks, and discover how to make the whole process a blast for everyone. So, grab your carving tools, get ready to get messy, and let's turn your front yard into a "display pumpkin carving for fun" showcase that will have everyone saying, "Wow!" We're not just carving pumpkins; we're crafting memories and maybe a few goosebumps along the way.
Easy Pumpkin Carving Ideas for a Fun Display

Easy Pumpkin Carving Ideas for a Fun Display
Simple Shapes, Big Impact
Okay, so you wanna make your porch look awesome without spending hours wrestling with a pumpkin? I get it. Let's start with the basics: simple shapes. Think circles, triangles, and squares. These aren't boring, trust me! You can arrange them in all sorts of ways to make fun faces or patterns. Imagine a pumpkin with a bunch of different sized circles for eyes, or a bunch of triangles for teeth. They’re quick, they’re easy, and they look fantastic when lit up at night. Don't overthink it, just get those basic shapes going, and you'll be surprised how cool they look.
Another great idea is using cookie cutters. Seriously! Press them firmly into the pumpkin, and then just carve along the edges. Stars, moons, bats – you name it. This is a fantastic way to get clean, consistent shapes without needing to be a master artist. Plus, it’s super fun to see those shapes come to life as you carve them. It’s like a cheat code for awesome pumpkin carving.
Stencils are Your Friend
If you're not feeling like a freehand artist, stencils are your new best friend. You can find tons of free stencils online, or even buy some at the store. Pick out a design you like, tape it to your pumpkin, and trace the lines with a poke tool. Once you have your outline, you can carve away. It's like coloring inside the lines, but with a knife. Stencils help you get more detailed designs without having to worry about messing up. It's a great way to try out a more complex design without the stress. Think about it: spooky ghosts, grinning cats, or maybe even your favorite cartoon character!
And don't think stencils are just for basic designs; you can layer them too. Use a larger stencil for the main shape, then add smaller stencils for details. It's like building your own pumpkin masterpiece, one layer at a time. It's a fantastic way to create something unique without needing to be a pro.
Go Beyond the Face
Who says pumpkins have to have faces? Get creative! Try carving simple patterns all over the pumpkin: polka dots, stripes, zigzags. These look amazing when the light shines through. You could even carve out a bunch of small holes to create a lantern effect. Think about carving out words or simple phrases for an extra touch. The possibilities are endless! It's about thinking outside the box, or in this case, outside the face.
Another idea? Carve out silhouettes! Find a cool image you like, trace it onto the pumpkin, and carve out the background. It's like creating a spooky shadow puppet. This is a really simple way to make your pumpkins look totally unique and stand out from the crowd. It’s all about having fun and experimenting with different ideas. Remember, there are no rules when it comes to pumpkin carving – just have fun!
Idea | Description | Difficulty |
|---|---|---|
Simple Shapes | Circles, triangles, squares | Easy |
Cookie Cutters | Press and carve shapes | Easy |
Stencils | Trace and carve designs | Easy to Medium |
Patterns | Polka dots, stripes, zigzags | Easy to Medium |
Silhouettes | Carve out the background | Medium |
Creative Display Ideas for Your Carved Pumpkins
Creative Display Ideas for Your Carved Pumpkins
Light It Up!
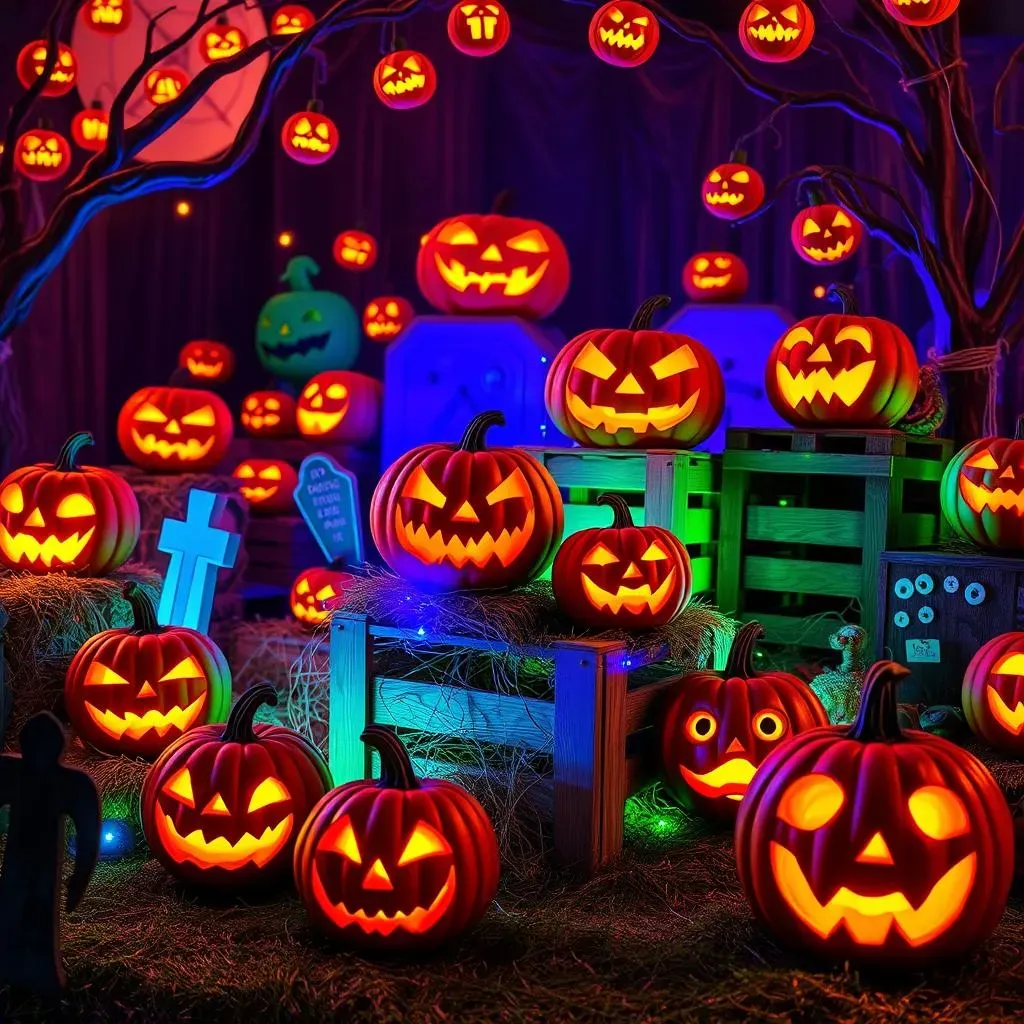
Okay, so you’ve got these awesome carved pumpkins, but now what? Don't just plop them on your porch and call it a day! Let's talk lighting. Forget those boring tea lights; we're going for drama! Battery-powered LED lights are your best friend here. They come in all sorts of colors, and you can even get flickering ones to add an extra spooky touch. Imagine your pumpkins glowing with eerie green or a vibrant purple. You can place them inside the pumpkins, but don't be afraid to experiment with lights around them, too. Think string lights draped around your porch or spotlights shining up from the ground. It's all about creating an atmosphere.
And here’s a fun idea: use different colored lights for different pumpkins. Maybe one has a warm orange glow, while another has a cool blue. It adds a touch of whimsy and makes your display visually interesting. You can even get lights that change color, turning your porch into a mini light show. The key is to play around and see what looks best. Don’t be afraid to go a little overboard – it’s Halloween, after all!
Elevate Your Display
Don't let your pumpkins just sit on the ground! Think about adding some height to your display. Use hay bales, wooden crates, or even old buckets to create different levels. This makes your pumpkins stand out more and adds visual interest. It's like creating a little stage for your gourd creations. You can also use things like tree stumps or even upside-down flower pots. Get creative with what you have around the house. It's all about making your display more dynamic and eye-catching.
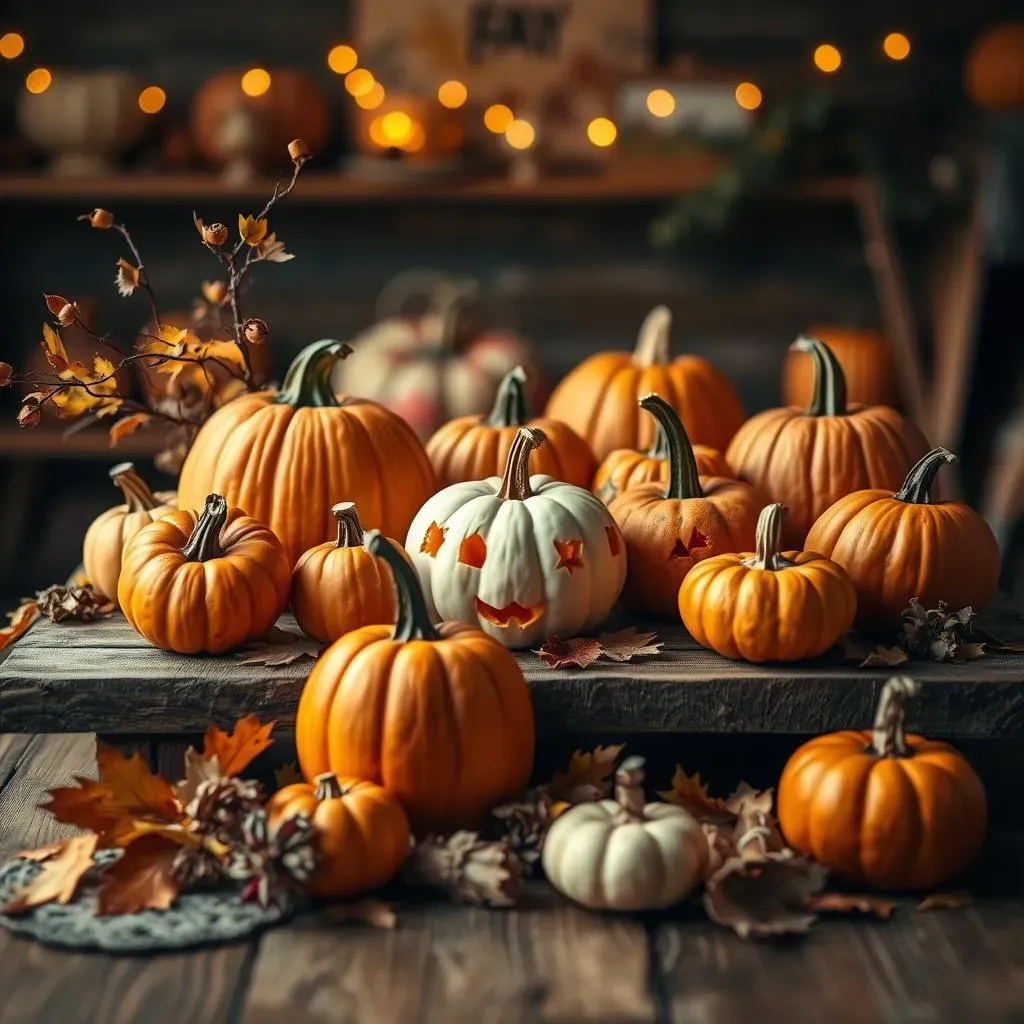
Another cool trick is to use different sizes of pumpkins. A big pumpkin in the center surrounded by smaller ones looks amazing. It creates a sense of scale and makes your display feel more intentional. And don't forget to add other Halloween decorations into the mix. Think spooky cobwebs, plastic spiders, or maybe even a friendly ghost. It's all about creating a cohesive and fun display that tells a story.
Themed Displays
Want to really impress your neighbors? Try creating a themed pumpkin display! Maybe you want to do a monster theme, a spooky graveyard scene, or even a funny cartoon character theme. The possibilities are endless! Once you decide on your theme, make sure your pumpkin designs and decorations match. For example, if you're doing a monster theme, carve out some scary faces and add some fake teeth or googly eyes. If you’re doing a graveyard, use some gray paint and moss, or carve out tombstone shapes. It's all about creating a cohesive look that ties everything together.
Themes are an awesome way to show off your creativity and make your display stand out. You can even get your family involved, and everyone can choose a character or part of the theme to work on. It's a fun way to get everyone into the Halloween spirit and create a unique display that’s personal and engaging. Remember, it's not just about having carved pumpkins; it's about creating an experience.
Display Idea | Description | Effect |
|---|---|---|
Colored Lights | LEDs in different colors | Spooky and vibrant |
Layered Lighting | Inside and around pumpkins | Dramatic and atmospheric |
Elevated Display | Hay bales, crates, buckets | Visually dynamic |
Themed Display | Monsters, graveyards, cartoons | Creative and cohesive |
Making Pumpkin Carving a Fun Activity for Everyone
Making Pumpkin Carving a Fun Activity for Everyone
Safety First, Fun Always
Alright, let’s talk safety, because nobody wants a trip to the ER on Halloween. First off, kids should always have an adult helping them with the carving. Those little pumpkin carving tools can be sharp! Instead of knives, consider using those plastic pumpkin carving kits, they're way safer for little hands. Also, make sure you're carving on a stable surface, not on your lap or a wobbly table. And here's a pro tip: use a small bowl to scoop out the pumpkin guts instead of your hands, it’s less messy and more hygienic. Remember, a safe carving session is a fun carving session. It’s all about making sure everyone can enjoy the process without any boo-boos!
Another super important thing is to keep the area well-lit. You don't want anyone fumbling around in the dark with sharp objects. If you're carving outside at night, make sure you have plenty of lights set up. And don’t forget to wear gloves if you have sensitive skin, pumpkin insides can be a bit irritating sometimes. It's about planning ahead and taking some simple precautions to make sure everyone has a great time. Think of it like setting up a fun obstacle course, but instead of running through it, you’re carving pumpkins in it! Safety is key, but it doesn’t mean we can’t have a blast doing it.
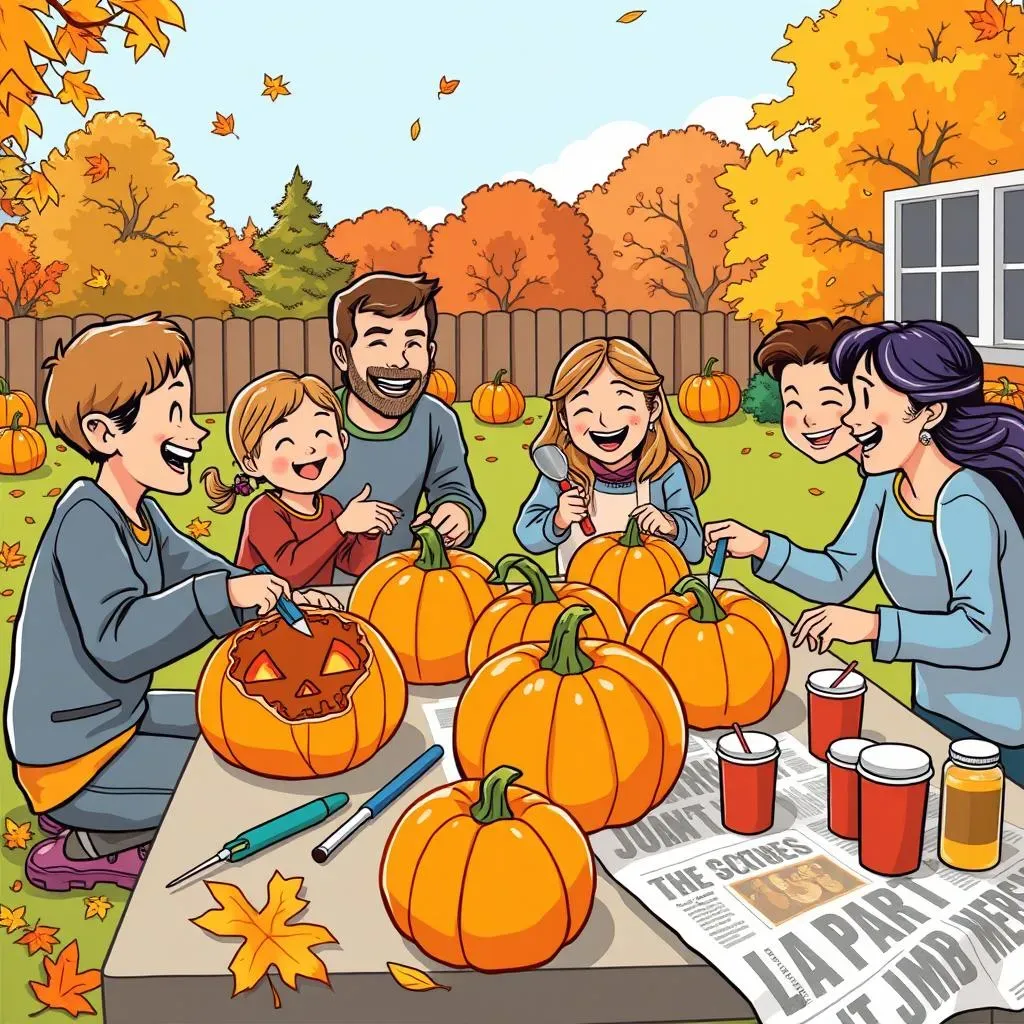
Make it a Party!
Pumpkin carving doesn't have to be a solo mission; it’s way more fun with friends and family! Turn it into a party! Set up a carving station with all the tools, stencils, and pumpkins. Put out some snacks and drinks, play some spooky tunes, and get everyone involved. You can even have a little contest for the best design. It’s a fantastic way to create memories and get everyone into the Halloween spirit. It’s not just about carving pumpkins; it’s about spending time together and having a laugh.
And here’s an idea: have a potluck where everyone brings a dish to share. You can make it a Halloween-themed potluck with spooky snacks and treats. It’s all about creating a fun and festive atmosphere. You can even set up a photo booth with some props and backdrops so everyone can take pictures of their carved masterpieces. Remember, it’s not just about the pumpkins; it’s about the whole experience. It’s about making memories and having a great time together. The more the merrier, right?
Embrace the Mess
Let's be real: pumpkin carving is messy. But that's part of the fun! Don't stress about keeping everything perfectly clean. It’s okay to get your hands dirty. It's okay to have pumpkin guts everywhere. It's all part of the experience. I mean, who doesn't love a good messy project? It’s about letting go and enjoying the process. Think of it like a mud pie party, but with pumpkins. It's a chance to unleash your inner kid and have some good old-fashioned fun.
And here’s a tip: lay down some newspaper or plastic tablecloths before you start carving. This will make cleanup way easier. You can also set up a designated area for all the pumpkin guts. And don’t be afraid to get creative with the mess. You can even use the pumpkin seeds to make a snack. It’s all about making the most of the experience and enjoying the process, mess and all. It's like a badge of honor showing you really dove into the fun. So, embrace the chaos and have a blast!
Tip | Description | Why it's fun |
|---|---|---|
Plastic Tools | Use plastic carving kits | Safer for little hands |
Carving Party | Carve with friends and family | More social and engaging |
Embrace the Mess | Don't stress about the mess | More relaxed and enjoyable |
Potluck | Bring snacks and dishes | Festive and collaborative |
Tips for a Safe and Successful Pumpkin Carving Display
Tips for a Safe and Successful Pumpkin Carving Display
Prep Your Pumpkins
Okay, so you're ready to carve, but hold up! Let's make sure we're starting with the right canvas. First off, pick pumpkins that are firm and have a nice flat bottom – nobody wants a wobbly pumpkin, right? Give them a good wash to get rid of any dirt or grime. Then, before you even think about carving, grab a marker and draw out your design. This way, you have a plan, and you're not just hacking away randomly. It's like sketching out a picture before you start painting – it helps you avoid mistakes and keeps things on track. Plus, it makes the whole carving process much smoother and less stressful.
And here's a little secret: use a spoon or a scoop to scrape out all the pumpkin guts. It's way more efficient than using your hands, and it keeps the mess contained. Make sure you get all the seeds and stringy bits out, because nobody wants a moldy pumpkin display. It’s all about taking the time to prep properly, so your pumpkins look their best for as long as possible. Think of it like setting the stage before a big performance – the better the prep, the better the show!
Keep it Lit and Lasting
Alright, you’ve got your pumpkins carved, they look amazing, but how do you keep them looking that way? First off, use battery-powered LED lights instead of candles. They're safer, they last longer, and they won't dry out your pumpkins. Plus, you can get them in all sorts of cool colors and flickering effects. It’s like upgrading from a flip phone to a smartphone; it’s just a better experience all around. Make sure to check the batteries regularly, so your display stays bright and spooky all night long.
Another pro tip: you can extend the life of your carved pumpkins by spraying them with a mixture of water and a little bit of bleach. This will help prevent mold and keep your pumpkins looking fresh for longer. It's like giving your pumpkins a little spa treatment. And here’s another idea: don’t leave your carved pumpkins out in the sun all day. The heat will make them dry out and wilt faster. Find a shady spot for them, or bring them inside during the day. It’s about taking some simple steps to make sure your hard work doesn't go to waste. Think of it like taking care of a delicate plant – with a little bit of care, it will thrive!
Tip | Description | Why it matters |
|---|---|---|
Firm Pumpkins | Choose solid, flat-bottomed pumpkins | Prevents wobbling and makes carving easier |
Pre-Draw Designs | Sketch your design before carving | Helps avoid mistakes and keeps you on track |
LED Lights | Use battery-powered lights | Safer, longer-lasting, and more versatile |
Bleach Spray | Spray with water and bleach mix | Prevents mold and extends pumpkin life |