Table of Contents
Ever feel like your Halloween pumpkins are just... blah? Like they're missing that certain *something*? You're not alone. We've all been there, staring at a blank pumpkin, wondering how to make it more than just a toothy grin. This year, we're ditching the basic triangle eyes and diving headfirst into the world of "display pumpkin carving for creativity." Think beyond the simple jack-o'-lantern. I'm talking about transforming gourds into works of art, showstoppers that'll make your neighbors do a double-take. We'll explore stencils that range from cute to creepy, techniques to get those crisp lines, and ideas to arrange your pumpkins into a display that screams "Halloween goals." So grab your carving tools, maybe a pumpkin spice latte, and let's get ready to turn those ordinary pumpkins into extraordinary Halloween masterpieces. Get ready to unleash your inner artist and make this Halloween the most creative yet! We'll show you how.
Unleash Your Inner Artist: Creative Pumpkin Carving Designs
Unleash Your Inner Artist: Creative Pumpkin Carving Designs
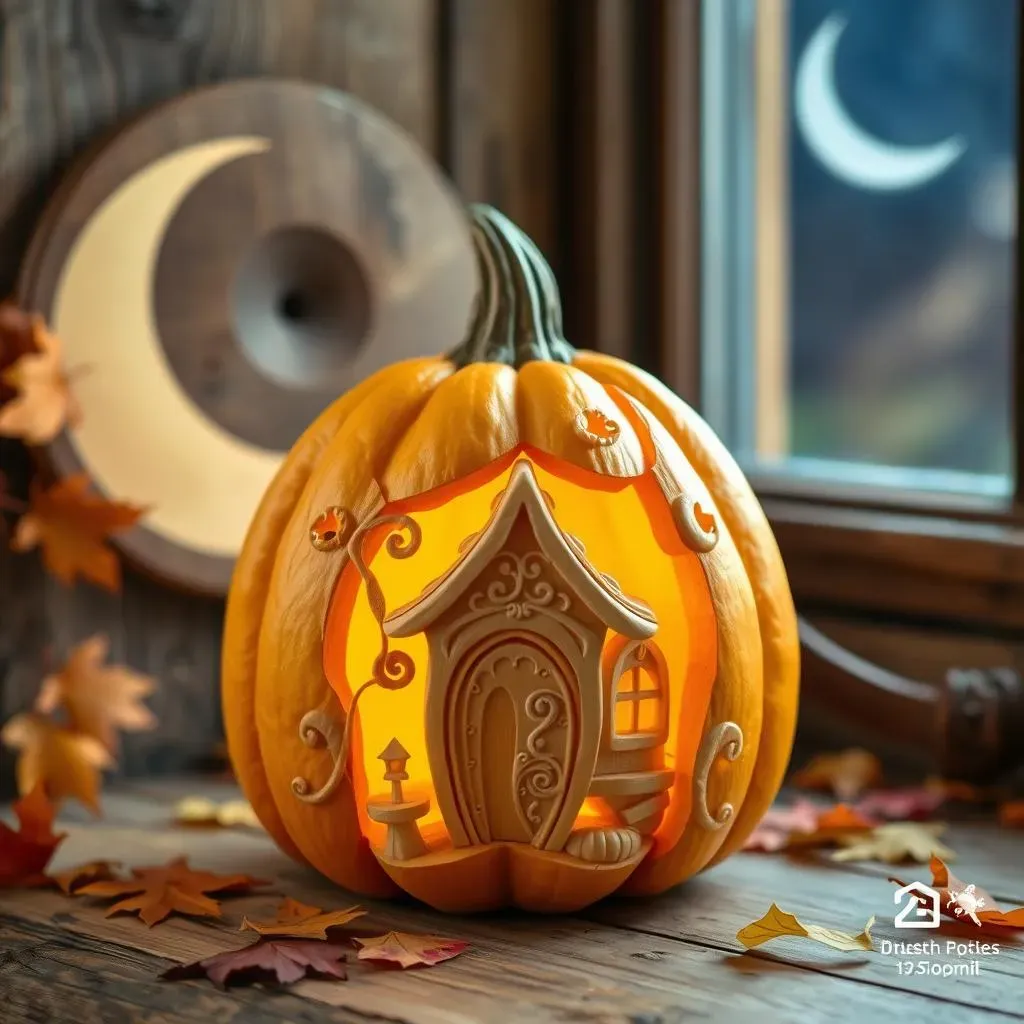
Okay, so you're ready to ditch the same old scary face, right? Good, because there's a whole universe of pumpkin carving ideas out there just waiting to be unleashed. Think of your pumpkin as a blank canvas, not just something to hold a candle. We're not just making jack-o'-lanterns; we're crafting mini-masterpieces. Forget the usual ghosts and goblins, let's explore some truly unique designs. How about a spooky forest scene, or maybe a whimsical fairy house? Or, if you're feeling a bit geeky, try carving your favorite video game character or a sci-fi symbol. The key here is to let your imagination run wild, and don't be afraid to experiment. This is where the fun begins, where you start to see that your pumpkin can be whatever you want it to be.
StepbyStep: Display Pumpkin Carving Techniques
StepbyStep: Display Pumpkin Carving Techniques
Gather Your Arsenal
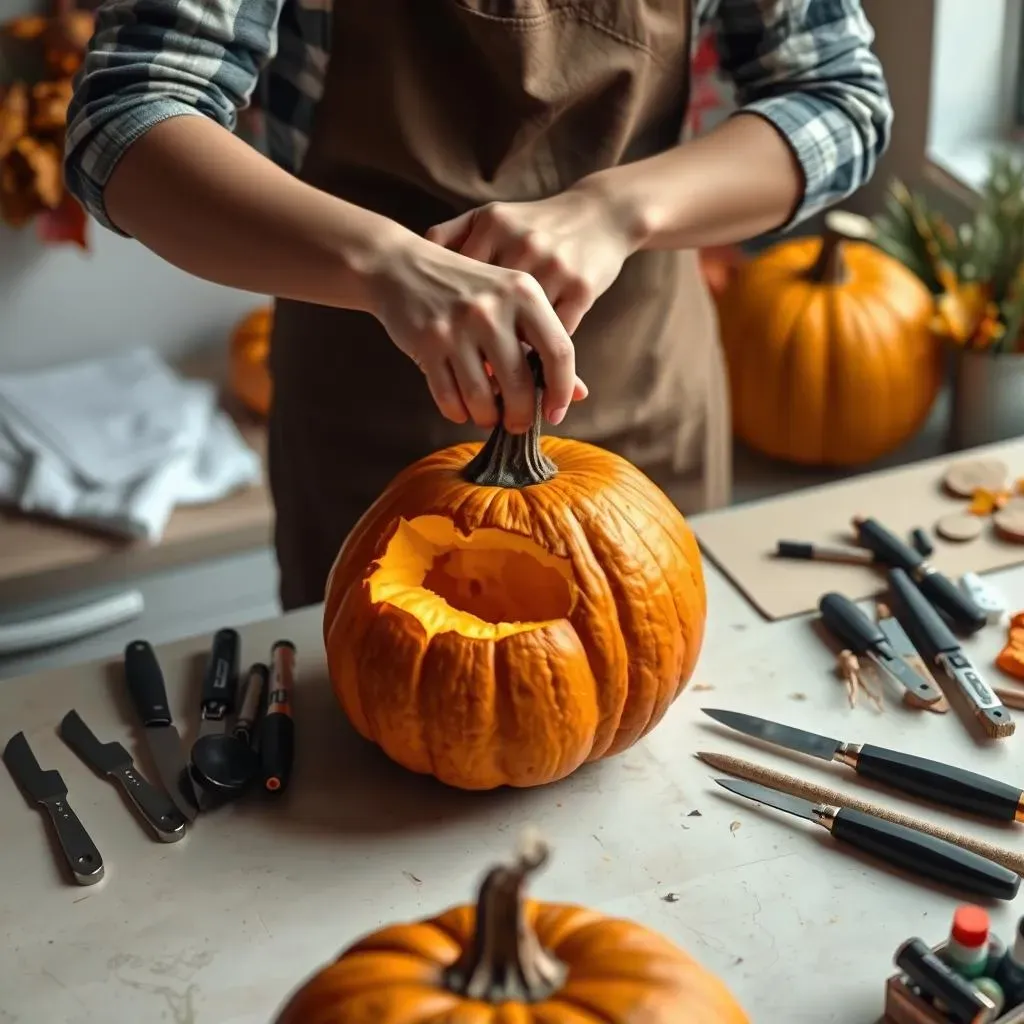
Alright, so you've got a killer design in mind, now what? It's time to get down to the nitty-gritty of carving, and that means having the right tools. You wouldn't try to build a house with just a spoon, would you? Same goes for pumpkin carving. Forget those flimsy plastic kits; we're going pro. Think sturdy serrated knives for the big cuts, smaller detail knives for the intricate work, and scoops for clearing out the pumpkin guts. A good marker is essential for transferring your design, and don't forget a poking tool to get those tricky bits out. And yes, gloves are a must unless you want pumpkin goo under your nails for a week. Trust me on this one.
Before you even think about making the first cut, make sure your pumpkin is clean and dry. This is key to making sure your stencil sticks and your lines are crisp. I learned this the hard way, with a stencil that slid halfway through my carving. It wasn't pretty. Once your pumpkin is prepped, tape your stencil firmly in place. Then, using your poking tool, carefully poke holes along the stencil lines. This creates a guide for your knife and makes sure that your design looks exactly the way you want it. It's like creating a connect-the-dots for your carving adventure, and it’s a total game-changer.
Tool | Use | Why It's Important |
|---|---|---|
Serrated Knife | Large cuts and removing sections | Provides control and makes clean cuts |
Detail Knife | Fine details and intricate work | Allows for precise carving |
Scoop | Removing pumpkin insides | Speeds up the messy part |
Marker | Transferring designs | Ensures accurate carving |
Poking Tool | Creating stencil guides | Makes carving easier and more precise |
The Art of the Cut
Now, for the actual carving part. Take a deep breath, and remember, this is supposed to be fun! Start by gently sawing along the poked lines of your stencil. Don’t rush, and don’t force the knife. Let the blade do the work. For smaller, more intricate cuts, use your detail knife. Remember, it's easier to take away more than it is to add back, so go slow and steady. I like to take breaks here and there, just to make sure I'm not getting carried away. It’s easy to get so involved you might end up carving off a bit more than you intended. Take your time, and admire the progress as you go.
Once you’ve finished carving your design, it’s time to clean up. Use your poking tool to push out any stubborn bits of pumpkin. Then, give your pumpkin a quick rinse inside and out to remove any seeds or pulp. This will help it last longer and keep it from getting too slimy. You can also use a bit of petroleum jelly on the cut edges to keep them from drying out. This is a trick I learned from a professional pumpkin carver, and it really does make a difference. It keeps your masterpiece looking fresher for longer, and that's what we all want, right?
- Slow and steady wins the race
- Don't force the knife
- Take breaks to avoid mistakes
- Clean your pumpkin for a longer life
Making a Scene: Creative Display Ideas for Your Carved Pumpkins
Making a Scene: Creative Display Ideas for Your Carved Pumpkins
Setting the Stage
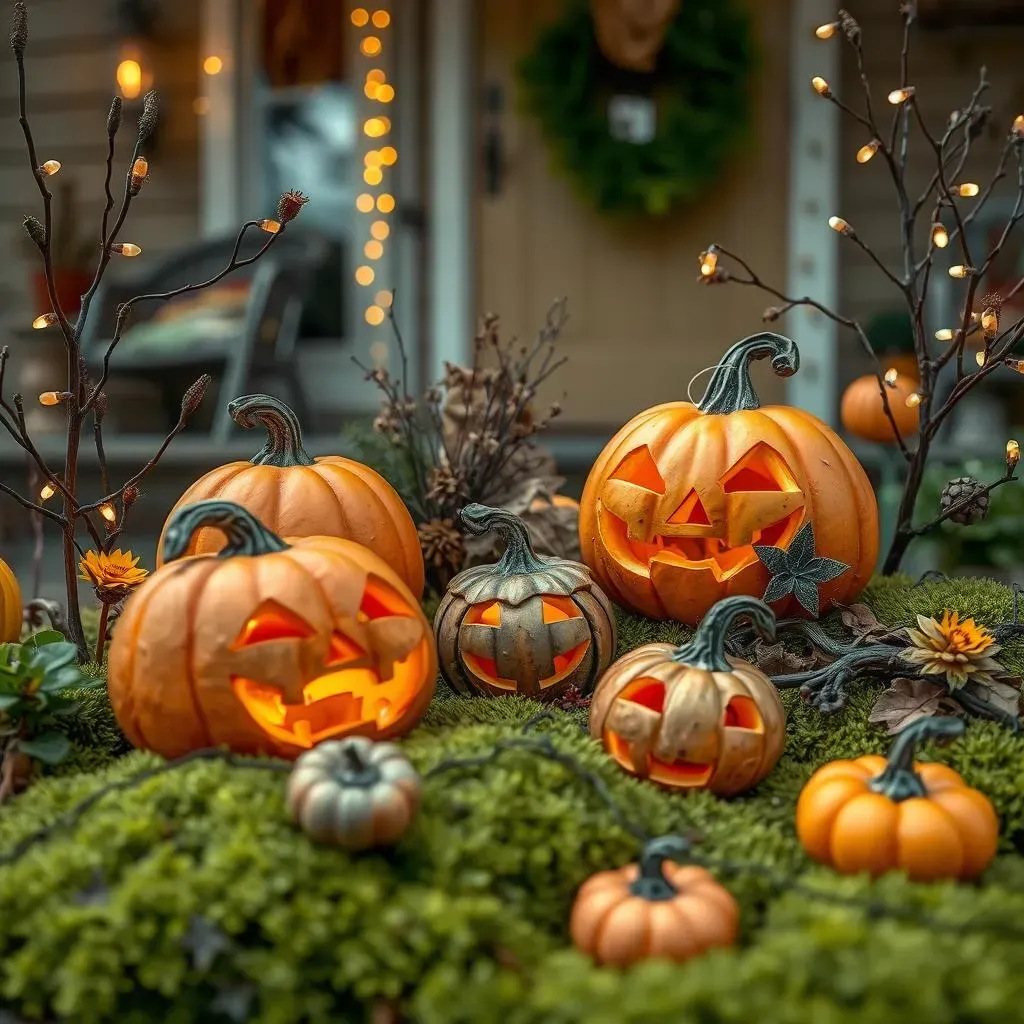
Alright, so you've poured your heart and soul into carving these amazing pumpkins, now what? Just plopping them on the porch isn't going to cut it, right? We need to think bigger, like we're designing a theatrical set for our pumpkin stars. The key here is to create a scene that tells a story. Think about using different heights and levels to make your display more visually interesting. I like to use old crates, hay bales, or even overturned buckets to add some dimension. Imagine a spooky graveyard scene with tombstones and cobwebs, or maybe a whimsical fairy garden with moss and twinkle lights. The possibilities are endless, and it’s all about layering and creating depth. Don't be afraid to get a little theatrical with it.
Consider the lighting, too. A single porch light isn’t going to cut it. We need to think about how we can use light to enhance our pumpkins and create a mood. Battery-operated tea lights are great for creating a soft, flickering glow inside the pumpkins. You could also use colored lights to add an extra layer of atmosphere. I once used purple and green lights to create a really eerie vibe for a haunted house theme, and it was a total hit. Remember, lighting is like the makeup for your display, it can make or break the whole look. And don’t forget about adding some natural elements like leaves, branches, or even some dried corn stalks to tie it all together.
Element | Purpose | Example |
|---|---|---|
Height | Adds visual interest | Crates, hay bales |
Lighting | Creates mood and enhances pumpkins | Tea lights, colored lights |
Natural Elements | Ties the display together | Leaves, branches |
Themes and Storytelling
Let's talk themes. A theme can really elevate your display from just a bunch of pumpkins to a cohesive storytelling experience. Think about what kind of vibe you want to create. Are you going for spooky, whimsical, or maybe a bit of both? Once you have your theme, everything else will fall into place. For example, if you’re going for a spooky theme, you could create a haunted forest scene with gnarled branches and some spooky sound effects. If you’re feeling more whimsical, think about a fairy garden with moss and flowers surrounding your carved pumpkins. I once created a pirate-themed display using old chests and ropes and it was a huge hit with the kids, so don’t be afraid to get a bit creative.
And remember, the details matter. Adding small touches like cobwebs, fake spiders, or even some spooky sound effects can make a big difference. It’s the little things that really bring your display to life. Think about what kind of story you want to tell with your pumpkins. Are they characters in a play? Are they part of a larger scene? The more you think about the narrative, the more engaging your display will be. I always like to add a little bit of humor to my displays too, because who doesn't love a good laugh with their scares? It's all about making your display unique and memorable.
- Choose a theme to guide your display
- Add small details for impact
- Think about the story you want to tell
- Don't be afraid to get creative and have fun