Table of Contents
Ever looked at those amazing carved pumpkins and thought, "I wish I could do that?" Well, guess what? You totally can! This guide is all about making display pumpkin carving for beginners super easy and fun. Forget the complicated stuff; we're going for cool designs that anyone can pull off. We'll start by picking the perfect pumpkin for your display, because let's face it, a wonky pumpkin can throw off your whole vibe. Then, we'll get into some simple carving techniques that won't leave you frustrated or with a pumpkin that looks like it lost a fight. Finally, we'll chat about how to show off your creation so it looks its best, whether it's on your porch or as a centerpiece. Ready to turn a plain pumpkin into a spooky sensation? Let's get carving!
Choosing Your Pumpkin for Display Carving
Choosing Your Pumpkin for Display Carving
The Shape and Size Matter
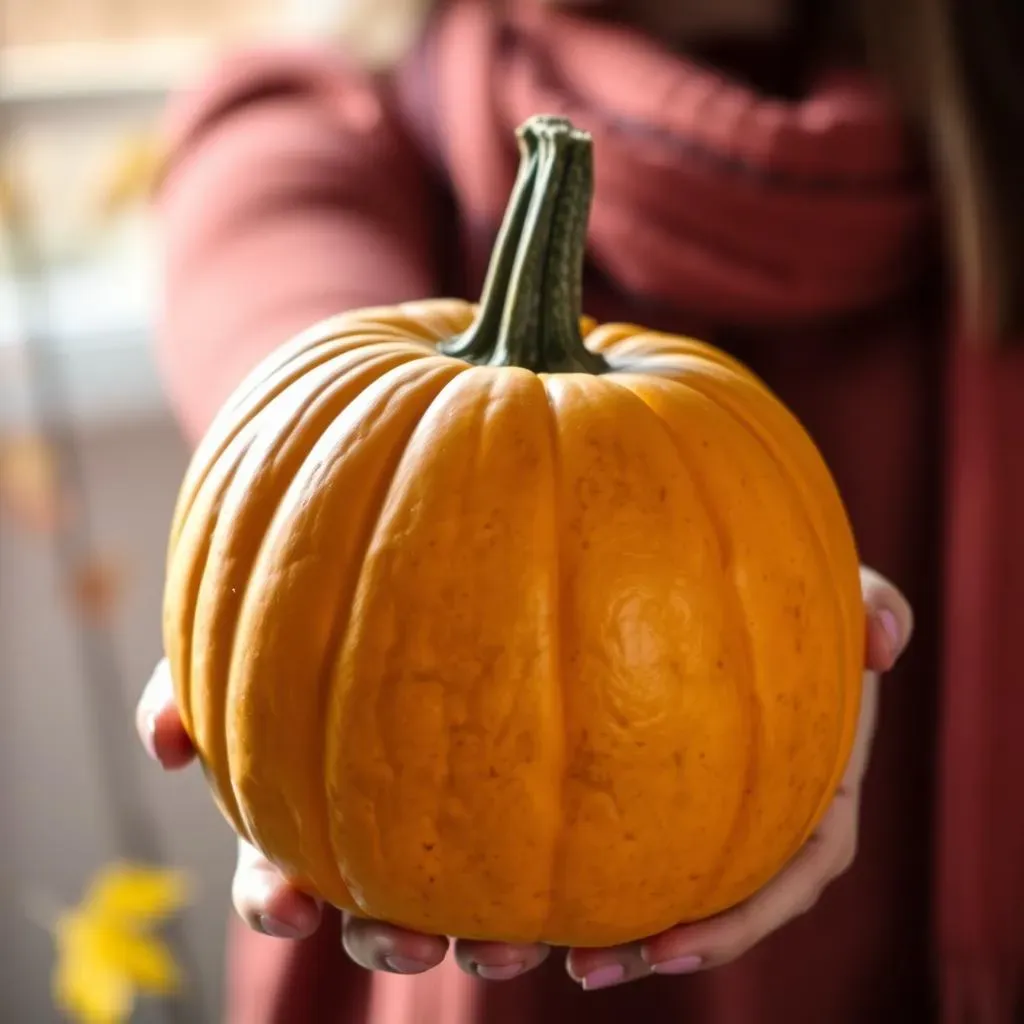
Okay, so you're ready to carve, but first, let's talk pumpkins. Not all pumpkins are created equal, especially when it comes to display carving. You're not just grabbing any old pumpkin; you're selecting a canvas for your masterpiece! Think about the shape. A nice, round pumpkin is great for classic jack-o'-lanterns, but if you're feeling creative, an oval or even a slightly lopsided pumpkin can add character. I once saw someone carve a crooked pumpkin into a witch’s face, and it was awesome. Size also matters. A huge pumpkin might seem impressive, but it can be a pain to carve, especially for beginners. Start with something manageable, maybe about the size of a basketball, and you'll thank me later.
Also, don't forget to check for any soft spots or bruises. Those are a no-go. You want a pumpkin that's firm and feels solid. Think of it like picking an apple; you wouldn’t choose one that’s mushy, right? The same logic applies here. A good, sturdy pumpkin will hold its shape better and last longer, giving you more time to enjoy your spooky creation. And hey, if you're going for a specific design, like a tall, skinny ghost, pick a pumpkin that matches that vibe. It's all about setting yourself up for success from the start.
Pumpkin Attribute | Why It Matters |
|---|---|
Shape | Impacts the design and overall look of the carving. |
Size | Affects carving difficulty and display space needs. |
Firmness | Ensures the pumpkin lasts longer and holds its shape well. |
Stem and Surface Check
Don't skip over the stem when you're pumpkin shopping! A strong, sturdy stem is a good sign that your pumpkin is healthy and hasn't been sitting around for too long. It's like the pumpkin's little handle, and you want it to be firmly attached. Plus, it adds a bit of extra character, especially if it's got a cool curl or twist. I remember one year, I picked a pumpkin with a super long, crooked stem, and it looked like a witch’s nose after I carved it – totally unplanned, but totally awesome! Now, run your hands over the surface. You're looking for a smooth, even canvas. Any big bumps or weird textures might make carving a little tricky. Small imperfections are fine, but avoid pumpkins with large, uneven surfaces.
Also, give it a gentle tap. A good pumpkin will sound hollow, which means it's ripe and ready for carving. If it sounds dull or thuddy, it might be a bit too dense or not quite ready. You're aiming for that Goldilocks zone – not too hard, not too soft, just right. And while you're at it, give it a good once-over for any signs of rot or mold. You don't want to bring a pumpkin home that's going to start smelling funky a few days after you carve it. Remember, we're going for a spooky display, not a smelly one! So, take your time, be choosy, and you'll find the perfect pumpkin for your carving adventure.
Easy Carving Techniques for Beginners
Easy Carving Techniques for Beginners
Tools of the Trade
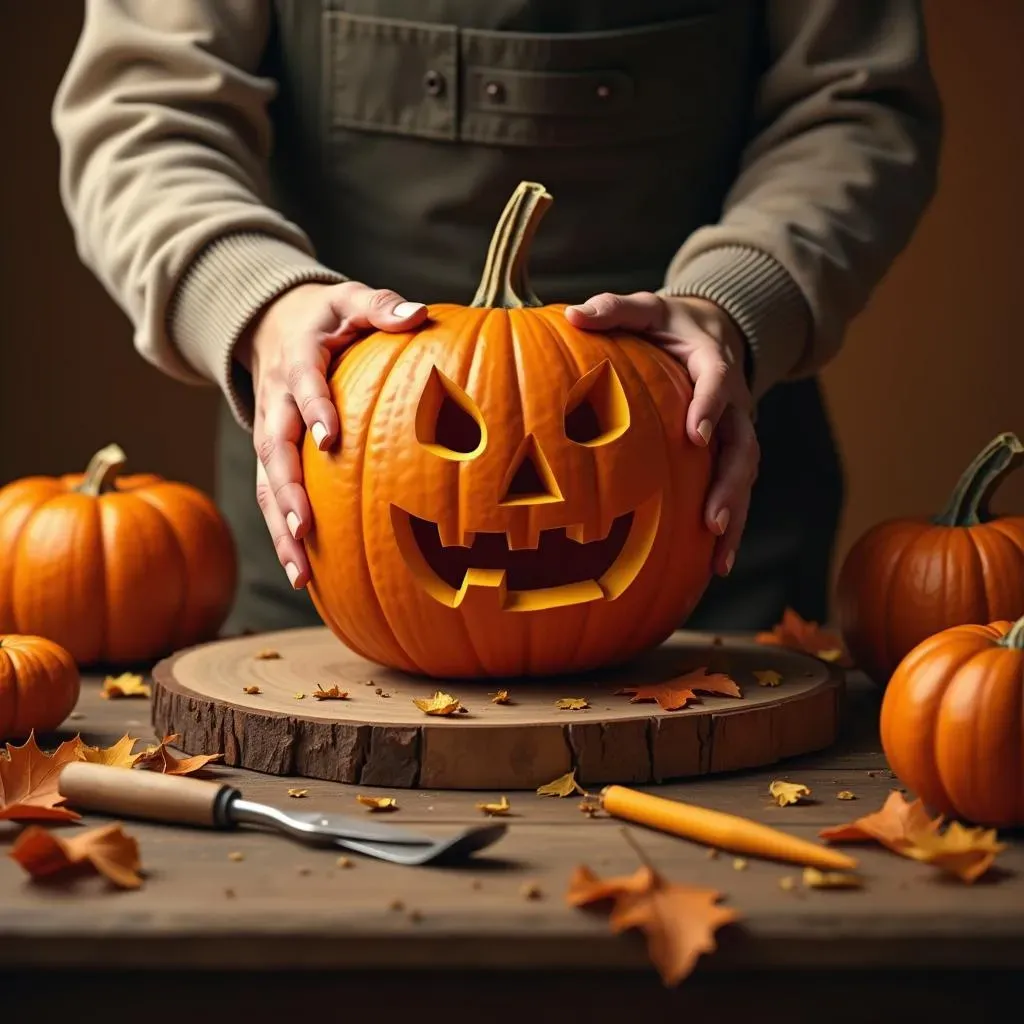
Alright, so you've got your perfect pumpkin, now let's talk tools. You don't need a fancy surgeon's kit to get started with display pumpkin carving for beginners. In fact, you can do a lot with just a few basic items. A good serrated knife, like a small kitchen knife or a pumpkin carving saw, is a must. It's way easier to cut through the pumpkin's tough skin with those jagged edges. I remember trying to use a regular butter knife once, and it was a total disaster – the pumpkin won, and I ended up with a sore hand! You'll also want a sturdy spoon or scoop for getting all those slimy pumpkin guts out. Trust me, that part is way less fun than it looks. And lastly, grab a marker. You can use a regular permanent marker or a dry-erase marker if you want to be able to make changes to your design. This way you can sketch out your design on the pumpkin before you start cutting.
Now, if you're feeling fancy, you can grab a cheap pumpkin carving kit from any store. They usually come with a few different saws and scrapers, which can make things a bit easier. But honestly, you don't need all the bells and whistles. It's more about the technique than the tools themselves. Think of it like cooking; a chef can make a gourmet meal with a simple pan, and you can carve an awesome pumpkin with just a few basic tools. It's all about knowing how to use them. So, before you start, make sure you’ve got a good knife, a spoon, and a marker, and you'll be ready to rock.
Tool | Why You Need It |
|---|---|
Serrated Knife or Pumpkin Carving Saw | For cutting through the pumpkin's tough skin. |
Spoon or Scoop | For removing the pumpkin guts. |
Marker | For drawing your design on the pumpkin. |
Simple Cuts, Big Impact
When it comes to display pumpkin carving for beginners, the key is to keep it simple. You don't need to try and carve a detailed portrait of your cat on your first try. Start with basic shapes like triangles, circles, and squares. These shapes are easy to cut and can be combined to create all sorts of cool designs. For example, a simple triangle can be a spooky eye, a zig-zag can be a creepy mouth, and a circle can be a cute nose. I remember when I first started, I was so intimidated by all the fancy designs. But then I realized that even simple cuts can look really awesome if you arrange them well. It's like building with LEGOs; start with the basic pieces and you can create anything you imagine.
Also, remember to cut slowly and carefully. You don’t want to slip and end up with a wonky eye or a mouth that looks like it’s melting. And don't be afraid to make mistakes! It's just a pumpkin, and it's supposed to be a little spooky and imperfect. Carving is like any other skill; you'll get better with practice. So, take your time, have fun, and don't stress about making it perfect. The goal is to create something that you're proud of, and something that looks cool on your porch. So, go for those simple cuts, and let your creativity shine. Remember, it’s all about having fun and making something unique, not about trying to be a professional pumpkin artist.
The Stencil Secret
If you're feeling a little unsure about drawing your design freehand, stencils are your best friend. You can find tons of free printable stencils online, or you can buy a stencil kit at the store. Using a stencil is like having a cheat sheet for your carving design. Just tape the stencil to your pumpkin and poke holes along the lines with a pin or a fork. This will create a dotted line on your pumpkin that you can then follow with your knife. It's like connect-the-dots, but with a spooky twist. I once used a stencil of a bat and it turned out amazing, even though I'm not a great artist. It’s a great way to get a clean and professional look without having to be a master carver.
Another great tip is to start by cutting out the smallest details first. This will make it easier to cut out the larger pieces later. Also, don't try to cut all the way through the pumpkin in one go. Start by scoring the surface of the pumpkin, then gradually cut deeper until you cut all the way through. It's like peeling an orange; you wouldn't try to peel it all at once, right? You'd make small cuts first. The same principle applies here. By taking your time and using a stencil, you can create a great looking pumpkin, even if you're a beginner. So grab a stencil, poke some holes, and let the carving begin. Remember, it’s all about having fun and making something that you’re proud to show off.
Displaying Your Carved Pumpkin Masterpiece
Displaying Your Carved Pumpkin Masterpiece
Location, Location, Location
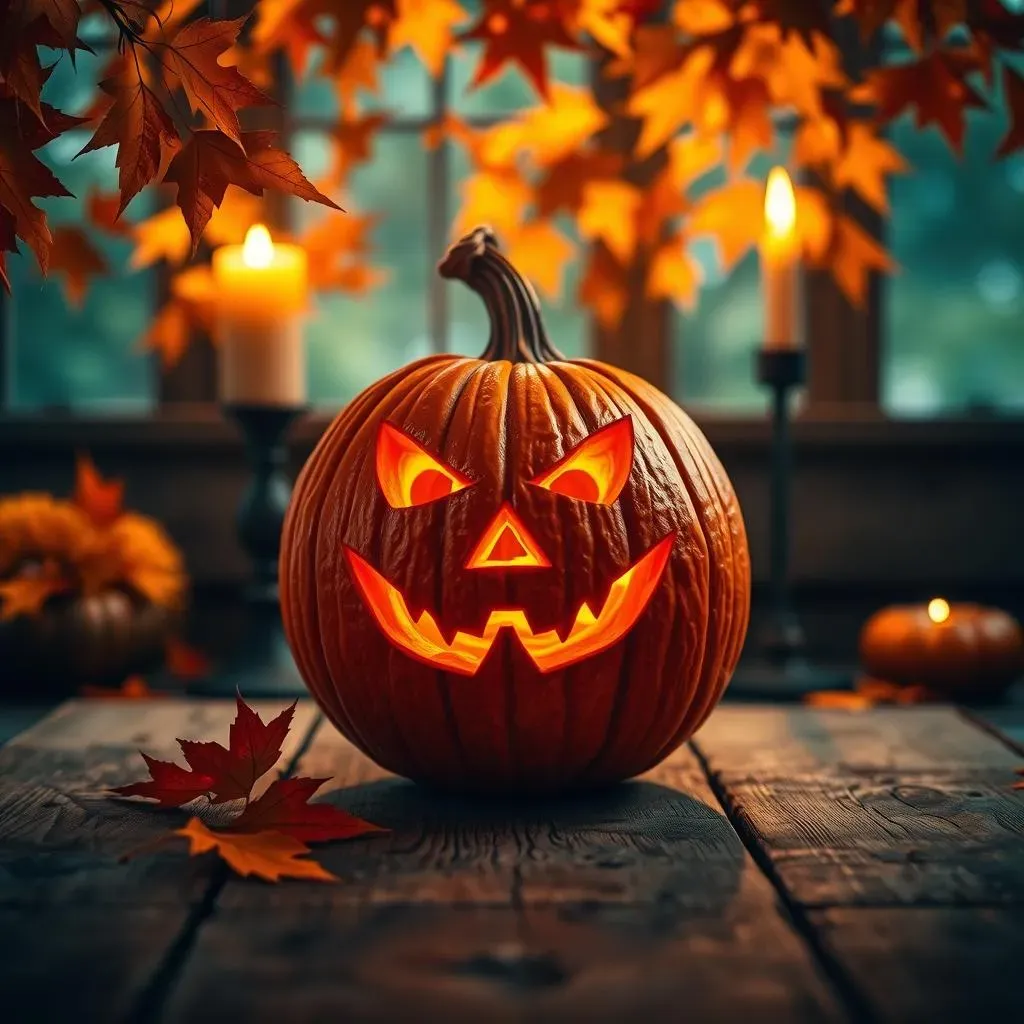
Okay, you’ve poured your heart and soul (and maybe some pumpkin guts) into carving your masterpiece, now it's time to show it off! Where you put your pumpkin can make all the difference. Think about visibility and safety. A well-lit porch is a classic spot, but consider other areas too. A windowsill, a garden wall, or even a table inside can work, depending on your style. I remember one year, I put my pumpkin on a hay bale by the front door, and it looked super festive! The key is to make sure it's somewhere people will actually see it. Also, think about the weather. If it's going to rain, you might want to choose a spot that’s covered or bring your pumpkin inside. No one wants a soggy, sad-looking pumpkin.
And hey, don’t be afraid to get creative with your display. You can add other decorations like hay bales, corn stalks, or even some spooky lighting. I've seen people create entire Halloween scenes with their pumpkins as the centerpiece, it's really awesome! It’s all about creating an atmosphere that complements your carving. So, take a walk around your house and yard, think about the best spot for your pumpkin, and get ready to make it shine. Remember, your pumpkin is a star, and it deserves a place where it can be admired by all.
Display Factor | Consideration |
|---|---|
Visibility | Choose a spot where your pumpkin can be easily seen. |
Weather | Protect your pumpkin from rain and harsh conditions. |
Ambiance | Enhance your display with other decorations and lighting. |
Light It Up
Okay, so your pumpkin is in the perfect spot, but now it needs some light! A simple candle inside is the classic choice, and it creates that eerie, flickering glow that’s perfect for Halloween. But you have to be super careful with real candles, make sure they are not going to fall over. I remember once we almost started a small fire because the candle fell over, so now I stick with battery-powered lights. Battery-operated tea lights or small LED lights are a great alternative. They’re safe, they last longer, and they come in all sorts of colors. You can even get color-changing lights that cycle through different colors, it looks really cool at night!
You can also get creative with how you light up your pumpkin. Try placing the light at the back of the pumpkin to create a silhouette effect, or use different colored lights to match your design, if you are using more than one pumpkin. I saw someone put a blue light inside their ghost pumpkin and it looked amazing. The key is to experiment and see what looks best. Think about what kind of mood you want your pumpkin to create and choose your lights accordingly. Whether you go for the classic candle glow or a modern LED light, adding some light will bring your carved pumpkin to life and make it a showstopper. Remember, it's all about making your pumpkin shine, literally!
Keep It Fresh
Alright, so you’ve got your pumpkin carved and glowing, but now you want to make it last. Carved pumpkins tend to get a bit sad and mushy after a few days, but there are ways to keep them fresh for longer. The first rule is to keep it cool. If you’re not displaying your pumpkin, store it in a cool, dry place, like a garage or basement. You can even put it in the fridge if you have enough space. I've heard people say that soaking your pumpkin in water can help, but I have never tried that. Also, keep it away from direct sunlight, because that can make it dry out faster.
Another trick is to spray the inside and outside of your pumpkin with a mixture of water and a little bit of bleach. This can help to kill any mold or bacteria that might be growing on your pumpkin. You can also spray it with a clear sealant to help lock in the moisture and keep it from drying out. It’s like giving your pumpkin a little spa treatment! Remember, your pumpkin is a work of art, and you want it to last as long as possible. So take the time to keep it fresh, and you’ll be able to enjoy your spooky creation for days to come. And hey, if your pumpkin starts to look a little sad, don't worry about it. Just enjoy it while it lasts, because that's what Halloween is all about.