Table of Contents
Halloween's just around the corner, and what better way to celebrate than by creating some truly spectacular jack-o'-lanterns? This year, ditch the simple triangle eyes and goofy grins. We're diving headfirst into the world of detailed pumpkin carving ideas for Halloween! Get ready to transform ordinary pumpkins into breathtaking works of art. This article is your ultimate guide, taking you from basic carving techniques to advanced designs that will leave your neighbors speechless. We'll explore a range of intricate patterns, from spooky and scary to cute and whimsical, offering step-by-step instructions and helpful tips along the way. Whether you're a seasoned pumpkin carver or a complete beginner, you'll find inspiration and practical advice to create the most impressive jack-o'-lantern on the block. Prepare to unleash your creativity and discover the joy of transforming a simple pumpkin into a stunning Halloween centerpiece. Let's get carving!
Mastering the Art of Detailed Pumpkin Carving for Halloween

Mastering the Art of Detailed Pumpkin Carving for Halloween
Getting Started: Tools and Techniques
So, you're ready to take your pumpkin carving to the next level? Awesome! First things first: gather your tools. You'll need more than just a flimsy kitchen knife. Think sharp carving tools – a good pumpkin carving kit is a great investment. Check out our guide on advanced pumpkin carving tools for some suggestions. Beyond the tools, the key is precision. Practice makes perfect, so don't be afraid to experiment on a few practice pumpkins before tackling your masterpiece. Start with simpler designs to get a feel for the tools and learn how to transfer your patterns onto the pumpkin surface effectively. Remember, even the most intricate designs start with a basic outline and gradually build up in detail.
Next, consider your design. Will you freehand it, or use a stencil? Stencils are great for beginners, providing a guide to follow. Many free printable stencils are available online, but you can also create your own using cardstock. For more advanced designs, you might consider complex pumpkin carving stencils or even try freehanding – it’s incredibly rewarding! Once you’ve chosen your design, carefully transfer it onto your pumpkin using a pen or marker. This is where patience is key. Take your time; accuracy is essential for a clean, professional-looking result.
Tool | Purpose |
|---|---|
Sharp carving knives | Cutting and shaping |
Small detail tools | Etching and fine carving |
Scoop | Removing pumpkin guts |
Transferring Designs and Initial Cuts
Now that you have your design and tools ready, it's time to transfer your chosen design onto the pumpkin's surface. If using a stencil, tape it securely to the pumpkin. Then, carefully trace the outline with a pen or marker. For freehand designs, gently sketch your design directly onto the pumpkin. Remember, it’s always a good idea to practice your design on paper before you start carving, especially if you're using a freehand approach. You can even find inspiration for detailed pumpkin carving ideas online to help you get started.
Once your design is transferred, it's time for the initial cuts. Start with the larger sections of your design. Use your largest carving tool to cut out these areas. Remember to take your time and make slow, deliberate cuts. Rushing can lead to mistakes and damaged tools, and nobody wants that. This step sets the foundation for your detailed work, so accuracy is paramount. For really impressive results, consider exploring advanced Halloween pumpkin designs for inspiration.
- Lightly trace the design.
- Begin with larger sections.
- Use slow, controlled cuts.
Amazing Detailed Pumpkin Carving Ideas for Halloween: Designs & Techniques
Amazing Detailed Pumpkin Carving Ideas for Halloween: Designs & Techniques
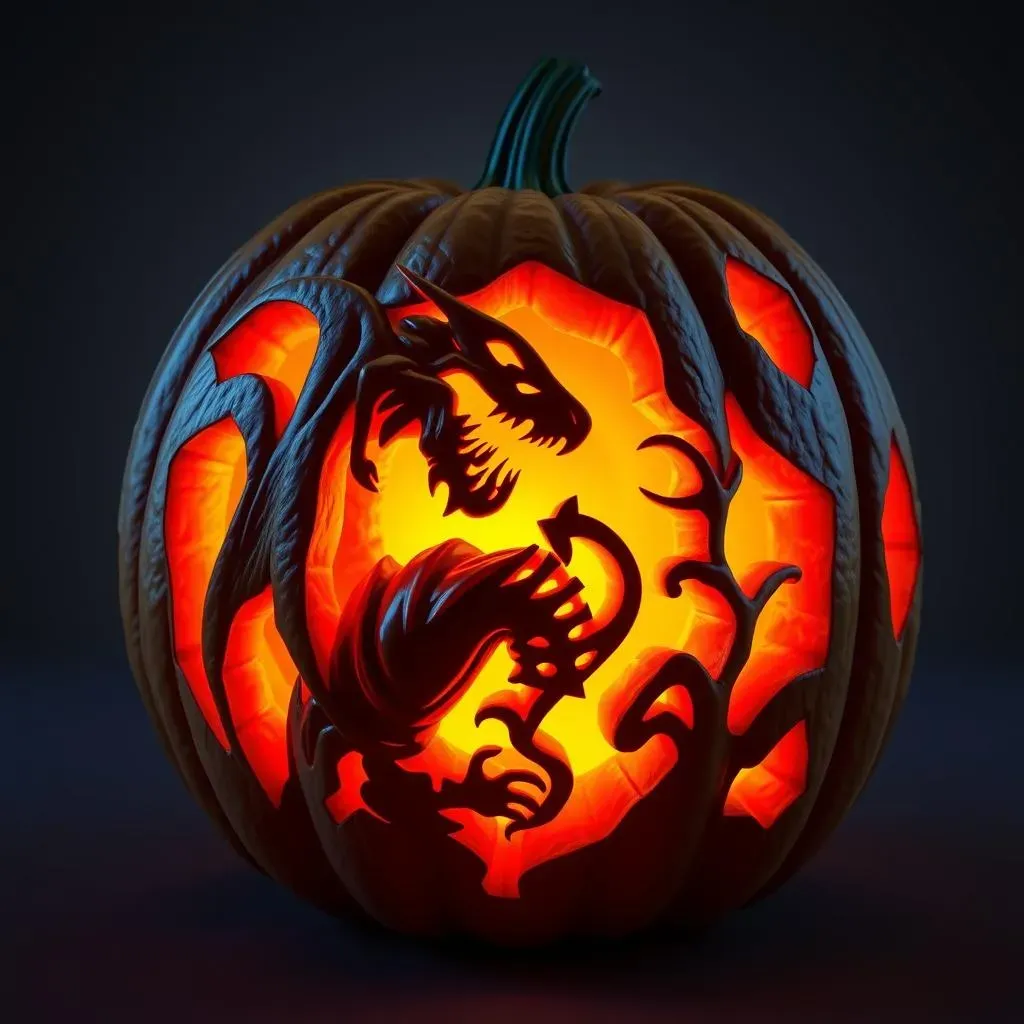
Spooky and Scary Designs
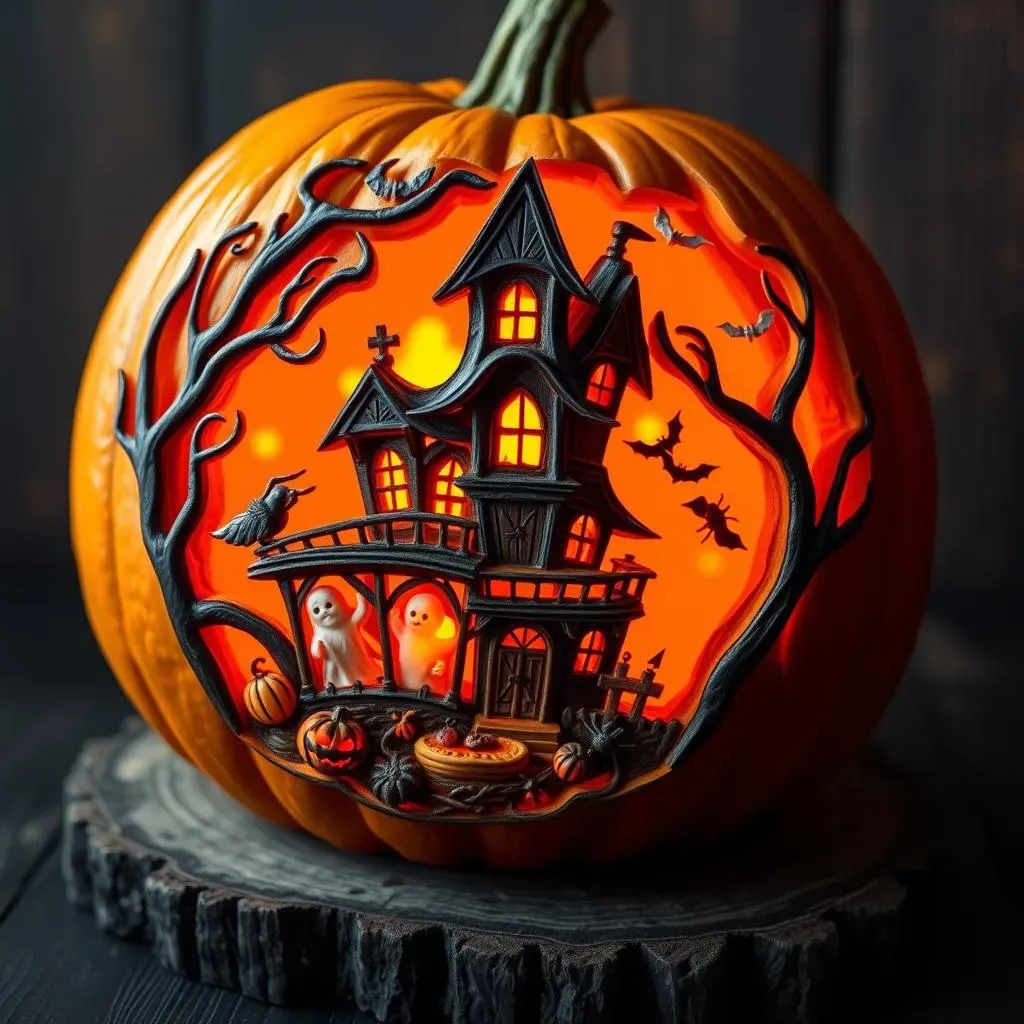
Let's kick things off with some seriously spooky designs! Think creepy crawlies, haunted houses, or terrifying faces. For beginners, simpler designs with bold outlines are a great starting point. You can find plenty of inspiration online for intricate pumpkin carving patterns – from classic ghosts and goblins to more modern horror icons. Remember, even a simple design can be incredibly effective with careful execution. The key is precision and paying attention to detail, ensuring clean cuts and well-defined features. Don't be afraid to experiment with different techniques – layering, etching, and even adding paint or other embellishments can elevate your spooky creations.
For a truly terrifying effect, consider incorporating glowing elements into your scary designs. You can achieve this by using LED lights or strategically placed glow sticks. This adds an extra dimension to your pumpkin, making it even more eye-catching and spooky. For more advanced carvers, think about creating multi-layered designs. This involves carving multiple layers of depth to your design, creating a three-dimensional effect. This technique requires more skill and patience but the results are stunning! For inspiration on more complex designs, check out our article on complex pumpkin carving designs.
- Simple designs with bold outlines.
- Incorporate glowing elements.
- Experiment with multi-layered designs.
Cute and Whimsical Designs
Not everyone's into spooky designs. If you prefer something cute and whimsical, there's a whole world of adorable pumpkin carving ideas out there! Think friendly animals, playful characters, or charming Halloween-themed designs. These designs often benefit from using smaller tools and focusing on intricate details. For example, you could carve a cute little bat with delicate wings, or a friendly pumpkin face with expressive features. Remember, even simple designs can be made incredibly charming with the right level of detail and execution. There are lots of resources online to help you find detailed pumpkin carving ideas for Halloween, even for the most challenging designs.
Adding color is a fantastic way to enhance your cute pumpkin designs. Use acrylic paints or markers to add highlights, shadows, and other details. This can transform an already adorable design into something truly special. You can even experiment with different textures and materials to add more visual interest. For instance, you could add glitter, small beads, or other decorative elements to your finished carving. This adds a unique touch and elevates the overall design. Remember, don't be afraid to get creative and let your personality shine through in your designs! For more inspiration, have a look at some advanced pumpkin carving ideas.
Design Type | Tools | Techniques |
|---|---|---|
Cute Animals | Small detail tools, fine carving knives | Precision carving, layering |
Playful Characters | Various sizes of tools, stencils | Detailed carving, color addition |
Advanced Techniques: Etching and Layering
Once you've mastered the basics, it's time to explore more advanced techniques. Etching involves creating fine details using small tools, adding incredible depth and texture to your designs. This technique is perfect for creating intricate patterns, delicate features, or even realistic portraits. Etching requires a steady hand and a lot of patience, but the results are well worth the effort. You can find tons of inspiration for intricate pumpkin carving designs for Halloween online, from geometric patterns to realistic depictions of nature.
Layering takes your pumpkin carving to a whole new level! It involves carving multiple layers of depth into your design, adding a three-dimensional effect. This technique is perfect for creating complex designs with shadows and highlights, adding depth and realism to your creations. Layering requires careful planning and precise execution, but the results are truly stunning. Combining layering with etching can create truly breathtaking designs. For more guidance on achieving professional results, check out our post on professional pumpkin carving tips.
Beyond the Basics: Advanced Detailed Pumpkin Carving Ideas for Halloween
Beyond the Basics: Advanced Detailed Pumpkin Carving Ideas for Halloween
Beyond the Basics: 3D Carving and Intricate Designs
Ready to level up your pumpkin carving game? Let's talk about pushing the boundaries with 3D carving and incredibly intricate designs. This isn't for the faint of heart; it requires serious skill, patience, and a whole lot of sharp tools! We're talking about creating designs that pop off the pumpkin, adding depth and dimension that'll make jaws drop. Think about carving scenes with multiple layers, creating realistic textures like wood grain or intricate patterns like Celtic knots. For inspiration, check out some examples of advanced pumpkin carving ideas online – you'll be amazed by what's possible!
One key to mastering 3D carving is understanding how light and shadow play a role in creating depth. Carefully plan your design to highlight these elements. Deep cuts will create shadows, while shallower cuts will emphasize highlights. This control over light and shadow is what brings your design to life. Don't be afraid to experiment! Try different carving techniques, like using a rotary tool for smoother cuts or combining etching with carving to create fine details. Remember, even the most skilled carvers started somewhere; practice makes perfect. For more advanced techniques, consider exploring resources on detailed pumpkin carving techniques.
- Plan your design with light and shadow in mind.
- Experiment with different carving tools.
- Practice, practice, practice!
Illuminating Your Masterpieces: Lighting Techniques
Now that you've created an amazing detailed pumpkin carving, it's time to make it truly shine! The right lighting can dramatically enhance your design, highlighting the intricate details and casting captivating shadows. Simple tea lights can work, but for a truly professional look, consider using LED lights. These offer more control over brightness, color, and placement. You can find a wide variety of LED lights specifically designed for pumpkin carving, offering different colors and effects. Think about how the light will interact with your design – strategically placing lights can create dramatic shadows and add depth to the overall effect. For extra impact, consider using multiple light sources, creating a more dynamic and engaging display.
Experiment with different lighting colors to enhance the mood and atmosphere. Warm, amber lights can create a cozy and inviting feel, while cooler, blue lights can create a more eerie and mysterious vibe. Consider the overall theme of your design when choosing the right color. For example, a spooky design might benefit from a spooky purple or green light, while a cute design might look better with a warm orange glow. For even more advanced lighting ideas, check out some examples of professional pumpkin carving ideas online – you'll find plenty of inspiration for illuminating your masterpiece.
Light Source | Pros | Cons |
|---|---|---|
Tea Light | Simple, inexpensive | Limited brightness, fire hazard |
LED Lights | Bright, long-lasting, color options | More expensive |
Preserving Your Pumpkin Carving: Tips and Tricks
All that hard work deserves to last! To help preserve your amazing pumpkin carving, there are a few things you can do. First, choose a good quality pumpkin – one that's firm and free of blemishes. A healthy pumpkin is more likely to last longer. Second, carefully clean out the inside of the pumpkin, removing all seeds and pulp. Leaving any organic matter inside can promote rot and shorten the life of your carving. Third, you can apply a sealant or preservative to the outside of your pumpkin to help prevent moisture loss and protect it from the elements. There are many commercial pumpkin sealants available, or you can even make your own using petroleum jelly or a similar product.
Storing your pumpkin correctly is also crucial. Keep it away from direct sunlight, heat, and moisture. A cool, dry location is ideal. You can even consider placing your carved pumpkin in a cool, dark place to help prolong its life. If you're displaying your pumpkin outdoors, protect it from rain and wind as much as possible. Consider using a protective covering, such as a clear plastic sheet, to shield it from the elements. A little extra care can make all the difference in preserving your masterpiece for longer. For additional tips on extending the life of your carving, check out our guide on professional pumpkin carving tips.