Table of Contents
Halloween is just around the corner, and what's more fun than transforming a plain pumpkin into a work of art? Forget scary ghouls for a moment; let's talk about adorable! This article is your go-to guide for all things cute pumpkin faces carving ideas. We're diving into the world of sweet and charming designs that are perfect for kids and adults alike. Whether you're a seasoned carver or a total newbie, we've got you covered. We'll explore simple designs that are easy to pull off, adorable animal-inspired faces, and funny, goofy expressions that will make everyone smile. Plus, we'll share some handy tips and tricks to make your carving experience smooth and successful. Get ready to unleash your creativity and make this Halloween the cutest one yet with some unforgettable cute pumpkin faces carving ideas.
Simple & Sweet: Easy Cute Pumpkin Faces Carving Ideas

Simple & Sweet: Easy Cute Pumpkin Faces Carving Ideas
Getting Started with Simple Shapes
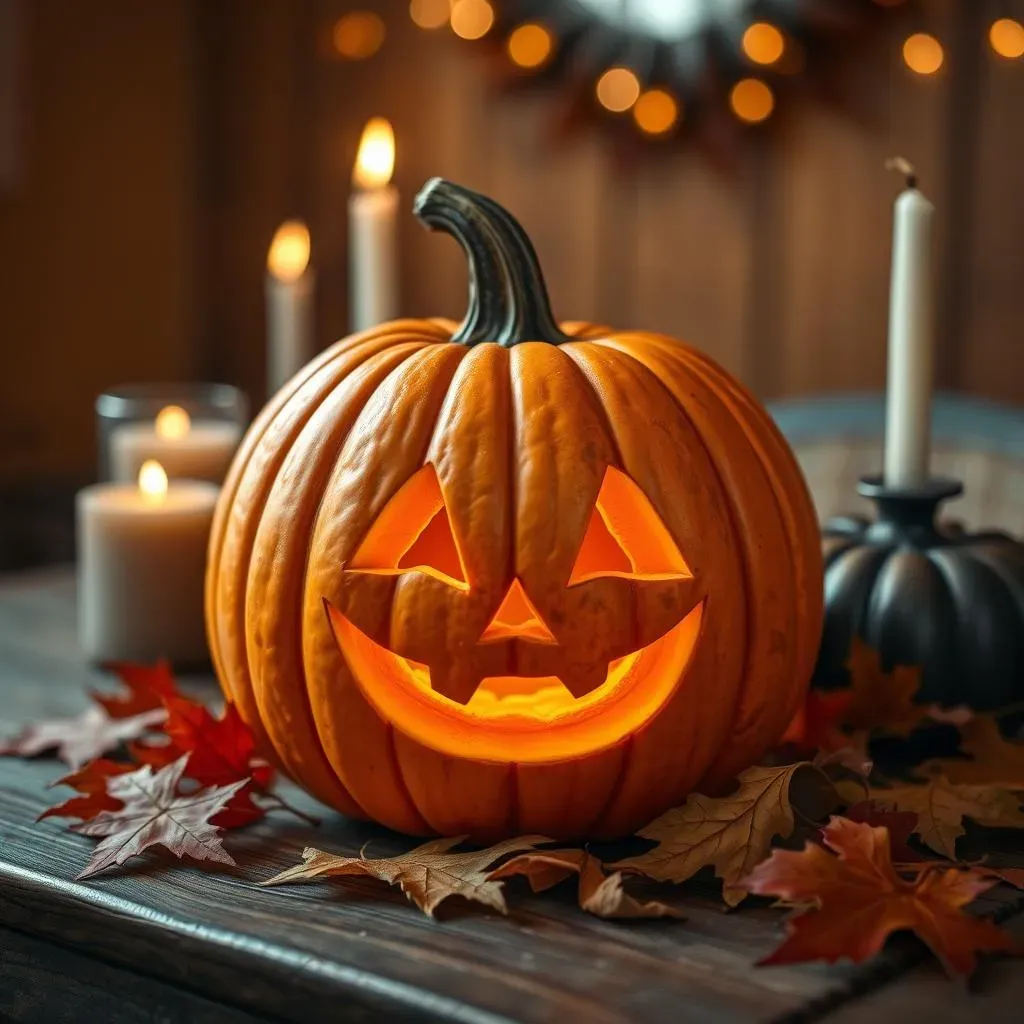
When we're talking cute, we don't need to overcomplicate things. Think basic shapes: circles, triangles, and simple curves. These are your best friends for easy pumpkin carving. A couple of big circles for eyes, a small triangle for a nose, and a gently curved line for a smile, and bam! You've got an adorable face. The beauty of this approach is that it's super forgiving. If your lines aren't perfectly straight, no sweat! It actually adds to the charm.
I remember my first time trying to carve a pumpkin. I thought I needed to be some kind of artist. My lines were wobbly, and the whole thing looked a bit like a Picasso gone wrong. But, you know what? It was still cute! And it taught me that perfection isn't the goal, just having fun is. So, don't be intimidated, just grab your tools and start simple.
The Power of Minimalist Design
Sometimes, less is definitely more. A few well-placed cuts can create a surprisingly cute effect. Imagine a pumpkin with just two small circles for eyes and a tiny, slightly off-center smile. It's simple, it's sweet, and it's ridiculously easy to do. This minimalist approach is not only great for beginners, but it also looks incredibly stylish. It's proof that you don't need to spend hours carving intricate designs to make something adorable.
Minimalist designs are also fantastic because they're quick. If you've got a bunch of pumpkins to carve, or you're short on time, this approach is a lifesaver. Plus, they're perfect for kids to try. They can get involved without getting frustrated by complex patterns. It's all about the fun, remember?
Shape | Description | Example |
|---|---|---|
Circle | Use for eyes or simple mouths | Two circles for eyes |
Triangle | Great for noses or small details | A small triangle for a nose |
Curve | Perfect for smiles or eyebrows | A simple curved line for a smile |
Adding Little Touches of Charm
Once you've got your basic face down, you can add small details to make it even cuter. Think about adding little dots for freckles, tiny triangles for teeth, or even a simple heart shape. These little touches can really bring your pumpkin to life. You could even use cookie cutters to create shapes on the pumpkin, making it even easier.
Don't be afraid to experiment a little. Try different combinations of shapes and see what you can come up with. It's your pumpkin, after all, so have fun with it! And remember, the goal here is cute, not perfect. So, embrace any imperfections and let your creativity shine. Sometimes, the little mistakes are what make your pumpkin unique and extra adorable.
Adorable Animals: Cute Pumpkin Faces with Furry Friends
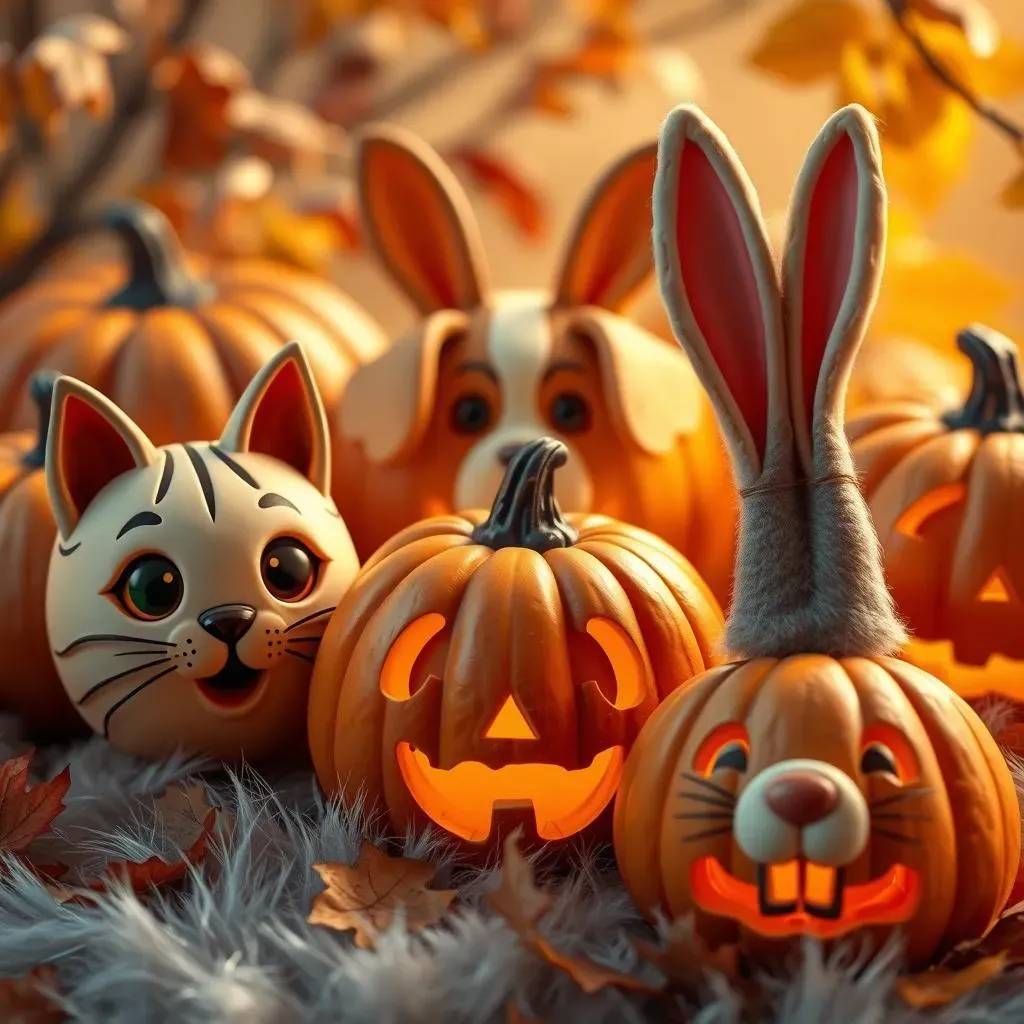
Adorable Animals: Cute Pumpkin Faces with Furry Friends
Purr-fectly Cute Cats
Let's be honest, who doesn't love a cute cat face? Translating that feline charm onto a pumpkin is easier than you might think. Think big, round eyes, a tiny triangle nose, and those adorable little whiskers. You can carve them out or even use black paint or markers to add detail. For extra cuteness, consider adding a small, curved mouth to make it look like your pumpkin cat is smiling. And if you're feeling extra creative, you can carve out little ears at the top of the pumpkin too.
I remember one year, my neighbor carved a whole family of cat pumpkins, each with different expressions. It was the cutest thing I'd ever seen! They even added little bows and collars made of felt. It just goes to show how much personality you can give to your pumpkins with a little imagination. Don't be afraid to make your cat pumpkin uniquely yours.
Woof-tastic Doggy Designs
If you're more of a dog person, then a puppy pumpkin is the way to go! You can go for a classic floppy-eared look, or try a perky, pointy-eared design. Big, expressive eyes are key here, and don't forget that adorable little snout. You can use a small circle or oval for the nose, and add a little tongue sticking out for extra cuteness. For a super fun touch, try adding a carved-out collar around the base of the pumpkin.
One of my friends has a golden retriever, and she carved a pumpkin that looked exactly like him, floppy ears and all. It was such a hit! It made me realize that the more personal you make your pumpkin, the more special it becomes. So if you've got a furry friend at home, why not try and capture their adorable features on your pumpkin?
Animal | Key Features | Extra Touches |
|---|---|---|
Cat | Round eyes, triangle nose, whiskers | Bows, collars, curved smile |
Dog | Expressive eyes, snout, floppy ears | Tongue, collar, perky ears |
Bunny | Long ears, small nose, buck teeth | Whiskers, cotton tail |
Beyond Cats and Dogs: Other Furry Friends
Don't limit yourself to just cats and dogs; there's a whole zoo of cute animals you can draw inspiration from! Think about bunnies with their long ears and buck teeth, or maybe a sweet little bear with its round face and small ears. You could even try a cute little fox with its pointy nose and bushy tail. The possibilities are endless! The key is to focus on the features that make each animal unique and then try to translate those onto your pumpkin.
I've seen some incredibly creative pumpkin carvings of owls, hedgehogs, and even little squirrels. It's amazing how much you can do with just a few simple cuts. Don't be afraid to step outside the box and try something totally different. Who knows, you might just create the cutest pumpkin animal ever!
Funny Faces: Goofy & Cute Pumpkin Carving Ideas
Funny Faces: Goofy & Cute Pumpkin Carving Ideas
Embrace the Silly: Exaggerated Features
Okay, now we're getting into the really fun part! Forget perfect symmetry and embrace the silly. Think big, goofy eyes that are all different sizes, or a mouth that stretches from one side of the pumpkin to the other. The more exaggerated the features, the funnier your pumpkin will look. You can even try giving your pumpkin a wonky nose or eyebrows that are all over the place. It's all about letting loose and having a laugh. I once saw a pumpkin with one eye way bigger than the other, and it was the funniest, cutest thing ever. It's proof that imperfections can make things even better.
Don't be afraid to play around with different shapes and sizes. Try carving out a zig-zag mouth or giving your pumpkin some crazy, uneven teeth. The key is to not take it too seriously and just go for it! Remember, the goal here is to make people smile, so the more ridiculous your pumpkin looks, the better. It’s like giving your pumpkin a personality transplant, but a goofy one.
Playful Expressions: Wacky Mouths and Eyes
Let's talk about expressions! A simple change in the shape of the mouth or eyes can completely transform your pumpkin's personality. A wide, toothy grin can make your pumpkin look like it's laughing, while a small, puckered mouth can give it a surprised expression. Experiment with different shapes and sizes to see what kind of emotions you can create. You could even try giving your pumpkin one eye that's wide open and another that's half-closed for a quirky, mischievous look.
I remember one year, I carved a pumpkin with a mouth that looked like it was yelling, and it was hilarious! It added so much character to my porch. It made me realize that pumpkins don't have to be just cute or scary; they can be funny and expressive too. So, don't be afraid to get creative with your pumpkin's facial expressions and let your sense of humor shine.
Expression | Mouth Shape | Eye Shape |
|---|---|---|
Laughing | Wide, toothy grin | Round, slightly squinted |
Surprised | Small, puckered | Wide open, round |
Mischievous | Slightly curved, one side higher | One eye wide, one half-closed |
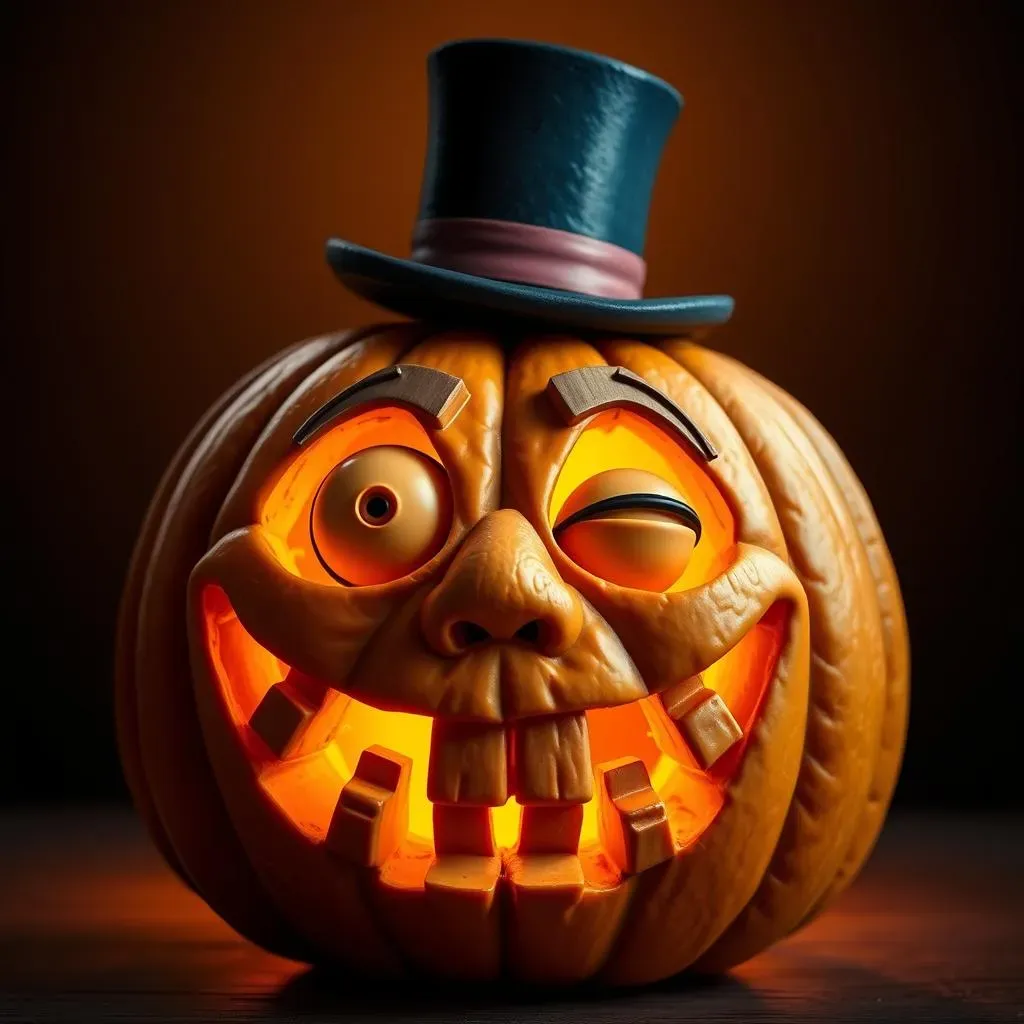
Adding Whimsy: Props and Accessories
Want to take your goofy pumpkin to the next level? Think about adding some fun props and accessories! You could give your pumpkin a pair of silly glasses using pipe cleaners, or a wacky hat made from felt. You could even give it a mustache using some twigs or fake fur. The possibilities are endless! These little additions can really bring your pumpkin to life and make it even more hilarious. It's like giving your pumpkin a costume, and who doesn't love a good costume party?
I once saw a pumpkin with a tiny top hat and a monocle, and it was the most ridiculous thing I'd ever seen. It was so over-the-top, but that's what made it so funny. So, don't be afraid to think outside the box and add some unexpected elements to your pumpkin. It's all about having fun and making something that will make people laugh. Remember, the sillier, the better!
StepbyStep: Tips for Perfect Cute Pumpkin Faces
StepbyStep: Tips for Perfect Cute Pumpkin Faces
Choosing the Right Pumpkin
Okay, first things first, let's talk pumpkins! Not all pumpkins are created equal when it comes to carving. You're looking for a pumpkin that's relatively smooth and has a nice, even surface. Avoid pumpkins with soft spots, bruises, or any signs of damage. You want a sturdy pumpkin that's going to hold up well during the carving process. Also, consider the size. If you're planning on doing a detailed design, you might want to go for a bigger pumpkin, but for simple designs, a smaller one will work just fine. I always feel like choosing the right pumpkin is half the battle; it sets the tone for the whole project.
I remember one year I picked a pumpkin that looked great on the outside but had a huge soft spot on the bottom. It collapsed mid-carving! It was a pumpkin disaster. So, trust me on this, take your time to pick a good pumpkin. Give it a gentle squeeze all over to make sure it's firm and ready to go. It's like picking the perfect canvas for your masterpiece, except this canvas is a pumpkin.
Essential Carving Tools
Now that you've got your perfect pumpkin, let's talk tools. You don't need to go out and buy a fancy carving kit. A simple serrated knife will do the trick for most of the cutting, but a small paring knife is also really helpful for fine details. A spoon or scoop is essential for cleaning out the insides of the pumpkin, and a marker is a must for drawing your design before you start cutting. Some people like to use a pumpkin saw, but I find that a regular knife works just as well. The key is to use tools that are sharp and easy to handle. Dull tools can be dangerous and make the carving process more difficult.
I know some people get intimidated by the idea of using sharp tools, but if you take your time and focus on what you're doing, you'll be fine. Always cut away from yourself, and if you're working with kids, make sure they have proper supervision. It's like cooking; you have to use the right tools to get the best results. And in this case, the best result is a super cute pumpkin!
Tool | Purpose | Tip |
|---|---|---|
Serrated Knife | Making larger cuts | Use a sawing motion |
Paring Knife | Fine details and curves | Use short, controlled cuts |
Spoon or Scoop | Removing pumpkin guts | Scrape the sides clean |
Marker | Drawing the design | Use a washable marker |
Drawing Your Design
Before you start cutting, it's a good idea to draw your design on the pumpkin first. This will give you a clear guide to follow and help you avoid any mistakes. You can use a washable marker or even a pencil. If you're using a stencil, simply tape it to the pumpkin and trace around the edges. Don't be afraid to make changes to your design as you go. It's your pumpkin, and it's all about having fun and being creative. I always feel like drawing the design is like sketching out the blueprint for your masterpiece.
One time I was so eager to start carving that I skipped the drawing step. I ended up with a pumpkin that looked nothing like what I had in mind! It was a good reminder that taking a little extra time to plan things out can make a big difference. It's like when you're baking a cake; you need to follow the recipe to get the best results. So, grab your marker and sketch out your cute pumpkin face before you start cutting.
Carving with Care
Now for the fun part: carving! Take your time and use slow, controlled cuts. Don't try to force the knife through the pumpkin; let it do the work. If you're having trouble with a particular area, try using a smaller knife or making several small cuts instead of one big one. It's like sculpting; you have to be patient and meticulous to get the best results. Remember, the goal here is not speed, it's precision and safety. I always think of carving as a form of meditation; it's all about being present and focused on the task at hand.
I've seen some people try to rush through the carving process, and it always ends in disaster. They end up with jagged edges and broken pieces. So, take a deep breath, relax, and enjoy the process. It's like tending a garden; you have to nurture your creation and give it the care it needs to flourish. And in this case, flourishing means having the cutest, most perfectly carved pumpkin on the block!
- Use a serrated knife for larger cuts
- Use a paring knife for details
- Cut slowly and carefully
- Don't force the knife
- Take breaks if needed