Table of Contents
Halloween is just around the corner, and what's more fun than carving pumpkins? But forget those scary, jagged grins for a moment. This year, let's dive into the world of adorable! If you're searching for cute ideas to carve a pumpkin, you've come to the right place. We're not talking about complicated designs that require an art degree. Instead, we're focusing on charming, easy-to-achieve looks that'll make your pumpkin the star of the porch. This article will guide you through simple, sweet faces, creative character pumpkins, and even share some tips to keep your cute creations looking fresh for longer. So, grab your carving tools, and let's get started on making some seriously cute pumpkins that even your grandma would "aww" at!
Easy & Adorable Pumpkin Faces
Easy & Adorable Pumpkin Faces
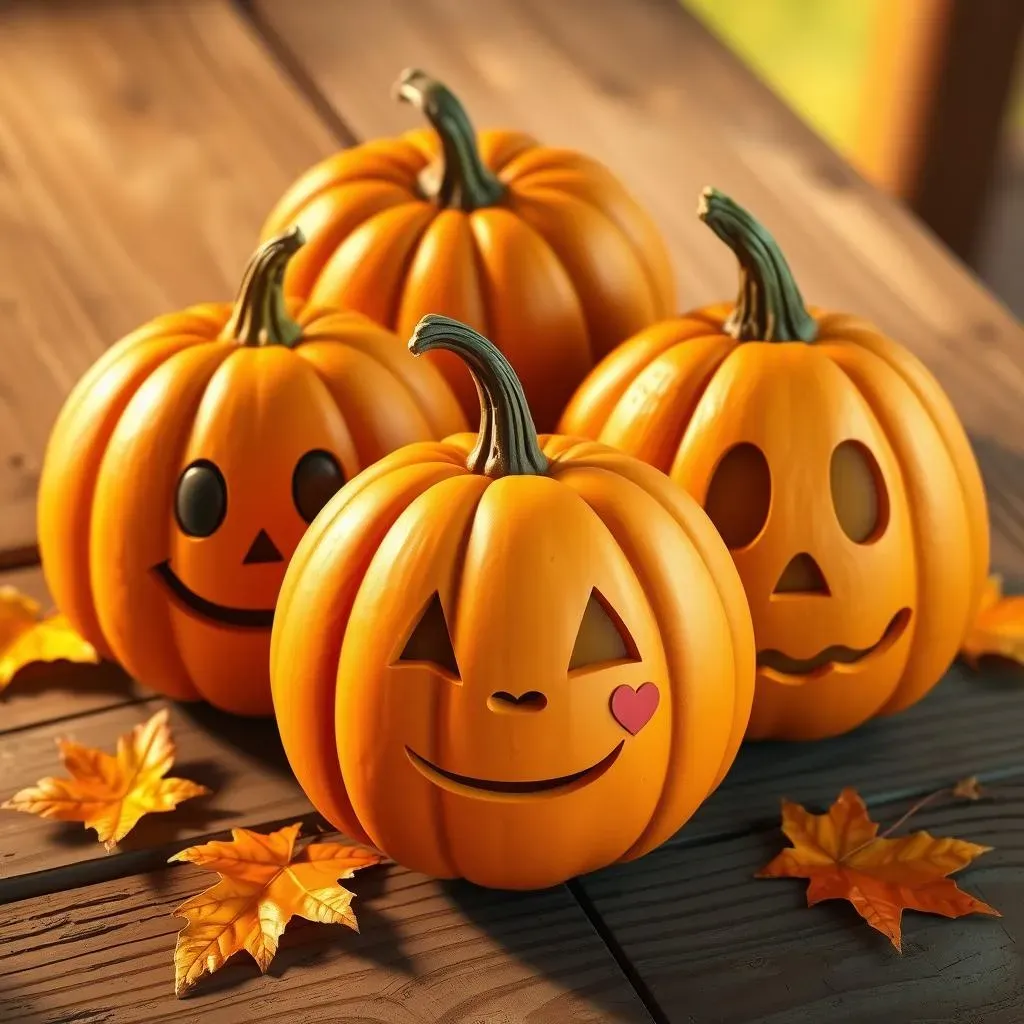
Simple Smiles & Sweet Eyes
Let's be honest, not everyone is a pumpkin carving pro, and that's totally okay! Sometimes, the simplest designs are the cutest. Think about basic shapes: circles for eyes, a little triangle for a nose, and a gentle curve for a smile. You don't need to get fancy; a few well-placed cuts can make a pumpkin look absolutely charming. It's all about keeping it clean and not overcomplicating things. I remember the first time I tried a super intricate design, it looked like a toddler had attacked the poor pumpkin with a spoon. So, trust me, simple is often better, and definitely cuter!
Another great idea is to use cookie cutters! Yes, you heard me right. Press a star, a heart, or even a simple circle cookie cutter into the pumpkin's surface, then use a small knife or carving tool to follow the outline. This is a fantastic way to get consistent shapes without any stress. You can also use a marker to draw your design lightly before you start carving. This way, you’re not making it up as you go. It’s like having training wheels for your pumpkin carving adventure. This method works wonders, especially with kids!
Design Element | Shape | Tips |
|---|---|---|
Eyes | Circles or ovals | Keep them symmetrical, use cookie cutters for consistency |
Nose | Small triangles or hearts | Keep it simple, don't make it too big. |
Mouth | Gentle curves or small smiles | Use a small, serrated knife for a clean cut. |
Adding Extra Charm
Now, if you want to step up the cuteness without making it hard, think about adding details. Instead of just carving a straight line for the mouth, try a wavy one or even a few small teeth. You could also use a small drill or a toothpick to poke tiny holes around the eyes or mouth for a polka-dot effect. These small details can make a big difference. I once saw a pumpkin with small, carved eyelashes above the eyes, and it was absolutely adorable! It's all about the little touches.
Don't underestimate the power of accessories either. A cute hat, a bow, or even some googly eyes can take your pumpkin to a whole new level of adorable. You can find all sorts of fun accessories at craft stores or even just use things you have lying around the house. I've used pipe cleaners for antennae on a bug-themed pumpkin, and it was a total hit. The key is to have fun and let your creativity run wild. Remember, it's not about perfection, it's about cuteness!
Creative & Cute Character Pumpkins
Creative & Cute Character Pumpkins
Favorite Characters Come to Life
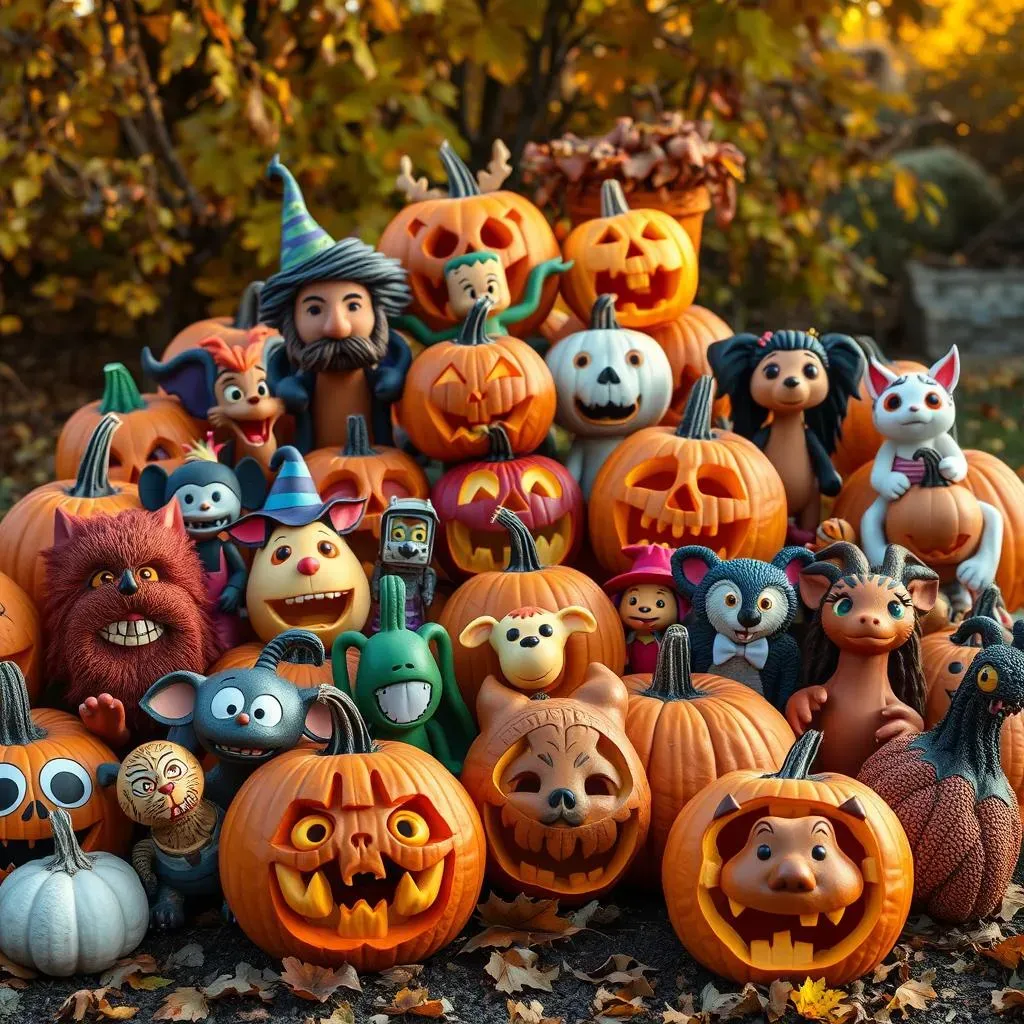
Okay, now let's get into the really fun part: turning your pumpkin into a character! Think about your favorite cartoon, book, or video game character. That cute little ghost from that one game? The adorable cat from your favorite cartoon? They can all become pumpkin masterpieces! It's like giving them a temporary home for Halloween. I remember one year, I carved a Totoro pumpkin, and it was the cutest thing ever. It was a bit of a challenge but totally worth it. Don't be afraid to get creative; even if it's not perfect, the effort makes it adorable.
When you're choosing your character, think about the shapes and colors involved. Simple, round characters often translate well to pumpkins. You can use paint to add details that would be difficult to carve, like different colored eyes or specific clothing. For example, a simple yellow circle with black eyes and a zig-zag mouth becomes a Pac-Man. Get some inspiration from online images, but don't be afraid to put your own spin on it. It’s all about making it your own, and that’s what makes it special. I've seen people use felt, yarn, and even buttons to bring their characters to life, the possibilities are endless.
Character Type | Pumpkin Shape | Color Palette | Extra Touches |
|---|---|---|---|
Animals | Round or oval | Natural or vibrant | Ears, whiskers, or tails |
Cartoons | Varies | Bright and bold | Specific clothing or accessories |
Monsters | Any shape | Spooky or playful | Horns, fangs, or googly eyes |
Storybook & Whimsical Pumpkins
Beyond well-known characters, you can also create pumpkins inspired by storybooks or whimsical themes. Think about fairies, gnomes, or even a cute little house with a pumpkin roof. These ideas can be a bit more abstract, which means you have a lot of room to play around with different shapes and textures. I once made a pumpkin that looked like a tiny mushroom house, complete with little carved windows and a mossy roof. It was so fun to create something that felt like it came straight out of a fairy tale.
When you're going the whimsical route, don't be afraid to use natural elements in your designs. Twigs for branches, leaves for roofs, or even small stones for pathways can add a wonderful, organic touch. You can also use different colored paints to create a more magical feel. Think glitter, metallic paints, or even glow-in-the-dark paint for an extra wow factor. The key is to create something that sparks joy and makes you smile. After all, that’s the point of making a cute pumpkin, isn't it?
Tips for Making Your Cute Carved Pumpkins Last
Tips for Making Your Cute Carved Pumpkins Last
The Vinegar Solution
Okay, so you've created the cutest pumpkin ever, but now what? You don't want it turning into a mushy mess in a few days, right? The secret weapon here is vinegar! Yes, the stuff you put on your salad. After you’ve finished carving, give your pumpkin a good bath—not literally, but close. Mix a solution of about one part white vinegar to ten parts water. Then, either spray the inside and all the carved areas or use a sponge to dab it on. This vinegar solution helps to kill bacteria and mold, which are the real culprits behind pumpkin decay. It’s like giving your pumpkin a little spa day to keep it fresh. I remember the first time I tried this, I was amazed at how much longer my pumpkins lasted, it was like magic!
Another cool trick is to use petroleum jelly or vegetable oil. After the vinegar treatment, rub a thin layer of petroleum jelly or vegetable oil on all the exposed cut surfaces. This helps to lock in moisture and prevents the pumpkin from drying out and shriveling. It’s like putting a moisturizer on your skin, but for your pumpkin. Make sure to get all the nooks and crannies. I usually use a cotton swab for the small details. This step is super important, especially if you live in a dry climate. Trust me, a little extra effort here will make a huge difference!
Treatment | How to Apply | Benefits |
|---|---|---|
Vinegar Solution | Spray or dab on carved areas | Kills bacteria and mold |
Petroleum Jelly or Vegetable Oil | Rub a thin layer on cut surfaces | Locks in moisture and prevents drying |
Location, Location, Location
Where you place your cute pumpkin also makes a big difference. Direct sunlight is the enemy of carved pumpkins. It dries them out quickly and makes them shrivel faster than you can say "trick or treat." Try to place your pumpkin in a cool, shaded area. If you’re putting it outside, a covered porch is ideal. If you’re keeping it inside, away from heat sources is best. Think of it like this: you wouldn't leave a piece of fruit baking in the sun, would you? Your pumpkin is no different. I once left a pumpkin on my sunny windowsill and it was a sad, shriveled mess in just two days. Learn from my mistakes!
Another thing to consider is the humidity. If you live in a humid area, your pumpkin might be more prone to mold. In that case, you might want to consider using a dehumidifier nearby or simply placing your pumpkin in a well-ventilated area. You can also try using silica gel packets, like the ones you find in shoe boxes or vitamin bottles. Just place a few of these inside the pumpkin to absorb excess moisture. It’s like giving your pumpkin a little bodyguard against the elements. These small adjustments can make a huge difference in how long your cute creation lasts. Remember, the goal is to enjoy your adorable pumpkin for as long as possible!