Table of Contents
Every fall, the great pumpkin carving ritual begins. Maybe you've seen those ridiculously intricate carvings online and thought, "Yeah, right, like I have six hours and the steady hand of a brain surgeon." Or perhaps your past attempts resulted in something that looked less like a festive jack-o'-lantern and more like a sad, lopsided mess. We get it. The pressure to create a masterpiece can kill the fun faster than forgetting to scoop out all the guts. But what if you could skip the stress and still end up with something genuinely charming? That's where the search for a *cute easy pumpkin carving idea* comes in. Forget the complex stencils and the fear of slicing off a finger. This article isn't about winning a carving competition; it's about having a good time and ending up with a pumpkin that brings a smile to your face without requiring a degree in sculpture. We're going to walk you through why simple is often better, share some clever tricks that don't even require a sharp knife, showcase some genuinely cute and *easy pumpkin carving idea* examples, and even tell you how to keep your creation looking fresh. Ready to ditch the frustration and embrace the charm of the simple pumpkin?
Why Go for a Cute Easy Pumpkin Carving Idea This Year?

Why Go for a Cute Easy Pumpkin Carving Idea This Year?
Skip the Stress, Maximize the Fun
Let's be honest. Those elaborate pumpkin carvings you see online? The ones with intricate details and multiple layers? They look amazing, but they require serious time, patience, and a skill set most of us don't possess after a long day. Trying to replicate them often leads to frustration, jagged edges, and maybe even a trip to the emergency room. Opting for a cute easy pumpkin carving idea strips away the performance anxiety. It's about enjoying the process, spending time with family (without yelling about uneven cuts), and ending up with a charming decoration that actually looks like it was intended to.
Think about it. Is the goal to impress strangers on Instagram or to have a pleasant autumnal activity? Choosing a simple design means you can finish it relatively quickly, avoid the dreaded mid-carve meltdown, and still have a result that feels festive and accomplished. It's the difference between attempting a gourmet five-course meal and making really good, comforting soup. Both have their place, but one is significantly less likely to end in tears.
Accessibility for Everyone Involved
Another major plus for embracing a cute easy pumpkin carving idea is that it opens the activity up to everyone. Got little kids? They can participate in drawing the design, scooping out the slimy guts (a rite of passage!), or even using safer tools for scraping or etching. Does your significant other claim they "aren't creative"? A simple design removes that excuse. It lowers the barrier to entry, turning what could be a solo, stressful endeavor into a genuinely shared experience.
We've all seen the lone parent hunched over a pumpkin, sweating and cursing while the kids lost interest hours ago. A simpler approach keeps everyone engaged, makes the cleanup less daunting, and ensures the final product is a group effort, even if the main carving falls to one person. It’s less about individual artistic genius and more about collective holiday spirit.
- Less time commitment
- Reduced risk of injury
- Suitable for all skill levels
- More inclusive family activity
- Higher chance of a successful outcome
Charm Trumps Complexity Every Time
Sometimes, the most endearing things are the simplest. A slightly wobbly smile, two perfectly round eyes, or a simple pattern can have more personality than an overly detailed, technically perfect carving. There's a certain naive charm to a cute easy pumpkin carving idea. It feels more homemade, more personal. These aren't museum pieces; they're temporary decorations meant to bring a little light and whimsy to a dark autumn night.
Consider the classic carved pumpkin face. It's simple, iconic, and instantly recognizable. You don't need to carve a portrait of your pet or a scene from a movie to make an impact. A friendly face, a simple shape like a star or moon, or even just using paint and accessories can create a pumpkin that is undeniably cute and welcoming. Focus on the feeling you want to evoke – warmth, friendliness, a touch of playful spookiness – rather than trying to achieve technical perfection.
Simple Tricks for Cute Pumpkin Designs (Beyond the Knife)
Simple Tricks for Cute Pumpkin Designs (Beyond the Knife)
Brush Up on Your Pumpkin Painting Skills
so maybe carving feels intimidating. You're picturing slips of the knife and jagged edges. What if you just… didn't carve? Painting pumpkins is a fantastic way to achieve a cute easy pumpkin design without any sharp objects involved. Grab some acrylic paints – they stick well to pumpkin skin – and let your imagination run wild. You can paint simple faces, polka dots, stripes, or even turn your pumpkin into a favorite character. Markers work too, especially for outlines or smaller details. Just make sure they're permanent markers, unless you want your design to run in the rain.
Painting is particularly great for little hands. They can use brushes, sponges, or even their fingers to create colorful, abstract designs that are undeniably cheerful. It's less about precision and more about expression. Plus, you can easily correct mistakes by painting over them, something you absolutely cannot do with a carving slip. It’s a messier process, sure, but often a lot less stressful than wrestling with a knife.
Accessorize Your Gourd
Who says pumpkins need to stand naked on your porch? Adding accessories is another brilliant way to achieve a cute look without carving. Think googly eyes, felt cutouts for mouths or ears, yarn for hair, or even little hats and scarves. Hot glue works wonders for attaching lightweight items. You can turn a pumpkin into a cat by adding felt ears and whiskers, or a monster with multiple googly eyes and pipe cleaner arms.
This method is incredibly versatile and allows for a lot of personality. You can give your pumpkin a grumpy expression with downturned felt eyebrows or a cheerful vibe with a big yarn smile. It’s like dressing up your pumpkin for Halloween! This approach is perfect for younger kids who might not be ready for even etching tools, letting them take full creative control over their pumpkin's final look.
Accessory Type | Cute Idea Example | How to Attach |
|---|---|---|
Googly Eyes | Multiple eyes for a silly monster | Hot glue or craft glue |
Felt Shapes | Cat ears, witch hat, simple mouth | Hot glue or craft glue |
Yarn | Hair, spider web | Hot glue |
Buttons/Sequins | Polka dots, facial features | Craft glue |
Scrape, Don't Cut: Etching Techniques
if you absolutely *must* use a tool, consider etching or scraping instead of carving all the way through. The pumpkin skin is relatively thin, and you can use simple tools like a linoleum cutter, a sturdy spoon, or even a pumpkin scraping tool (often included in carving kits) to remove just the top layer of the skin. This reveals the lighter flesh underneath, creating a design that glows when lit from within, but is much easier and safer than full carving.
Etching is great for creating patterns, writing words, or making detailed pictures without the risk of the pumpkin collapsing. You can draw your design on the pumpkin first with a pencil, then carefully scrape away the areas you want to highlight. It requires a bit of patience, but it's significantly less prone to mistakes than deep carving. It's a nice middle ground between painting and traditional jack-o'-lanterns, offering a subtle, elegant way to decorate your pumpkin while still keeping it a cute easy pumpkin project.
Our Favorite Cute Easy Pumpkin Carving Idea Examples
Our Favorite Cute Easy Pumpkin Carving Idea Examples
Classic Cute Faces and Simple Shapes
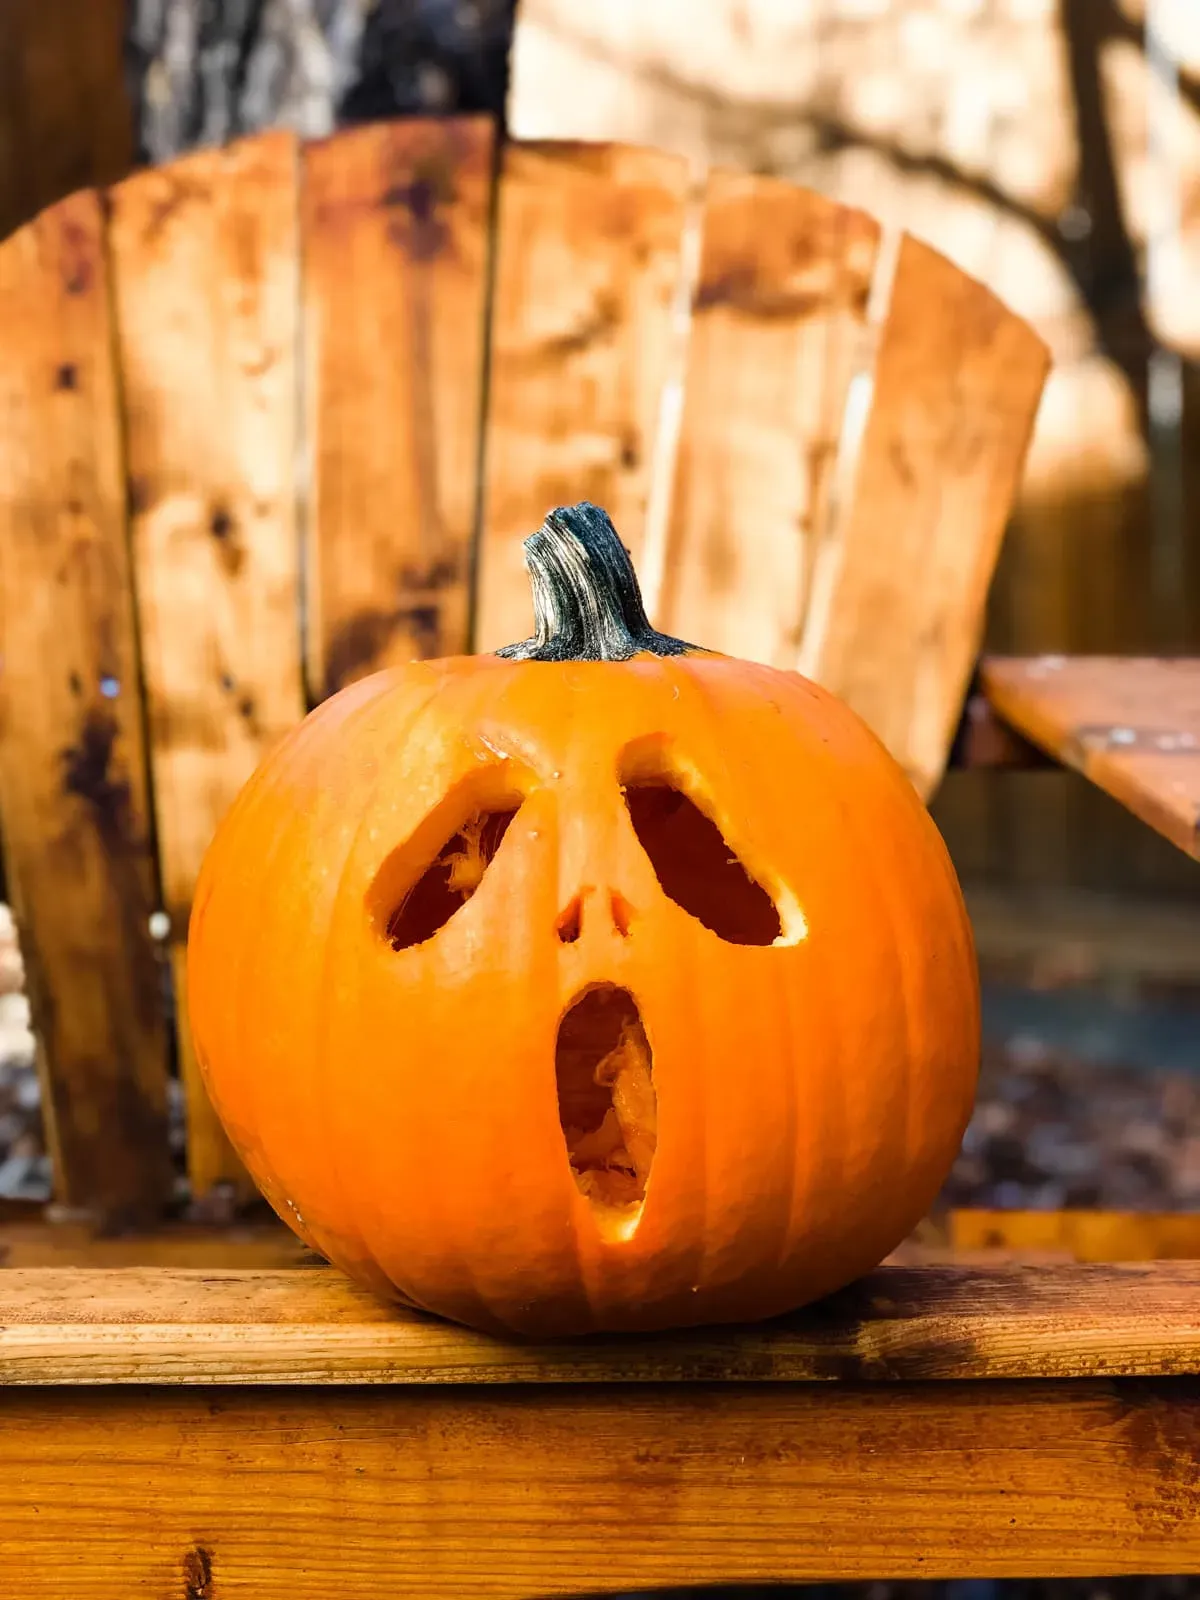
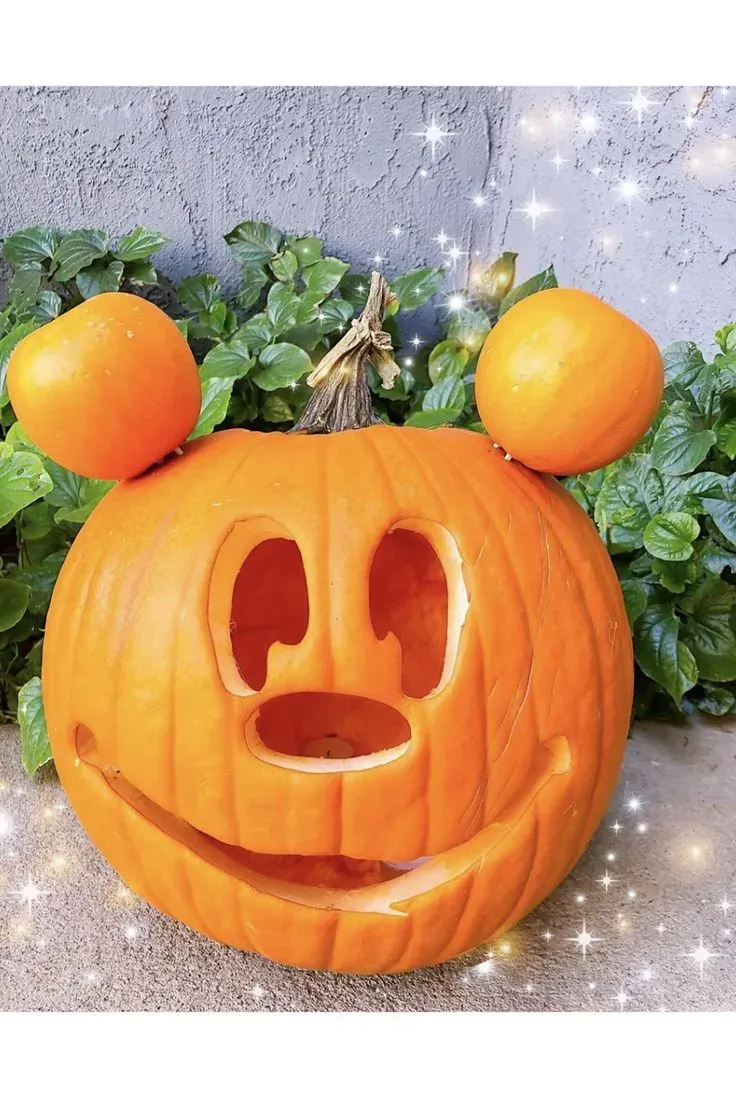
Alright, let's get down to brass tacks. When you're aiming for a cute easy pumpkin carving idea, you don't need to reinvent the wheel. The absolute simplest way to go is a classic, friendly face. Forget jagged, scary teeth unless that's your specific brand of "cute." Think round or slightly oval eyes, a simple triangle or button nose, and a curved, smiling mouth. That's it. You can draw it freehand with a dry-erase marker first – mistakes wipe right off. Using simple cookie cutters for shapes like stars, moons, or bats can also make for a quick, clean, and undeniably cute result. Just press the cutter into the pumpkin skin, then use a tool to cut along the impression or tap the cutter gently with a mallet to push it through.
Seriously, don't overthink the face. A slightly goofy smile is often more charming than a perfectly symmetrical grin. Two mismatched eyes? Adds character. The goal is approachability, not anatomical accuracy. We've seen pumpkins with just two carved circles for eyes and a simple curve for a mouth that were far more appealing than some overly ambitious, poorly executed monster.
Leveraging Stencils for Effortless Charm
If drawing freehand makes your hand tremble, stencils are your best friend for a cute easy pumpkin carving idea. You don't need to buy fancy, expensive ones. A quick online search yields tons of free printable stencils for everything from cartoon characters to simple animals like owls or cats. Print it out, tape it onto your pumpkin, and use a poker tool (the little spikey wheel in carving kits works perfectly) to trace the outline by poking small holes through the paper into the pumpkin skin. Remove the stencil, and you've got a clear dotted line to follow with your carving tool. This method takes the guesswork out of the design phase entirely.
Even complex-looking stencils can be broken down into simple cuts when you use this technique. Just follow the dots. It’s like paint-by-numbers, but for pumpkin guts. This is especially helpful for slightly more detailed, but still fundamentally simple, designs that you want to look clean and intentional. It’s a way to borrow some artistic talent without needing it yourself.
Here are a few cute easy pumpkin carving idea examples using these methods:
- Smiling ghost face (simple oval eyes, wavy mouth)
- Friendly black cat silhouette (using a stencil or simple freehand shape)
- Star or moon cutouts (using cookie cutters)
- Pumpkin with oversized, surprised eyes and a tiny "o" mouth
- Owl face (two large circles for eyes, small triangle beak, use etching for feather texture)
Making Your Cute Pumpkin Masterpiece Last
Making Your Cute Pumpkin Masterpiece Last
Keep it Hydrated, But Not Drowning
So you've nailed your cute easy pumpkin carving idea. It looks fantastic sitting there, all proud and festive. But pumpkins, bless their gourd-y hearts, are essentially giant vegetables and they start to break down the moment you cut into them. The key to extending their lifespan is managing moisture. They need some hydration to keep from shriveling, but too much encourages mold. After carving, give your pumpkin a bath. Seriously. Dunk the whole thing in a tub of cold water for a few hours. This helps the flesh rehydrate. Once it's had its soak, pat it dry. You can also mist the cut edges daily with a spray bottle filled with water, maybe mixed with a tiny splash of bleach (like one teaspoon per quart of water) to ward off creepy crawlies and mold.
Avoid letting your pumpkin sit directly on wet surfaces for extended periods. If it's on your porch steps and it rains, try to move it or put something underneath it to keep the bottom dry. A constantly wet base is an open invitation for rot to set in faster than you can say "boo." Think of it like keeping a cut flower fresh – it needs water, but you don't want it sitting in a stagnant, slimy vase.
Deterring the Critters and Creepies
Beyond simple dehydration, your cute easy pumpkin carving idea faces threats from the natural world. Squirrels, chipmunks, and various molds and bacteria see your carved creation as a buffet or a cozy place to set up shop. Keeping them away is crucial for longevity. That bleach-and-water mist we mentioned earlier is a good first line of defense against mold. For the critters, a thin layer of petroleum jelly rubbed on the cut edges can make it less appealing. Some people swear by spraying the pumpkin with a clear acrylic sealant (available at craft stores), avoiding the cut areas, which can help protect the outer skin.
Another trick is to place your pumpkin in a spot where it's less accessible to hungry wildlife. High on a sturdy table or hanging basket works. If you're using a real candle inside, the heat can actually speed up deterioration, so consider using battery-operated LED lights instead. They're safer and don't cook your pumpkin from the inside out. Nobody wants a baked jack-o'-lantern.
Here's a quick rundown of defense tactics:
- Soak in water after carving
- Mist daily with water/bleach solution
- Apply petroleum jelly to cut edges
- Use clear acrylic spray sealant (avoid cuts)
- Place in a location away from ground critters
- Use LED lights instead of candles
Location, Location, Location
Where you put your cute easy pumpkin carving idea matters significantly for how long it lasts. Extreme temperatures, both hot and cold, are bad news. Direct sunlight acts like a dehydrator, causing the pumpkin to wilt and the carved parts to shrink and warp. Freezing temperatures can cause the pumpkin's cell walls to burst, leading to a mushy collapse when it thaws. The ideal spot is cool, dry, and out of direct sun and heavy rain.
A covered porch or a sheltered entryway is usually the best bet. If you live in an area with warm daytime temperatures, bringing the pumpkin inside during the hottest part of the day can help. At night, if a hard freeze is expected, either bring it inside or cover it with a blanket. A little thoughtful placement can add days, sometimes even a week or more, to your pumpkin's display time, ensuring your charming creation lasts through Halloween and beyond.
Wrapping Up Your Cute Pumpkin Project
So there you have it. Turns out you don't need to be a master carver to make a pumpkin look good. Ditching the overly ambitious designs and sticking to a cute easy pumpkin carving idea means less stress, fewer potential injuries, and honestly, often a more charming result anyway. Whether you poked holes, used cookie cutters, or went for a simple, sweet face, the goal was to have a bit of fun and end up with something you actually like sitting on your porch. Pumpkin carving doesn't have to be a high-stakes operation. Grab a pumpkin, pick an idea that doesn't make you sweat, and enjoy the process. It's just a pumpkin, after all.