Table of Contents
Alright, let's talk pumpkins. Every fall, it feels like there's an unspoken competition on front porches, doesn't it? You see those elaborate, museum-worthy carvings, and maybe you think, "Nope. Not happening." We get it. The thought of wrestling with a gourd, hoping it doesn't collapse into a soggy mess, can be less 'spooky fun' and more 'stressful chore.' Forget the intricate masterpieces that require surgical precision and a week off work. What if you could actually create something cool, something that turns heads (or at least gets a nod of approval from the neighborhood kids), without needing an art degree or industrial-grade tools? That's where the magic of creative easy pumpkin carving ideas comes in. We're cutting through the complexity to give you simple, effective ways to transform a plain pumpkin into a Halloween statement. We'll cover the bare-bones essentials you actually need, ditch the fancy stuff, dive into some genuinely achievable designs, and even tell you how to keep your creation looking decent for more than two days. Ready to skip the frustration and get straight to the fun?
Why Choose Creative Easy Pumpkin Carving Ideas This Year?
Why Choose Creative Easy Pumpkin Carving Ideas This Year?
Let's be honest, nobody needs another stressed-out evening covered in pumpkin guts, staring down a complex stencil that looks suspiciously like it requires a laser cutter. That’s precisely Why Choose Creative Easy Pumpkin Carving Ideas This Year? Because Halloween should be fun, not a test of your fine motor skills under duress. Opting for easier, yet still creative, designs means less time struggling with tricky angles and more time enjoying the process – maybe even with a warm drink in hand. It’s about getting that festive look on your porch without the inevitable moment where you accidentally slice off a crucial piece of your elaborate design, leaving you with a lopsided, sad-looking squash. Simple doesn't mean boring; it means achievable, less frustrating, and frankly, way more enjoyable for everyone involved, especially if kids are lending a hand.
Tool Time: Getting Started with Simple Pumpkin Carving Gear

Tool Time: Getting Started with Simple Pumpkin Carving Gear
Ditching the Fancy Kits
Forget those twenty-piece carving sets that look like something a brain surgeon would use. For creative easy pumpkin carving ideas, you really don't need much. Think basic kitchen stuff. A sturdy spoon is your best friend for scooping out the guts. Honestly, a regular metal spoon works just fine, maybe one with a slightly sharper edge if you have it. You'll also need a decent knife. Not a gigantic butcher knife, but a smaller, sharp paring knife or utility knife gives you control for cutting shapes. That's really the core of it – scoop and cut. No need for specialized saws or loop tools just yet.
Adding a Couple of Helpers
so you've got the spoon and the knife. What else makes life easier without getting complicated? A dry-erase marker is fantastic. You can draw your design directly on the pumpkin, and if you mess up, just wipe it off and try again. Much less commitment than permanent marker. A small, sharp poker or drill bit can be useful for making small holes or starting points for cuts, especially if you're doing patterns with dots or small details. And seriously, grab some old newspapers or a drop cloth. Pumpkin guts go everywhere. It's inevitable, embrace the mess, but contain it.
- Sturdy Metal Spoon (for scooping)
- Sharp Paring or Utility Knife (for cutting)
- Dry-Erase Marker (for drawing designs)
- Small Poker or Drill Bit (optional, for small holes)
- Newspapers or Drop Cloth (for mess management)
Safety First, Guts Second
Look, knives are sharp. Pumpkins are round and sometimes wobbly. Carving requires focus. Always cut away from yourself, obviously. If kids are helping, give them the spoon duty or let them draw the design with the marker. Keep fingers clear of the blade. Working on a stable surface is key – no carving on your lap unless you enjoy emergency room visits. And when you're done scooping, wipe down the inside and outside of the pumpkin. Less slime means less slip when you start cutting. Simple tools, simple safety rules. It keeps the fun from turning into a Halloween horror story for the wrong reasons.
Creative Easy Pumpkin Carving Ideas You Can Actually Do
Creative Easy Pumpkin Carving Ideas You Can Actually Do
Shapes and Patterns: Your New Best Friends
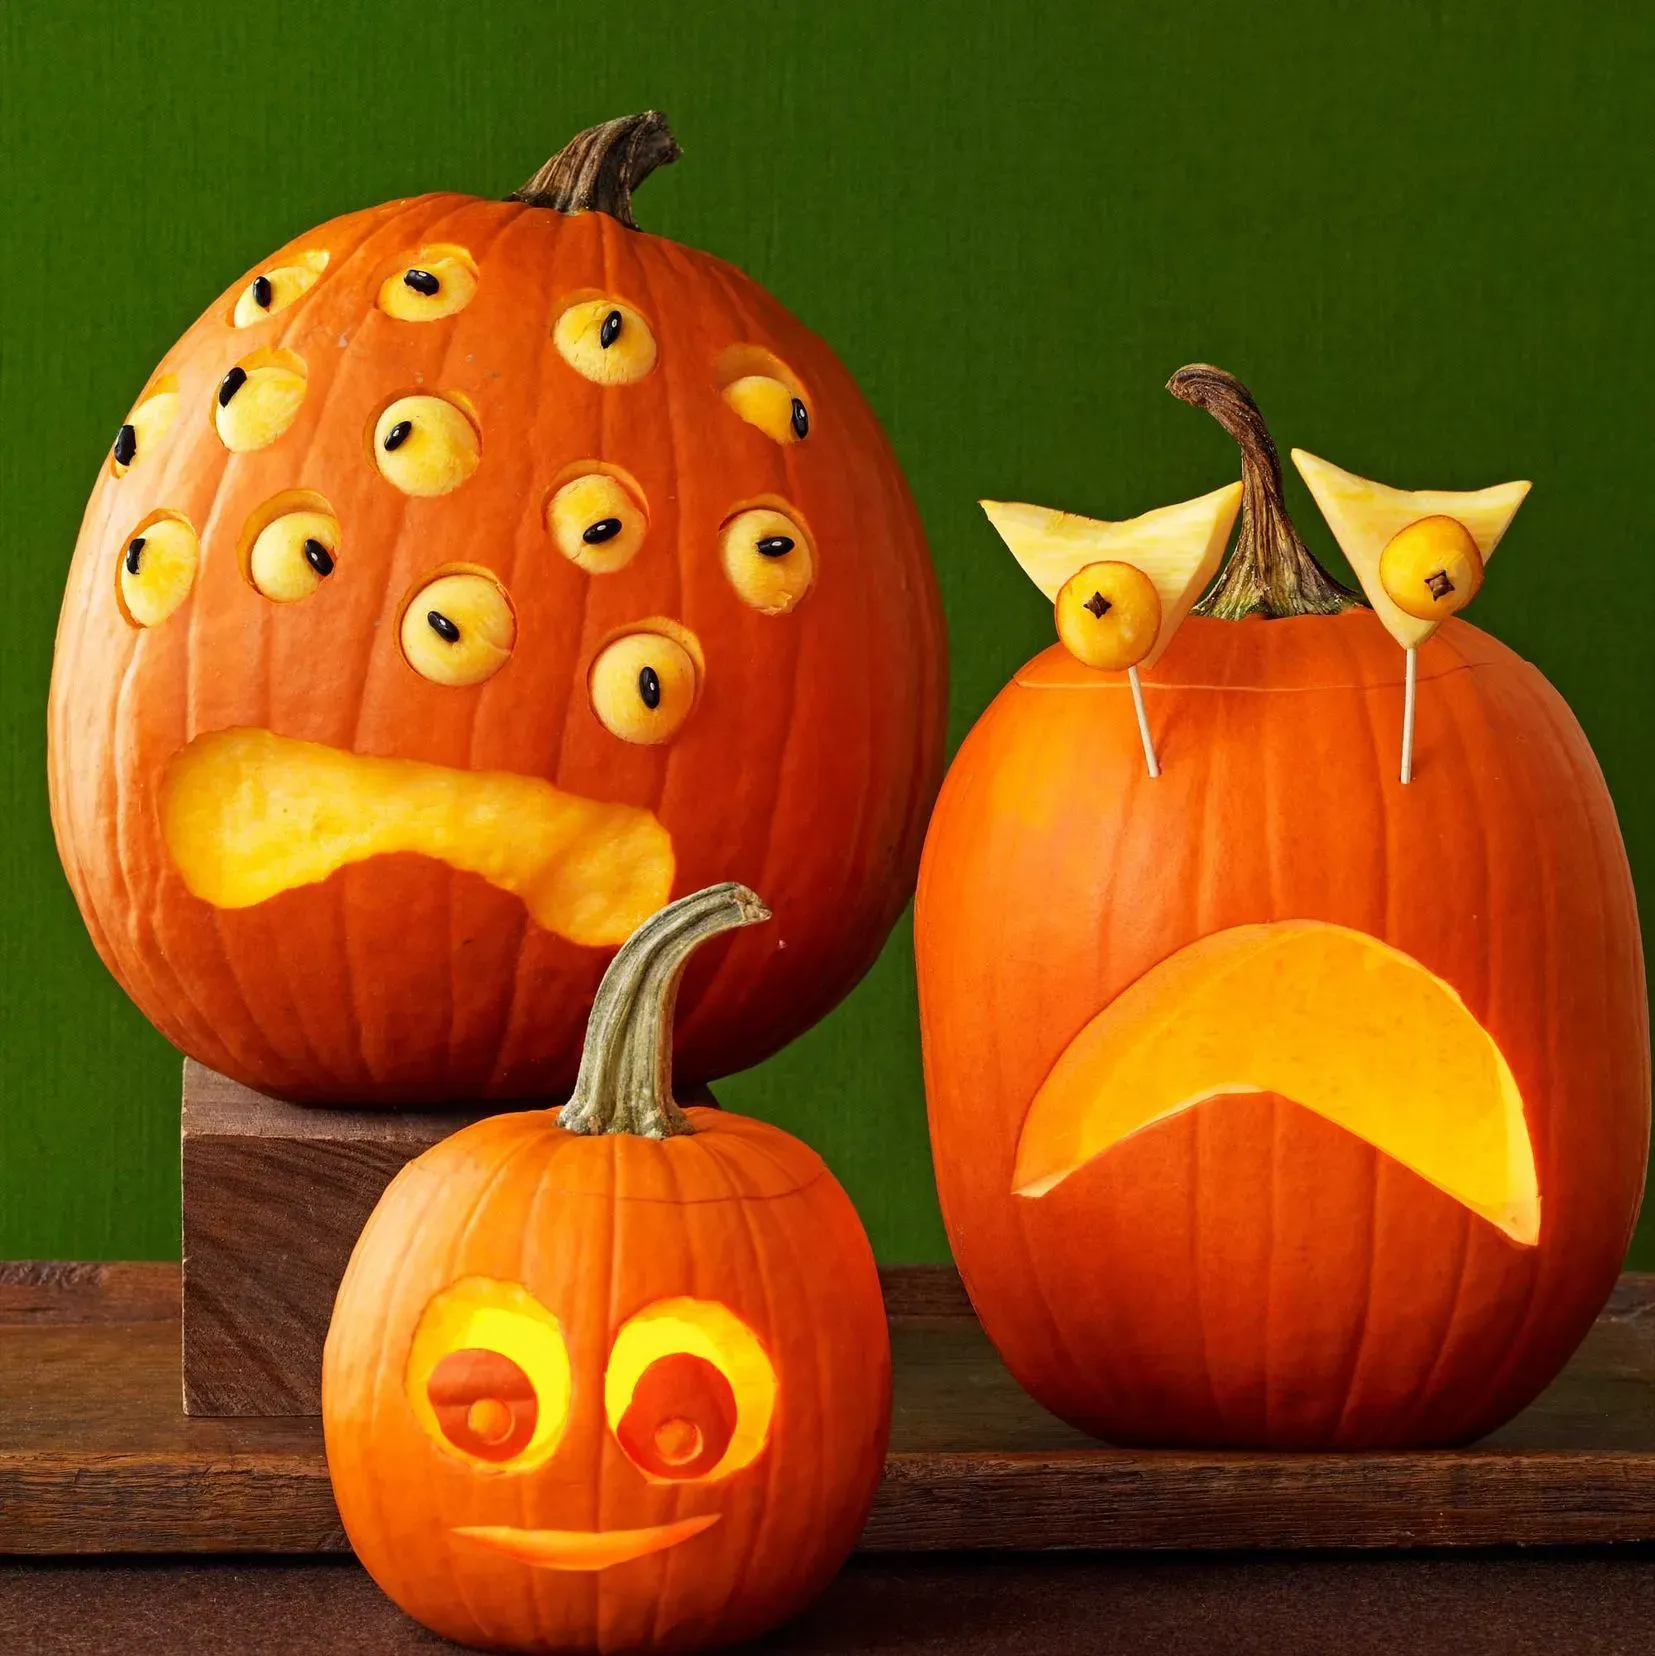
let's get into the fun part: what to actually carve. Forget trying to replicate a portrait of your pet cat. For creative easy pumpkin carving ideas that don't require a steady hand and years of practice, lean into simple shapes and repeating patterns. Think stars, moons, circles, triangles. You can scatter them randomly across the pumpkin or create simple geometric designs. A series of different sized circles can look surprisingly modern and cool when lit up. Or maybe a few scattered stars and a crescent moon? It's effective, requires minimal precision, and you're less likely to end up with something that looks like it lost a fight with a badger. This approach is forgiving; small wobbles in your cut just look like part of the design.
Outline and Silhouette Magic
Another fantastic way to tackle creative easy pumpkin carving ideas is focusing on outlines or silhouettes. Instead of carving out the entire shape of a spooky house or a black cat, just carve the outline. This uses less cutting, reduces the chance of structural collapse, and still gives you a clear, recognizable image. A simple bat shape, a ghost outline, or even just carving out block letters to spell "BOO" or "SPOOKY" works great. You're removing less material, which makes the whole process faster and less risky. Plus, the contrast between the carved outline and the uncarved pumpkin creates a nice effect when the light is inside.
- Simple geometric shapes (circles, squares, stars)
- Scattered or repeating patterns
- Outlines of classic Halloween symbols (bats, ghosts, cats)
- Block letters or simple words
- Using negative space to your advantage
Mixing Carving with Other Tricks
Who said you have to *only* carve? Some of the best creative easy pumpkin carving ideas blend carving with other methods. Carve a simple shape, like a big mouth or just the eyes, and then use paint, markers, or even pushpins to add details like teeth, eyebrows, or freckles. You could carve a few holes and then stick twigs or pipe cleaners through them to create hair or crazy appendages. My neighbor once just carved two simple eyes and a jagged mouth on a tall pumpkin, then stuck a cheap witch's hat on top. Looked way more impressive than the effort involved. Combining techniques reduces the amount of tricky carving you need to do while still letting you get pretty creative with the final look.
Make Your Masterpiece Last: Simple Tips for Fresh Pumpkins

Make Your Masterpiece Last: Simple Tips for Fresh Pumpkins
Cleanliness is Next to Pumpkin Godliness
you've nailed your creative easy pumpkin carving ideas. It looks fantastic! Now, how do you keep it from turning into a sad, moldy mess by Halloween night? First things first: cleanliness. Once you've scooped out all the guts and seeds (and ideally saved the seeds for roasting, because snacks), give the inside a good wipe down. Get rid of any stringy bits clinging to the walls. Some folks swear by wiping the inside with a splash of bleach solution (about a teaspoon of bleach per quart of water) or white vinegar. This kills some of the bacteria and mold spores that are just waiting to start their party. Let it air out for a bit before you do anything else. A clean pumpkin is a slightly more resilient pumpkin.
Keep it Hydrated (or Sealed)
Carving exposes the pumpkin's flesh to the air, which makes it dry out and start to shrivel. To combat this, you have a couple of options. One is to keep it hydrated. You can mist the inside and carved edges with water daily, or even give it a quick dunk in a water bath for a few hours if it starts looking thirsty. Another method is sealing the cut edges. Petroleum jelly (Vaseline) or even vegetable oil rubbed onto the cut surfaces can help lock in moisture and slow down the drying process. It's not a perfect shield, but it creates a barrier against the elements.
- Wipe inside with bleach solution or vinegar.
- Let the pumpkin air dry after cleaning.
- Mist the inside and carved areas daily with water.
- Apply petroleum jelly or vegetable oil to cut edges.
- Give a "water bath" if the pumpkin looks dry.
Location, Location, Location
Where you put your carved pumpkin makes a big difference in how long it lasts. Extreme temperatures are the enemy. Direct sunlight will cook it, causing it to soften and rot faster. Freezing temperatures can damage the cell structure and turn it mushy. Find a cool, dry, shaded spot on your porch or yard. If you live in a particularly warm climate, bringing it inside overnight might buy you a little extra time. Avoid placing it directly on soil or grass, as moisture from the ground can accelerate decay. Elevate it slightly on a step or a piece of wood. Protecting your creative easy pumpkin carving ideas from the elements is key to enjoying them longer.
Carve On: Making Your Mark (Easily)
So there you have it. Ditching the pressure to craft a gallery-worthy gourd doesn't mean you're stuck with a sad, toothless grin. Creative easy pumpkin carving ideas are genuinely within reach for anyone with a knife (or even just a drill). We've covered the simple gear, tossed out some ideas that won't make you want to rage-quit, and even offered tips to keep your hard work from turning into compost overnight. The goal isn't perfection; it's putting something out there that makes you smile, maybe gives a trick-or-treater a little pause, and doesn't leave you covered in pumpkin guts contemplating your life choices. Pick a design, grab a pumpkin, and give it a shot. Worst case? You've got material for pie. Probably.