Table of Contents
Let's be honest, the thought of carving a pumpkin often brings two conflicting images to mind: the Pinterest-perfect masterpiece and the sad, lopsided mess you inevitably create. You envision glowing faces and intricate designs, then remember the dull knife, the slippery insides, and the general feeling that this is harder than it looks. Halloween demands carved pumpkins, though, a flickering beacon on the porch. But who has the time or the patience for designs that require a sculptor's touch? This year, we're cutting straight to the point. Forget the overly complicated patterns that end in frustration. We're focusing on creative and easy pumpkin carving ideas that deliver impressive results without the headache. We'll walk you through the tools that make a difference, simple prep steps, straightforward techniques, and plenty of specific designs that look far more difficult than they actually are. Get ready to transform that plain gourd into something cool, spooky, or just plain fun, without needing a first aid kit or a therapy session afterward.
Getting Started: Tools and Prep for Easy Pumpkin Carving
Getting Started: Tools and Prep for Easy Pumpkin Carving
Alright, so you've got your pumpkin, sitting there on the counter, looking innocent enough. Before you dive in with that flimsy plastic saw from the dollar store carving kit – and trust me, we've all been there, wrestling with those things – let's talk about what actually makes Getting Started: Tools and Prep for Easy Pumpkin Carving, well, *easy*. Forget the fancy gadgets you'll use once and shove in a drawer. You need a few reliable items that turn this potential wrestling match into something enjoyable. Think of it like having the right wrench for the job instead of trying to use a butter knife. A sharp, small serrated knife (like a paring knife, but maybe one you don't mind risking a bit), a sturdy scoop for gutting (an ice cream scoop works wonders compared to your bare hands or a dull spoon), and perhaps a linoleum cutting tool or clay sculpting loops for detail work are your best friends. Don't underestimate the power of a decent tool; it saves knuckles and sanity. And prep? Get all the guts and seeds out thoroughly. It's messy, yes, but a clean canvas is key to a smooth carving process. Wash the outside too; you don't want dirt interfering with your design.
What's actually useful from those kits, you ask? Here's the breakdown:
- The flimsy saw: Good for starting cuts, maybe, but dulls instantly. Use a real knife carefully.
- The scoop: Usually terrible. Invest in a solid metal ice cream scoop.
- Detail tools: The small pokers and loop tools can be decent for scraping and fine lines.
- Stencils: Sometimes okay, but drawing freehand or using your own printed design is often better.
Simple Shapes and Patterns: Creative and Easy Pumpkin Carving Ideas for Beginners
Simple Shapes and Patterns: Creative and Easy Pumpkin Carving Ideas for Beginners
Starting with the Basics: Why Simple Works
so you've got your clean pumpkin and some halfway decent tools. Now what? Don't feel pressured to immediately attempt a detailed portrait of your dog. For creative and easy pumpkin carving ideas, especially when you're just starting out, simple shapes and patterns are your best friends. Think classic geometric shapes – circles, triangles, squares. They're predictable, they're easy to cut cleanly, and when arranged cleverly, they can create surprisingly effective designs. A series of different sized circles can look like bubbles or eyeballs. Triangles become sharp teeth or abstract patterns. Even simple lines, cut with precision, can create modern, minimalist designs. The key is confidence in your cuts. Simple shapes allow you to focus on technique rather than complexity, which reduces the chance of frustrating mistakes.
Putting Simple Shapes to Work: Beginner-Friendly Designs
Using these basic building blocks, you can craft some truly creative and easy pumpkin carving ideas. Forget the standard jack-o'-lantern face for a moment. How about a pattern of scattered stars and moons using small cookie cutters (yes, you can gently tap metal cookie cutters into the pumpkin skin, then carve or scrape out the shape)? Or a minimalist design of just a few sharp, angled lines emanating from the center? A series of different sized holes drilled with drill bits (carefully!) creates a cool, modern look that's incredibly simple. These aren't just lazy options; they're deliberate design choices that prioritize clean execution and visual impact over intricate detail. They prove that creative and easy pumpkin carving ideas don't have to be boring.
- Simple Shape Ideas:
- Circles (different sizes)
- Triangles (sharp points or rounded corners)
- Squares and Rectangles
- Straight Lines
- Dots (using drill bits or scraping tools)
Beyond the Face: More Creative and Easy Pumpkin Carving Ideas
Beyond the Face: More Creative and Easy Pumpkin Carving Ideas
so you've mastered the basic shapes and maybe even attempted a simple face. But what if you want to step outside the traditional jack-o'-lantern box? Creative and easy pumpkin carving ideas don't have to stop at two eyes and a jagged grin. Think of the pumpkin as a blank canvas for something entirely different. You can carve patterns inspired by nature, like leaves or vines winding around the gourd. Or create miniature scenes within the pumpkin's cavity – a tiny haunted house silhouette, a spooky forest, or even a simple starry night sky. This approach often uses the negative space more effectively and can feel less pressure than getting a face *just right*. It opens up a whole new world of possibilities beyond spooky visages.
Ready to ditch the standard face? Here are a few starting points:
- Geometric patterns (like repeating triangles or squares)
- Nature scenes (trees, stars, moon, vines)
- Silhouette carvings (haunted house, bats flying)
- Word carvings (spell out "BOO" or "EEK")
- Abstract designs
Techniques to Make Creative and Easy Pumpkin Carving Even Simpler

Techniques to Make Creative and Easy Pumpkin Carving Even Simpler
so you've got some simple shapes in mind or maybe a cool silhouette. Now let's talk about making the actual carving less of a chore and more of a clean operation. This is where understanding a few simple techniques really shines for creative and easy pumpkin carving ideas. Don't just hack away at the lines you drew. Instead, try a plunge cut – stick your knife straight into the pumpkin wall, then saw gently along your design line. This gives you more control. For curves, use shorter strokes and pivot the knife as you go. And here's a pro tip that feels almost like cheating: instead of trying to pull the cut piece out immediately, push it *in* slightly from the outside. It often pops right through the inner wall, making removal much cleaner. If you're doing intricate details or scraping (not cutting all the way through), those linoleum cutters or clay tools are golden. They let you shave off layers of skin to create lighter effects without the risk of your knife slipping and ruining the whole thing. Think of it as controlled peeling rather than brute force cutting.
Specific Creative and Easy Pumpkin Carving Ideas to Try This Year

Specific Creative and Easy Pumpkin Carving Ideas to Try This Year
Think Beyond the Traditional Face
Alright, enough with the theory. You're here for the goods, the actual Specific Creative and Easy Pumpkin Carving Ideas to Try This Year that won't make you want to throw the pumpkin across the yard. Let's start simple but effective. Forget the wobbly triangle eyes. How about a constellation pattern? You just need different-sized drill bits or even just a skewer to poke holes. Random clusters look like stars, or you can try to map out a real constellation – Orion always looks cool. Another trick? Use cookie cutters. Seriously. Metal ones work best. Press them firmly into the pumpkin skin, then carefully carve around the impression or just scrape away the skin inside the shape for a lighter effect. Think small bats, stars, or even tiny ghosts. This isn't cheating; it's just smart. It gives you clean, recognizable shapes without the freehand pressure.
Another idea that's surprisingly easy: silhouetted scenes. Cut out the main opening on the back of the pumpkin (that's where the light goes in anyway). Then, on the front, carve simple outlines of things like a haunted house on a hill, a few spooky trees, or bats flying against a moon. You're not carving intricate details, just the basic shape. When lit from behind, the negative space creates a dramatic silhouette. It looks sophisticated but is fundamentally just cutting along simple lines. These Specific Creative and Easy Pumpkin Carving Ideas lean into simplicity while looking polished.
Leverage Texture and Layering
If you're feeling slightly more ambitious but still want easy wins for Specific Creative and Easy Pumpkin Carving Ideas, consider designs that use texture and layering rather than just cutting all the way through. Scraping away just the outer layer of skin is a fantastic technique. You can draw patterns, words, or images, then use a linoleum cutter or even a sturdy spoon to scrape off the orange skin, revealing the lighter flesh underneath. This creates a glow effect when lit, but without the risk of structural collapse that comes with cutting thin lines all the way through. Try scraping a spiderweb design, or maybe some spooky text like "ENTER IF YOU DARE."
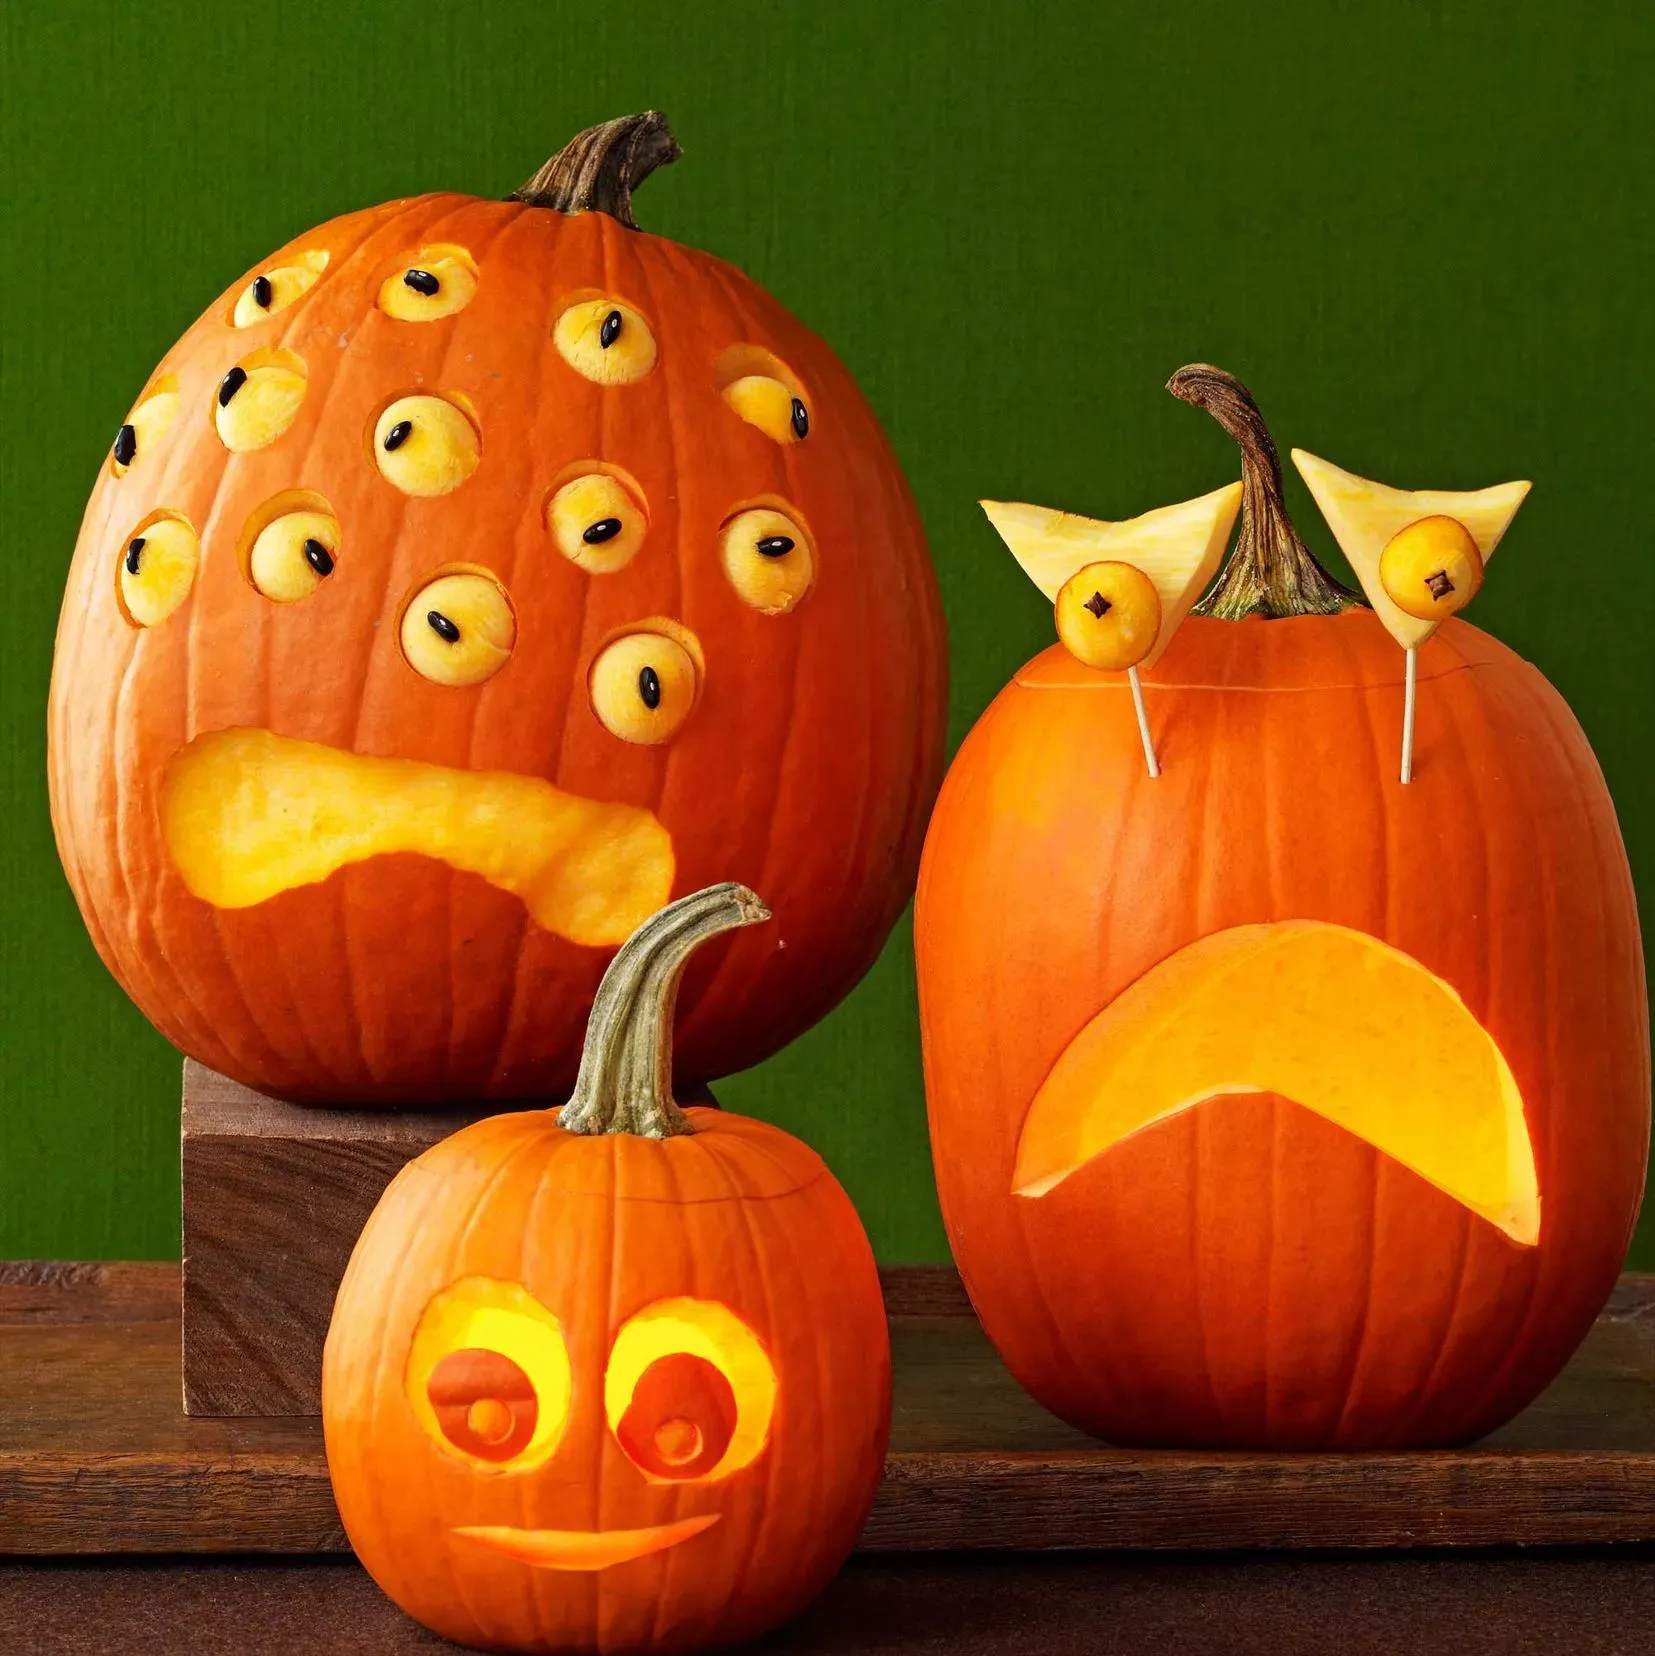
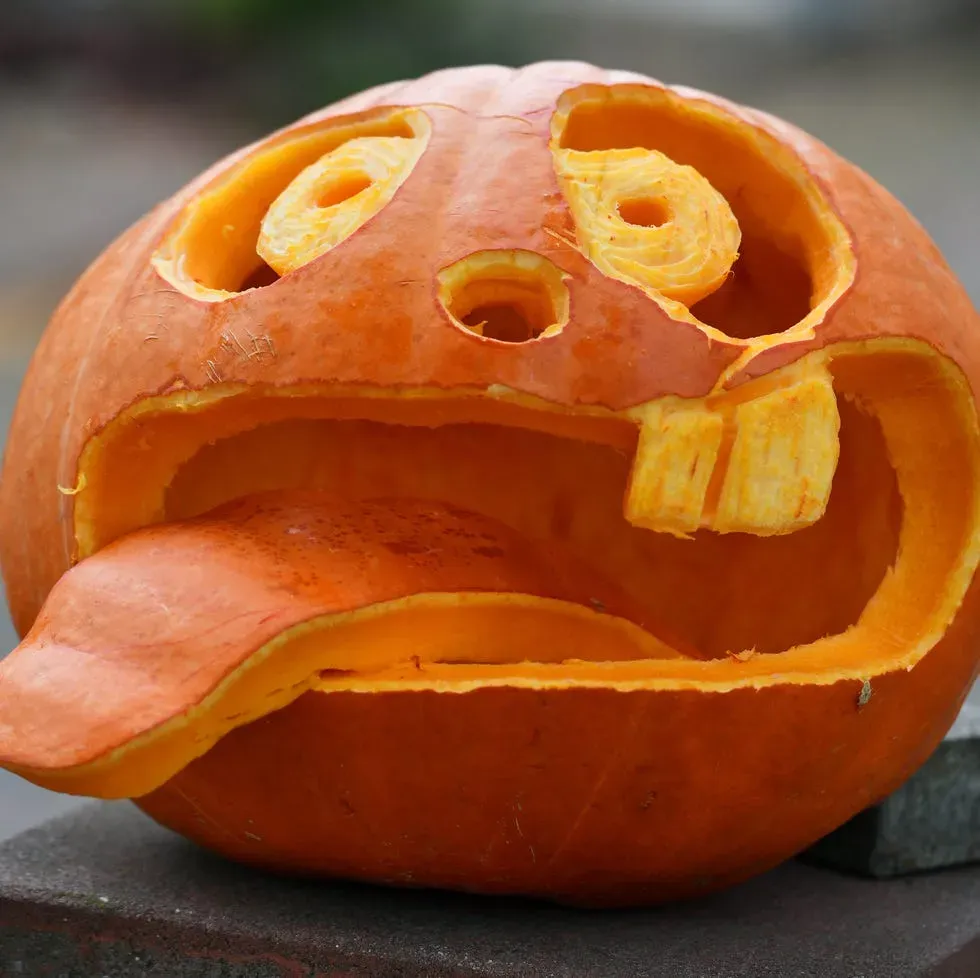
Layering can also be simple. Instead of cutting a full mouth, cut a series of jagged teeth shapes that overlap slightly. Or create layered eyes by carving one circle, then a smaller circle inside it, removing only the inner one. You get depth without complex cuts. One of my personal favorites? A simple pattern of varying depth cuts – some all the way through, some just scraped – to create a dynamic, modern design that catches the light differently. These aren't brain surgery; they're just clever ways to use the pumpkin's surface to your advantage for creative and easy pumpkin carving ideas.
Still wondering where to start?
- Try the "Constellation" method with drilled holes.
- Use metal cookie cutters for clean, small shapes.
- Carve simple silhouettes on the front with the back open.
- Scrape away the skin instead of cutting through for texture.
- Experiment with varying cut depths.
Carve On, With Less Stress
So there you have it. Putting a cool jack-o'-lantern on your porch doesn't require sacrificing a Saturday or your sanity. We've covered the basics, shown you how to simplify the process, and tossed out a bunch of creative and easy pumpkin carving ideas that won't leave you weeping over a ruined gourd. Grab some decent tools, pick a design that speaks to your level of ambition (or lack thereof), and give it a shot. The goal is a decent-looking pumpkin, not a museum piece. Worst case, you have a slightly misshapen but entirely charming Halloween decoration. Best case, you actually enjoy the process and end up with something pretty cool. Now go forth and carve, the easy way.