Table of Contents
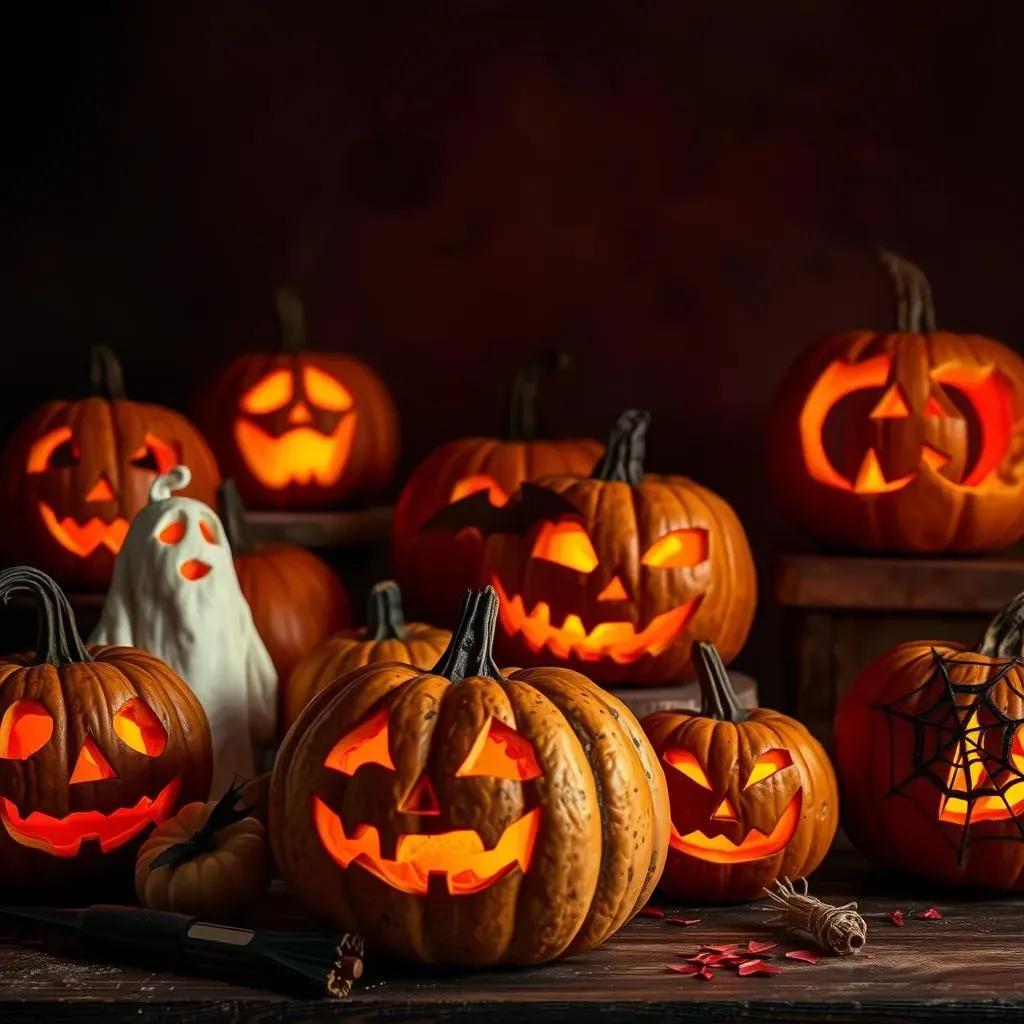
Halloween is creeping closer, and you know what that means: it's time to unleash your inner pumpkin Picasso! Forget the same old triangle eyes and goofy grins. This year, we're diving headfirst into the world of cool scary cool pumpkin carving ideas that will make your jack-o'-lantern the envy of the entire neighborhood. Whether you're a seasoned carving pro or a newbie armed with nothing but a spoon and a dream, we've got something for you.
Unleash Your Inner Artist: Cool Scary Pumpkin Faces
Unleash Your Inner Artist: Cool Scary Pumpkin Faces
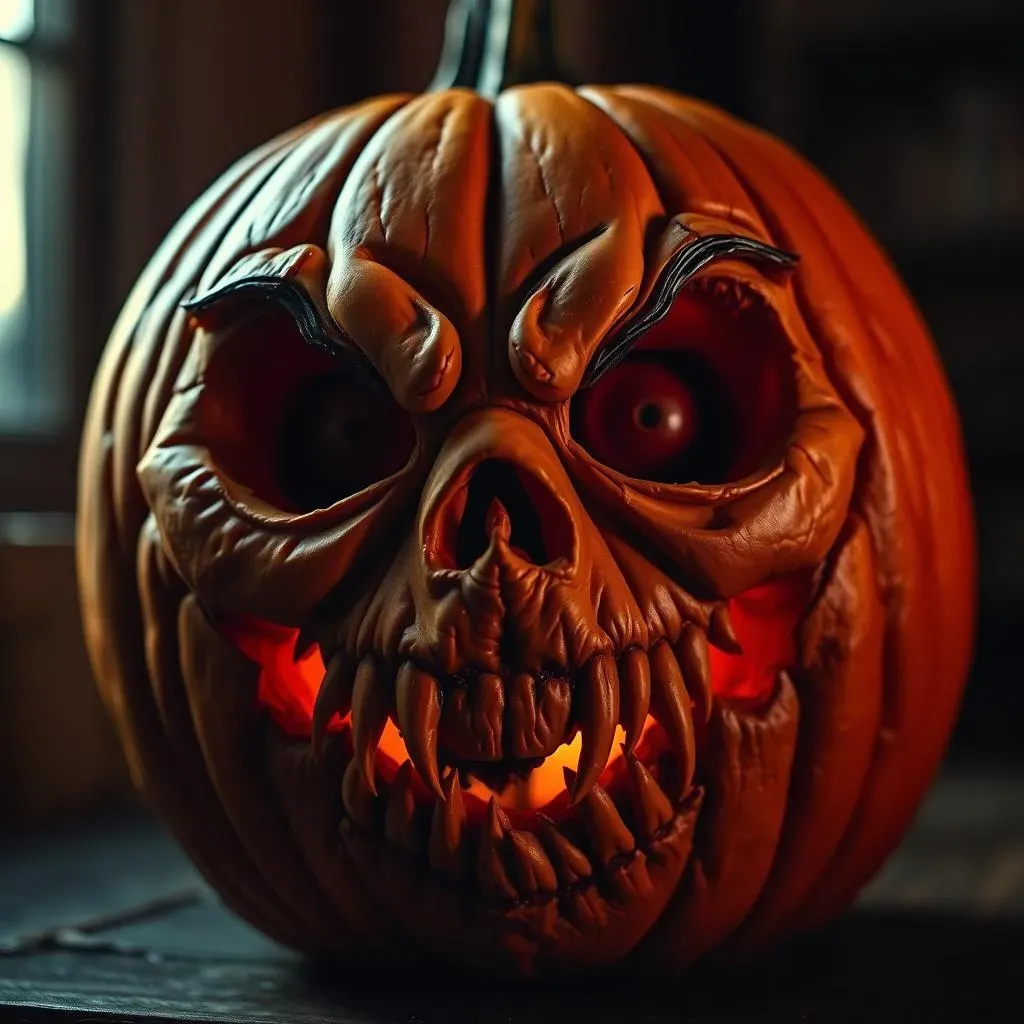
Classic Creepy: The Timeless Scary Pumpkin Face
Let's start with the basics, but with a twist! Forget the cute, friendly jack-o'-lanterns. We're going for pure, unadulterated terror. Think jagged teeth, menacing brows, and eyes that seem to follow you in the dark. The key here is asymmetry. Perfectly symmetrical faces are boring. Give your pumpkin character by making one eye slightly larger than the other, or angling the mouth to one side. Imperfection is key to achieving that truly unsettling look.
To really amp up the scare factor, consider using different carving depths. Carve deeply around the eyes to create deep, shadowed sockets that give the impression of a hollow, empty skull. Use shallower cuts to create wrinkles and other facial details that add to the realism. And don't be afraid to experiment with different tools! A small gouge or V-shaped tool can be perfect for creating sharp, jagged teeth, while a larger spoon can be used to scoop out large chunks of pumpkin flesh for a more dramatic effect.
Modern Monsters: Scary Pumpkin Faces with a Twist
so you've mastered the classic scary face. Now it's time to get a little more creative! Think beyond the traditional monster tropes. What about a zombie pumpkin with exposed brains? Or a vampire pumpkin with long, sharp fangs dripping with (fake) blood? Or even a creepy clown pumpkin with a sinister smile and wild, unruly hair made from dried corn husks?
The possibilities are endless! The best way to come up with unique ideas is to draw inspiration from your favorite horror movies, books, and video games. Consider incorporating elements from pop culture into your designs. A pumpkin carved to resemble Pennywise from "It" is sure to be a crowd-pleaser (or a crowd-scarer!). Don't be afraid to get messy and experiment with different materials. Fake blood, glow-in-the-dark paint, and even small plastic spiders can all be used to add to the overall effect.
Design Element | Tips for Maximum Scare |
|---|---|
Eyes | Asymmetrical, deep sockets, follow-you effect |
Mouth | Jagged teeth, sinister smile, exaggerated expressions |
Details | Wrinkles, scars, textures |
Beyond the Basics: Creative Scary Pumpkin Carving Ideas
Beyond the Basics: Creative Scary Pumpkin Carving Ideas
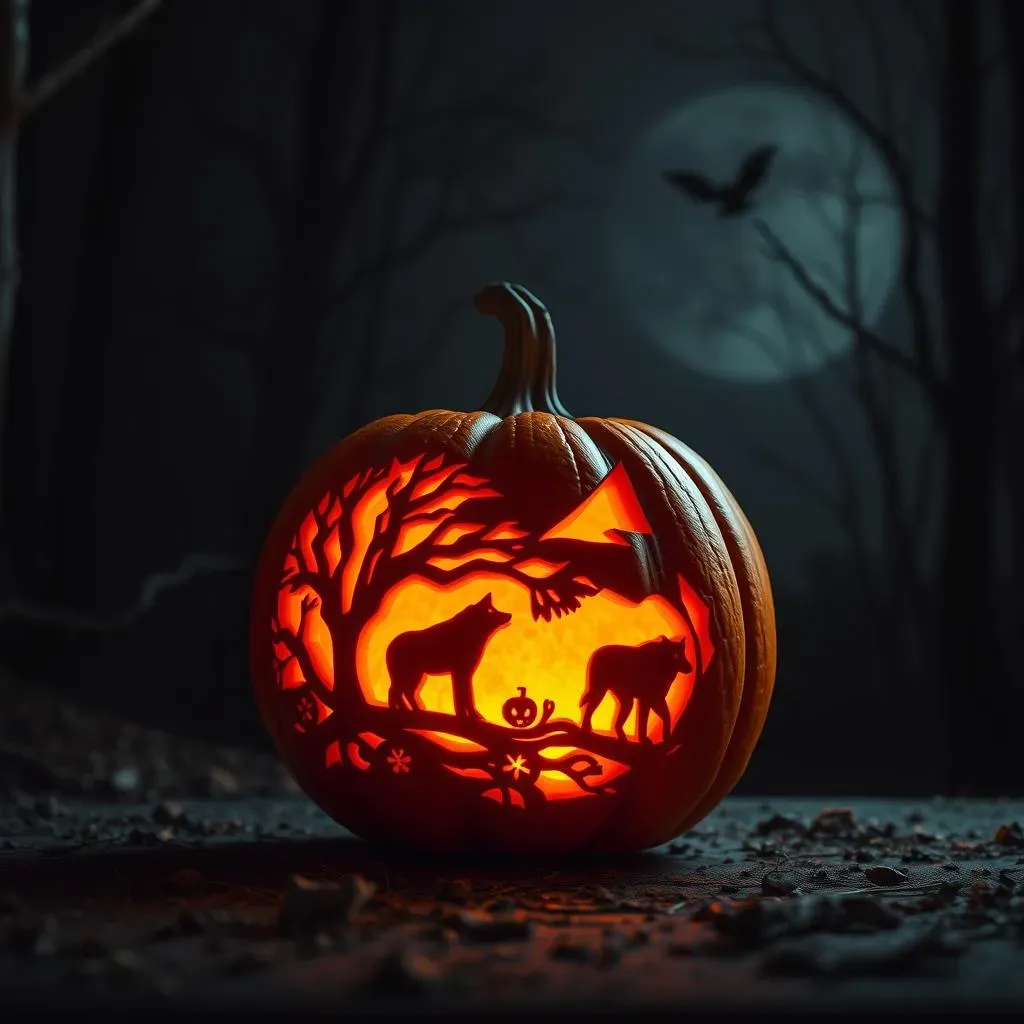
Shadowy Silhouettes: Carving Negative Space
Alright, so you've nailed the classic scary face. Ready to blow some minds? Let's talk negative space carving. Instead of carving out the pumpkin to create the design, you're carving around it. Think of it like a stencil, but on a 3D gourd! This technique can create some seriously stunning and eerie effects, especially when you light it up at night. Imagine a spooky forest scene with bare trees and howling wolves, all silhouetted against the warm glow of the pumpkin's interior. Or perhaps a haunted house with gnarled windows and a menacing figure lurking inside. The key is to plan your design carefully and use a variety of carving depths to create contrast and dimension.
To achieve the best results, start by sketching your design onto the pumpkin's surface. Use a fine-tipped marker or pen for precise lines. Then, carefully carve away the areas around your design, leaving the silhouette intact. Remember to work slowly and steadily, and don't be afraid to take breaks to admire your progress. The more intricate your design, the more time and patience it will require. But trust me, the end result will be well worth the effort!
Pumpkin Props: Adding 3D Elements for Extra Scare
Want to take your pumpkin carving to the next level? Try incorporating 3D elements into your design! This could involve attaching smaller pumpkins to the main pumpkin, or using other materials like twigs, branches, or even metal scraps to create a more dynamic and visually interesting sculpture. For example, you could create a spider pumpkin with long, spindly legs made from wire and covered in black paint. Or a witch pumpkin with a pointy hat made from a small, cone-shaped gourd. The possibilities are truly endless!
When adding 3D elements to your pumpkin carving, it's important to consider both the aesthetic and the structural integrity of your design. Make sure that any materials you use are securely attached to the pumpkin and that they won't cause it to topple over or break. You may need to use glue, wire, or even small screws to hold everything in place. And don't forget to think about how the 3D elements will interact with the light. Experiment with different angles and positions to create interesting shadows and highlights.
Technique | Description | Scare Factor |
|---|---|---|
Negative Space | Carving around the design to create a silhouette. | Eerie, Mysterious |
3D Elements | Adding props and external materials to the pumpkin. | Dynamic, Visually Striking |
Drilling | Creating patterns of holes for a spooky, starlight effect. | Subtle, Atmospheric |
Don't just carve, create a scary masterpiece!
Easy & Spooky: Cool Pumpkin Carving Ideas for Beginners
Easy & Spooky: Cool Pumpkin Carving Ideas for Beginners
Simple Shapes, Big Scares: Beginner-Friendly Designs
so you're new to the pumpkin carving game? No sweat! You don't need to be an artist to create a seriously spooky jack-o'-lantern. The key is to start with simple shapes and designs that are easy to execute. Think classic ghosts, bats, and spiderwebs. These designs are not only easy to carve, but they also look incredibly effective when illuminated.
To make things even easier, consider using stencils. You can find tons of free stencils online, or you can even create your own by drawing simple shapes on a piece of paper and tracing them onto your pumpkin. Once you have your design in place, simply use a small carving knife or pumpkin carving tool to carefully cut along the lines. Remember to take your time and work slowly, and don't be afraid to ask for help if you're struggling.
Tool Time: Essential Gear for Easy Carving
Having the right tools can make all the difference when it comes to pumpkin carving. You don't need to spend a fortune on fancy equipment, but there are a few essential items that will make the process much easier and more enjoyable. First, you'll need a good carving knife or pumpkin carving tool. A serrated knife works well for cutting through the pumpkin's thick skin, while smaller carving tools are ideal for creating finer details. You'll also need a sturdy spoon or scoop for removing the pumpkin's seeds and pulp. And don't forget a bowl or trash bag to collect all the mess!
In addition to these basic tools, you may also want to consider investing in a few optional extras, such as a stencil kit, a pumpkin carving saw, and a set of sculpting tools. These tools can help you create more intricate designs and add extra flair to your jack-o'-lantern. But remember, you don't need to have all the bells and whistles to create a great pumpkin carving. With a little creativity and the right basic tools, you can create a spooky masterpiece that will impress all your friends and neighbors.
Tool | Use | Beginner Tip |
|---|---|---|
Serrated Knife | Cutting the lid and larger shapes. | Use a sawing motion, not just pushing. |
Scoop | Removing seeds and pulp. | Scrape the sides clean for easier carving. |
Small Carving Tools | Fine details and stencils. | Work slowly and carefully. |
Easy doesn't mean boring! Get carving!
Level Up Your JackO'Lantern: Advanced Cool Scary Pumpkin Designs
Level Up Your JackO'Lantern: Advanced Cool Scary Pumpkin Designs
Intricate Illusions: Mastering the Art of Depth and Texture
Alright, you've conquered the basics, dabbled in 3D, and maybe even flirted with negative space. Now it's time to truly level up your Jack-O'-Lantern game and dive into the world of intricate illusions! We're talking about creating the illusion of depth and texture that will make people do a double-take. Forget flat, two-dimensional carvings. We want to create pumpkins that look like they're popping right out of the gourd!
The key to achieving this level of realism is to master the art of layering and shading. This involves using a variety of carving depths to create highlights and shadows that give the impression of three-dimensionality. For example, you could carve deeply around the eyes and mouth to create deep, shadowed sockets, and then use shallower cuts to create wrinkles, scars, and other facial details. You can also use different carving tools to create different textures. A small gouge or V-shaped tool can be perfect for creating sharp, jagged edges, while a larger spoon can be used to create smooth, rounded surfaces. Remember, practice makes perfect! Don't be afraid to experiment with different techniques and tools until you find what works best for you.
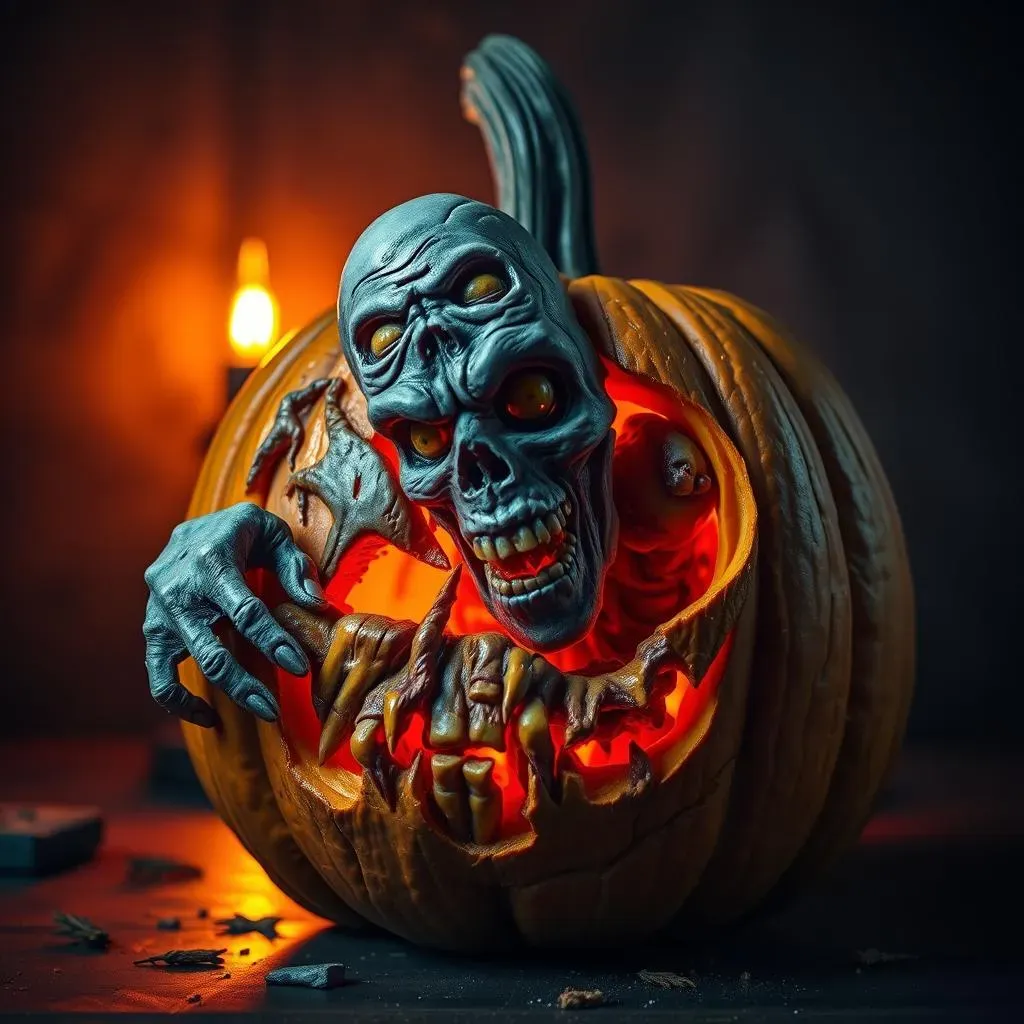
Motion and Mayhem: Bringing Your Pumpkin to Life
So you've got the depth and texture down. Now let's add some action! Advanced pumpkin carving isn't just about static images; it's about creating a sense of motion and mayhem. Think about carving a scene of a zombie bursting out of the pumpkin, or a werewolf lunging at the viewer. The key is to use dynamic lines and shapes to convey a sense of movement and energy.
One way to achieve this is to use flowing lines and curves to create a sense of motion. For example, you could carve a swirling vortex of bats flying out of the pumpkin's mouth, or a series of jagged lines that represent the zombie's decaying flesh. You can also use different carving depths to create a sense of perspective and depth. Carve the foreground elements more deeply than the background elements to create the illusion of distance. And don't be afraid to get creative with your lighting! Use different colored lights or strobe lights to add to the overall effect.
Technique | Description | Illusion Created |
|---|---|---|
Layered Carving | Using varying depths to create shadows and highlights. | 3D Depth |
Dynamic Lines | Flowing curves and jagged edges to suggest movement. | Motion and Energy |
Creative Lighting | Colored lights or strobe effects to enhance the scene. | Atmosphere and Drama |
Your Spooktacular Pumpkin Awaits!
So, there you have it – 90 cool scary cool pumpkin carving ideas to ignite your Halloween spirit! From the subtly spooky to the downright terrifying, we've explored a wide range of designs and techniques to help you create the perfect jack-o'-lantern. Remember, the most important thing is to have fun and let your creativity shine. Don't be afraid to experiment, make mistakes, and learn along the way. With a little practice and a lot of imagination, you'll be carving pumpkins that will impress your friends, family, and maybe even a few friendly neighborhood ghosts for years to come. Happy carving, and Happy Halloween!