Table of Contents
Tired of the annual pumpkin carving mess? Want your spooky season decorations to last longer than a week? Then it's time to explore cool pumpkin ideas without carving! Forget the knives and stencils, because we're diving headfirst into a world of paint, glitter, fabric, and pure imagination. This year, your pumpkins can be as unique and expressive as you are, without any of the gooey cleanup.
Painting Pumpkins: Unleash Your Inner Artist with NoCarve Cool Pumpkin Ideas
Painting Pumpkins: Unleash Your Inner Artist with NoCarve Cool Pumpkin Ideas
Metallic Magic: Gilding Your Gourds
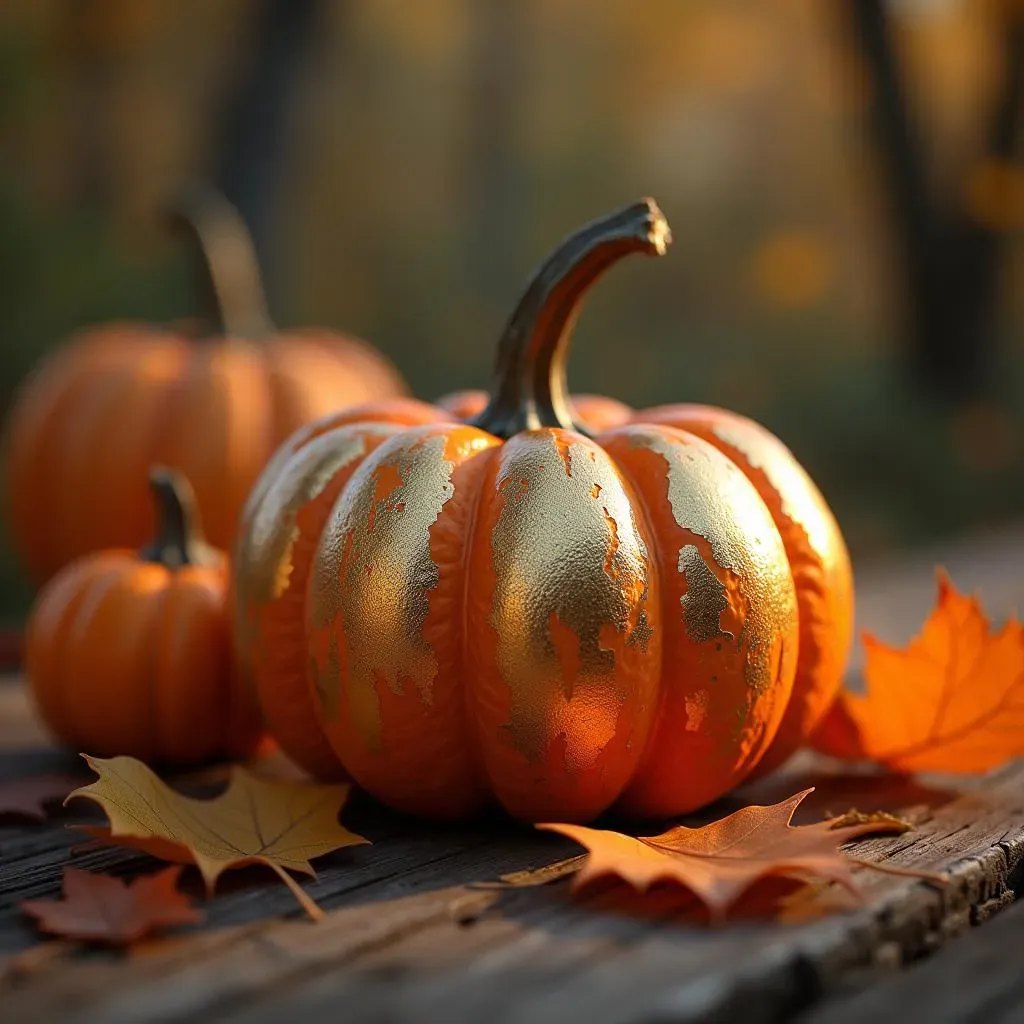
Want to add a touch of elegance to your Halloween decor? Metallic paint is your best friend! Gold, silver, bronze, or copper – take your pick. You can go for a full metallic pumpkin or create intricate designs with stencils. For a rustic look, try dry brushing – lightly dipping your brush in paint and then wiping off most of it before applying to the pumpkin. This creates a subtle, textured effect that's perfect for fall.
For a truly eye-catching piece, consider using leafing. Apply adhesive to your pumpkin in the desired pattern, then gently press gold, silver, or copper leaf onto the adhesive. Once dry, brush away the excess for a stunning gilded effect. It's easier than it sounds, and the results are absolutely gorgeous! Think of it like giving your pumpkin a Midas touch!
Chalkboard Creations: Doodle Your Dreams
Chalkboard pumpkins are not only super trendy but also incredibly versatile. Simply paint your pumpkin with chalkboard paint (you can find it at any craft store), let it dry completely, and then let your creativity run wild! Doodle spooky scenes, write fun Halloween messages, or even create a countdown to trick-or-treating. The best part? You can change the design as often as you like!
To take your chalkboard pumpkin to the next level, try using chalk markers instead of regular chalk. Chalk markers provide more vibrant colors and finer lines, allowing you to create more detailed designs. Plus, they're less messy than regular chalk! And don't forget to seal your design with a clear sealant spray to prevent smudging. That way your creation will last the whole spooky season.
Paint Type | Pros | Cons | Best For |
|---|---|---|---|
Metallic Paint | Elegant, eye-catching, durable | Can be expensive, requires careful application | Sophisticated Halloween displays |
Chalkboard Paint | Versatile, reusable, fun for all ages | Requires sealant, can be messy | Interactive and customizable decorations |
Acrylic Paint | Wide range of colors, affordable, easy to use | Can chip or fade, requires multiple coats | Detailed designs and vibrant colors |
Embellishing Pumpkins: Glamorous & Fun NoCarve Cool Pumpkin Ideas
Embellishing Pumpkins: Glamorous & Fun NoCarve Cool Pumpkin Ideas
Glitter Galore: Sparkle and Shine
Who doesn't love a little sparkle? Glitter is the easiest way to add instant glam to your pumpkins. You can use it to create all sorts of designs, from simple stripes and polka dots to intricate patterns and monograms. For a super easy glitter pumpkin, simply coat the entire pumpkin in glue and then sprinkle with glitter. Shake off the excess and let it dry. Voila! A dazzling decoration that's sure to catch everyone's eye.
Want to get a little more creative? Try using different colors and types of glitter to create unique effects. Chunky glitter adds a bold, textured look, while fine glitter creates a subtle shimmer. You can also use stencils to create glitter designs. Just apply adhesive through the stencil and then sprinkle with glitter. Remove the stencil and let it dry. The possibilities are endless!
Jeweled Jewels: Bling It On
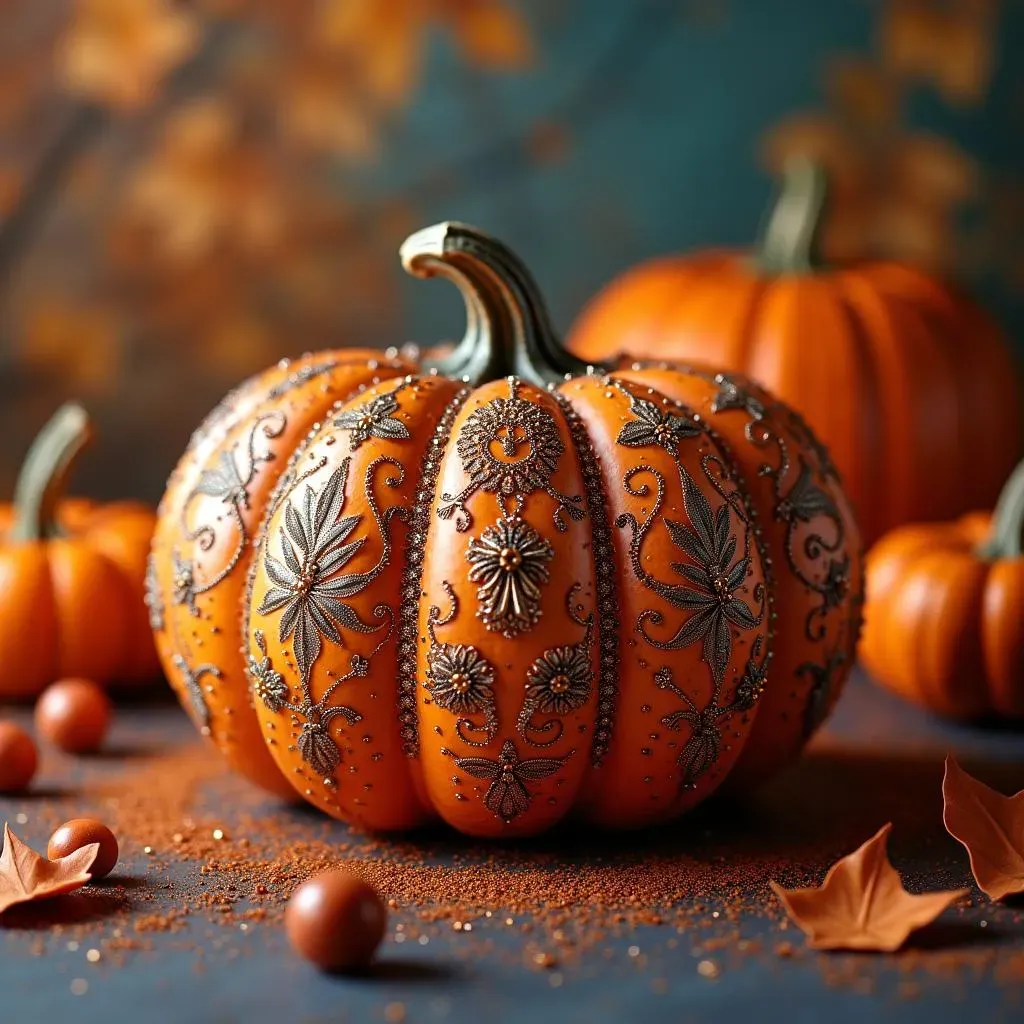
Take your pumpkin decorating to the next level with jewels and rhinestones! These sparkly embellishments are perfect for adding a touch of elegance and glamour to your Halloween decor. You can glue them on in intricate patterns, create jeweled monograms, or simply scatter them randomly for a dazzling effect. For a truly luxurious look, try using a variety of different sizes and shapes of jewels.
For an extra touch of sparkle, consider using adhesive gems with a holographic finish. These gems reflect light in a rainbow of colors, creating a mesmerizing effect. You can also use pearl beads for a more classic and sophisticated look. Simply glue them on in rows or clusters to create a stunning jeweled pumpkin that's fit for a queen!
Embellishment Type | Pros | Cons | Best For |
|---|---|---|---|
Glitter | Easy to use, affordable, adds instant sparkle | Can be messy, sheds easily | Creating dazzling and eye-catching decorations |
Jewels & Rhinestones | Elegant, glamorous, adds texture and dimension | Can be time-consuming, requires careful application | Luxurious and sophisticated Halloween displays |
Temporary Tattoos | Easy to apply, wide variety of designs, fun for all ages | Not very durable, can be easily scratched off | Quick and easy decorations with a touch of personality |
Decoupage & Fabric Pumpkins: Unique Textures and NoCarve Cool Pumpkin Ideas
Decoupage & Fabric Pumpkins: Unique Textures and NoCarve Cool Pumpkin Ideas
Decoupage Dreams: Paper Perfection
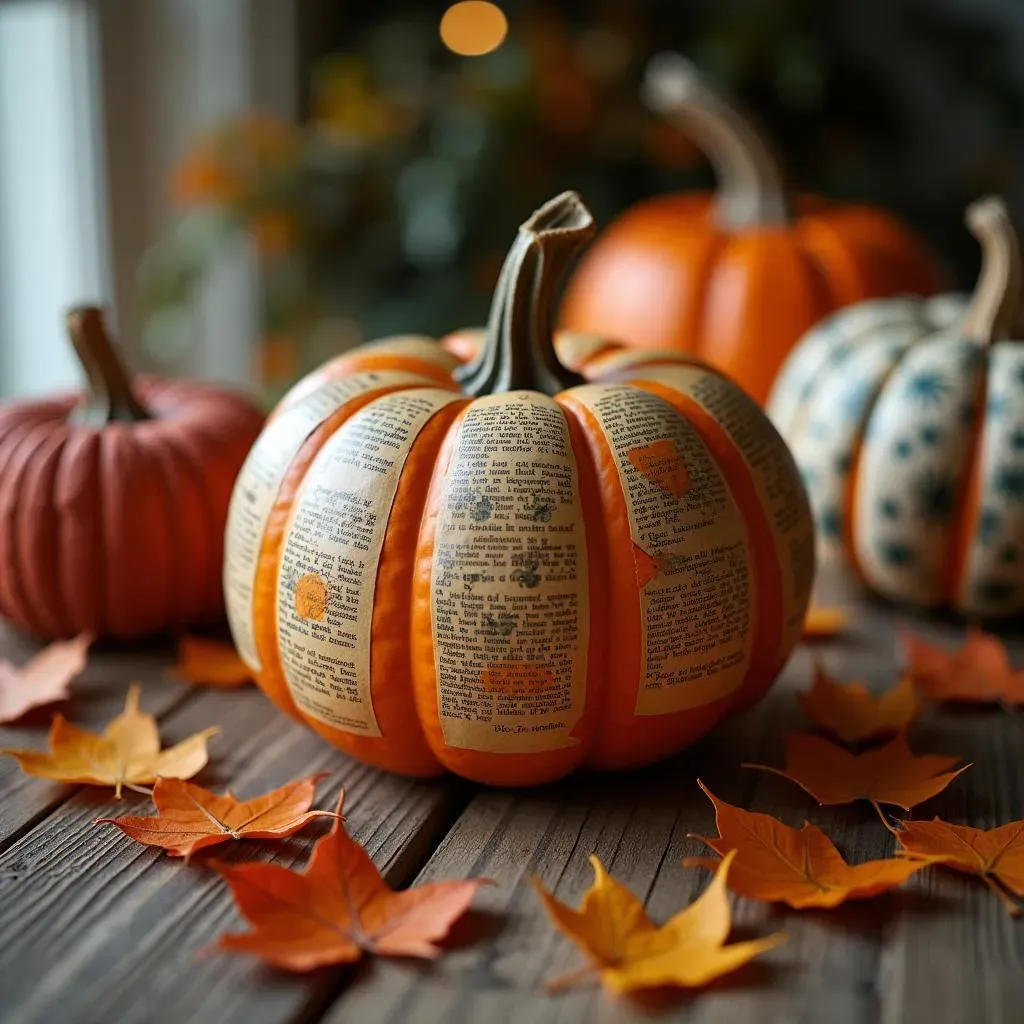
Decoupage is a fancy word for gluing paper cutouts onto a surface, and it's a fantastic way to create unique and personalized pumpkins. You can use anything from vintage book pages and colorful napkins to scrapbook paper and even old maps. Simply cut out your desired shapes, apply decoupage glue (like Mod Podge) to the back of the paper, and carefully smooth it onto the pumpkin. Overlap the edges slightly for a seamless look. Once dry, seal with another layer of decoupage glue to protect your design.
To make your decoupage pumpkin even more interesting, try using different textures of paper. Corrugated cardboard, tissue paper, and even dried leaves can add depth and dimension to your design. You can also experiment with different finishes of decoupage glue. Matte gives a subtle, understated look, while gloss adds a shiny, eye-catching finish. It's like giving your pumpkin a paper makeover!
Fabric Fantasy: Wrap It Up
Fabric is another great way to add texture and pattern to your no-carve pumpkins. You can wrap the entire pumpkin in fabric, create fabric appliques, or even use fabric to create a patchwork effect. For a simple fabric-wrapped pumpkin, cut a piece of fabric large enough to cover the entire pumpkin. Apply fabric glue to the pumpkin and then carefully smooth the fabric over the surface. Trim away any excess fabric and secure the edges with more glue.
Want to get a little more creative? Try using different types of fabric to create unique textures and patterns. Burlap adds a rustic, country feel, while velvet adds a touch of luxury. You can also use lace, ribbon, or even old scarves to create interesting designs. And don't forget to embellish your fabric pumpkins with buttons, beads, or other decorative elements. It's all about creating a one-of-a-kind masterpiece!
Lace Embrace: Delicate Details
Speaking of lace, let's give it its own moment. Lace is perfect for adding delicate and intricate details to your no-carve pumpkins. You can wrap the entire pumpkin in lace, create lace stencils, or even use lace to create a delicate overlay. For a simple lace-wrapped pumpkin, cut a piece of lace large enough to cover the entire pumpkin. Apply fabric glue to the pumpkin and then carefully smooth the lace over the surface. Trim away any excess lace and secure the edges with more glue.
To make your lace pumpkin even more special, try painting the pumpkin a contrasting color before applying the lace. This will allow the lace pattern to really stand out. You can also embellish your lace pumpkins with pearls, rhinestones, or other sparkly elements. And don't be afraid to experiment with different types of lace. Delicate floral lace, bold geometric lace, or even stretchy lace can all create unique and beautiful effects.
Material | Pros | Cons | Best For |
|---|---|---|---|
Decoupage Paper | Versatile, personalized, wide range of designs | Requires sealant, can be time-consuming | Creating unique and meaningful decorations |
Fabric | Adds texture, wide range of patterns and colors, can be reused | Requires fabric glue, can be bulky | Creating cozy and stylish Halloween displays |
Lace | Delicate, intricate, adds a touch of elegance | Can be fragile, requires careful application | Creating romantic and sophisticated decorations |
Character Pumpkins: Building Fun Scenes with NoCarve Cool Pumpkin Ideas

Character Pumpkins: Building Fun Scenes with NoCarve Cool Pumpkin Ideas
Stack 'Em High: Pumpkin People
Why settle for one pumpkin when you can create a whole character? Stack different sized pumpkins on top of each other to create fun and whimsical pumpkin people! Use paint, fabric scraps, and other embellishments to bring your characters to life. A small pumpkin on top could be the head, adorned with a painted face and a silly hat made from felt. The middle pumpkin could be the body, dressed in a fabric vest and button details. And the bottom pumpkin could be the base, decorated with painted shoes or boots. It's like building a snowman, but with pumpkins!
To make your pumpkin people even more stable, consider using wooden dowels to connect the pumpkins. Simply drill holes in the top and bottom of each pumpkin and then insert the dowels. This will prevent your characters from toppling over. And don't forget to add some personality with accessories! A scarf, a pair of glasses, or even a tiny umbrella can really bring your pumpkin people to life. It's all about creating a fun and imaginative scene that will delight everyone who sees it.
Minion Mania: Googly Eyes and Overalls
Who doesn't love those adorable yellow, pill-shaped characters? Minions are a perfect theme for no-carve pumpkins! Simply paint your pumpkin yellow and then add the signature googly eyes and blue overalls. You can use black paint or markers to create the details, such as the goggles, hair, and mouth. For an extra touch of authenticity, add a small "G" logo to the overalls.
To make your Minion pumpkins even more fun, consider creating a whole group of them! Use different sized pumpkins to create Minions of different heights and widths. You can also vary the expressions and poses of your Minions to create a dynamic and playful scene. And don't forget to add some props! A tiny banana, a construction helmet, or even a ukulele can really bring your Minion pumpkins to life. It's like creating your own little Minion army!
Character Type | Materials Needed | Difficulty | Best For |
|---|---|---|---|
Pumpkin People | Different sized pumpkins, paint, fabric scraps, embellishments, wooden dowels (optional) | Medium | Creating whimsical and imaginative scenes |
Minions | Yellow paint, googly eyes, blue fabric or paint, black paint or markers | Easy | Creating a fun and playful Halloween display |
Monster Mash | Assorted pumpkins, paint, googly eyes, felt, pipe cleaners, other craft supplies | Medium to Hard | Creating spooky and creative monster characters |
Monster Mash: Spooky and Silly
Get ready to unleash your inner monster maker! Creating monster pumpkins is a fun and creative way to add a spooky touch to your Halloween decor. Use paint, googly eyes, felt, pipe cleaners, and other craft supplies to create a cast of creepy and kooky characters. A large pumpkin with lots of googly eyes and a gaping mouth can be a silly monster. A smaller pumpkin with sharp felt teeth and pointy ears can be a scary creature. It's all about letting your imagination run wild and creating unique and terrifying (or hilarious) monsters.
To make your monster pumpkins even more realistic, consider adding some texture. Bumpy paint, faux fur, and even dried moss can add depth and dimension to your creations. You can also use different colors and patterns to create unique monster skins. And don't forget to add some accessories! A witch's hat, a pair of horns, or even a tiny trident can really bring your monster pumpkins to life. It's like creating your own little monster movie set!
Unleash Your Creativity with No-Carve Pumpkin Decor
So, there you have it – a treasure trove of cool pumpkin ideas without carving to ignite your Halloween creativity! From painting and embellishing to decoupage and character building, the possibilities are truly endless. Embrace these no-carve methods to create unique, long-lasting decorations that reflect your personal style. This year, let your imagination run wild and transform those ordinary pumpkins into extraordinary works of art that will impress your neighbors and delight your family. Happy decorating!