Table of Contents
Tired of the same old jack-o'-lantern grin? Want to impress your neighbors with a pumpkin that screams creativity but doesn't require a master sculptor's touch? You've come to the right place! Forget those wobbly triangles and uneven smiles. This guide is all about unlocking cool pumpkin carvings easy enough for anyone to pull off, regardless of artistic skill. We're diving into a world of clever techniques, from using simple tools you probably already have in your kitchen to leveraging free stencils that will transform your pumpkin into a spooky masterpiece. Whether you're a complete beginner or just looking to up your Halloween game, get ready to discover a range of ideas that are both achievable and seriously impressive. So, grab a pumpkin, gather your tools, and let's get carving! We'll walk you through everything from essential tools to easy-to-follow designs, and even some pro tips for making your pumpkin the envy of the block. Get ready to unleash your inner artist and create some truly memorable Halloween decorations.
Simple Tools for Cool Pumpkin Carvings
Simple Tools for Cool Pumpkin Carvings
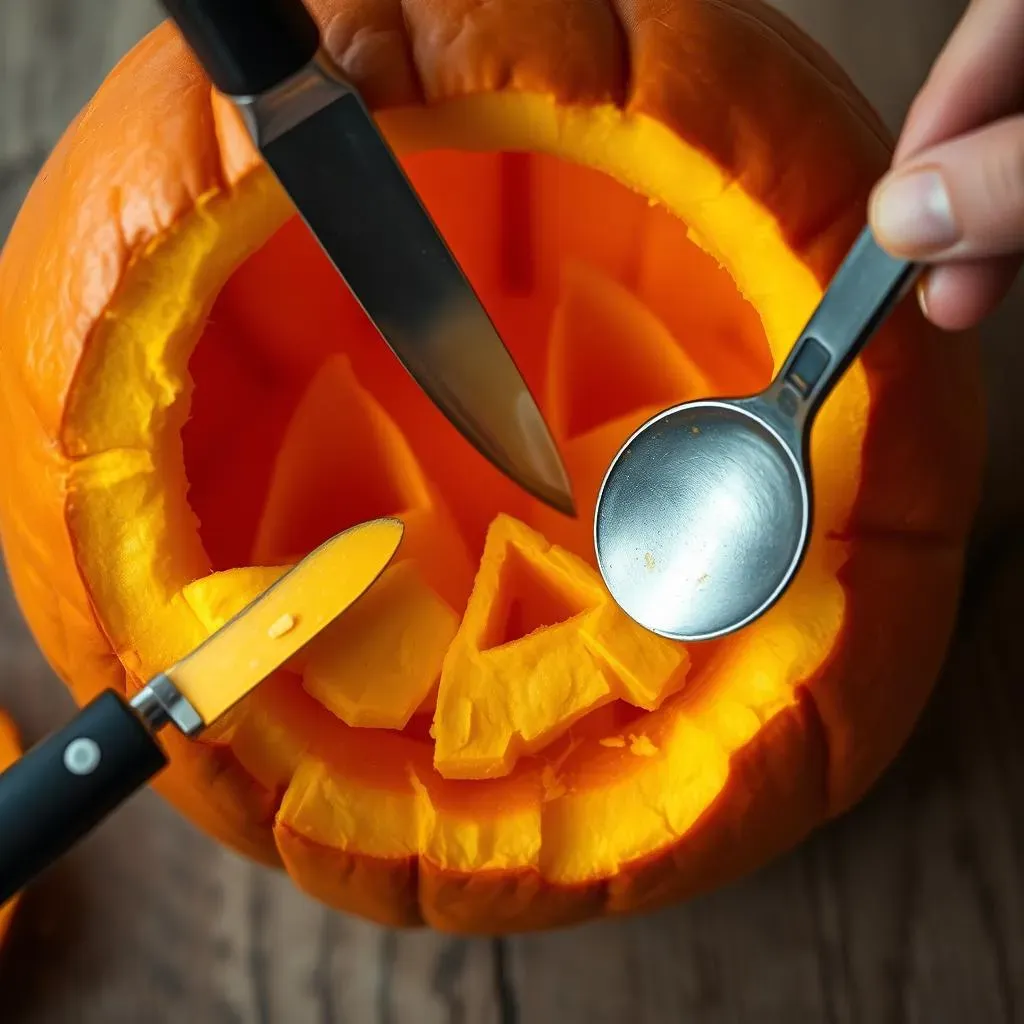
You don't need a fancy sculpting kit to create amazing pumpkin art. In fact, some of the best cool pumpkin carvings come from using simple tools you probably already have lying around your kitchen. Think beyond the flimsy plastic carving tools from those kits – those are more frustrating than helpful! We're talking about things like paring knives, melon ballers, and even cookie cutters. These everyday items can be surprisingly effective for creating detailed and interesting designs. The key is to think creatively and use the tools in unexpected ways.
For instance, a small paring knife is great for precise cuts and fine details. A melon baller can be used to scoop out small circles, creating a dotted or textured effect. And cookie cutters? They're perfect for making repeating shapes quickly and easily. Don't underestimate the power of a good spoon, either. It's essential for scraping out the pumpkin guts and thinning the walls for easier carving. Remember, safety first! Always carve on a stable surface and be mindful of your fingers.
Tool | Use | Why it's great |
|---|---|---|
Paring Knife | Detailed cuts, fine lines | Precision and control |
Melon Baller | Circles, texture | Easy to create uniform shapes |
Cookie Cutters | Repeating shapes | Speed and consistency |
Spoon | Gutting, thinning walls | Essential for prep work |
Easy Pumpkin Carving Ideas for Beginners
Easy Pumpkin Carving Ideas for Beginners
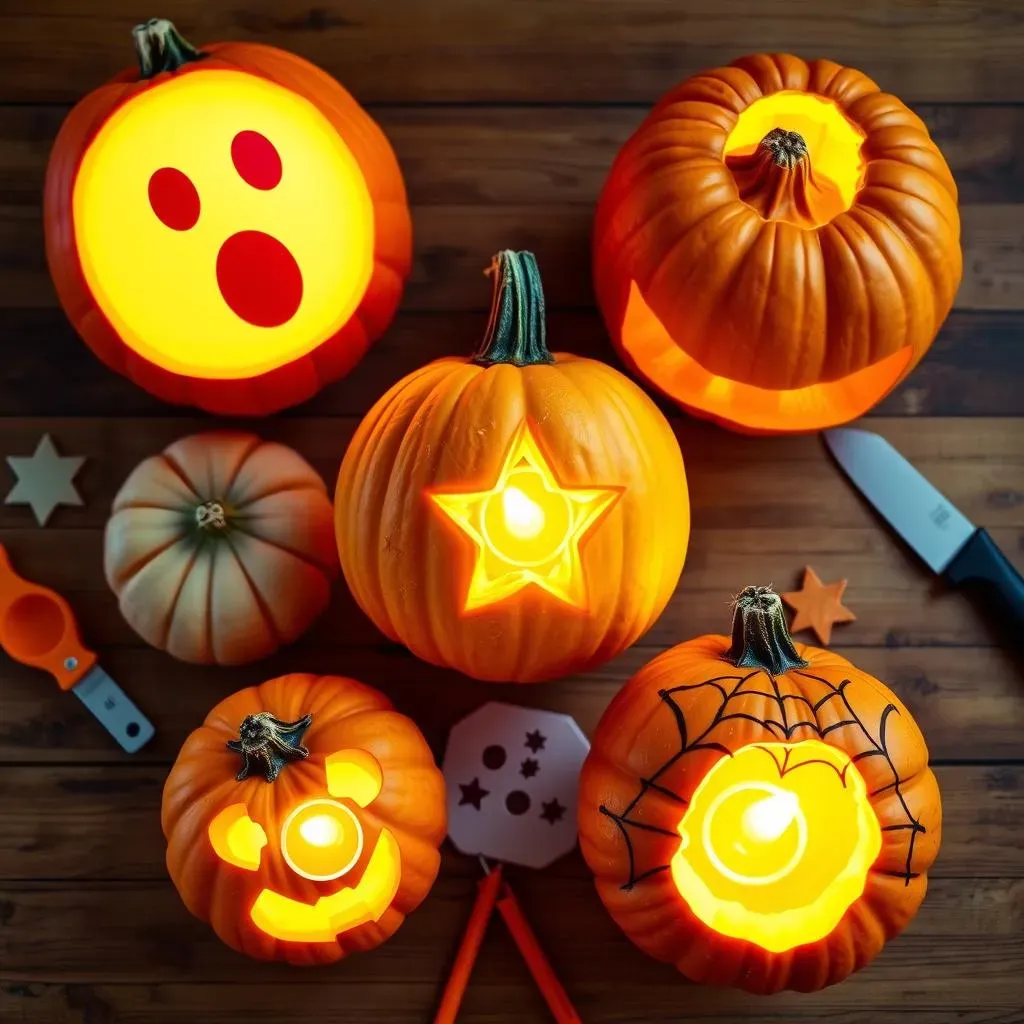
so you're ready to ditch the basic triangle eyes, but maybe you're not quite ready for intricate portraits. No problem! There are tons of easy pumpkin carving ideas for beginners that still look super cool. Think about simple shapes, silhouettes, and patterns. A classic ghost is always a winner – just a few oval-shaped eyes and a simple mouth, and you're done. Stars are another great option; use a cookie cutter or a stencil for perfect points. Or how about a spooky spider web? You can carve the basic web shape and then use a marker to draw on the details. The beauty of these designs is that they're forgiving – a little wobble here or there just adds to the spooky charm!
Another fantastic beginner-friendly idea is to focus on textures instead of complex shapes. Use a melon baller to create a polka-dot effect, or try carving simple lines and grooves to mimic wood grain. You can even use a drill to create a pattern of holes – it's surprisingly effective and requires minimal carving skill. Remember, the goal is to have fun and create something you're proud of. Don't put too much pressure on yourself to be perfect. Even the simplest designs can look amazing with a little creativity and a well-placed candle!
Cool Pumpkin Carving Designs: Stencils and Templates

Cool Pumpkin Carving Designs: Stencils and Templates
Ready to take your pumpkin game to the next level without needing a degree in fine arts? Stencils and templates are your secret weapon! The internet is overflowing with cool pumpkin carving designs, from spooky bats and grinning skulls to your favorite movie characters and intricate floral patterns. The beauty of using stencils is that they provide a clear outline to follow, making even complex designs achievable for beginners. You can find free stencils online with a quick search, or even create your own by printing out a picture and tracing it onto your pumpkin. Once you've got your stencil, simply tape it to your pumpkin and use a pointed tool, like an awl or a thick needle, to poke holes along the lines. Remove the stencil and connect the dots with your carving tools. It's like a connect-the-dots for Halloween!
When selecting stencils and templates, consider your skill level and the time you have available. Intricate designs can be challenging and time-consuming, while simpler designs can be just as effective. Don't be afraid to modify a stencil to make it your own. You can add extra details, change the expression, or even combine elements from different stencils to create a unique design. Also, think about the size of your pumpkin and choose a stencil that fits appropriately. A stencil that's too large or too small will be difficult to work with and may not look as good in the end. With a little planning and the right stencil, you can create a truly impressive pumpkin carving that will wow your friends and neighbors.
- Pro Tip: Use transfer paper to get a clean outline on your pumpkin.
- Another Pro Tip: Lightly spray the stencil with adhesive spray to keep it in place while you're poking holes.
Advanced Techniques for Cool Pumpkin Carvings
Advanced Techniques for Cool Pumpkin Carvings
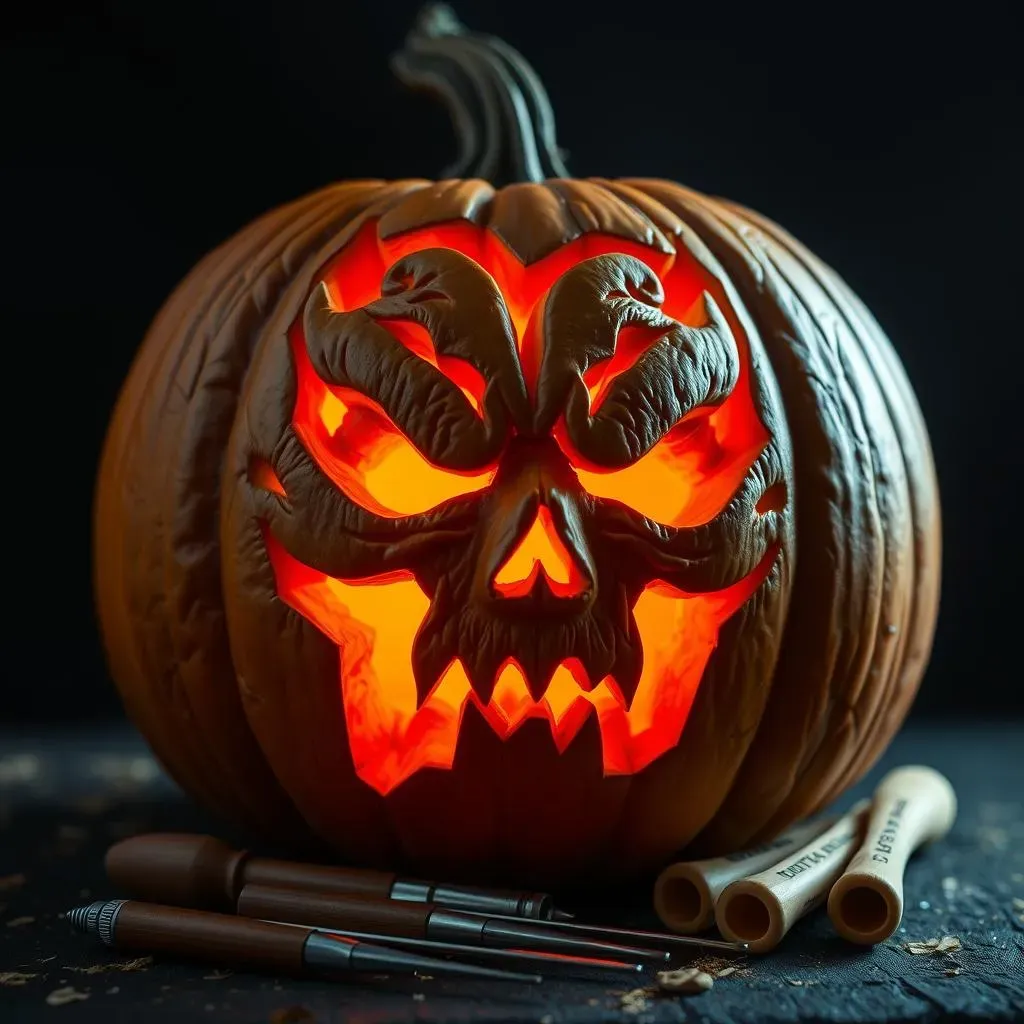
Alright, so you've mastered the basics and you're itching to push your pumpkin carving skills to the next level? Let's talk advanced techniques for cool pumpkin carvings! This is where things get really interesting, and where you can truly create some show-stopping designs. We're moving beyond simple shapes and stencils and diving into techniques like 3D carving, using power tools, and even incorporating light and shadow to create depth and dimension. It might sound intimidating, but with a little practice and the right tools, you can achieve amazing results. Think of it like leveling up in your favorite video game – it takes some effort, but the rewards are totally worth it!
One of the most impressive advanced techniques is 3D carving, where you're not just cutting through the pumpkin, but actually sculpting it. This involves using a variety of tools, like gouges and loop tools, to remove layers of pumpkin flesh and create raised or recessed areas. You can use this technique to create realistic facial features, intricate patterns, or even entire scenes on your pumpkin. Another cool technique is using power tools, like rotary tools or detail sanders, to smooth out surfaces, create fine details, or even add texture to your carving. Just be sure to wear safety glasses and gloves, and take it slow and steady. Finally, experiment with lighting to enhance your carving. Use different colored lights, strobe effects, or even project images onto your pumpkin to create a truly unique and eye-catching display.
Before you start hacking away, it's crucial to plan your design carefully. Sketch it out on paper first, paying attention to the different levels of depth and the way light will interact with the carving. Use reference photos to guide you, especially if you're attempting a realistic portrait or scene. And don't be afraid to practice on a smaller pumpkin or even a block of foam before tackling your masterpiece. Remember, patience is key! Advanced carving techniques take time and practice to master, so don't get discouraged if your first attempt isn't perfect. Just keep experimenting and learning, and you'll be creating incredible pumpkin carvings in no time.
Displaying Your Cool Pumpkin Carvings: Lighting and Presentation
Displaying Your Cool Pumpkin Carvings: Lighting and Presentation
Setting the Stage: Location, Location, Location
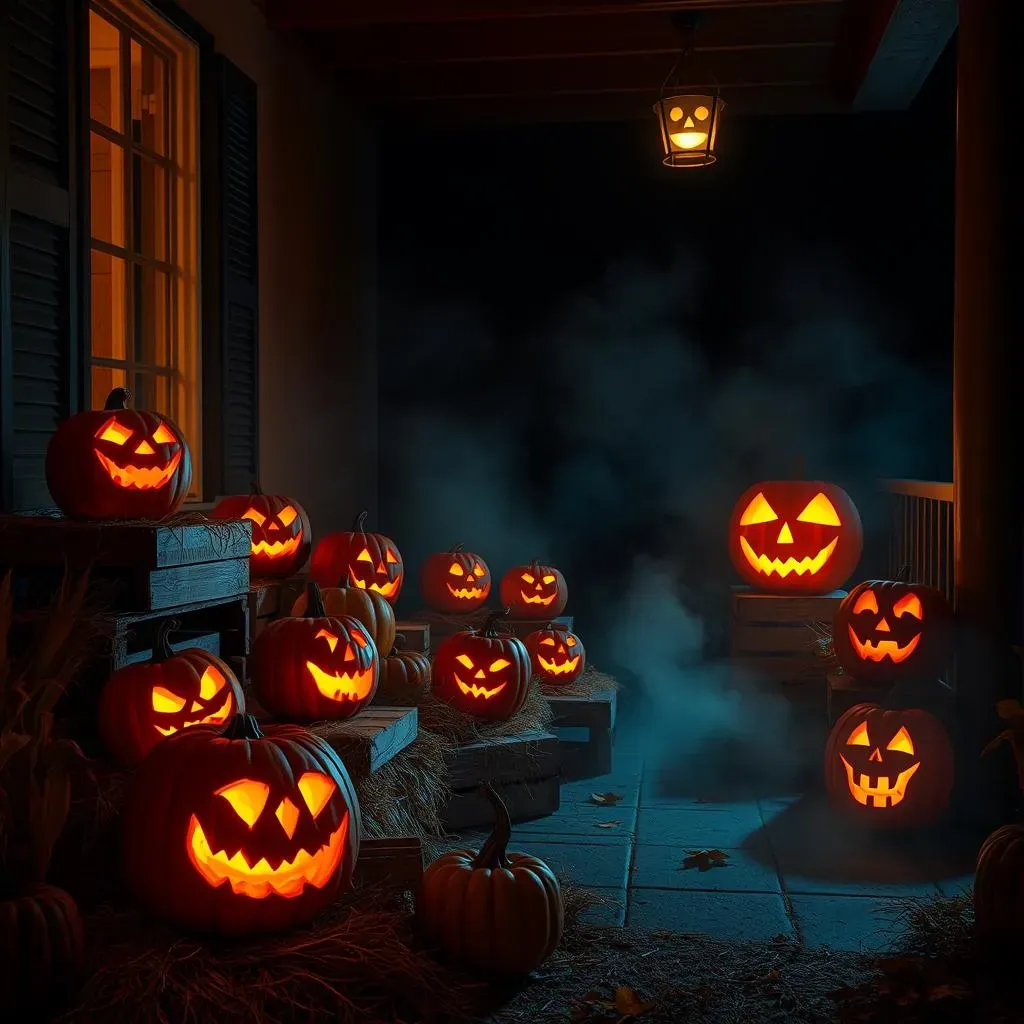
you've poured your heart and soul into creating cool pumpkin carvings, now you need to show them off! But simply plopping them on your porch isn't going to cut it. Think about the overall ambiance you want to create. Is it spooky? Whimsical? Elegant? The location of your pumpkin display should complement the style of your carvings. A well-lit porch is always a good choice, but consider other spots like your front garden, a window display, or even indoors as a centerpiece. Think about the backdrop, too. A plain wall might make your pumpkins stand out more, while a leafy bush could add a touch of natural spookiness.
Also, consider the safety aspects. Make sure your pumpkins are placed on a stable surface where they won't get knocked over by trick-or-treaters or strong winds. If you're using real candles, keep them away from flammable materials like dry leaves or curtains. And don't forget about the weather! If rain is in the forecast, you might want to move your pumpkins to a covered area to protect them from the elements. A little planning goes a long way in ensuring your hard work stays safe and looks its best.
Let There Be Light: Choosing the Right Illumination
Lighting is absolutely crucial for showcasing your cool pumpkin carvings. It can make or break the entire display! While traditional candles are classic, they're not always the safest or most practical option. Battery-operated LED lights are a fantastic alternative. They come in a variety of colors and brightness levels, and they're much safer and longer-lasting than candles. You can even find flickering LED candles that mimic the look of a real flame. For a more dramatic effect, try using spotlights to highlight specific features of your carvings or to create interesting shadows. Colored lights can also add a fun and spooky touch. Green lights can make your pumpkins look extra eerie, while orange lights can enhance the warm, autumnal vibe.
Experiment with different lighting techniques to see what works best for your carvings. Try placing a light inside the pumpkin and another one behind it to create a layered effect. Or use a flashlight to project a beam of light through a small hole in the back of the pumpkin, creating a spotlight effect. You can even use Christmas lights to add a festive touch. Whatever you choose, make sure the lighting is bright enough to show off the details of your carvings, but not so bright that it washes them out. The goal is to create a warm and inviting glow that draws people in and highlights the artistry of your pumpkins.
Lighting Option | Pros | Cons |
|---|---|---|
Candles | Classic look, warm glow | Fire hazard, short-lasting |
LED Lights | Safe, long-lasting, variety of colors | Less authentic look |
Spotlights | Dramatic effect, highlights details | Requires power source |
Adding the Final Touches: Props and Ambiance
To really make your cool pumpkin carvings stand out, consider adding some extra props and decorations to create a complete Halloween scene. Think about incorporating elements like hay bales, corn stalks, gourds, and fall leaves to create a rustic, autumnal vibe. You can also add spooky elements like spider webs, skeletons, and tombstones to amp up the scare factor. A fog machine can create an eerie atmosphere, especially when combined with colored lights. And don't forget about sound! Playing some spooky sound effects or Halloween-themed music can really set the mood.
When arranging your props, think about creating different levels and textures. Place taller items in the back and shorter items in the front to create depth. Use different materials and colors to add visual interest. And don't be afraid to get creative! You can use old crates, barrels, or even tree stumps to create unique display platforms. The goal is to create a cohesive and visually appealing scene that complements your pumpkin carvings and enhances the overall Halloween experience.
Finally, remember to keep it fun and personal! Add your own unique touches to the display to make it truly your own. Maybe you have a collection of vintage Halloween decorations that you can incorporate, or perhaps you want to create a theme based on your favorite scary movie. Whatever you choose, let your personality shine through and create a display that you're proud of. After all, Halloween is all about having fun and celebrating the spooky season with friends and family.
Conclusion: Carve Your Way to Halloween Success
So, there you have it! A treasure trove of ideas and techniques to make cool pumpkin carvings easy and achievable for everyone. From selecting the right tools to mastering simple yet effective designs, you're now equipped to create pumpkins that stand out from the patch. Remember, the key is to have fun and let your creativity flow. Don't be afraid to experiment with different stencils, lighting options, and carving techniques to find what works best for you. With a little practice and a dash of imagination, you'll be crafting spooky and stunning pumpkin displays that will impress your friends, family, and the entire neighborhood. Happy carving, and Happy Halloween!