Table of Contents
Halloween's knocking, and that means it's pumpkin season! Forget the same old toothy grin; it's time to unleash some seriously cool pumpkin carving ideas that are easy enough for anyone to pull off. Whether you're a total newbie or just looking for a fresh take on a classic, we've got you covered.
Easy Pumpkin Carving Ideas for Beginners: Get Spooky Quick

Easy Pumpkin Carving Ideas for Beginners: Get Spooky Quick
Trace and Cut: The Stencil Superstar
so you're staring at a pumpkin and feeling a little intimidated? Don't sweat it! The easiest way to get started is with stencils. Seriously, they're a game-changer. You can find tons of free printable stencils online – think classic ghosts, bats, or even simple geometric shapes. Print one out, tape it to your pumpkin, and trace the design with a marker. Then, just carefully cut along the lines. Boom! Instant spooky success.
Pro tip: Use a pumpkin carving kit with those little saws – they're way easier to maneuver than a kitchen knife, especially for beginners. And don't be afraid to start small. A simple design, perfectly executed, looks way better than a complicated one that's a bit of a mess.
Drill It, Don't Kill It: The Power of Patterns
Want to add a little flair without a ton of cutting? Grab a drill! This is seriously one of the coolest and easiest pumpkin carving ideas for beginners. Use different sized drill bits to create patterns of holes in your pumpkin. You can do lines, dots, spirals – whatever your heart desires. When you light it up, the light shines through the holes, creating a super cool effect. It’s like pointillism, but with power tools and pumpkins!
Try using a template to mark your drill points, or just go freehand for a more organic look. Either way, drilling is a surprisingly satisfying way to decorate a pumpkin, and it's way less messy than traditional carving.
Peel and Reveal: The Two-Toned Terror
This one's a little different, but still super easy and effective. Instead of cutting all the way through the pumpkin, use a carving tool (or even a vegetable peeler!) to carefully peel away the outer layer of the pumpkin skin. This reveals the lighter flesh underneath, creating a cool two-toned effect. You can create all sorts of designs this way – think swirling patterns, spooky silhouettes, or even just simple stripes.
This technique works best with pumpkins that have a good color contrast between the skin and the flesh. And remember, patience is key! Go slow and steady to avoid accidentally cutting too deep. The peel and reveal method is a great way to add depth and dimension to your pumpkin carving without having to do a ton of actual cutting. It's one of my favorite easy pumpkin carving ideas!
Technique | Difficulty | Spook Factor |
|---|---|---|
Stencil Cutting | Easy | Variable |
Drill Patterns | Easy | Medium |
Peel & Reveal | Easy | Medium |
Cool Pumpkin Carving Ideas: Stencils and Templates for Instant Success
Cool Pumpkin Carving Ideas: Stencils and Templates for Instant Success
Free Stencil Bonanza: Where to Find the Best Designs
Alright, so you're ready to rock the stencil game? Awesome! The internet is your best friend here. Tons of websites offer free, printable pumpkin carving stencils. We're talking everything from cute cartoon characters and spooky Halloween icons to intricate patterns and even pop culture references. A quick Google search for "free pumpkin carving stencils" will give you more options than you could possibly carve in a single Halloween season.
Some of my go-to sites include Pumpkin Pile, DLTK's Crafts for Kids, and even Pinterest is a goldmine for finding unique stencil designs. Just remember to check the licensing – most are for personal use, which is perfect for our purposes.
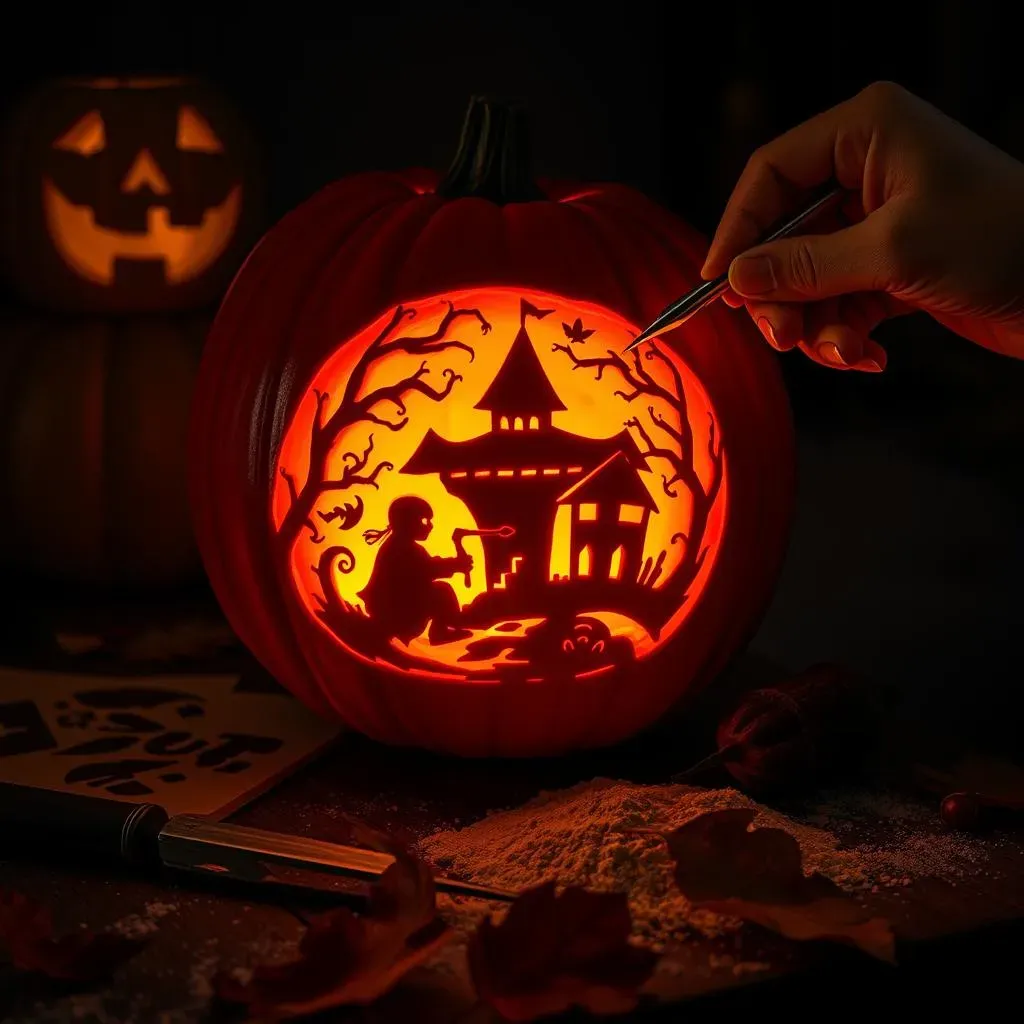
From Paper to Pumpkin: Transferring Your Design Like a Pro
you've found the perfect stencil. Now what? Here's how to get that design onto your pumpkin flawlessly. First, print out your stencil and trim it to size. Then, tape it securely to the pumpkin. Next, grab a poking tool (an awl, a thick needle, or even a sharpened pencil will work) and carefully poke holes along the stencil lines, transferring the design to the pumpkin's surface. The closer together the holes, the more accurate your carving will be.
Once you've poked the entire design, remove the stencil. You should now have a dotted outline of your design on the pumpkin. Now, grab your carving tools and carefully connect the dots, cutting along the lines to reveal your masterpiece.
Pro Tip: If you're having trouble seeing the dotted lines, try lightly dusting the pumpkin with flour. This will help the dots stand out, making it easier to carve.
Level Up Your Stencil Game: Tips and Tricks for Carving Success
Want to take your stencil carving to the next level? Here are a few tips and tricks to keep in mind. First, choose the right pumpkin. Look for one with a smooth, relatively flat surface – this will make it easier to apply the stencil and carve accurately. Next, make sure your carving tools are sharp. Dull tools are not only frustrating, but they're also dangerous.
When carving, start with the small, intricate details first. This will help prevent you from accidentally damaging the larger sections of the design. And finally, don't be afraid to get creative! You can customize your stencils by adding your own personal touches, like extra details or different carving techniques.
Tip | Description |
|---|---|
Choose the Right Pumpkin | Smooth, flat surface for easy stenciling. |
Sharp Tools | Essential for clean, safe carving. |
Start with Details | Prevents accidental damage to larger areas. |
Customize | Add your own creative touches to the design. |
Beyond the Jacko'Lantern: Unique & Cool Pumpkin Decorating Ideas
Beyond the Jacko'Lantern: Unique & Cool Pumpkin Decorating Ideas
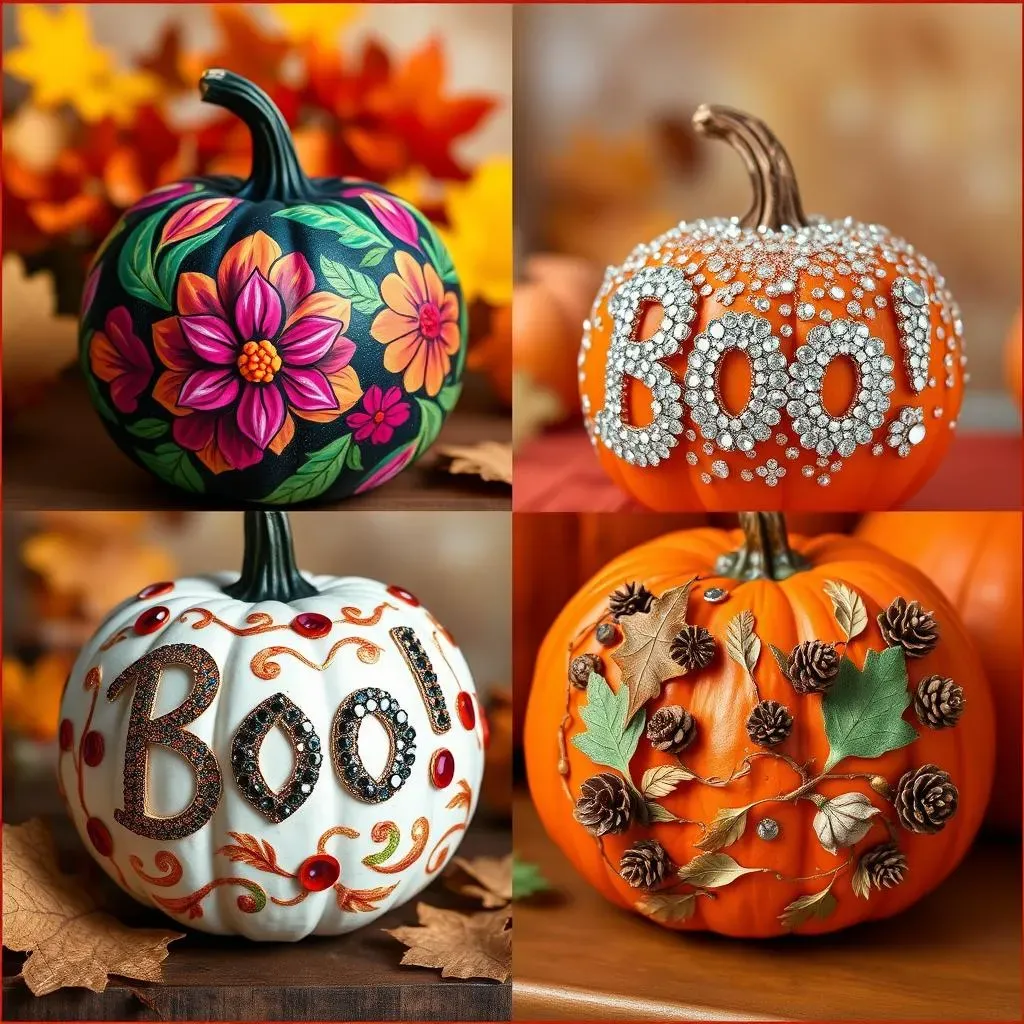
Paint It Up: No-Carve Pumpkin Masterpieces
Alright, let's ditch the knives for a minute! If you're not into carving (or just want to avoid the mess), painting is an awesome way to create unique and cool pumpkin decorations. Grab some acrylic paints, stencils, brushes, and let your imagination run wild! You can paint anything from intricate floral designs and geometric patterns to spooky scenes and silly characters.
Want a pro tip? Use painter's tape to create clean lines and sharp edges. And don't be afraid to experiment with different paint finishes – metallic paints, glitter, and glow-in-the-dark paint can all add a fun and festive touch. Also, consider spray painting the entire pumpkin a base color before adding your design for a more polished look.
Glam It Out: Embellishments and Sparkle
who says pumpkins have to be scary? Add some glitz and glam to your Halloween decor with embellishments! Think sequins, beads, rhinestones, glitter, and ribbons. You can glue these onto your pumpkin in all sorts of creative ways – create intricate patterns, spell out words, or simply add a touch of sparkle to a painted design.
For a super easy and elegant look, try wrapping your pumpkin in lace or burlap ribbon. Secure it with hot glue, and then add a few strategically placed rhinestones or pearls. You can also use pushpins to create patterns with sequins or beads – this is a great option for kids (with supervision, of course!).
Nature's Bounty: Organic Pumpkin Art
Want a more natural and rustic look? Use elements from nature to decorate your pumpkin! Think leaves, twigs, pinecones, acorns, and dried flowers. You can glue these onto your pumpkin to create all sorts of cool and earthy designs. Try arranging leaves in a swirling pattern, or create a mini forest scene with twigs and pinecones.
For a fun and festive touch, try painting the natural elements with metallic gold or silver paint. You can also use hot glue to attach small succulents or air plants to your pumpkin for a living, breathing decoration. Just remember to mist the plants with water occasionally to keep them healthy.
Decoration Type | Materials | Difficulty | Wow Factor |
|---|---|---|---|
Painted Pumpkins | Acrylic paints, brushes, stencils | Easy to Medium | Variable |
Embellished Pumpkins | Sequins, beads, rhinestones, glue | Easy to Medium | High |
Natural Pumpkins | Leaves, twigs, pinecones, glue | Easy | Medium |
Level Up Your Carving Game: Advanced Cool Pumpkin Carving Techniques (Made Easy!)
Level Up Your Carving Game: Advanced Cool Pumpkin Carving Techniques (Made Easy!)
Shading Secrets: Mastering Depth and Dimension
Ready to go beyond basic outlines? Let's talk shading! This is where you can really add depth and dimension to your cool pumpkin carving. The trick is to carve to different depths – the deeper you carve, the more light will shine through, creating lighter areas. Shallower carving results in darker, shaded areas. Start by carving your main design as usual. Then, identify areas where you want shading. Use your carving tools to carefully shave away thin layers of the pumpkin skin in these areas. The key is to go slow and steady, gradually removing more material until you achieve the desired effect.
Think of it like sculpting! You're not just cutting out shapes, you're shaping the light. Experiment with different carving tools to create different textures and shading effects. A small, thin saw is great for detail work, while a wider tool can be used for larger areas of shading. Don't be afraid to make mistakes – you can always adjust the shading by removing more material or blending the edges.
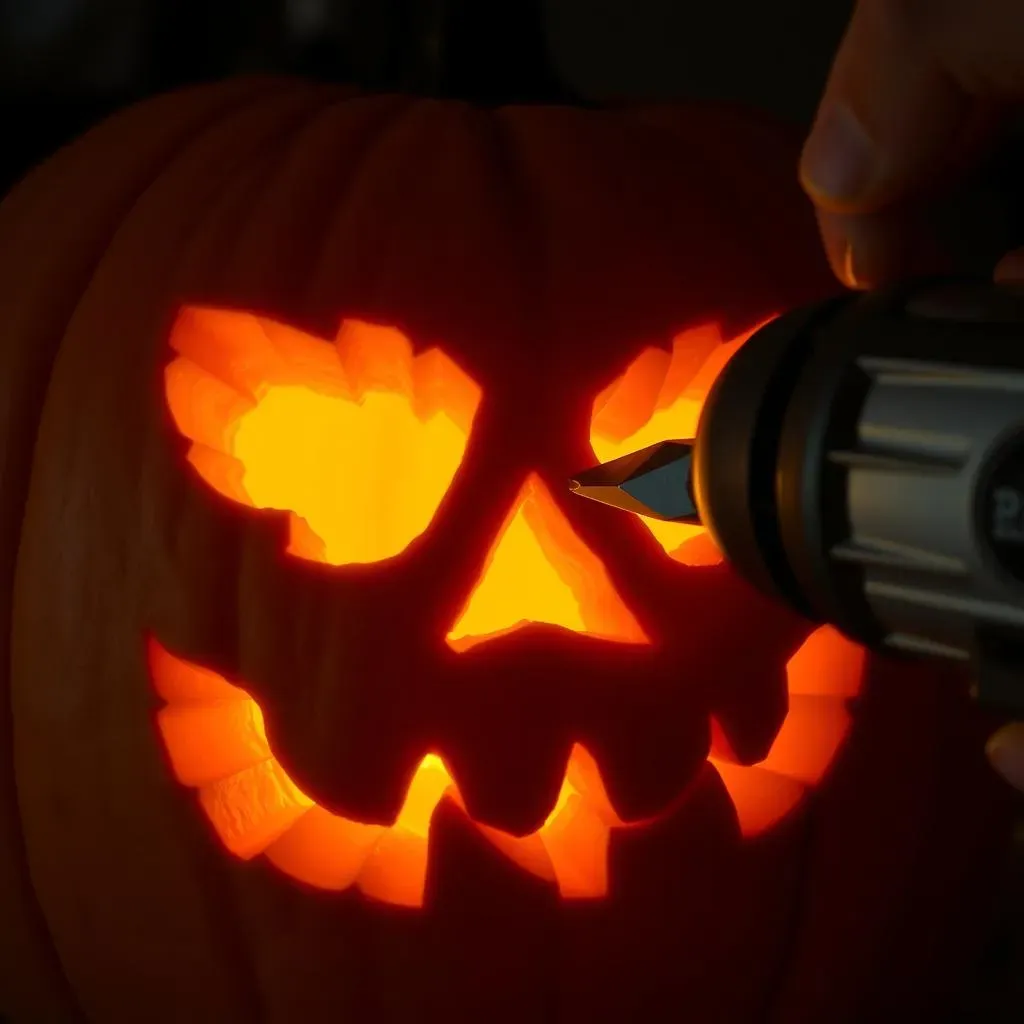
Power Carving: Tools and Techniques for the Pro
"pro" might be a stretch, but let's get serious about tools! If you're planning on doing some more advanced cool pumpkin carving, investing in a power carving kit can be a game-changer. These kits typically include a rotary tool with various attachments, like small grinding stones and carving bits. Power carving allows you to remove material much faster and more precisely than traditional hand tools. But be warned: it takes practice! Start with some scrap pumpkins to get a feel for the tool and the different attachments.
When power carving, always wear safety glasses to protect your eyes from flying debris. And remember to work in a well-ventilated area, as power carving can create a lot of dust. Use light pressure and let the tool do the work. Don't force it, or you could end up with a jagged edge or a broken bit. With a little practice, you'll be amazed at the intricate details and smooth finishes you can achieve with power carving. It's like going from finger painting to oil painting – a whole new level of artistic expression!
Technique | Description | Tools | Difficulty |
|---|---|---|---|
Shading | Carving to different depths for light and shadow. | Various carving tools | Medium |
Power Carving | Using a rotary tool for faster, precise carving. | Power carving kit | Medium to Hard |
Your Pumpkin Masterpiece Awaits!
So, there you have it – a treasure trove of cool and easy pumpkin carving ideas to make your Halloween unforgettable. Whether you opted for a simple stenciled design, a no-carve masterpiece, or dared to try some slightly more advanced techniques, the most important thing is to have fun and let your creativity shine. Grab your carving tools (or your paintbrushes!), gather your friends and family, and get ready to create some pumpkin magic that will impress everyone who crosses your doorstep. Happy Halloween!