Table of Contents
Halloween is creeping closer, and you know what that means: it's pumpkin carving season! Ditch the same old triangle eyes and crooked smiles. This year, let's aim for something truly spooktacular. But if you're a newbie, don't sweat it. We've got a cauldron full of cool pumpkin carving ideas for beginners that'll make your jack-o'-lantern the envy of the neighborhood. Forget complicated patterns and professional-grade tools. We're talking about designs that are fun, achievable, and guaranteed to impress. Whether you're after cute and quirky or slightly spooky, there's a carving idea here for everyone. Ready to transform your plain pumpkin into a masterpiece? We'll start with the basics: gathering your tools, prepping your pumpkin, and then diving headfirst into a treasure trove of designs. From simple silhouettes to slightly more detailed creations, you'll find the perfect project to match your skill level and Halloween vibe. Plus, we'll explore some creative twists to take your carving to the next level. So, grab your carving kit and let's get started!
Gear Up: Essential Tools and Prep for Cool Pumpkin Carving
Gear Up: Essential Tools and Prep for Cool Pumpkin Carving
Gather Your Arsenal: The Essential Toolkit
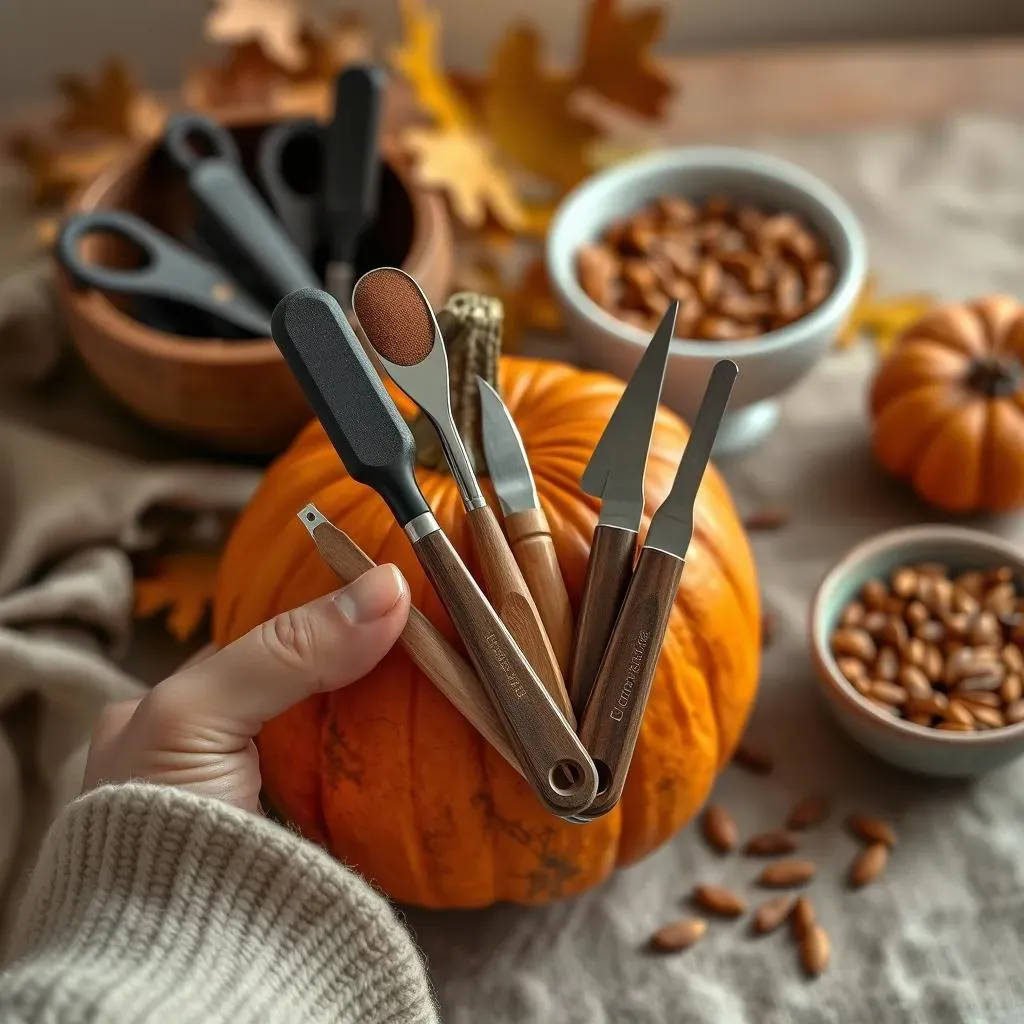
Alright, future pumpkin Picasso, before you even think about carving, you gotta assemble your gear. Don't worry, you don't need a fancy art studio. Just a few key tools will make the whole process smoother and safer. First, and most importantly, invest in a good pumpkin carving kit. Those flimsy plastic saws that come with some pumpkins? Toss 'em. A decent kit will have sturdy saws of various sizes for different details, a scoop for gutting, and maybe even some stencils to get you started. Think of it as your pumpkin-carving Excalibur.
Beyond the kit, grab a large spoon or scraper (for maximum pumpkin guts removal), a bowl for the seeds (more on that later!), and some paper towels for easy cleanup. A drill can also be handy for making perfectly round holes, especially if you're planning a design with stars or polka dots. And finally, don't forget a good light source. A bright lamp or even a headlamp will help you see what you're doing, especially when you're working on intricate details.
Operation Pumpkin Prep: Choosing and Cleaning Your Canvas
So, you've got your tools, now it's time to find your perfect pumpkin. Look for one that's relatively smooth, with a sturdy stem and no soft spots. Give it a little knock – a hollow sound means it's ripe and ready to carve. The size depends on your design, but beginners might want to start with a medium-sized pumpkin. Once you've chosen your victim...err...pumpkin, it's time for surgery.
First, wash the outside of the pumpkin with soap and water to remove any dirt or grime. Then, using a sharp knife (adults only!), cut a large circle around the stem. Angle the knife inwards slightly, so the lid will sit nicely back in place. Now comes the fun part: gutting! Use your scoop or large spoon to scrape out all the seeds and stringy bits. The cleaner you get the inside, the easier it will be to carve. Trust me on this one. Pro tip: save those seeds! Roasted pumpkin seeds are a delicious and healthy snack.
Workspace Wonders: Setting Up for Success
Before you start hacking away, take a moment to set up your carving station. Cover your work surface with newspaper or a plastic tablecloth to protect it from pumpkin guts and stray carvings. Make sure you have plenty of light, and keep your tools within easy reach. A comfortable chair is also a must, especially if you're planning a marathon carving session. Think of it as your pumpkin-carving command center.
Also, consider having a damp cloth handy to wipe down your tools and pumpkin as you go. This will help prevent the saws from getting clogged and keep your design clean and crisp. And finally, don't forget to put on some Halloween-themed music to get you in the spooky spirit! With your tools, pumpkin, and workspace prepped, you're now officially ready to unleash your inner artist and create a jack-o'-lantern that's truly one-of-a-kind.
Easy Peasy: Simple and Cool Pumpkin Carving Ideas for Beginners
Easy Peasy: Simple and Cool Pumpkin Carving Ideas for Beginners
Classic Silhouettes: Spooky Shapes Made Simple
Alright, let's start with the basics. Sometimes, the simplest designs are the most effective. Think classic Halloween silhouettes: a bat, a ghost, a cat, or a witch's hat. These are super easy to carve, even if you've never held a carving saw before. Just find a simple image online, print it out, and tape it to your pumpkin. Then, use a pin or a toothpick to poke holes along the outline of the image. Remove the paper, and you'll have a dotted line to follow with your saw. Simple, right?
For a little extra flair, try carving the silhouette all the way through the pumpkin, or just removing the surface layer of the pumpkin skin. Removing the surface layer lets light shine through in a softer, more diffused way. Trust me, even a basic bat silhouette can look incredibly cool when it's glowing from within. Plus, these designs are super forgiving – a little wobble here and there just adds to the spooky charm!
Geometric Grooves: Patterns That Pop
Want something a little more modern? Geometric patterns are your friend. Think simple triangles, squares, circles, or diamonds. You can arrange them in rows, create a repeating pattern, or even use them to create a cool, abstract design. The key here is to keep it simple and symmetrical. Use a ruler or a stencil to ensure your shapes are consistent, and take your time when carving. The cleaner your lines, the more polished the final product will look.
Another fun idea is to use different sized drill bits to create a polka dot pattern. This is a great option if you're looking for a no-carve alternative, or if you want to involve younger kids in the pumpkin decorating process. Just mark your dots with a marker, and then drill away! You can even paint the dots different colors for an extra pop of personality. Who knew math could be so spooky?
Design Idea | Difficulty | Tools Needed |
|---|---|---|
Bat Silhouette | Easy | Carving kit, stencil |
Triangle Pattern | Easy | Carving kit, ruler |
Polka Dots | Easy | Drill, marker |
NextLevel Designs: Intricate and Cool Pumpkin Carving Ideas
NextLevel Designs: Intricate and Cool Pumpkin Carving Ideas
Detailed Doodles: From Paper to Pumpkin
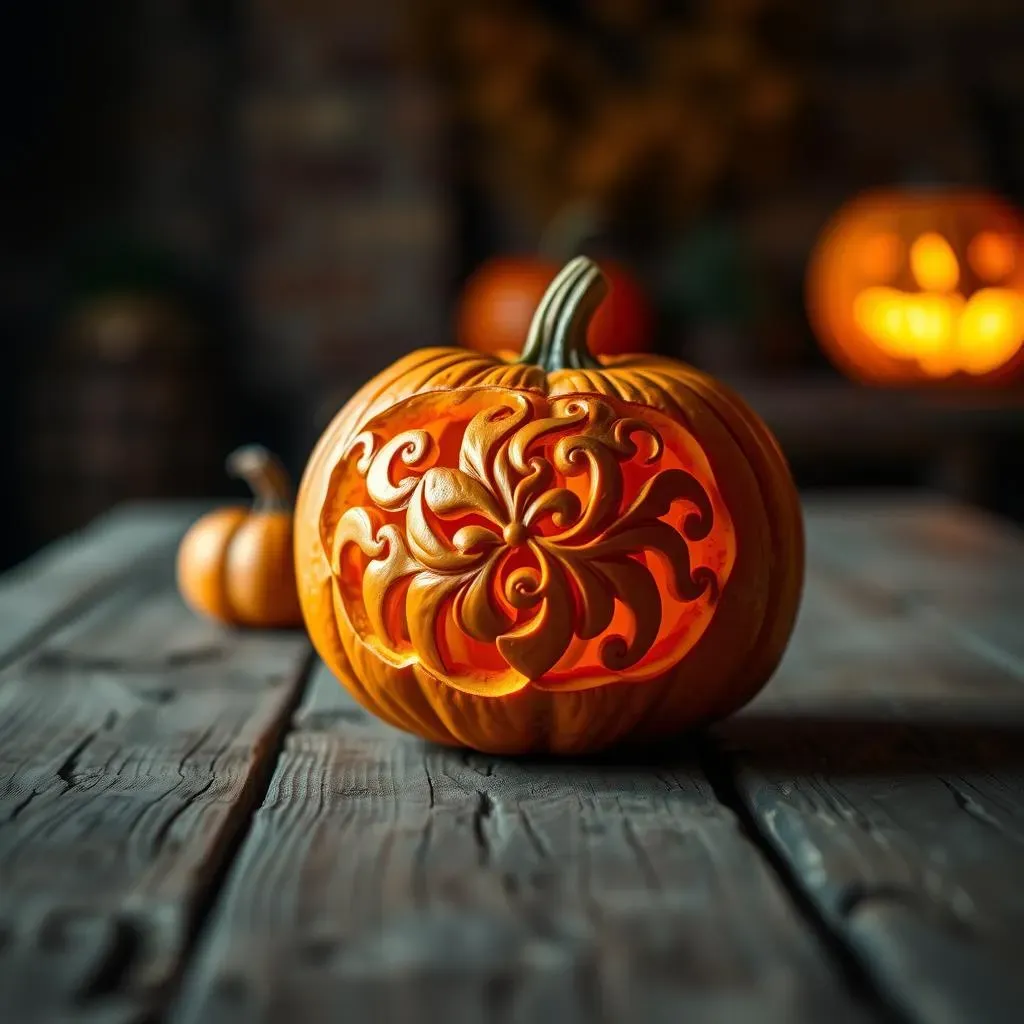
Ready to step up your carving game? Let's talk about intricate designs. We're moving beyond basic shapes and diving into the world of detailed doodles. Think elaborate floral patterns, intricate Celtic knots, or even miniature portraits. The key here is patience and a steady hand. Start by sketching your design onto paper, then transfer it to your pumpkin using the same pin-pricking technique we talked about earlier. But instead of just outlining the design, you'll want to transfer as much detail as possible.
Once your design is transferred, it's time to break out the finer carving tools. Use small saws and gouges to carefully remove the pumpkin skin, following your design as closely as possible. Remember, it's better to start small and gradually remove more pumpkin than to accidentally carve away too much. And don't be afraid to experiment with different carving depths to create a layered effect. A little shading can go a long way in adding depth and dimension to your design.
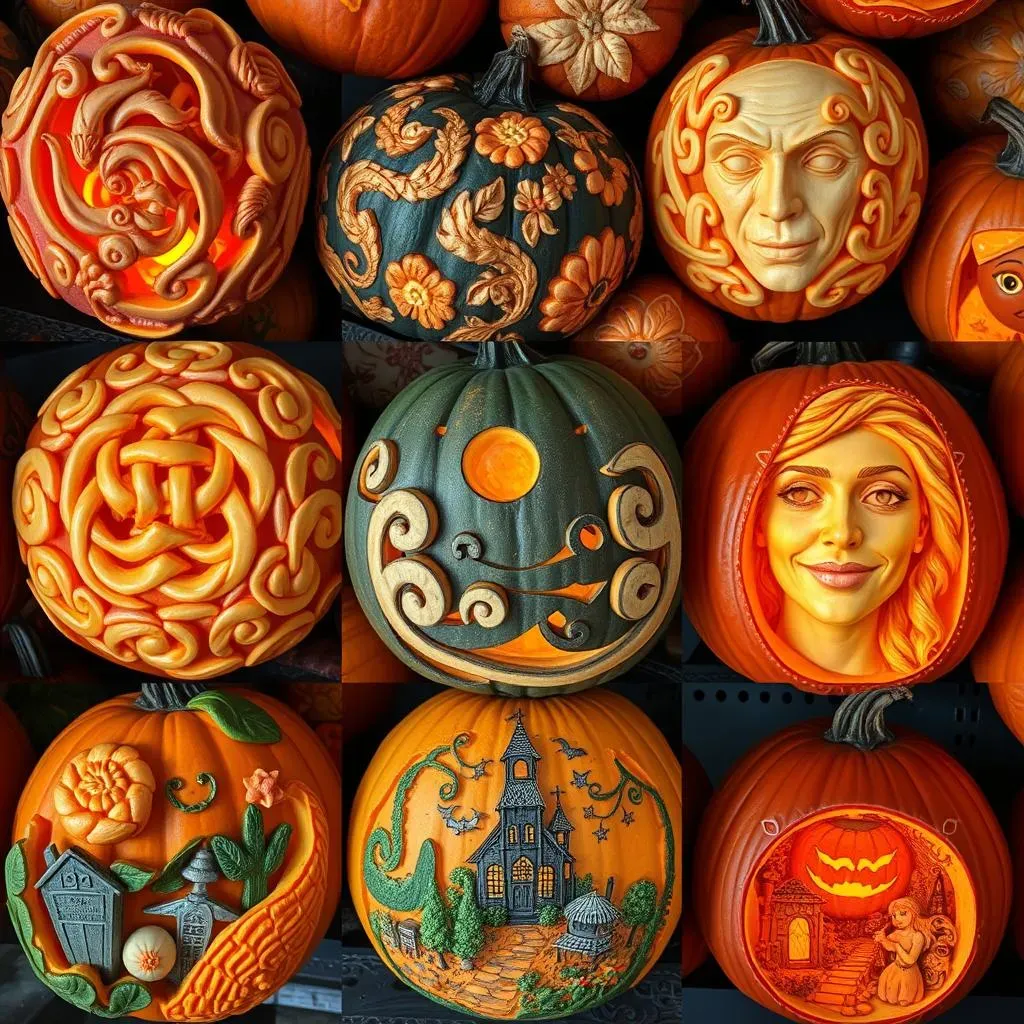
Scene Stealers: Carving a Pumpkin Story
Why just carve a face when you can carve a whole scene? Imagine a spooky graveyard, a haunted house on a hill, or even a whimsical fairy garden, all brought to life on the surface of your pumpkin. Scene carving takes a little more planning and skill, but the results are totally worth it. Start by sketching out your scene on paper, paying attention to perspective and composition. Then, transfer your design to your pumpkin, again using the pin-pricking method.
When carving your scene, think about using different carving techniques to create depth and texture. Carve some areas all the way through to let the light shine brightly, and leave other areas with just the surface skin removed to create shadows and highlights. You can even use clay sculpting tools to add extra details, like tiny tombstones or miniature trees. The possibilities are endless! Just remember to take your time, be patient, and don't be afraid to get creative. Your pumpkin is your canvas, so let your imagination run wild!
Design Idea | Difficulty | Estimated Time |
|---|---|---|
Floral Pattern | Medium | 2-3 hours |
Graveyard Scene | Hard | 4-6 hours |
Beyond the Basics: Creative Twists on Cool Pumpkin Carving
Beyond the Basics: Creative Twists on Cool Pumpkin Carving
Pumpkin as Canvas: Painting and Mixed Media
so you've mastered carving. What's next? Let's ditch the traditional jack-o'-lantern look altogether and treat your pumpkin like a canvas! Grab some acrylic paints, glitter, sequins, or even some fabric scraps and go wild. Paint a portrait, create an abstract design, or even decoupage your pumpkin with Halloween-themed images. The possibilities are endless, and the best part is, there's no wrong way to do it. Unleash your inner artist and let your creativity shine!
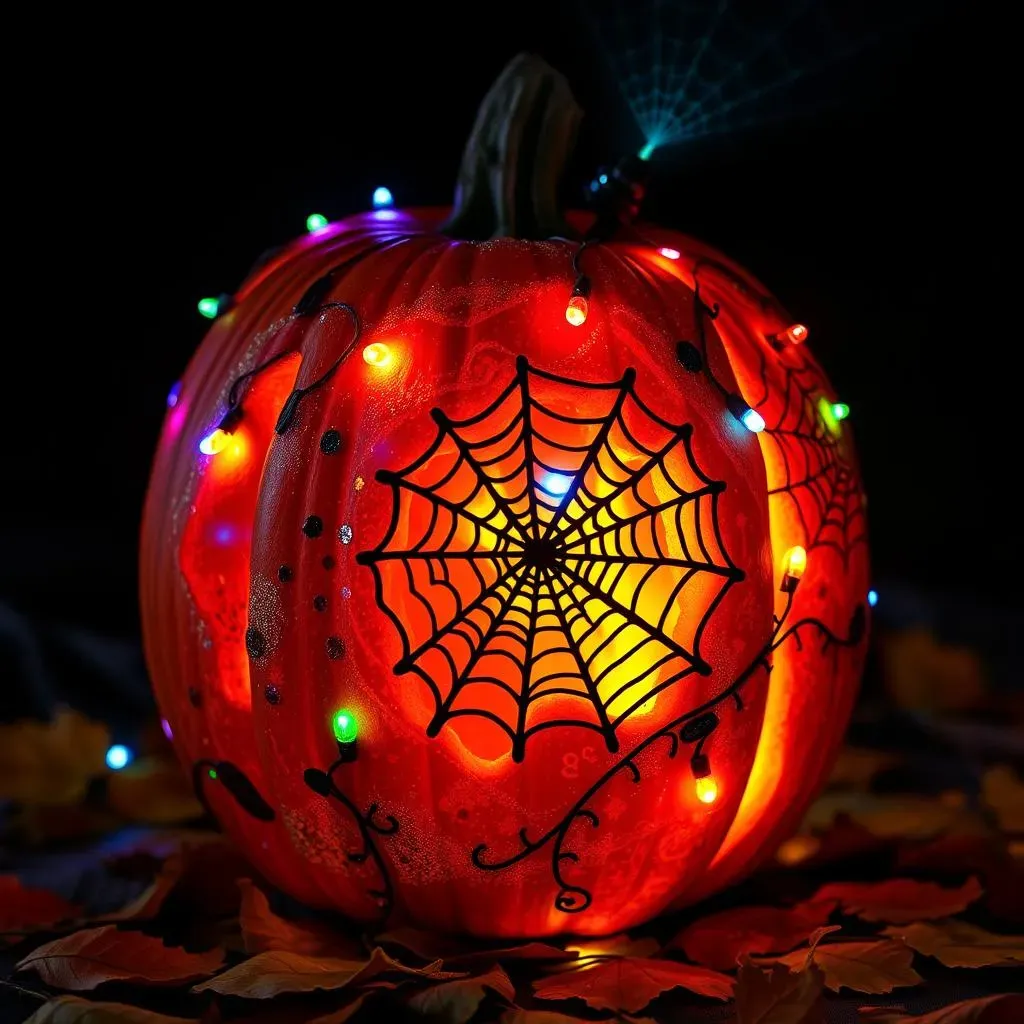
For a cool mixed media effect, try combining carving with painting. Carve out a simple design, like a spiderweb or a crescent moon, and then paint the surrounding area with glow-in-the-dark paint. Or, carve out a series of small holes and then glue colorful beads or gems into the holes to create a dazzling, illuminated effect. Just remember to use waterproof materials if you're planning on displaying your pumpkin outdoors.
Illuminating Ideas: Light It Up!
The right lighting can take your pumpkin from "meh" to "mesmerizing." Sure, you can stick a regular candle inside, but why not get a little more creative? Try using battery-operated fairy lights to create a soft, magical glow. Or, use a colored light bulb to cast your pumpkin in an eerie green or purple hue. You can even find flickering LED candles that mimic the look of a real flame without the fire hazard.
Another fun idea is to use a projector to cast images onto your pumpkin. Just set up a mini projector, find a spooky image online, and project it onto your pumpkin. Then, trace the image with a marker and carve away! This is a great way to create incredibly detailed designs without having to be a master artist. Just be sure to use a projector that's bright enough to show up in the dark, and adjust the focus until the image is clear and sharp.
Lighting Option | Effect | Pros | Cons |
|---|---|---|---|
Fairy Lights | Soft, magical glow | Safe, battery-operated | Can be dim |
Colored Bulb | Eerie, dramatic hue | Adds instant atmosphere | Can be too bright |
Projector | Detailed images | Easy to create complex designs | Requires projector |
Unleash Your Inner Carver: Cool Pumpkin Creations Await!
So, there you have it – a monstrously massive collection of cool pumpkin carving ideas for beginners to seasoned pros. From the adorably simple to the wickedly intricate, there's a design to ignite your Halloween spirit. Remember, the most important thing is to have fun and let your creativity shine. Don't be afraid to experiment, get a little messy, and maybe even invent your own ghoulish grin. Happy carving, and may your jack-o'-lanterns light up the night with spooky smiles!