Table of Contents
Halloween is just around the corner, and what better way to celebrate than with a creatively carved pumpkin? Forget the same old triangle eyes and toothy grin. This year, it's time to ditch the predictable and dive into the world of cool pumpkin carving ideas. Whether you're a seasoned pro with a garage full of tools or a complete beginner armed with nothing but a spoon, there's a pumpkin masterpiece waiting to be unleashed.
Unique Pumpkin Carving Ideas: Beyond the Basic Jacko'Lantern
Unique Pumpkin Carving Ideas: Beyond the Basic Jacko'Lantern
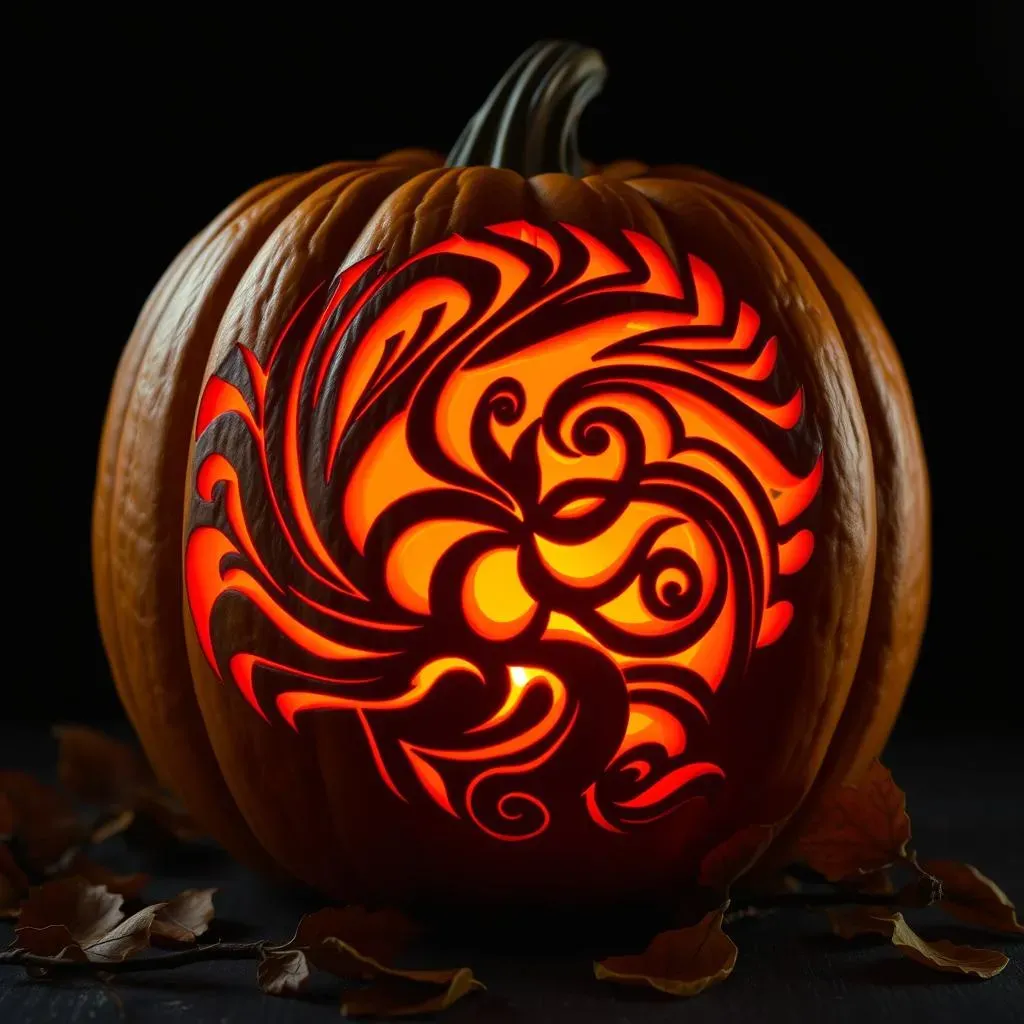
Embrace the Unexpected: Abstract and Geometric Designs
Tired of the same old spooky faces? Let's ditch the traditional and dive headfirst into abstract and geometric pumpkin carving! Think bold lines, unexpected shapes, and patterns that play with light and shadow. This is where you can really let your creativity shine, no stencil required. Imagine a pumpkin adorned with intricate triangles, swirling spirals, or even a deconstructed portrait. The beauty of abstract art is that there are no rules – just your imagination.
For inspiration, look to modern art movements like Cubism or Constructivism. Consider how you can translate those styles onto the curved surface of a pumpkin. You could even try carving positive and negative space to create a visually stunning effect. Don't be afraid to experiment with different tools and techniques to achieve your desired look. A simple V-gouge can work wonders for creating sharp, clean lines.
Nature-Inspired Carvings: From Flora to Fauna
Bring the beauty of the outdoors inside with nature-inspired pumpkin carvings. Think delicate floral patterns, majestic animal silhouettes, or even a miniature landscape carved right into the pumpkin's surface. This is a fantastic way to showcase your carving skills and create a truly unique piece of art. Carving flowers like roses, sunflowers, or lilies can add an elegant touch to your Halloween decor. Or, you could opt for a more whimsical approach with playful animal designs like owls, foxes, or even a quirky squirrel.
For a truly impressive display, consider carving a miniature forest scene onto your pumpkin. Use different carving depths to create a sense of perspective, and add details like tiny trees, mushrooms, and woodland creatures. You can even incorporate real natural elements like twigs and leaves to enhance the overall effect. Just remember to choose elements that are safe and non-toxic.
Pop Culture Pumpkin Art: Carve Your Fandom
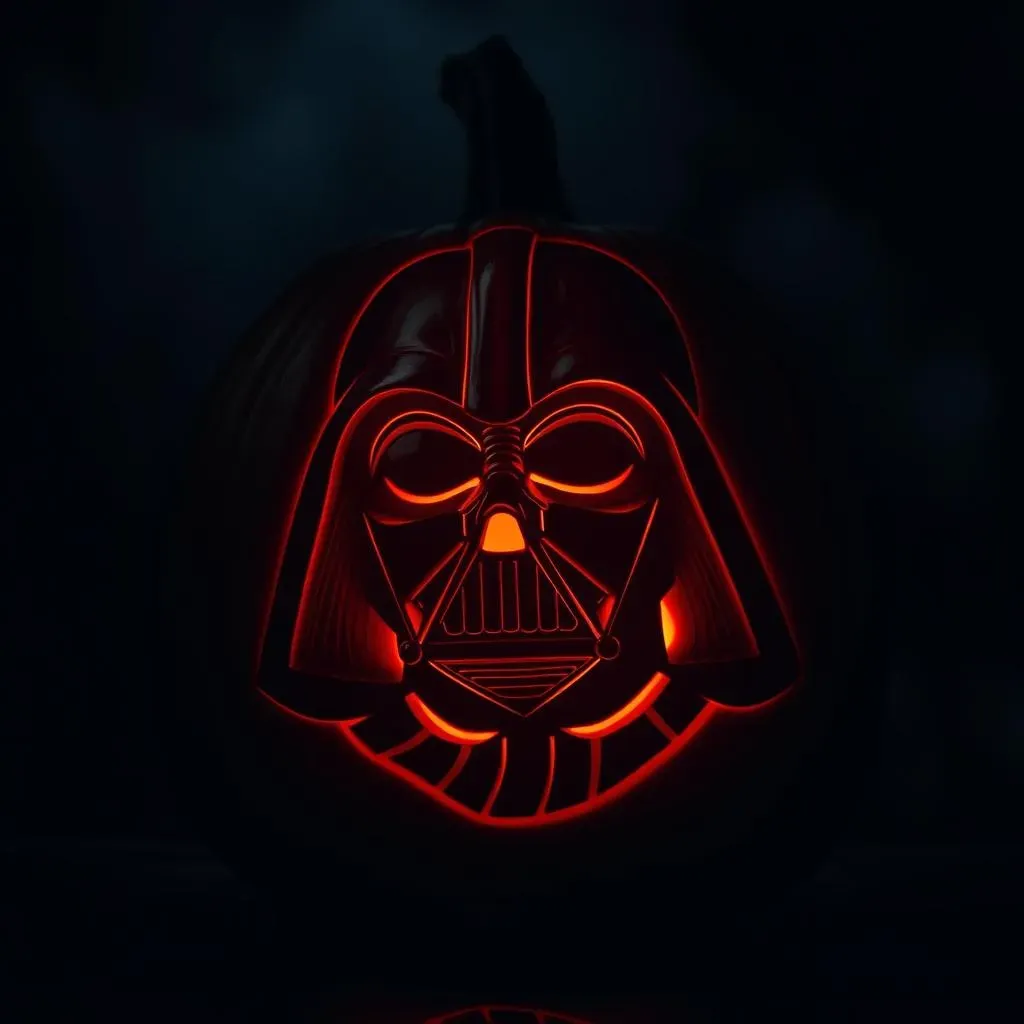
Show off your love for your favorite movies, TV shows, video games, and books by carving pop culture-themed pumpkins. Whether you're a die-hard Star Wars fan, a Marvel maniac, or a devoted Potterhead, there's a pop culture pumpkin carving idea out there for you. Imagine a pumpkin emblazoned with the iconic Star Wars logo, a portrait of your favorite superhero, or the Hogwarts crest. The possibilities are endless!
The key to a successful pop culture pumpkin carving is to choose a design that is both recognizable and relatively simple to execute. Consider using stencils to help guide your carving, especially for more complex designs. You can find free printable stencils online for a wide variety of pop culture characters and symbols. Don't be afraid to get creative with your interpretation – you could even add your own unique twist to a classic design.
For example, instead of carving a traditional portrait of Darth Vader, you could create a stylized silhouette or a more abstract representation of the character. Or, you could carve a scene from your favorite movie or TV show onto the pumpkin's surface. The goal is to create a pumpkin that is both visually appealing and a reflection of your personal fandom.
Easy Pumpkin Carving Ideas for Beginners and Kids
Easy Pumpkin Carving Ideas for Beginners and Kids
Simple Shapes and Silhouettes
Starting your pumpkin carving journey? No sweat! Let's kick things off with super simple shapes and silhouettes. Think classic stars, moons, or even a friendly ghost. These designs are perfect for beginners and kids because they require minimal cuts and are easy to trace. Grab a stencil (or draw your own!), tape it to the pumpkin, and follow the lines with a small carving knife or even a plastic pumpkin carving tool. Remember, safety first – adult supervision is a must for younger carvers!
Once you've traced your design, carefully start sawing along the lines. Don't try to cut all the way through in one go; instead, use a gentle sawing motion to gradually work your way through the pumpkin's flesh. For younger kids, consider using cookie cutters to create simple shapes. Just press the cutter into the pumpkin's surface and then carefully remove the surrounding pumpkin flesh with a spoon or scooping tool. It's a fun, safe, and easy way to create adorable pumpkin designs!
The Power of Polka Dots and Stripes
Want to add a touch of whimsy to your pumpkin without complicated carving? Polka dots and stripes are your answer! These designs are incredibly easy to execute and can be customized to fit any style. For polka dots, simply use a drill or a small round cookie cutter to create evenly spaced holes across the pumpkin's surface. You can vary the size of the dots for a more playful look, or even create patterns with different colored lights shining through the holes.
Stripes are just as easy to create. Use masking tape to create clean, straight lines across the pumpkin, then carve out the exposed areas with a carving knife or a scooping tool. You can create vertical, horizontal, or even diagonal stripes for a unique and eye-catching design. For an extra touch of flair, consider painting the uncarved areas with bright, contrasting colors. It's a simple yet effective way to transform your pumpkin into a work of art!
Design Idea | Difficulty | Tools Needed |
|---|---|---|
Starry Night Pumpkin | Easy | Star stencil, carving knife |
Polka Dot Pumpkin | Easy | Drill or cookie cutter |
Striped Pumpkin | Easy | Masking tape, carving knife |
Advanced Pumpkin Carving Techniques: Taking Your Skills to the Next Level

Advanced Pumpkin Carving Techniques: Taking Your Skills to the Next Level
3D Carving: Adding Depth and Dimension
Ready to make your pumpkin pop? 3D carving is where it's at! This technique involves carving at different depths to create a layered effect, making your design literally jump off the pumpkin's surface. Think of it like sculpting, but with a pumpkin. You'll need a good set of carving tools, including gouges of various sizes, and a keen eye for detail. Start by sketching out your design, paying close attention to the areas you want to stand out. Then, carefully remove thin layers of pumpkin flesh, working your way from the shallowest areas to the deepest.
The key to successful 3D carving is patience and precision. Take your time and don't try to remove too much material at once. It's always better to make multiple shallow cuts than one deep one. Also, remember to keep the pumpkin's thickness in mind – you don't want to accidentally carve all the way through! With practice, you'll be able to create stunning 3D pumpkin carvings that will amaze everyone who sees them.
Shading and Texture: Creating Realistic Effects
Want to take your pumpkin carving to the next level of realism? Master the art of shading and texture! This involves using different carving techniques to create subtle variations in light and shadow, adding depth and dimension to your design. For shading, try using a rasp or a fine-grit sandpaper to gently thin the pumpkin's surface, allowing more light to shine through. You can also use a variety of carving tools to create different textures, such as stippling, hatching, or cross-hatching.
Experiment with different techniques to see what works best for you. For example, you could use a small V-gouge to create fine lines that mimic the texture of fur or feathers. Or, you could use a rotary tool with a sanding attachment to create smooth, gradient-like shading effects. The possibilities are endless! Just remember to take your time and practice on scrap pieces of pumpkin before attempting to carve your final design.
Technique | Description | Tools Needed |
|---|---|---|
3D Carving | Carving at different depths to create a layered effect. | Gouges, carving knives |
Shading | Thinning the pumpkin's surface to allow more light to shine through. | Rasp, sandpaper |
Texturing | Creating different surface textures with various carving tools. | V-gouge, rotary tool |
Themed Pumpkin Carving: Pop Culture, Movies, and More
Themed Pumpkin Carving: Pop Culture, Movies, and More
Alright, let's talk themed pumpkin carving! This is where you can truly geek out and let your fandom flag fly. Pop culture, movies, TV shows, video games – the possibilities are as endless as your imagination. Think about your favorite characters, iconic symbols, or memorable scenes, and then figure out how to translate them onto a pumpkin canvas. Are you a die-hard Star Wars fan? Carve a Darth Vader helmet or the Millennium Falcon. Obsessed with Harry Potter? The Hogwarts crest or a Golden Snitch would be epic. Marvel maniac? Go for the Avengers logo or a portrait of your favorite superhero. The key is to choose something you're passionate about and that will resonate with other fans.
Don't be afraid to get creative with your interpretation. You don't have to stick to a literal representation. Consider using silhouettes, abstract designs, or even incorporating elements of humor. For example, you could carve a zombie version of your favorite Disney princess or a pumpkin that looks like it's been invaded by tiny Xenomorphs. The goal is to create something that is both visually appealing and a reflection of your unique personality. And remember, stencils are your best friend! You can find tons of free printable stencils online for just about any pop culture character or symbol you can imagine. So, go forth and carve your fandom with pride!
Tools and Tips for Cool Pumpkin Carving Success
Tools and Tips for Cool Pumpkin Carving Success
Essential Carving Tools: Setting Yourself Up for Success
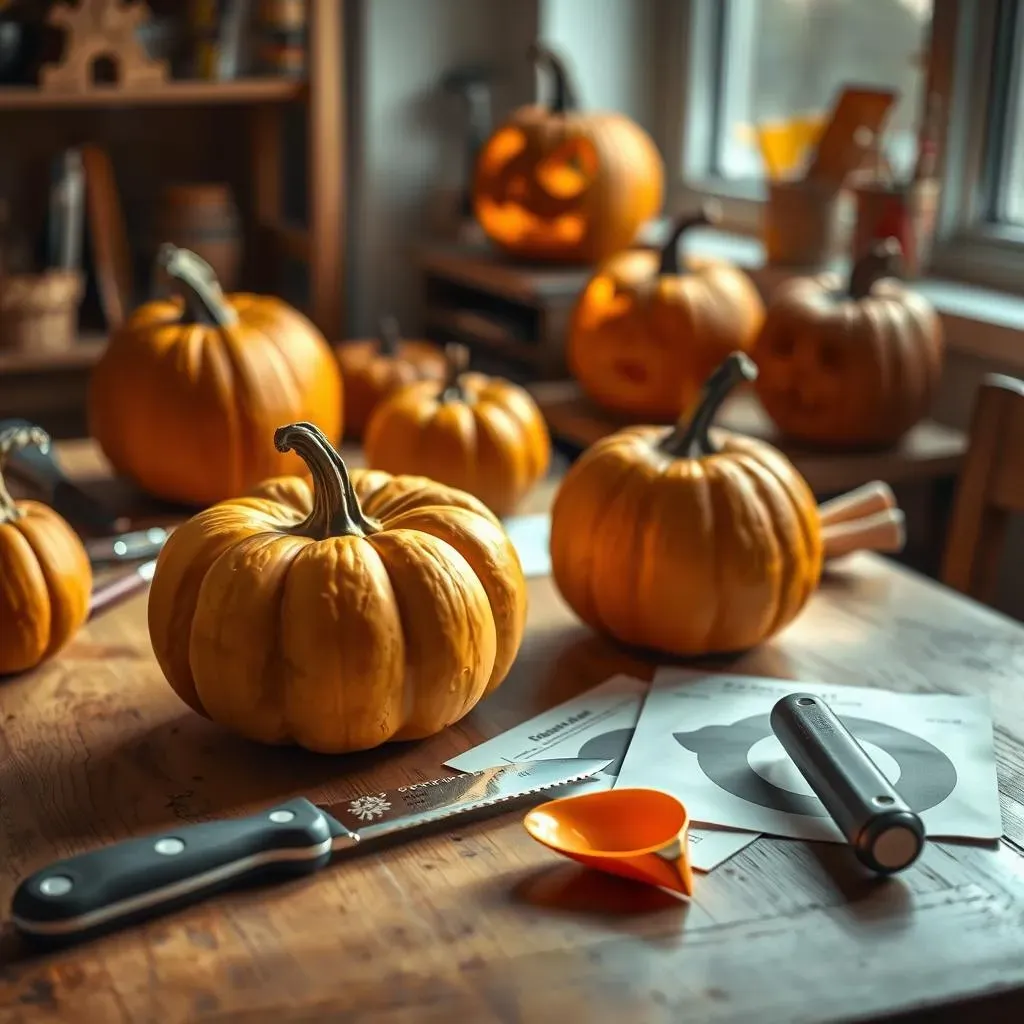
Alright, let's talk tools! Having the right equipment can make or break your pumpkin carving experience. You don't need to spend a fortune, but a few key items will make the process much smoother and more enjoyable. First up, a good pumpkin carving kit is a must-have. These kits typically include a variety of saws, gouges, and scoops designed specifically for carving pumpkins. Look for a kit with sturdy, comfortable handles and sharp, durable blades. A serrated knife is also essential for cutting the lid and removing the pumpkin's innards. And speaking of innards, a good scoop is crucial for scraping out all those stringy seeds and pulp. Trust me, you don't want to be using a spoon for this task!
Beyond the basics, consider investing in a few specialized tools to take your carving to the next level. A set of wood carving gouges can be incredibly useful for creating intricate details and 3D effects. A rotary tool with various attachments, such as sanding drums and engraving bits, can also be a game-changer for adding texture and shading. And don't forget about stencils! Whether you're a beginner or an experienced carver, stencils can help you create precise and professional-looking designs. You can find tons of free printable stencils online, or you can even create your own using a computer and printer.
Pro Tips for a Smooth Carving Experience
you've got your tools, you've got your design, now it's time to carve! But before you start hacking away at that pumpkin, let's go over a few pro tips to ensure a smooth and successful carving experience. First and foremost, safety first! Always carve in a well-lit area and use caution when handling sharp tools. Never carve towards yourself, and keep your fingers out of the path of the blade. If you're carving with kids, make sure they're supervised at all times and using appropriate safety gear.
Next, take your time and don't rush the process. Carving a pumpkin is a marathon, not a sprint. Work in small sections and use gentle, controlled movements. If you're carving a complex design, consider tracing it onto the pumpkin using a stencil or a marker. This will help you stay on track and avoid mistakes. And finally, don't be afraid to experiment! Pumpkin carving is all about having fun and expressing your creativity. So, try new techniques, push your boundaries, and don't be afraid to make mistakes. After all, even the most experienced carvers started somewhere!
Tip | Description |
|---|---|
Safety First | Carve in a well-lit area, use caution with sharp tools, and supervise children. |
Take Your Time | Work in small sections and use gentle, controlled movements. |
Experiment | Try new techniques and don't be afraid to make mistakes. |
Embrace the Carving Spirit: Final Thoughts on Cool Pumpkin Carving Ideas
So, there you have it – a treasure trove of cool pumpkin carving ideas to ignite your Halloween spirit! From simple, kid-friendly designs to intricate masterpieces, the possibilities are endless. Remember, the most important thing is to have fun and let your creativity shine. Don't be afraid to experiment with different techniques, themes, and tools to create a pumpkin that's uniquely yours. Whether you're aiming for spooky, funny, or downright impressive, a well-carved pumpkin is the perfect way to add a personal touch to your Halloween decorations. Happy carving, and may your pumpkins be the coolest on the block!