Table of Contents
Forget the mess and the risk of carving! This year, we're diving headfirst into the world of cool no carve pumpkin ideas. Whether you're a seasoned crafter or just looking for a fun, kid-friendly activity, we've got you covered. Real pumpkins are great, but let's face it, they don't last. Plus, sharp knives and little hands? Not always the best combo. That's why we're obsessed with no-carve options that are not only safer but also allow for endless creativity and a longer-lasting fall display.
Painted Pumpkin Perfection: Cool No Carve Ideas
Painted Pumpkin Perfection: Cool No Carve Ideas
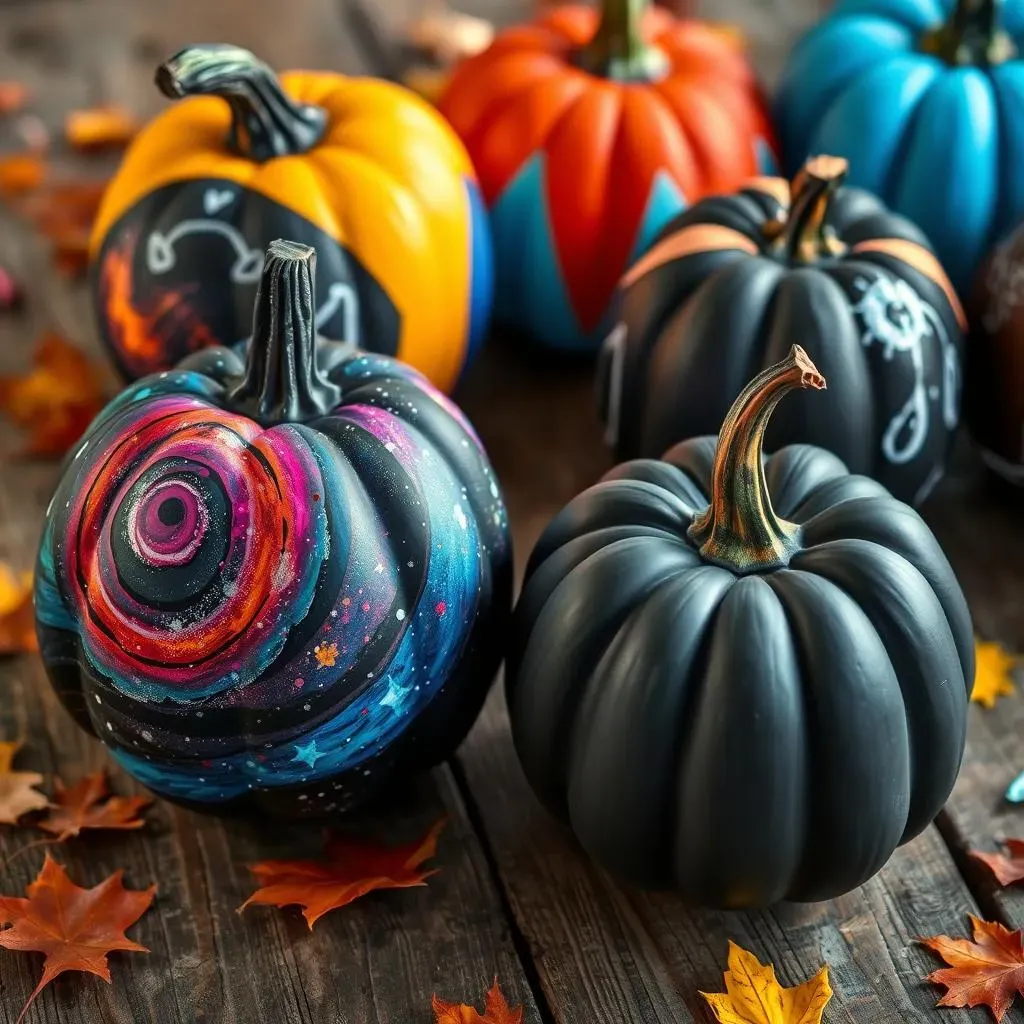
so you're itching to try some painted pumpkin perfection? Awesome! This is where the cool no carve pumpkin ideas really start to shine. Forget the stencils and complicated carving patterns. We're talking about unleashing your inner artist with some simple paints, brushes, and a whole lot of imagination. Think beyond the traditional jack-o'-lantern face. What about a galaxy-themed pumpkin with swirling nebulas and shimmering stars? Or maybe a chic, minimalist design with geometric shapes and bold colors? The possibilities are truly endless, and that's what makes this so much fun.
Before you even pick up a brush, think about the look you want to achieve. Are you going for spooky, whimsical, elegant, or modern? This will help you choose the right colors, patterns, and techniques. Acrylic paints are a great option because they're versatile, affordable, and dry quickly. But don't be afraid to experiment with other types of paint, like spray paint, chalkboard paint, or even metallic paint. And remember, you don't have to be a professional artist to create something amazing. Even simple designs can look stunning with the right color combinations and a little bit of creativity.
Paint Type | Best For | Tips |
|---|---|---|
Acrylic | Detailed designs, solid coverage | Use multiple thin coats, let dry completely between coats |
Spray Paint | Quick coverage, ombre effects | Use in a well-ventilated area, apply in light, even strokes |
Chalkboard Paint | Interactive designs, reusable | Allow to cure completely before using chalk |
Glitter & Glam: Sparkly No Carve Pumpkin Decor
Glitter & Glam: Sparkly No Carve Pumpkin Decor
Get Your Sparkle On
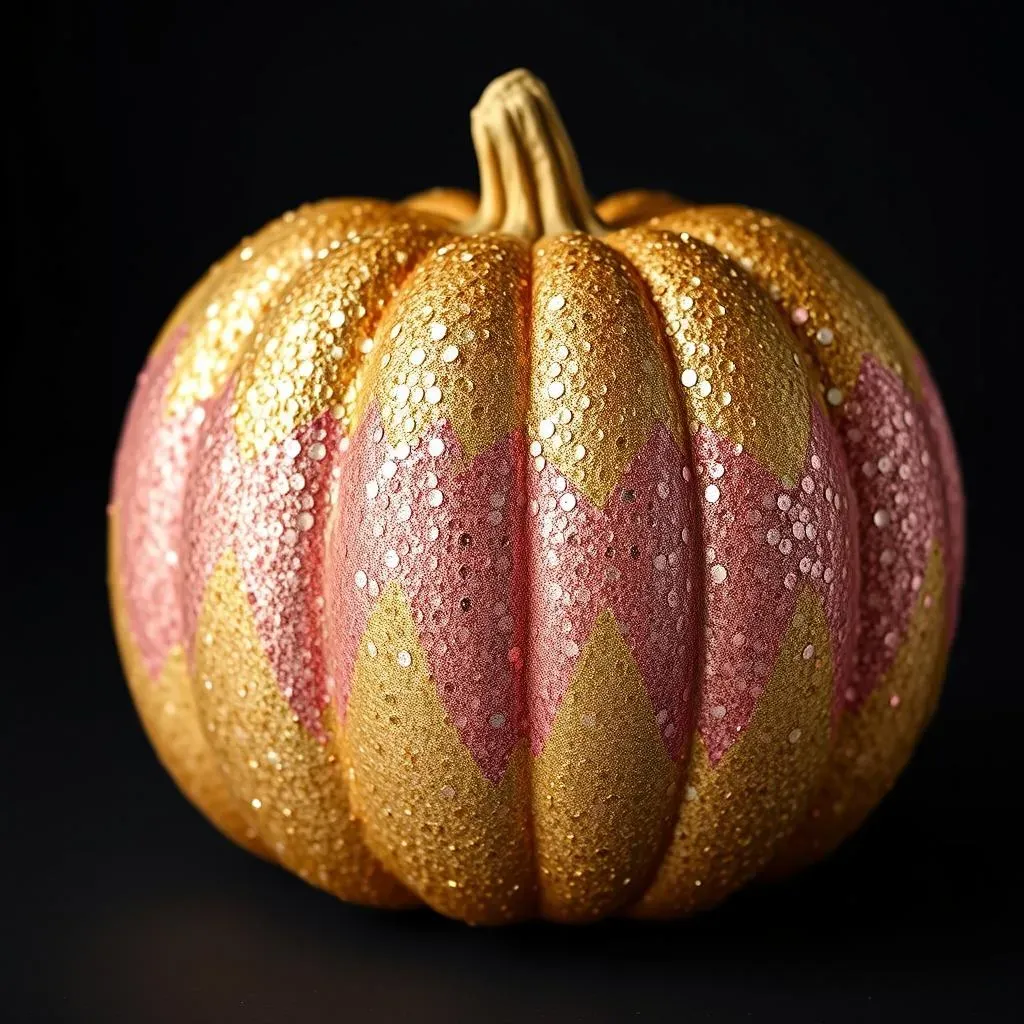
let's talk glitter! If you're looking to add some serious pizzazz to your fall décor, sparkly no carve pumpkin designs are the way to go. This is where you can really let your personality shine (pun intended!). Whether you're a fan of subtle shimmer or full-on glitz, there's a glittery pumpkin idea out there for you. Think beyond just coating the whole pumpkin in glitter. What about creating intricate patterns, adding glitter accents to painted designs, or even using glitter to create a stunning ombre effect? It's all about experimenting and having fun!
Before you dive in, it's essential to gather the right supplies. You'll need your pumpkins (real or faux, your choice!), glitter in various colors and sizes, craft glue (or Mod Podge), and some brushes. For more intricate designs, consider using stencils or painter's tape to create clean lines and shapes. And don't forget a drop cloth or some newspaper to protect your work surface – glitter has a way of getting everywhere!
Glitter Application Techniques
Now that you've got your supplies, let's talk application techniques. For an all-over glitter effect, apply a generous layer of craft glue to the pumpkin, then sprinkle glitter liberally over the glue. Gently shake off any excess glitter and let it dry completely. For more targeted glitter accents, use a small brush to apply glue to specific areas, then sprinkle with glitter. You can also create patterns using stencils or painter's tape. Simply apply the stencil or tape to the pumpkin, apply glue to the exposed areas, sprinkle with glitter, and then carefully remove the stencil or tape. The key is to work in small sections and let the glue dry completely before moving on to the next section.
Want to take your glitter game to the next level? Try mixing different colors and sizes of glitter for a more dynamic effect. You can also add other embellishments, like sequins, rhinestones, or even small beads, for extra sparkle and dimension. Remember, there are no rules when it comes to glitter – the more creative, the better!
"Glitter is my makeup." - Kesha
Sealing the Sparkle
Once you've finished decorating your pumpkin with glitter, it's important to seal it to prevent the glitter from flaking off. This will help your design last longer and keep your home from becoming a glitter bomb. The best way to seal glitter is with a clear acrylic sealer. You can find this at most craft stores in either a spray or brush-on formula. Apply a thin, even coat of sealer to the entire pumpkin and let it dry completely. You may need to apply multiple coats for maximum protection.
With a little bit of glitter and some creativity, you can transform ordinary pumpkins into dazzling works of art. So, go ahead, embrace the sparkle and let your inner artist shine! Just be prepared to find glitter in every nook and cranny of your house for the next few weeks – it's a small price to pay for such beautiful fall décor!
Technique | Description | Best For |
|---|---|---|
All-Over Glitter | Coating the entire pumpkin in glitter | Maximum sparkle, bold statement |
Glitter Accents | Adding glitter to specific areas or details | Subtle shimmer, highlighting features |
Glitter Ombre | Creating a gradient effect with glitter | Stylish and modern look |
Decoupage Dreams: Unique No Carve Pumpkin Designs
Decoupage Dreams: Unique No Carve Pumpkin Designs
Paper Napkin Magic
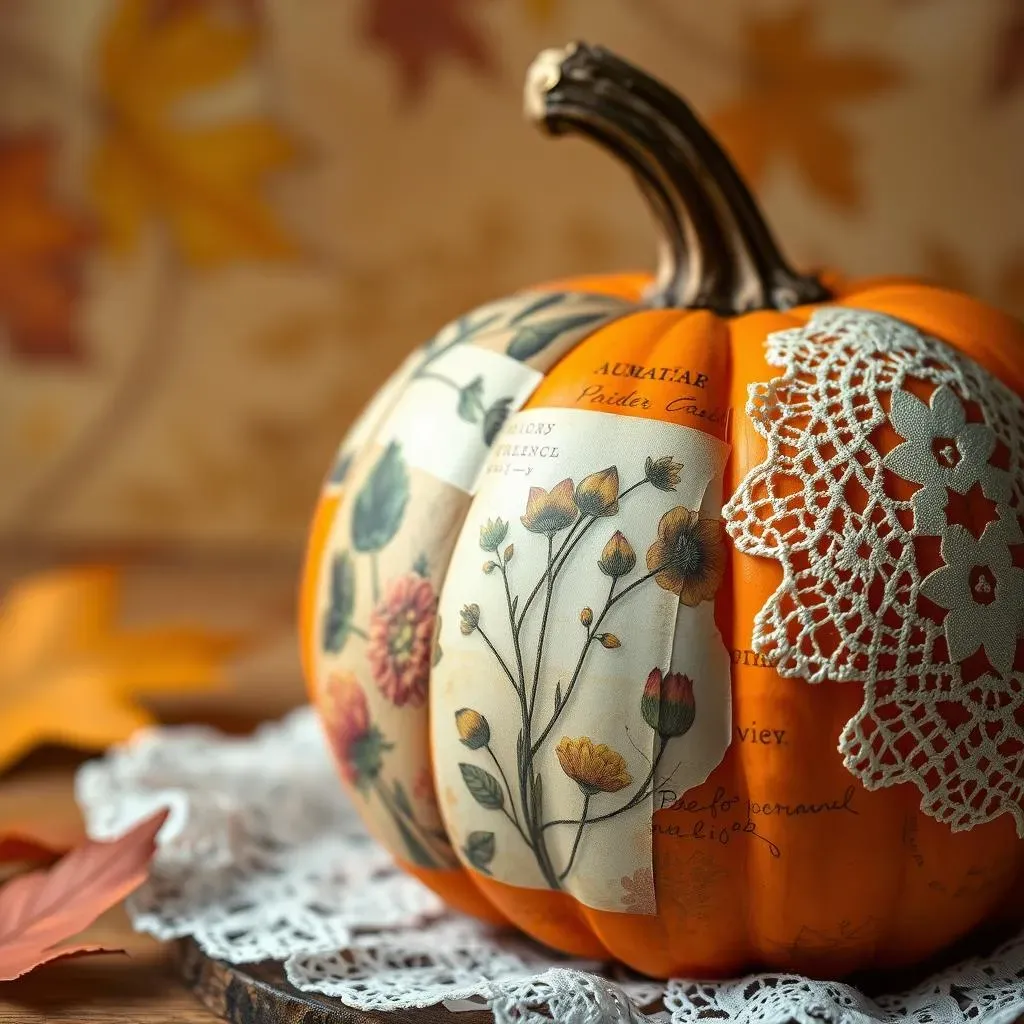
let's get into decoupage! If you're not familiar, decoupage is basically the art of gluing paper cutouts onto a surface and then sealing it. And trust me, it's way easier than it sounds! For unique no carve pumpkin designs, decoupage opens up a world of possibilities. Think vintage botanical prints, quirky comic book panels, or even just some pretty patterned paper. The beauty of it is that you can completely transform a plain pumpkin into a one-of-a-kind masterpiece with just a few simple supplies.
To get started, you'll need your pumpkin, some pretty paper (paper napkins work great because they're thin and easy to work with), Mod Podge (or another decoupage medium), a brush, and some scissors. Carefully cut out the designs you want to use from your paper. If you're using paper napkins, be sure to peel off the extra layers of paper so you're just working with the printed top layer. Then, apply a thin layer of Mod Podge to the area of the pumpkin where you want to place your cutout. Gently position the cutout on the Mod Podge and smooth it out with your fingers or a soft cloth, working from the center outwards to avoid wrinkles and bubbles. Once the Mod Podge is dry, apply a top coat to seal everything in.
Fabric Fun & Beyond
But wait, there's more to decoupage than just paper! You can also use fabric scraps, lace, or even dried leaves to create textured and visually interesting designs. Imagine a pumpkin covered in vintage floral fabric, or one adorned with delicate lace doilies. The possibilities are truly endless! Just make sure to use a fabric-specific decoupage medium if you're working with fabric.
Another fun idea is to combine decoupage with other techniques, like painting or glitter. For example, you could paint the pumpkin a solid color and then add decoupage accents, or you could create a glittery background and then decoupage images on top. Don't be afraid to experiment and get creative! Decoupage is all about having fun and expressing your personal style. And the best part? It's a relatively inexpensive way to create stunning fall décor that will last for years to come.
Theme It Up: Pop Culture & Character Pumpkins (No Carve!)
Theme It Up: Pop Culture & Character Pumpkins (No Carve!)
Bring Your Fandom to Fall
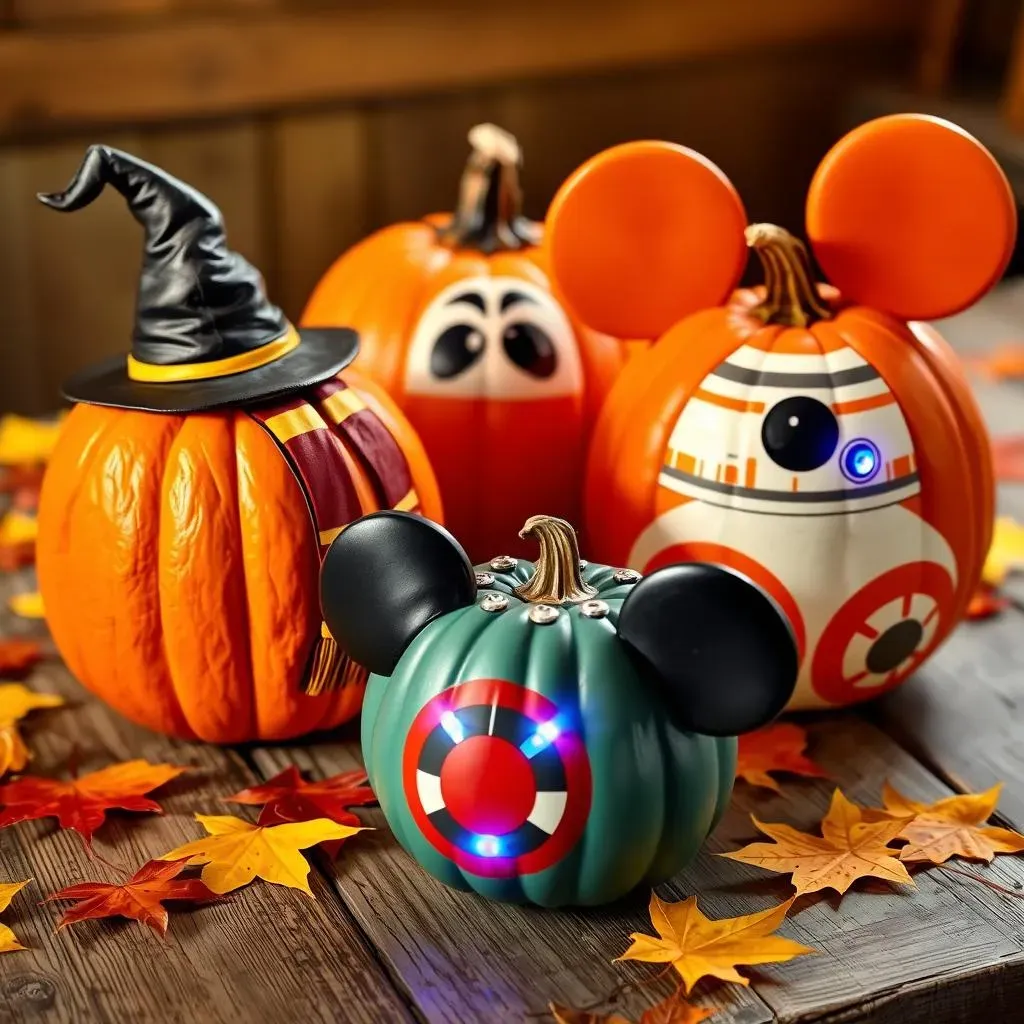
fellow fandom fanatics, this is where things get seriously fun! If you're looking to inject some personality into your fall décor, pop culture & character pumpkins (no carve!) are the ultimate way to do it. Think beyond the basic ghosts and goblins. What about a Harry Potter-themed pumpkin with a painted Sorting Hat and a Gryffindor scarf? Or a Star Wars-inspired pumpkin with a BB-8 design and some strategically placed LED lights? The possibilities are as endless as your imagination (and your streaming queue!). This is your chance to show off your love for your favorite movies, TV shows, books, and video games in a creative and festive way.
The key to success with themed pumpkins is to choose a design that's both recognizable and relatively easy to execute. Remember, we're going for no-carve, so complex designs with lots of intricate details might be challenging. Instead, focus on iconic symbols, characters, or quotes that capture the essence of your chosen theme. For example, a simple silhouette of Batman against a yellow moon is instantly recognizable and easy to paint. Or, you could decoupage pages from a Harry Potter book onto a pumpkin for a truly magical effect.
Character Creation Station
So, how do you bring your favorite characters to life on a pumpkin? One popular technique is to use paint. Acrylic paints are a great option because they're versatile and easy to work with. Start by sketching your design onto the pumpkin with a pencil, then carefully fill it in with paint. For added dimension, consider using different shades of the same color to create highlights and shadows. You can also add details with paint markers or fine-tipped brushes. If you're not confident in your freehand drawing skills, you can use stencils or print out images from the internet and trace them onto the pumpkin.
Another fun idea is to use craft foam to create character features. Cut out shapes like ears, noses, and hats from craft foam and then glue them onto the pumpkin. You can also use googly eyes to add a touch of whimsy. For a more sophisticated look, try using metallic paints or glitter to add some sparkle and shine. And don't forget about accessories! A well-placed scarf, hat, or pair of glasses can really bring your character to life. No matter which technique you choose, the most important thing is to have fun and let your creativity shine!
"The best way to predict the future is to create it." - Peter Drucker
Level Up Your Pumpkin Game
Ready to take your themed pumpkins to the next level? Consider adding some special effects to really make them stand out. For example, you could use LED lights to illuminate your pumpkin from the inside, creating a spooky or magical glow. You could also add sound effects, like a recording of Darth Vader's breathing for a Star Wars pumpkin or a snippet of Hedwig's theme for a Harry Potter pumpkin. For a truly immersive experience, consider creating a mini-scene around your pumpkin. For example, you could create a tiny Hogwarts castle out of cardboard and place it next to your Harry Potter pumpkin, or you could create a miniature Death Star out of Styrofoam and place it next to your Star Wars pumpkin.
And don't forget about the presentation! A well-placed pumpkin on a festive tablecloth or surrounded by other themed decorations can really elevate your entire display. So, go ahead, embrace your inner geek and create some truly unforgettable pop culture & character pumpkins this fall. Your friends and neighbors will be amazed by your creativity and attention to detail!
Theme | Iconic Elements | No-Carve Ideas |
|---|---|---|
Harry Potter | Sorting Hat, Hogwarts Crest, Golden Snitch | Painted Sorting Hat, Decoupage book pages, Glitter Snitch |
Star Wars | BB-8, Darth Vader, Lightsabers | BB-8 painted design, Darth Vader silhouette, Craft foam lightsabers |
Disney | Mickey Mouse, Princesses, Villains | Mickey Mouse ears, Princess dress designs, Villainous expressions |
Nature's Touch: Incorporating Natural Elements in Cool No Carve Pumpkins
Nature's Touch: Incorporating Natural Elements in Cool No Carve Pumpkins
Earthy Elegance
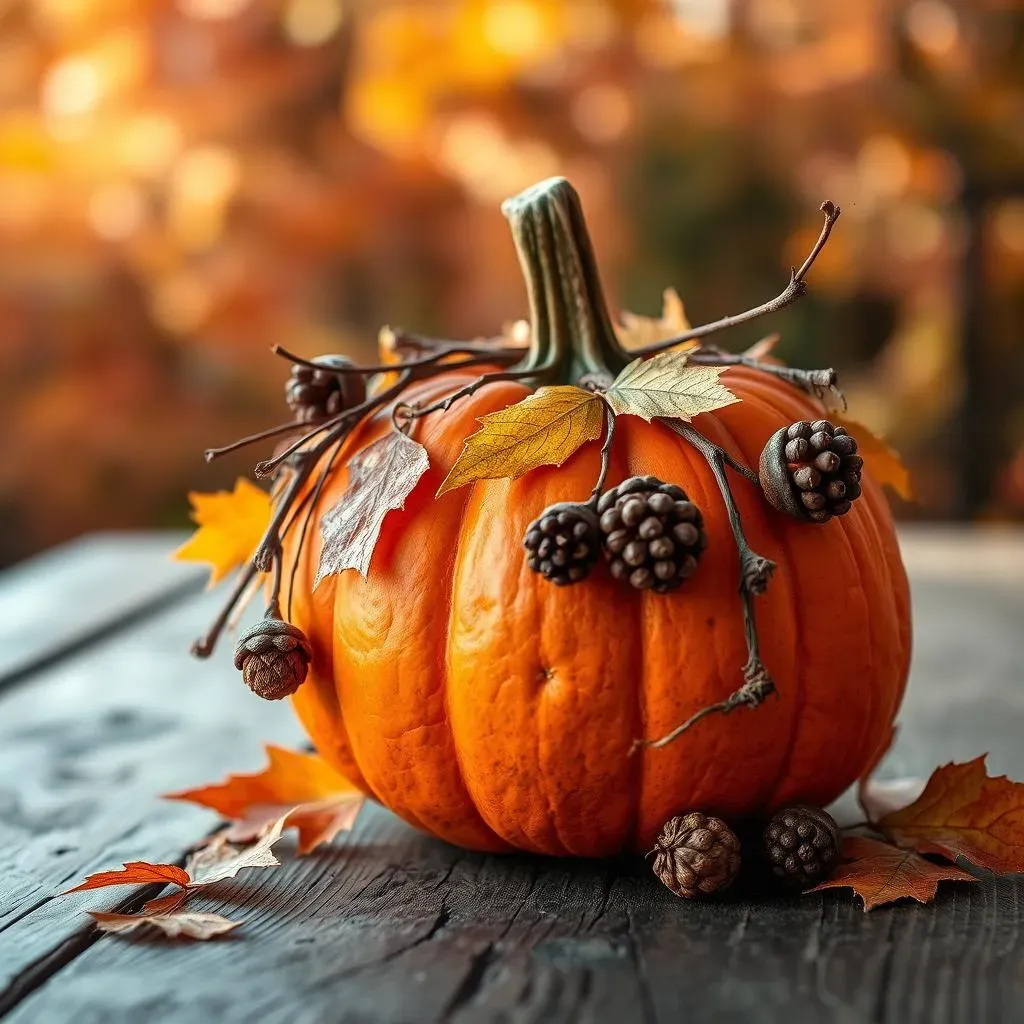
Alright, let's talk about bringing the outdoors in! I'm super excited about incorporating natural elements in cool no carve pumpkins. This is where you can really get creative and add a touch of rustic charm to your fall décor. Forget the store-bought decorations – we're going straight to Mother Nature for inspiration! Think about all the beautiful things you can find right in your backyard or on a nature walk: leaves, twigs, acorns, pinecones, dried flowers, even small stones can be used to create stunning pumpkin designs. It's all about embracing the natural beauty of the season and adding a touch of organic elegance to your home.
Before you start gluing things onto your pumpkin, take some time to gather your materials and plan your design. Consider the colors, textures, and shapes of the natural elements you've collected. Are you going for a minimalist look with just a few strategically placed leaves, or a more elaborate design with a variety of different materials? You can also paint or stain the natural elements to customize them to your liking. For example, you could spray paint acorns gold for a touch of glamour, or stain twigs a darker color for a more rustic look. The key is to experiment and have fun!
Branching Out with Twigs & Leaves
Now, let's get down to the nitty-gritty of how to actually attach these natural elements to your pumpkin. For smaller items like leaves, acorns, and dried flowers, craft glue or Mod Podge will work just fine. Simply apply a small amount of glue to the back of the item and then press it firmly onto the pumpkin. For larger items like twigs and pinecones, you might need to use a hot glue gun for a more secure hold. Just be careful not to burn yourself! You can also use wire or twine to attach natural elements to the pumpkin. Simply wrap the wire or twine around the item and then tie it securely to the pumpkin stem or body.
One of my favorite techniques is to create a "twiggy" pumpkin by covering the entire surface with small twigs. Simply cut the twigs to different lengths and then glue them onto the pumpkin in a random pattern. This creates a textured and visually interesting look that's perfect for a rustic fall display. You can also create leaf-covered pumpkins by overlapping different colored leaves on the surface of the pumpkin. This creates a beautiful and colorful design that celebrates the changing seasons. And don't forget about adding other embellishments, like ribbon, twine, or even small fairy lights, to add a touch of whimsy. With a little bit of creativity and some natural materials, you can create stunning pumpkin designs that are both beautiful and eco-friendly!
Element | Application | Style |
|---|---|---|
Leaves | Glued in overlapping patterns | Colorful, autumnal |
Twigs | Attached to create a "twiggy" texture | Rustic, natural |
Pinecones | Hot glued for secure attachment | Woodsy, textured |
Embrace the No-Carve Pumpkin Revolution!
So, there you have it – a whole host of cool no carve pumpkin ideas to inspire your fall decorating. From the simplicity of paint to the sparkle of glitter and the artistry of decoupage, there's a no-carve technique for every style and skill level. The best part? These creations will last far longer than their carved counterparts, bringing joy throughout the entire autumn season. Don't be afraid to experiment, get creative, and put your own personal spin on these ideas. Happy decorating, and may your fall be filled with beautiful, no-carve pumpkins!