Table of Contents
Halloween is creeping closer, and that means it's time to think about pumpkins! But forget those same old triangle eyes and toothy grins. Are you ready to take your jack-o'-lantern game to the next level? This year, ditch the predictable and dive headfirst into a world of cool ideas to carve a pumpkin that will make your porch the envy of the neighborhood. We're not just talking about spooky faces; think intricate designs, pop culture icons, and downright artistic creations. This guide is your ultimate source for pumpkin carving inspiration. We'll explore classic designs with a modern twist, uncover unique and unexpected carving concepts, and arm you with the essential tools and techniques to bring your vision to life. Plus, we'll share tips on how to make your masterpiece last longer and even suggest some fun alternatives to traditional carving. So, grab your carving kit, unleash your creativity, and get ready to transform ordinary pumpkins into extraordinary works of art. Let's get carving!
Classic Cool Pumpkin Carving Ideas with a Twist
Classic Cool Pumpkin Carving Ideas with a Twist
The Timeless Jack-o'-Lantern Remix
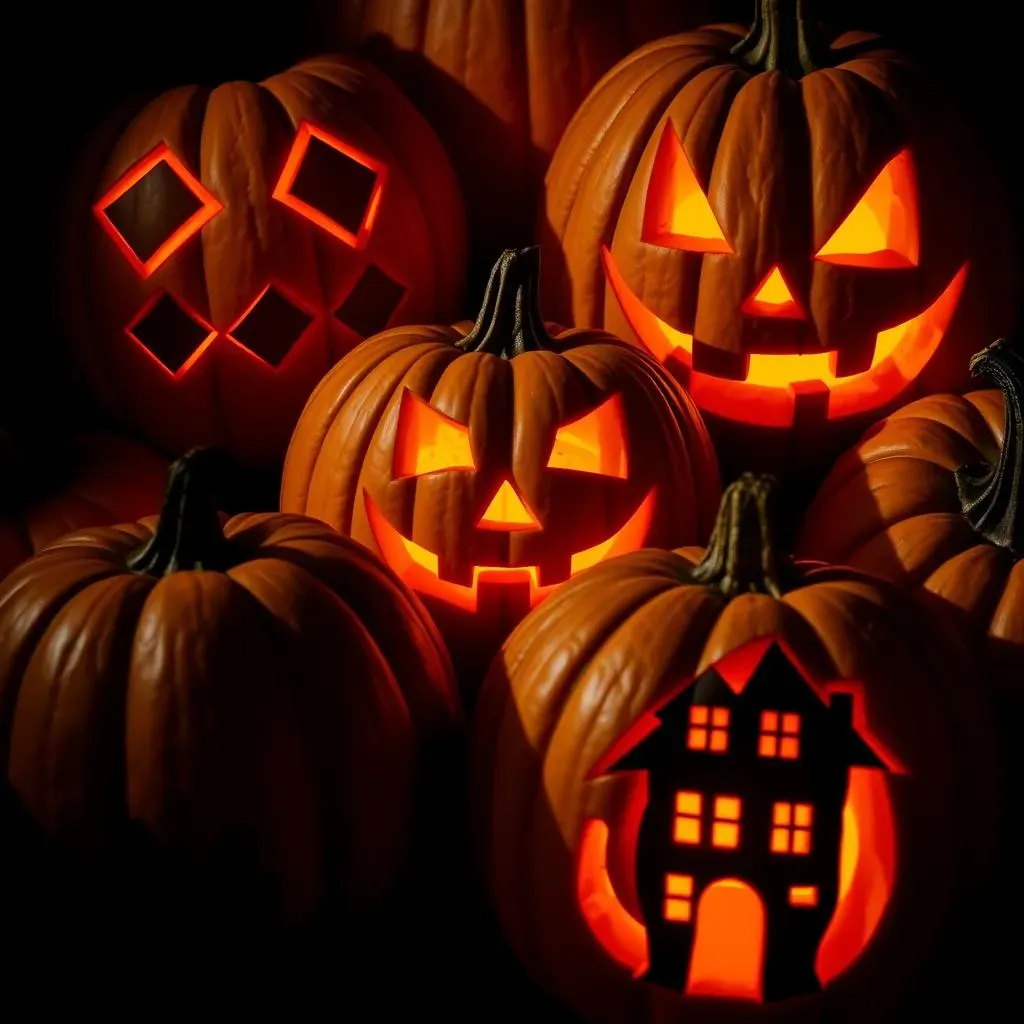
Let's face it, the classic jack-o'-lantern is a staple for a reason. It's recognizable, fun, and relatively easy to carve. But that doesn't mean you can't give it a cool, modern upgrade! Think about playing with the traditional features. Instead of simple triangle eyes, try using different geometric shapes – diamonds, hexagons, or even stars. Get creative with the mouth, too. A wide, toothy grin is always a hit, but what about a mischievous smirk or a surprised "O" shape?
You can also add depth and dimension by carving different layers into the pumpkin. Carve the outline of the eyes and mouth deeply, and then shave away the surrounding area to create a subtle glow effect. This adds a touch of sophistication to a classic design. Or, consider incorporating patterns around the face – polka dots, stripes, or even a spiderweb design. The possibilities are endless!
Spooky Silhouettes and Shadow Play
Another fantastic way to twist classic pumpkin carving is to focus on silhouettes. Instead of carving a traditional face, consider carving a spooky silhouette of a haunted house, a black cat, or a witch flying on a broomstick. These designs are visually striking and can be surprisingly easy to execute, especially if you use a stencil.
Shadow play is another cool technique to add a touch of mystery and intrigue. Carve small holes or patterns into the pumpkin that will cast interesting shadows when the candle is lit. Experiment with different shapes and sizes to create unique and spooky effects. You can even combine silhouettes and shadow play for a truly captivating jack-o'-lantern.
Here's a simple table to help you visualize some classic ideas with a twist:
Classic Element | Cool Twist | Effect |
|---|---|---|
Triangle Eyes | Geometric Shapes (Diamonds, Hexagons) | Modern, Edgy |
Toothy Grin | Mischievous Smirk | Playful, Intriguing |
Simple Face | Haunted House Silhouette | Spooky, Dramatic |
Basic Holes | Intricate Shadow Patterns | Mysterious, Captivating |
Beyond the Basics: Unique and Cool Pumpkin Carving Designs
Beyond the Basics: Unique and Cool Pumpkin Carving Designs
Pumpkin Portraits: Capture Your Favorite Characters
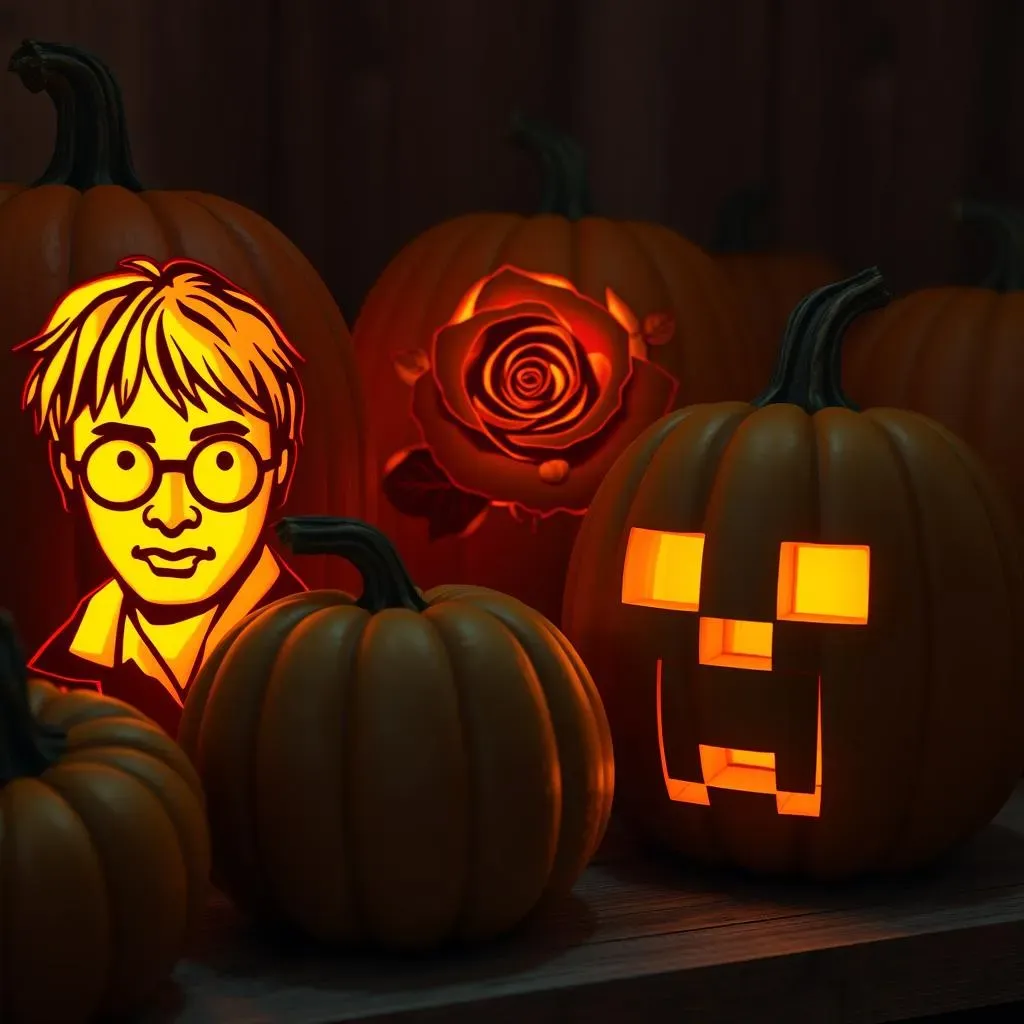
Tired of ghouls and goblins? Why not immortalize your favorite characters on a pumpkin canvas? From beloved movie icons to cartoon heroes, the possibilities are endless. Think about carving a portrait of Harry Potter, Wonder Woman, or even Baby Yoda. These designs require a bit more skill and patience, but the results are truly stunning. You can find stencils online or even create your own using a photo editing software.
Consider using different carving depths to create shading and highlights, bringing your portrait to life. Don't be afraid to experiment with color, too. Use paint or markers to add details and enhance the likeness of your chosen character. Pumpkin portraits are a fantastic way to showcase your fandom and impress your neighbors.
Nature's Bounty: Floral and Fauna Designs
Bring the beauty of the natural world to your Halloween display with floral and fauna-inspired pumpkin carvings. Intricate floral patterns, delicate leaves, and whimsical animal designs can transform a simple pumpkin into a work of art. Think about carving a blooming rose, a graceful owl, or a playful squirrel.
These designs often require a steady hand and a keen eye for detail, but the results are well worth the effort. Use specialized carving tools to create fine lines and intricate patterns. You can also incorporate real leaves, twigs, and flowers into your design for an added touch of natural beauty. Light your creation with a soft, warm light to enhance the delicate details and create a magical ambiance.
Geek Chic: Embrace Your Inner Nerd
For the tech-savvy and science-minded, geek chic pumpkin carvings are a must-try. Embrace your inner nerd with designs inspired by video games, coding, and scientific concepts. Think about carving a pixelated character from Minecraft, a circuit board pattern, or even a DNA double helix.
These designs are not only visually interesting but also a great conversation starter. Use stencils or create your own designs using graphic design software. Consider incorporating LED lights or other electronic components to add a futuristic touch to your creation. Geek chic pumpkin carvings are a fun and creative way to showcase your passion for science and technology.
Here's a table to spark some geeky inspiration:
Geeky Theme | Pumpkin Carving Idea | Extra Touches |
|---|---|---|
Video Games | Pixelated Character (e.g., Mario) | LED lights for glowing effect |
Coding | Circuit Board Pattern | Metallic paint for realistic look |
Science | DNA Double Helix | Glow-in-the-dark paint |
Space | Constellation Map | Pinprick holes for starry effect |
Tools and Tips for Cool Pumpkin Carving Success
Tools and Tips for Cool Pumpkin Carving Success
Gather Your Arsenal: Essential Carving Tools
Before you even think about drawing a design, you need the right tools. A basic pumpkin carving kit is a great starting point. These kits usually include a small serrated saw, a scoop, and some simple stencils. However, if you're serious about taking your carving skills to the next level, consider investing in some more specialized tools. A variety of small saws with different blade shapes will allow you to create intricate details. A good quality scoop is essential for removing all the pumpkin guts (more on that later!). And don't forget about detail tools like gouges and loop tools, which are perfect for creating fine lines and textures.
Also, think about the unsung heroes of pumpkin carving: a sturdy work surface, a good light source, and some comfortable gloves. Carving can be messy, so protect your table with newspaper or a drop cloth. A bright light will help you see what you're doing and prevent accidents. And gloves will protect your hands from getting sticky and sore.
Prep Like a Pro: Pumpkin Selection and Gutting
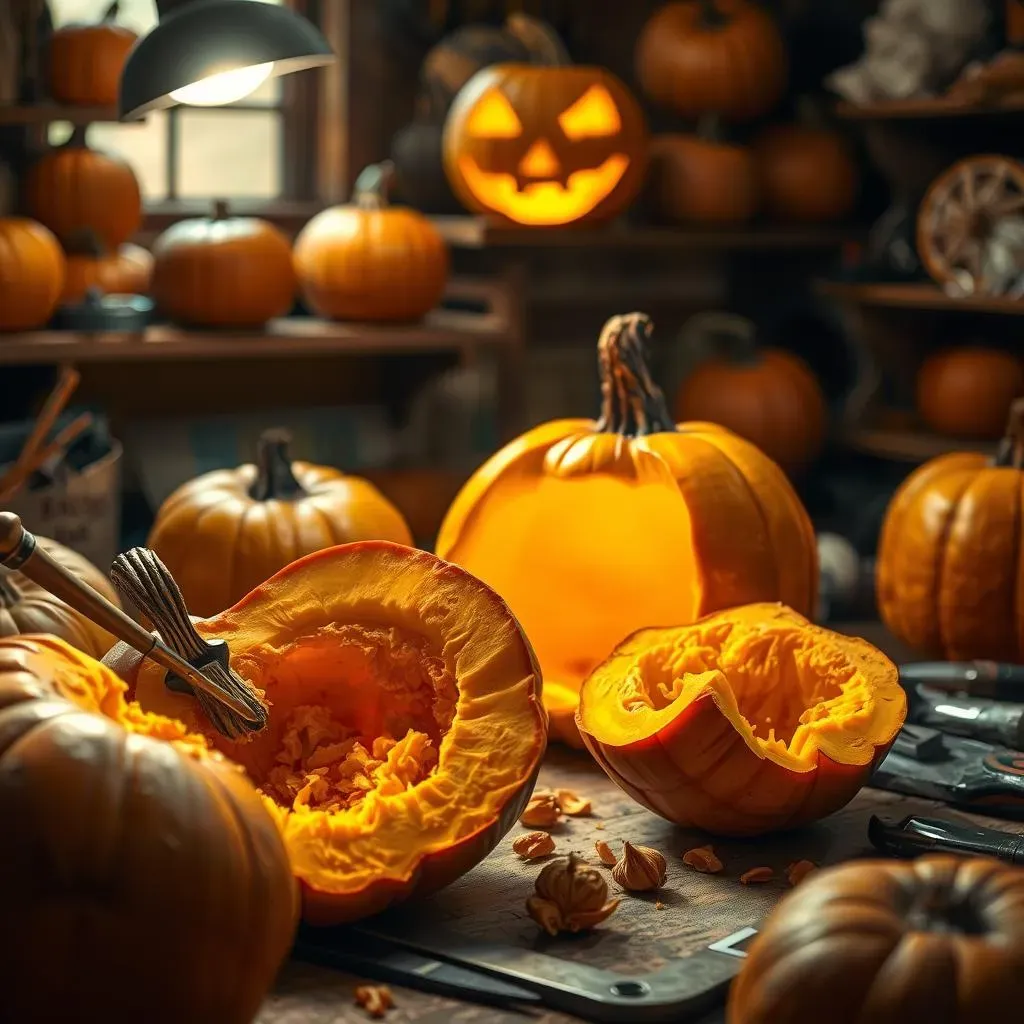
Choosing the right pumpkin is crucial for carving success. Look for a pumpkin that is firm, with a smooth, even surface. Avoid pumpkins with soft spots or blemishes, as these are signs of decay. The stem should be green and firmly attached. Give the pumpkin a gentle thump – it should sound hollow. The size of the pumpkin will depend on the complexity of your design, but bigger isn't always better. A smaller pumpkin can be easier to handle and carve.
Once you've selected your pumpkin, it's time for the messy part: gutting! Cut a large hole in the top of the pumpkin, making sure to angle the knife inward. This will create a "lid" that won't fall through. Use a sturdy scoop to remove all the seeds and pulp. Scrape the inside walls of the pumpkin clean to create a smooth surface for carving. Don't throw away the seeds! You can roast them for a delicious and healthy snack.
Master the Technique: Carving, Shaving, and Lighting
Now for the fun part: bringing your design to life! Start by transferring your design onto the pumpkin using a stencil or freehand drawing. Use a marker or pen to trace the lines. If you're using a stencil, secure it to the pumpkin with tape. When carving, always use a sawing motion, rather than trying to force the blade through the pumpkin. Work slowly and carefully, following the lines of your design. For intricate details, use smaller tools and take your time.
Shaving is a technique that involves removing the outer layer of the pumpkin's skin to create a translucent effect. This is a great way to add depth and dimension to your carving. Use a gouge or loop tool to carefully shave away the skin, being careful not to cut all the way through. Finally, lighting is key to showcasing your masterpiece. A traditional candle is always a good option, but consider using battery-operated LED lights for a safer and longer-lasting glow. You can even use colored lights to create different effects.
Here's a quick checklist for carving success:
- Choose the right pumpkin: Firm, smooth, and hollow sounding.
- Gather your tools: Serrated saws, scoop, detail tools.
- Prepare your design: Stencil or freehand drawing.
- Carve carefully: Use a sawing motion and follow the lines.
- Shave for depth: Remove the outer layer of skin.
- Light it up: Candle or LED lights.
Making Your Cool Pumpkin Carving Last and Other Fun Ideas
Making Your Cool Pumpkin Carving Last and Other Fun Ideas
Preserve the Magic: Tips for Longevity
You've poured your heart and soul into creating a stunning pumpkin masterpiece, so naturally, you want it to last as long as possible. Unfortunately, carved pumpkins are susceptible to mold and decay. But don't despair! There are several things you can do to extend the life of your jack-o'-lantern. First, make sure to clean your pumpkin thoroughly after carving. Remove any excess pulp or seeds, as these can promote mold growth. You can also try soaking your pumpkin in a bleach solution (1 tablespoon of bleach per gallon of water) for a few hours. This will kill any existing mold spores and help prevent new ones from forming.
Another trick is to apply a thin layer of petroleum jelly or vegetable oil to the carved surfaces. This will help to seal in moisture and prevent the pumpkin from drying out. Store your pumpkin in a cool, dry place, away from direct sunlight. If possible, bring it indoors at night, as colder temperatures can slow down the decay process. With a little care and attention, you can keep your cool pumpkin carving looking its best for days, even weeks!
Beyond the Carve: Alternative Pumpkin Decorating
Not feeling up to the challenge of carving? Or maybe you want to create some pumpkin decorations that will last for years to come? No problem! There are plenty of fun and creative alternatives to traditional carving. Painting is a great option for all ages and skill levels. Use acrylic paints to create colorful designs, patterns, or even portraits. You can also use stencils or freehand drawing to guide your brush.
Another fun idea is to decorate your pumpkin with embellishments like glitter, sequins, buttons, or googly eyes. Glue these items onto the pumpkin's surface to create a unique and eye-catching design. You can also use fabric scraps, yarn, or ribbon to add texture and dimension. For a more natural look, try decorating your pumpkin with leaves, twigs, and berries. The possibilities are endless! No-carve pumpkins are a fantastic way to express your creativity without the mess and hassle of carving. Plus, they'll last much longer, so you can enjoy your Halloween decorations for the entire season.
Seed-sational Ideas: Repurposing Pumpkin Seeds and Guts
Don't let those pumpkin seeds and guts go to waste! They're a treasure trove of possibilities. Roasting pumpkin seeds is a classic fall treat. Simply toss the seeds with olive oil, salt, and your favorite spices, then roast them in the oven until they're crispy and golden brown. Pumpkin seeds are a healthy and delicious snack that's perfect for satisfying those autumn cravings.
As for the pumpkin guts, they can be used to make a variety of delicious dishes, such as pumpkin soup, pumpkin bread, or pumpkin pie filling. You can also compost the guts to create nutrient-rich soil for your garden. Pumpkin compost is a great way to give back to the earth and reduce your environmental impact. So, before you toss those pumpkin remains in the trash, think about all the creative and sustainable ways you can repurpose them.
Here's a table of ideas for pumpkin repurposing:
Pumpkin Part | Repurposing Idea | Benefits |
|---|---|---|
Seeds | Roasted Pumpkin Seeds | Healthy snack, delicious flavor |
Guts | Pumpkin Soup/Bread | Reduces food waste, tasty dishes |
Entire Pumpkin (After Halloween) | Composting | Enriches soil, eco-friendly |
Carved Pumpkin Pieces | Bird Feeder | Attracts birds, natural decoration |
Conclusion: Carve Out Some Fun with Cool Pumpkin Ideas
So, there you have it – a treasure trove of cool ideas to carve a pumpkin that will set your Halloween display apart. From reimagined classics to wildly unique designs, the possibilities are as endless as your imagination. Remember, the key is to have fun and let your personality shine through each ghoulish grin or spooky silhouette. With the right tools, a dash of creativity, and these handy tips, you're well on your way to creating a jack-o'-lantern masterpiece that will impress trick-or-treaters and neighbors alike. Happy carving, and Happy Halloween!