Table of Contents
Tired of the same old toothy grin staring out from your porch every Halloween? Yearning to unleash your inner artist and transform a humble pumpkin into a masterpiece of spooky (or silly) art? Then you've come to the right place! This isn't your grandma's guide to triangle-eyed jack-o'-lanterns. We're diving headfirst into the world of cool ideas for pumpkin carving, exploring techniques, tools, and inspiration that will elevate your gourd game to a whole new level. Whether you're a seasoned carving pro or a pumpkin-spiced newbie, we've got something for everyone. Get ready to discover stencils that'll make intricate designs a breeze, tools that'll give you laser-like precision, and creative concepts that range from funny faces to pop culture icons. We'll even cover the best ways to display your illuminated creations, ensuring your pumpkin shines bright all season long. So, grab your carving kit, clear your workspace, and prepare to be inspired. Let's turn those pumpkins into works of art!
Beyond the Basic JackO'Lantern: Elevating Your Pumpkin Carving Game
Beyond the Basic JackO'Lantern: Elevating Your Pumpkin Carving Game
Ditch the Template: Unleashing Your Creativity
Let's face it, those generic pumpkin carving templates are, well, generic. They're the pumpkin equivalent of painting-by-numbers. But you're an artist, or at least an artist in the making! It's time to ditch the pre-printed patterns and embrace the freedom of freehand carving. Think of your pumpkin as a blank canvas, ripe with possibilities. Don't be afraid to experiment with different shapes, sizes, and depths of cuts. The more you play around, the more unique and expressive your jack-o'-lantern will become.
Not sure where to start? Think about what inspires you. Are you a fan of spooky monsters? Maybe a whimsical forest creature? Or perhaps a portrait of your pet hamster? The possibilities are endless! Sketch out your ideas on paper first, then transfer them to your pumpkin using a washable marker. And remember, there are no mistakes, only opportunities for happy little accidents (thanks, Bob Ross!).
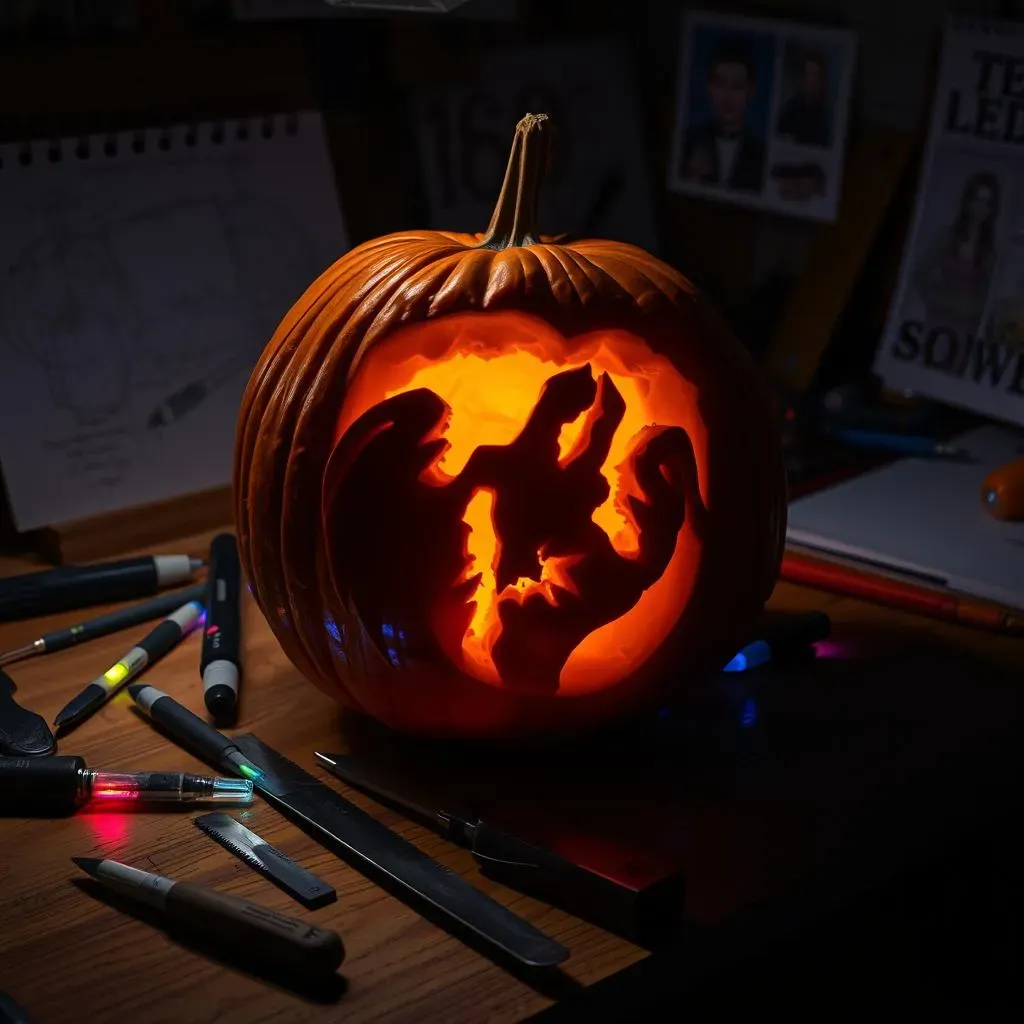
The Right Tools for the Job: Beyond the Kitchen Knife
let's talk tools. That old kitchen knife you've been using for years? It's time for an upgrade. Think of it like this: you wouldn't try to paint the Mona Lisa with a rusty spoon, would you? Investing in a good pumpkin carving kit is a game-changer. These kits typically include a variety of saws, gouges, and scrapers that are specifically designed for working with pumpkin flesh. The smaller saws are perfect for intricate details, while the gouges and scrapers allow you to create different textures and depths.
But don't stop there! Get creative with your tools. A melon baller can be used to create perfectly round holes, while a drill can add a touch of industrial chic to your design. And don't forget about safety! Always carve in a well-lit area and use a sturdy surface. And for goodness sake, keep your fingers out of the way!
Here's a quick rundown of essential tools:
- **Pumpkin Carving Saw:** For cutting out large sections and basic shapes.
- **Detail Carving Knife:** For intricate designs and fine lines.
- **Gouges:** For creating textured surfaces and removing large areas of pumpkin flesh.
- **Scrapers:** For thinning out the pumpkin wall to allow more light to shine through.
- **Pencils/Markers:** For tracing stencils or drawing your own designs.
Light and Shadow: The Art of Illumination
Carving is only half the battle. The real magic happens when you add light. A flickering candle can add a spooky, atmospheric glow to your jack-o'-lantern, but it's not the only option. Consider using LED lights for a brighter, longer-lasting effect. You can even find battery-operated strobe lights or color-changing LEDs to add a touch of pizzazz. Experiment with different lighting techniques to create different moods. For example, placing a light inside the pumpkin and shining it through a thin layer of flesh can create a soft, ethereal glow. Or, use multiple lights to highlight different areas of your design.
And don't forget about the environment! Be mindful of fire safety when using candles. Place your jack-o'-lantern on a stable surface away from flammable materials. And if you're using electric lights, make sure they're rated for outdoor use.
Cool Ideas for Pumpkin Carving: Stencils, Tools, and Techniques
Cool Ideas for Pumpkin Carving: Stencils, Tools, and Techniques
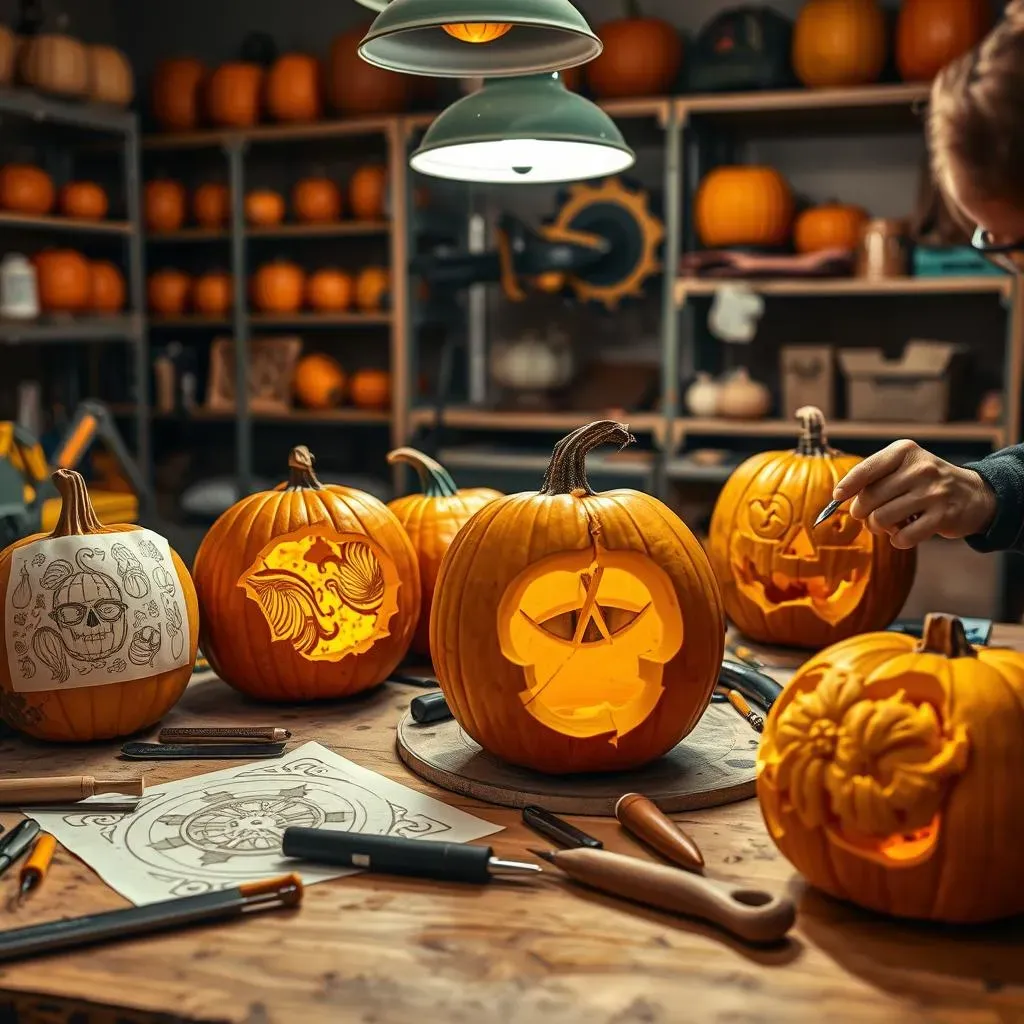
Stencils: Your Shortcut to Pumpkin Perfection
so maybe freehand carving sounds a little intimidating. No worries! That's where stencils come in. Stencils are your secret weapon for achieving intricate designs without the need for artistic superpowers. You can find a massive variety of stencils online, in craft stores, or even create your own. From simple geometric patterns to complex character portraits, there's a stencil out there for every skill level and interest. The key is to choose a stencil that matches your carving abilities. Don't bite off more than you can chew, especially if you're a beginner. Start with something simple and gradually work your way up to more complex designs.
Using a stencil is easy peasy. Just tape the stencil to your pumpkin, trace the design onto the surface using a washable marker or a poking tool, and then carefully carve along the lines. Pro tip: Use a poking tool to create small holes along the stencil lines before you start carving. This will help guide your saw and prevent the stencil from slipping. Also, consider the type of pumpkin you're using. A larger, flatter pumpkin is ideal for more intricate stencil designs, while a smaller, rounder pumpkin is better suited for simpler patterns.
Beyond the Basic Saw: Expanding Your Tool Arsenal
We touched on tools earlier, but let's dive a little deeper. While a basic pumpkin carving kit is a good starting point, there are a few other tools that can take your carving to the next level. For example, a rotary tool (like a Dremel) can be used to create incredibly detailed carvings, especially for removing thin layers of pumpkin flesh to create shading effects. Wood carving tools can also be used to add texture and dimension to your designs. And don't forget about sculpting tools! These tools are perfect for shaping and refining your carvings.
But remember, with great power comes great responsibility. Always use caution when working with sharp tools, and wear safety glasses to protect your eyes from flying pumpkin bits. And if you're using a power tool, make sure you're familiar with its operation and safety features before you start carving. Also, it's worth noting that some pumpkins are easier to carve than others. Look for pumpkins with smooth, thin skin and firm flesh. Avoid pumpkins that are bruised, soft, or have blemishes.
Tool | Use | Skill Level |
|---|---|---|
Pumpkin Carving Saw | Cutting out large sections | Beginner |
Detail Carving Knife | Intricate designs | Intermediate |
Rotary Tool (Dremel) | Detailed shading and fine lines | Advanced |
Wood Carving Tools | Adding texture and dimension | Advanced |
Mastering the Art of Pumpkin Carving Techniques
Now that you've got your stencils and tools, it's time to talk technique. One of the most important techniques to master is the art of "controlled carving." This means using slow, deliberate movements to create clean, precise cuts. Avoid sawing back and forth aggressively, as this can damage the pumpkin and create jagged edges. Instead, use a gentle rocking motion to guide the saw through the pumpkin flesh.
Another important technique is "depth carving." This involves removing different layers of pumpkin flesh to create shading effects and add dimension to your design. For example, you can carve away a thin layer of flesh to allow more light to shine through, or you can carve away a deeper layer to create a darker shadow. Experiment with different depths to create a range of effects. And don't be afraid to make mistakes! Pumpkin carving is all about experimentation and having fun. If you mess up, don't sweat it. Just grab another pumpkin and start over. After all, practice makes perfect!
Creative Pumpkin Carving Ideas: From Funny Faces to Pop Culture Icons
Creative Pumpkin Carving Ideas: From Funny Faces to Pop Culture Icons
Classic with a Twist: Reinventing Funny Faces
Let's start with the classics, but give them a modern makeover. Forget the same old triangular eyes and snaggle-toothed grins. Think expressive eyebrows, mischievous smiles, and maybe even a monocle! The key is to add personality. Consider carving different shapes for the eyes – circles, squares, diamonds – to create unique expressions. Experiment with different mouth shapes too. A wide, toothy grin is always a crowd-pleaser, but a subtle smirk or a surprised "O" can be just as effective. And don't be afraid to add accessories! A carved-on hat, a pair of glasses, or even a handlebar mustache can take your funny face to the next level.
Here's a fun twist: try carving a "reverse" funny face. Instead of carving out the features, carve away the background, leaving the face raised and protruding from the pumpkin. This creates a cool 3D effect that's sure to impress. Also, consider the size and shape of your pumpkin. A tall, skinny pumpkin is perfect for a goofy, elongated face, while a round, plump pumpkin is ideal for a chubby, cheerful character.
Pop Culture Pumpkins: Carving Your Fandom
Ready to unleash your inner geek? Pop culture pumpkins are a fantastic way to show off your fandom and impress your fellow nerds. From superheroes to movie villains to video game characters, the possibilities are endless. The key is to choose a design that's recognizable and translates well to pumpkin carving. Simple silhouettes and iconic symbols are always a good choice. For example, you could carve the Batman logo, a Star Wars stormtrooper helmet, or a Minecraft creeper face. But don't be afraid to get more ambitious! With the right tools and techniques, you can carve incredibly detailed portraits of your favorite characters.
Stencils are your best friend when it comes to pop culture pumpkins. You can find a ton of free stencils online, or you can create your own using a photo editing program. Just upload an image of your favorite character, convert it to black and white, and then simplify the design to make it easier to carve. Remember to consider the complexity of the design and choose a stencil that matches your skill level. And don't forget to add your own personal touch! A little bit of creativity can go a long way in making your pop culture pumpkin truly unique.
Beyond Faces: Abstract and Artistic Designs
Who says pumpkin carving has to be all about faces and characters? If you're feeling adventurous, why not try carving an abstract or artistic design? Geometric patterns, floral motifs, and even landscapes can look stunning when illuminated from within a pumpkin. The key is to think outside the box and experiment with different shapes, textures, and techniques. For example, you could carve a series of concentric circles, a swirling vortex, or a stylized tree. You could also try using different carving tools to create different effects. A rotary tool can be used to create smooth, flowing lines, while wood carving tools can add texture and dimension.
Consider using different sized pumpkins to create a pumpkin "sculpture". Stacking pumpkins and carving designs that flow from one pumpkin to the next. This can create a dramatic and eye-catching display. And don't forget about color! You can paint your pumpkin before or after carving it to add a pop of color and enhance your design. Acrylic paints work well, but make sure to use a sealant to protect the paint from the elements.
Design Type | Description | Skill Level |
|---|---|---|
Geometric Patterns | Simple shapes like circles, squares, and triangles | Beginner |
Floral Motifs | Flowers, leaves, and vines | Intermediate |
Landscapes | Scenes of nature, like mountains, trees, and rivers | Advanced |
Abstract Designs | Non-representational patterns and shapes | Advanced |
DIY Pumpkin Carving: Cool Ideas for All Skill Levels
DIY Pumpkin Carving: Cool Ideas for All Skill Levels
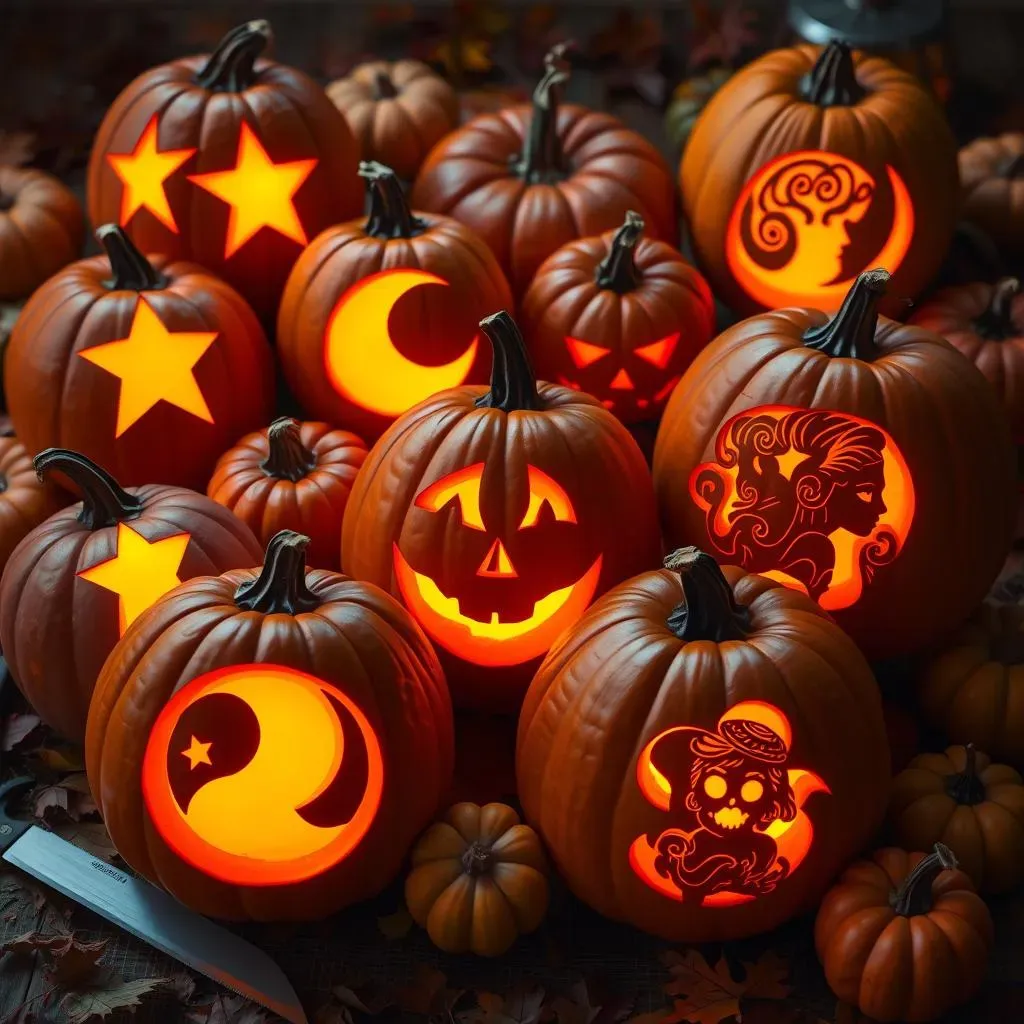
Beginner-Friendly Fun: Simple Shapes and Silhouettes
Alright, so you're new to the pumpkin carving game? No sweat! Let's start with the basics. Forget about trying to replicate the Mona Lisa on a gourd. Instead, focus on simple shapes and silhouettes that are easy to carve and still look awesome. Think stars, moons, bats, ghosts, or even just a classic jack-o'-lantern face with basic shapes. The key is to keep it simple and have fun.
Grab a stencil (or draw your own!), tape it to your pumpkin, and use a poking tool to transfer the design. Then, carefully carve along the lines with a small pumpkin carving saw. Remember, slow and steady wins the race. Don't try to rush it, or you might end up with a mangled mess. And if you make a mistake? No biggie! Just embrace it and call it "artistic license."
Intermediate Intricacy: Stepping Up Your Carving Game
so you've mastered the basic shapes and silhouettes? Ready to take your pumpkin carving to the next level? It's time to try some more intricate designs that require a little more skill and precision. Think detailed patterns, layered carvings, or even simple character portraits. The key is to choose a design that's challenging but not overwhelming.
Consider using more advanced carving tools, like a detail carving knife or a rotary tool, to create finer lines and shading effects. Depth carving is also your friend here. By removing different layers of pumpkin flesh, you can create a sense of depth and dimension that will really make your carving pop. And don't be afraid to experiment with different lighting techniques to highlight your design. A well-placed LED light can make all the difference.
Skill Level | Design Ideas | Tools |
|---|---|---|
Beginner | Stars, moons, bats, simple faces | Pumpkin carving saw, poking tool |
Intermediate | Detailed patterns, layered carvings, simple portraits | Detail carving knife, rotary tool |
Advanced | Complex portraits, 3D carvings, custom designs | Wood carving tools, sculpting tools |
Advanced Artistry: Complex Designs and 3D Effects
So, you're a pumpkin carving pro? You've got the skills, the tools, and the patience to tackle even the most challenging designs? Then it's time to unleash your inner artist and create something truly spectacular. Think complex portraits, 3D carvings, or even custom designs that showcase your unique style and creativity. The sky's the limit!
Consider using wood carving tools and sculpting tools to add texture and dimension to your carvings. Experiment with different lighting techniques to create dramatic effects. And don't be afraid to push the boundaries of what's possible. The best pumpkin carvings are the ones that surprise and delight. Remember safety first! Wear gloves and eye protection.
Light Up the Night: Displaying Your Cool Pumpkin Carvings

Light Up the Night: Displaying Your Cool Pumpkin Carvings
Setting the Stage: Creating the Perfect Ambiance
You've poured your heart and soul into carving these amazing pumpkins, so don't just plop them down on the porch and call it a day! Think about how you can create an entire spooky scene. A little extra effort in presentation can really make your carvings shine, literally and figuratively. Consider the placement of your pumpkins. Grouping them together can create a more dramatic effect than scattering them randomly. Use different heights and sizes to add visual interest. And don't forget about the background! Drape some black fabric behind your pumpkins to create a spooky backdrop, or use some strategically placed spotlights to highlight their features.
Add some props! A few strategically placed cobwebs, skeletons, or tombstones can really enhance the spooky atmosphere. And don't forget about the sound! Playing some eerie music in the background can set the perfect mood for your Halloween display. When thinking about your lighting setup, consider the type of light you're using. Warm, flickering lights can create a spooky, atmospheric glow, while bright, white lights can highlight the details of your carvings.
Safety First: Lighting Options and Placement
While a flickering candle is a classic choice for illuminating jack-o'-lanterns, it's not always the safest option. If you're using candles, make sure to place your pumpkins on a stable surface away from flammable materials. And never leave lit candles unattended! A safer alternative is to use battery-operated LED lights. These lights are available in a variety of colors and styles, and they won't pose a fire hazard. You can even find LED lights that flicker like real candles!
Consider the placement of your lights. Placing a single light inside the pumpkin will create a general glow, while using multiple lights can highlight specific areas of your design. You can also use colored lights to create different effects. For example, a red light can create a spooky, demonic glow, while a green light can evoke a sense of eerie mystery. Remember to conceal the light source as much as possible. You want the light to emanate from the carving itself, not from the bulb or fixture.
Beyond the Porch: Creative Display Ideas
Don't limit yourself to just displaying your pumpkins on the porch! Get creative with your display and think outside the box. Consider creating a pumpkin "totem pole" by stacking several carved pumpkins on top of each other. Or, create a pumpkin "garden" by scattering carved pumpkins throughout your yard. You can even hang carved pumpkins from trees or eaves using sturdy rope or wire. Just make sure they're securely fastened and won't fall and injure anyone.
Think about incorporating your pumpkins into other Halloween decorations. For example, you could place a carved pumpkin on top of a hay bale, surrounded by corn stalks and scarecrows. Or, you could use carved pumpkins as centerpieces for your Halloween party. Be mindful of the weather! If it's going to rain, make sure to protect your pumpkins from the elements. Rain can damage the carvings and cause the pumpkins to rot more quickly. Consider covering your pumpkins with a tarp or bringing them indoors if the weather is particularly bad.
Display Idea | Description | Pros | Cons |
|---|---|---|---|
Porch Display | Classic and simple | Easy to set up, visible to trick-or-treaters | Can be predictable, limited space |
Pumpkin Totem Pole | Eye-catching and unique | Adds height and visual interest | Requires multiple pumpkins, can be unstable |
Pumpkin Garden | Spooky and immersive | Creates a festive atmosphere | Requires a large yard, can be time-consuming |
Hanging Pumpkins | Unexpected and whimsical | Adds a touch of magic | Requires sturdy hanging points, can be difficult to install |
Conclusion: Let Your Pumpkin Creations Shine
So, there you have it – a treasure trove of cool ideas for pumpkin carving to ignite your imagination this Halloween. From mastering essential techniques to exploring creative designs, you're now equipped to transform ordinary pumpkins into extraordinary works of art. Don't be afraid to experiment, embrace the mess, and most importantly, have fun with the process. Whether you opt for a spooky scene, a funny face, or a pop culture tribute, your unique pumpkin carving will undoubtedly bring joy and admiration to all who behold it. Now go forth, carve with confidence, and let your pumpkin creations shine!