Table of Contents
Halloween is just around the corner, and what's Halloween without a jack-o'-lantern grinning from your porch? Carving pumpkins is a time-honored tradition, a messy, fun, and creative way to celebrate the spooky season. But let's be honest, are you tired of the same old triangle eyes and toothy grins? Year after year, the same old scary face? It's time to break free from the clichés and unleash your inner artist!
Preparation: Setting Up Your Pumpkin Carving Station
Preparation: Setting Up Your Pumpkin Carving Station
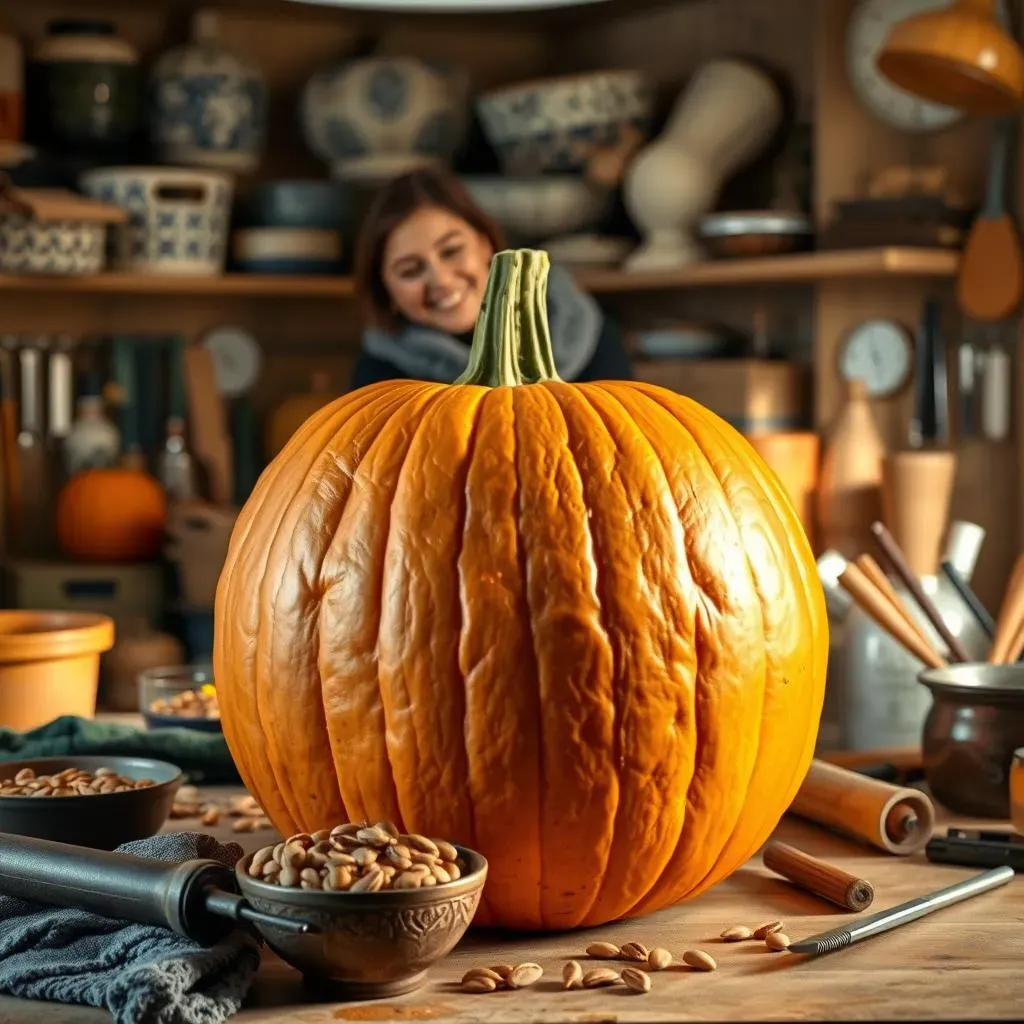
Alright, so you're ready to dive into the world of pumpkin carving? Awesome! But before you start hacking away at that gourd, let's talk prep. Trust me, a little bit of setup goes a long way in making the whole experience smoother, safer, and a whole lot more fun. Think of it like setting up a mini-art studio – you need the right tools and a clean workspace to really let your creativity flow.
First things first: location, location, location. You're going to want a spot that's easy to clean because, let's face it, pumpkin carving is messy. A garage, a covered porch, or even just spreading out some newspaper on the kitchen table works great. Next, gather your arsenal. A good carving kit is essential, but don't underestimate the power of everyday kitchen tools. A sturdy spoon for scooping, a serrated knife for sawing, and some smaller detail tools can make all the difference.
- Workspace: Cover your area with newspaper or a plastic tablecloth for easy cleanup.
- Lighting: Make sure you have plenty of light! A well-lit area will help you see what you're doing and prevent accidents.
- Tools: Invest in a good pumpkin carving kit or gather your own from the kitchen.
- Comfort: Wear comfortable clothes that you don't mind getting dirty.
Don't forget the pumpkin itself! Give it a good wash to remove any dirt or debris. Now, here's a pro tip: before you even think about cutting, draw your design on the pumpkin with a washable marker. This gives you a roadmap to follow and helps prevent any carving regrets. And finally, have a bowl handy for all those pumpkin seeds – roasting them is a delicious Halloween treat!
Setting up your pumpkin carving station isn't just about practicality; it's about creating an environment that fosters creativity and enjoyment. When you're organized and prepared, you can relax and focus on the fun part: bringing your pumpkin carving vision to life. So, take a few minutes to get everything in order, and you'll be well on your way to creating a masterpiece.
Classic Cool Pumpkin Carving Ideas with a Twist

Classic Cool Pumpkin Carving Ideas with a Twist
Alright, let's get to the fun part: the carving! We're starting with the classics, but with a little twist to make them stand out. Think beyond the basic spooky face. How can we elevate those traditional designs? Maybe it's adding intricate details, playing with different expressions, or incorporating unexpected elements. The goal is to take what's familiar and make it fresh and exciting.
One way to do this is to think about emotion. Instead of just a generic scary face, try carving a pumpkin that looks genuinely surprised, mischievously grinning, or even a little bit sad. Experiment with the shape of the eyes and mouth to convey different feelings. Another great twist is to add patterns or textures. Use small carving tools to create intricate designs around the eyes or mouth, or even carve patterns all over the pumpkin's surface. This adds depth and visual interest to your classic design.
Consider adding elements that aren't traditionally associated with jack-o'-lanterns. Maybe carve a hat on top of your pumpkin, or add a pair of glasses. You could even carve a scene from your favorite movie or book onto the pumpkin's surface. The possibilities are endless! Remember, the key is to have fun and let your imagination run wild. So, grab your tools, get inspired, and get ready to create some classic pumpkin carvings with a twist!
Let's look at some concrete examples. Take the classic ghost. Instead of a simple oval shape, try making it more dynamic, like it's floating or swirling. Add some wispy details to the edges to give it a more ethereal look. Or how about a bat? Instead of just a silhouette, carve intricate details into the wings to make them look more realistic. These small tweaks can make a big difference in the overall impact of your pumpkin carving.
Classic Design | Twist Idea |
|---|---|
Spooky Face | Add intricate patterns around the eyes and mouth |
Ghost | Make it dynamic, like it's floating or swirling |
Bat | Carve intricate details into the wings |
Unique and Modern Pumpkin Carving Designs
Unique and Modern Pumpkin Carving Designs
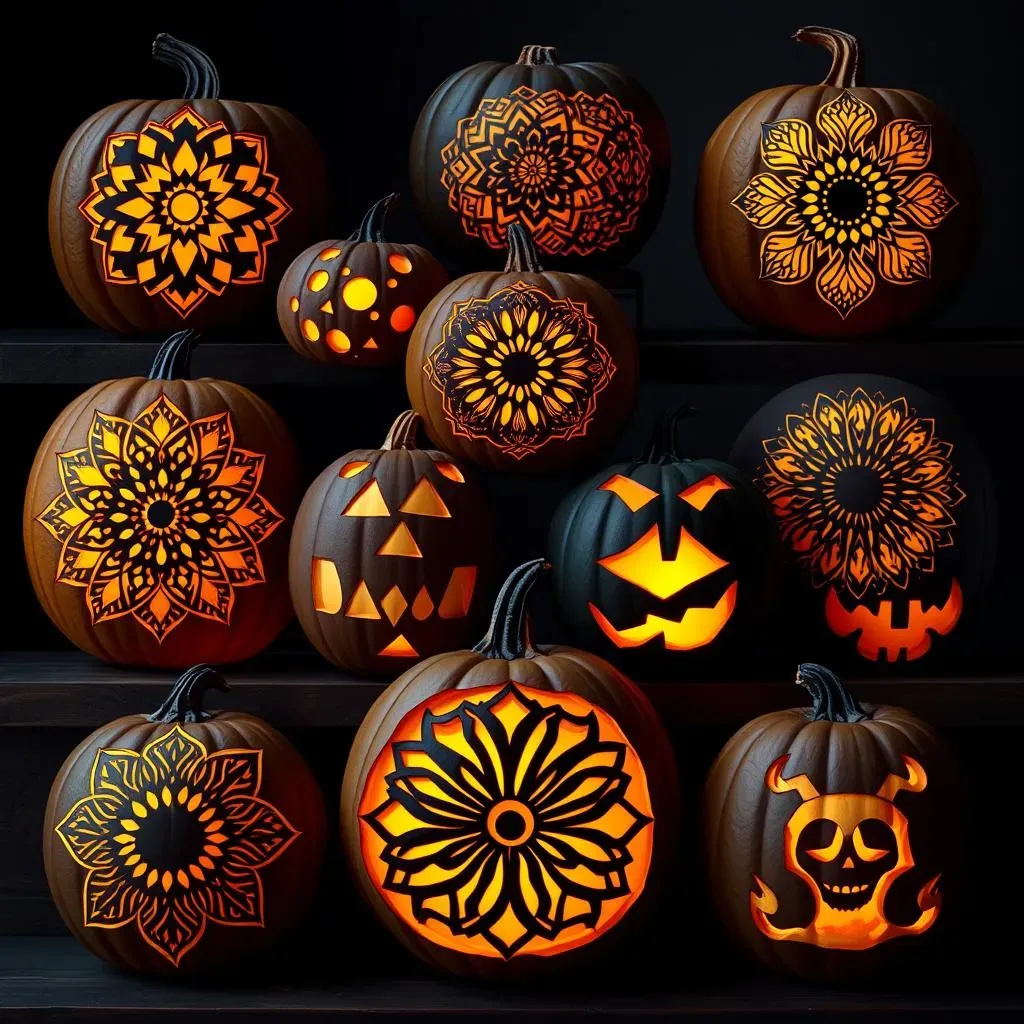
so you've mastered the classic pumpkin with a twist. Now, let's catapult ourselves into the 21st century with some unique and modern pumpkin carving designs. Forget the spooky clichés; we're talking about abstract art, geometric patterns, pop culture icons, and anything else that screams "cutting-edge creativity." This is where you can really let your personality shine and create a pumpkin that's a true reflection of your style.
One popular trend is to carve pumpkins with geometric patterns. Think intricate mandalas, tessellating shapes, or even just simple stripes and polka dots. These designs are visually striking and can be surprisingly easy to execute, especially if you use stencils or templates. Another idea is to draw inspiration from modern art. Carve abstract shapes and lines, or create a pumpkin that mimics the style of your favorite artist. This is a great way to show off your artistic flair and create a pumpkin that's truly one-of-a-kind.
Pop culture is another rich source of inspiration for modern pumpkin carvings. Carve your favorite movie character, a logo from your favorite band, or even a portrait of a celebrity. These designs are sure to be a hit with your friends and neighbors, and they're a great way to show off your fandom. Remember, the key to successful modern pumpkin carving is to be bold, creative, and have fun. Don't be afraid to experiment with different techniques and styles until you find something that you love. And most importantly, don't worry about being perfect – the imperfections are what make your pumpkin unique and special.
For example, think about carving a superhero logo, but instead of just tracing the outline, try adding some depth and dimension to it. Carve away some of the pumpkin around the logo to make it stand out, or use different carving tools to create different textures. Or, if you're a music lover, carve the sound waves of your favorite song onto the pumpkin's surface. This is a subtle but impactful way to show off your passion for music.
Modern Design | Description |
|---|---|
Geometric Patterns | Intricate mandalas, tessellating shapes, stripes, and polka dots |
Abstract Art | Shapes and lines inspired by modern artists |
Pop Culture Icons | Movie characters, band logos, celebrity portraits |
Advanced Pumpkin Carving Techniques for the Pro
Advanced Pumpkin Carving Techniques for the Pro
Sculpting in the Round
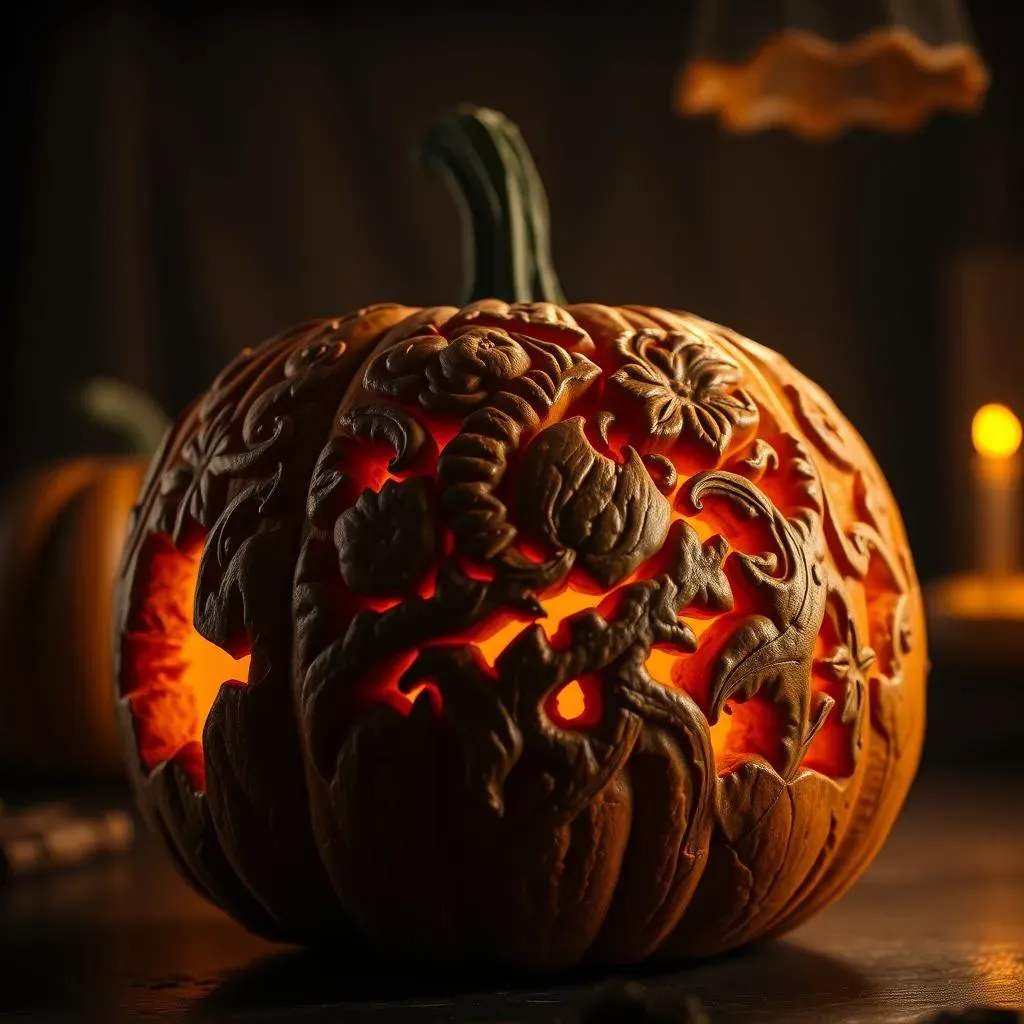
so you're not just carving anymore; you're sculpting! This technique involves using your tools to create three-dimensional shapes and forms on your pumpkin. Think beyond the surface and start thinking about depth, texture, and volume. This is where you can really bring your pumpkin to life and create a truly stunning piece of art. Start by sketching out your design, paying close attention to the different planes and levels of the sculpture. Then, use your carving tools to carefully remove the pumpkin flesh, gradually shaping the form.
One of the key things to remember when sculpting in the round is to work slowly and deliberately. It's better to remove too little pumpkin than too much, as you can always go back and refine the shape later. Also, be sure to use a variety of different tools to create different textures and effects. A small gouge can be used to create fine details, while a larger knife can be used to remove larger chunks of pumpkin. And don't forget to use your hands to feel the shape and make sure it's coming together as you envisioned.
Technique | Description | Tools |
|---|---|---|
Layered Carving | Carving different depths to create a 3D effect. | Gouges, loop tools, detail knives |
Negative Space Carving | Focusing on removing the background to highlight the design. | Thin saws, detail knives |
Using Power Tools for Pumpkin Carving
Ready to take your pumpkin carving to the next level? Power tools can be your best friend! Dremels, rotary tools, and even power saws can help you achieve intricate details and complex designs that would be impossible with hand tools alone. But with great power comes great responsibility! Safety is paramount when using power tools, so always wear safety glasses and gloves, and be sure to read the instructions carefully before you begin.
When using power tools for pumpkin carving, it's important to use the right attachments. A small grinding bit can be used to create fine details, while a larger cutting wheel can be used to remove larger chunks of pumpkin. Experiment with different attachments to see what works best for your design. Also, be sure to work slowly and deliberately, as power tools can remove pumpkin flesh very quickly. And remember, practice makes perfect! Don't be afraid to experiment and try new things until you find a technique that you're comfortable with.
Light and Shadow Mastery
The real magic of pumpkin carving happens when you play with light and shadow. This is where you can create depth, drama, and a truly spooky atmosphere. Experiment with different light sources to see how they affect the look of your pumpkin. A single candle can create a warm, flickering glow, while multiple lights can create a brighter, more even illumination. You can also use colored lights to add a touch of whimsy or create a specific mood.
Consider carving different thicknesses of pumpkin flesh to create varying levels of transparency. Thin areas will let more light through, creating a brighter glow, while thicker areas will block more light, creating deeper shadows. You can also use different carving tools to create different textures, which will further affect the way light interacts with the pumpkin's surface. And don't forget about the power of negative space! Carving away the background around your design can create a dramatic silhouette effect.
Beyond the Carve: Cool Ways to Decorate Your Pumpkin

Beyond the Carve: Cool Ways to Decorate Your Pumpkin
Paint It Up!
Who says you have to carve a pumpkin to make it festive? Painting your pumpkin opens up a whole new world of design possibilities! Grab some acrylic paints, brushes, and get ready to unleash your inner artist. You can create intricate patterns, whimsical characters, or even abstract designs. The best part? No messy carving required!
Consider using stencils to create crisp, clean lines, or try freehand painting for a more organic look. You can also experiment with different painting techniques, such as ombre effects, splattering, or even using sponges to create texture. And don't forget the details! Use fine-tipped brushes to add intricate details, such as tiny flowers, delicate vines, or even the faces of your favorite characters.
Glitter and Glam
If you're looking to add a touch of sparkle and glam to your Halloween decor, look no further than glitter! This is a super easy and effective way to transform a plain pumpkin into a dazzling centerpiece. Simply apply a layer of glue to your pumpkin, then sprinkle glitter over the glue. Shake off the excess glitter and let it dry. Voila! You have a glittery masterpiece.
Experiment with different colors and types of glitter to create different effects. Chunky glitter will add a bold, eye-catching sparkle, while fine glitter will create a more subtle shimmer. You can also use different colored glues to create interesting patterns and designs. For example, try using white glue to create a snowflake pattern, then sprinkle blue glitter over the glue. Or use black glue to create a spiderweb design, then sprinkle silver glitter over the glue.
Decoration | Description |
|---|---|
Glitter Pumpkin | A pumpkin covered in glitter for a sparkling effect. |
Sequin Pumpkin | A pumpkin covered in sequins for a glamorous look. |
Decoupage Delight
Decoupage is the art of decorating an object by gluing colored paper cutouts onto it. This is a fun and easy way to add a unique and personalized touch to your pumpkin. You can use anything from old newspapers and magazines to fabric scraps and even dried flowers. Simply cut out the shapes you want to use, apply a layer of decoupage glue to your pumpkin, and then carefully place the cutouts onto the glue. Apply another layer of glue over the cutouts and let it dry.
This is a great way to recycle old materials and create a truly one-of-a-kind pumpkin. Consider using vintage book pages to create a sophisticated and elegant pumpkin, or use colorful comic book pages to create a fun and playful pumpkin. You can also use fabric scraps to create a textured and tactile pumpkin. The possibilities are endless!
Conclusion: Unleash Your Inner Pumpkin Picasso
So there you have it – 110 cool ideas for carving pumpkins to make this Halloween the most creative yet! From the subtly spooky to the outrageously original, we hope this guide has sparked your imagination and given you the confidence to try something new. Remember, the most important thing is to have fun and let your personality shine through in your pumpkin masterpiece. Don't be afraid to experiment, get a little messy, and most importantly, enjoy the process. Happy carving, and Happy Halloween!