Table of Contents
Halloween is creeping closer, and that means it's time to unleash your inner artist and dive headfirst into the wonderful world of pumpkin carving. Forget those same-old triangle eyes and goofy grins; we're talking next-level creativity that'll make your jack-o'-lantern the star of the neighborhood. Are you ready to transform a simple gourd into a spooky, silly, or stunning work of art? This year, we're ditching the predictable and embracing a whole host of cool ideas for carving a pumpkin that are guaranteed to impress.
Classic Cool Pumpkin Carving Ideas with a Twist
Classic Cool Pumpkin Carving Ideas with a Twist
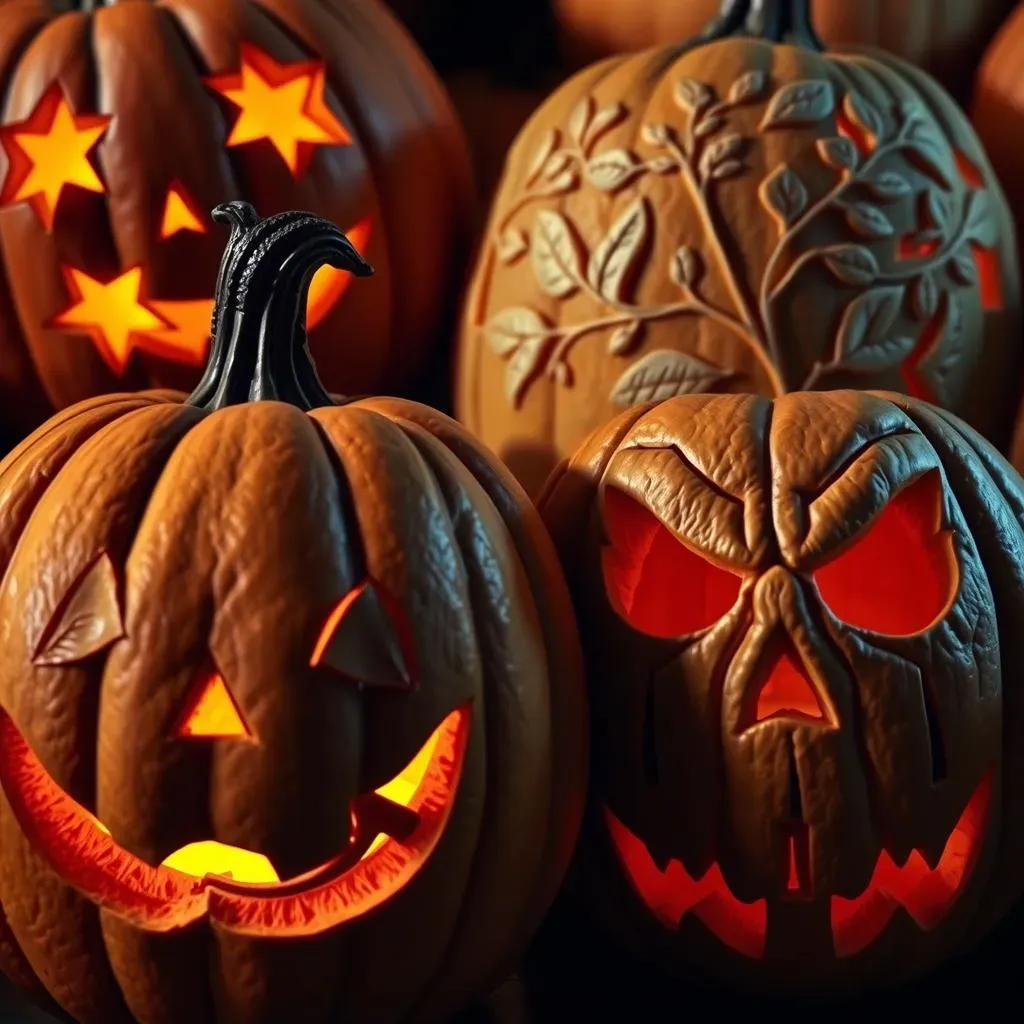
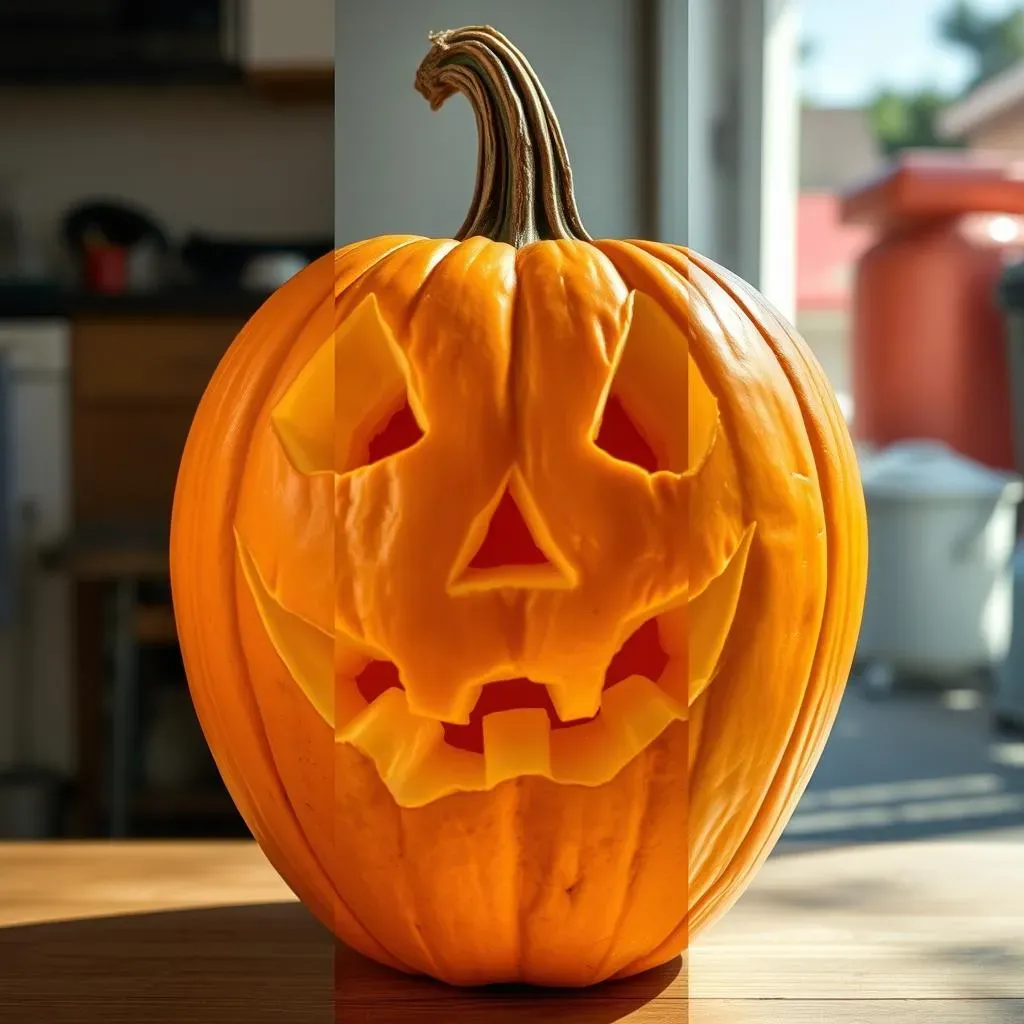
Let's face it, the classic jack-o'-lantern is a Halloween staple, but that doesn't mean it has to be boring! One of the cool ideas for carving a pumpkin is to put a modern spin on tradition. Think beyond the basic triangle eyes and toothy grin. How about experimenting with different shapes for the eyes – maybe stars, crescent moons, or even quirky, asymmetrical forms? For the mouth, consider a wide, mischievous smile, a surprised "O" shape, or even a set of jagged, vampire-like fangs. It's all about taking those familiar elements and giving them a fresh, unexpected twist.
Another way to elevate the classic jack-o'-lantern is to play with textures and patterns. Instead of just carving simple shapes, try using different tools to create a variety of effects. A small gouge can create subtle shading, while a drill can add interesting holes and patterns. You could even use cookie cutters to create repeating shapes or carve intricate designs inspired by nature, like leaves, vines, or flowers. Don't be afraid to experiment and let your creativity run wild! A classic design with a modern edge is always a winner.
Want to make it even more interesting? Consider adding some depth and dimension to your classic design. Carve away layers of the pumpkin to create a 3D effect. For example, you could carve a spooky face and then carve away the skin around the eyes and mouth to make them appear sunken and more menacing. Or, you could carve a simple shape and then use a smaller tool to add intricate details and textures. The possibilities are endless! Remember, the goal is to take something familiar and make it your own.
Beyond the Basic Jacko'Lantern: Unique Pumpkin Carving Ideas
Beyond the Basic Jacko'Lantern: Unique Pumpkin Carving Ideas
Embrace the Unexpected: Character Creations
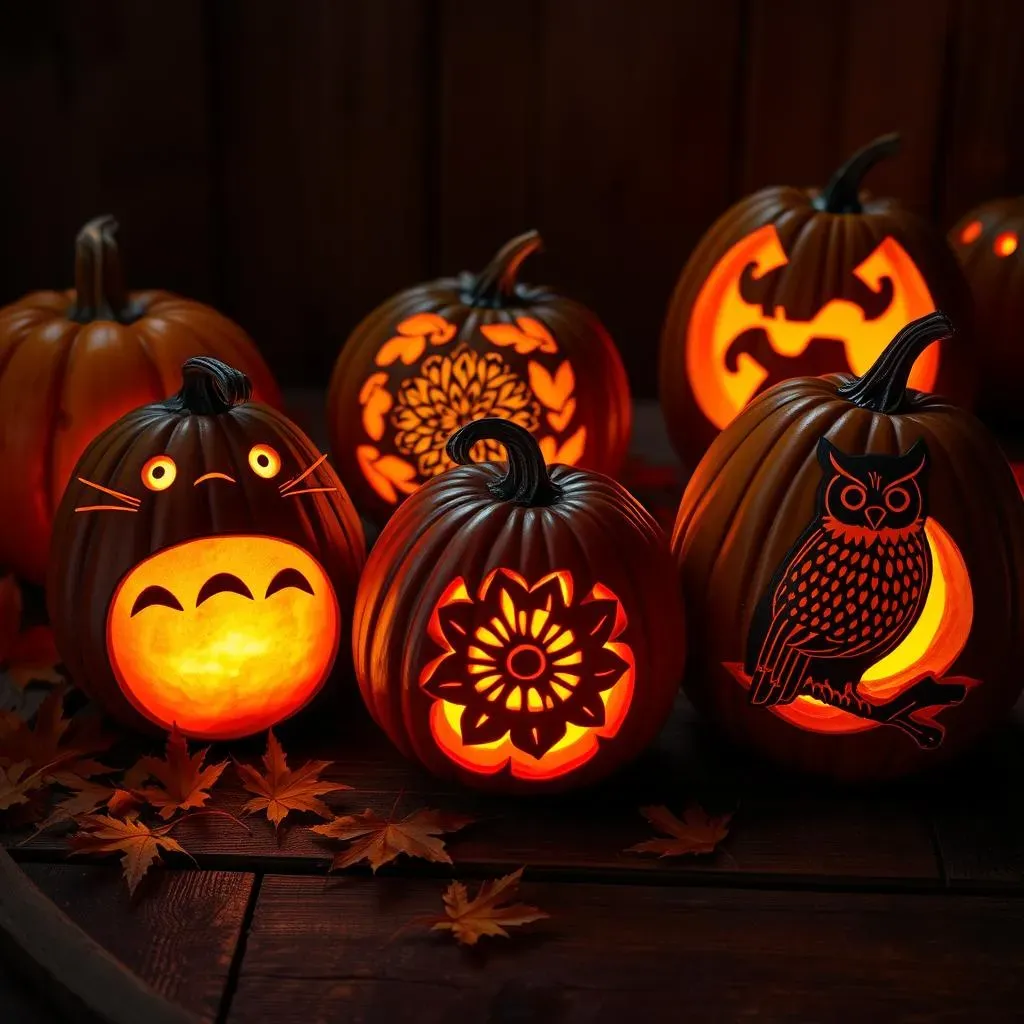
Tired of spooky faces? Let's ditch the ghouls and ghosts for something completely different. Think about your favorite characters from movies, books, or even video games. Carving a portrait of Harry Potter, a Grogu, or a beloved cartoon character is a fantastic way to showcase your fandom and add a personal touch to your Halloween decorations. The key here is to find a good reference image and take your time to capture the details. Stencils can be a lifesaver, especially for more complex designs. Don't be afraid to get creative with the lighting, too. A strategically placed LED can really bring your character to life!
For example, one year I carved a Totoro pumpkin for my niece. It took a bit of patience to get the shading right, but the look on her face when she saw it was priceless. It was way cooler than any generic scary face, and it sparked a conversation about her favorite movie. This goes to show that some cool ideas for carving a pumpkin can be really simple.
Nature's Inspiration: Floral and Fauna Designs
Another avenue for unique pumpkin carving lies in the beauty of the natural world. Instead of focusing on scary or cartoonish themes, draw inspiration from flowers, leaves, animals, and other elements of nature. Imagine a pumpkin adorned with intricate floral patterns, delicate vines, or a majestic owl perched on a branch. These designs can be incredibly elegant and sophisticated, adding a touch of natural beauty to your Halloween display.
To achieve these designs, consider using stencils or freehand drawing your design onto the pumpkin before carving. Experiment with different carving techniques to create texture and depth, such as shallow cuts for shading or deeper cuts for bolder outlines. You can also incorporate natural elements like leaves, twigs, or berries into your design for an extra touch of authenticity. Trust me, cool ideas for carving a pumpkin are never too far, you can create a stunning piece of art that celebrates the beauty of nature.
Design Idea | Difficulty | Tools Needed |
|---|---|---|
Floral Pattern | Medium | Carving knife, gouges, stencils (optional) |
Owl on a Branch | Advanced | Carving knife, detail tools, reference image |
Leafy Vine | Easy | Carving knife, stencil or freehand drawing |
Cool Pumpkin Carving Ideas for Kids (and the Young at Heart)
Cool Pumpkin Carving Ideas for Kids (and the Young at Heart)
Easy Peasy Pumpkin Faces
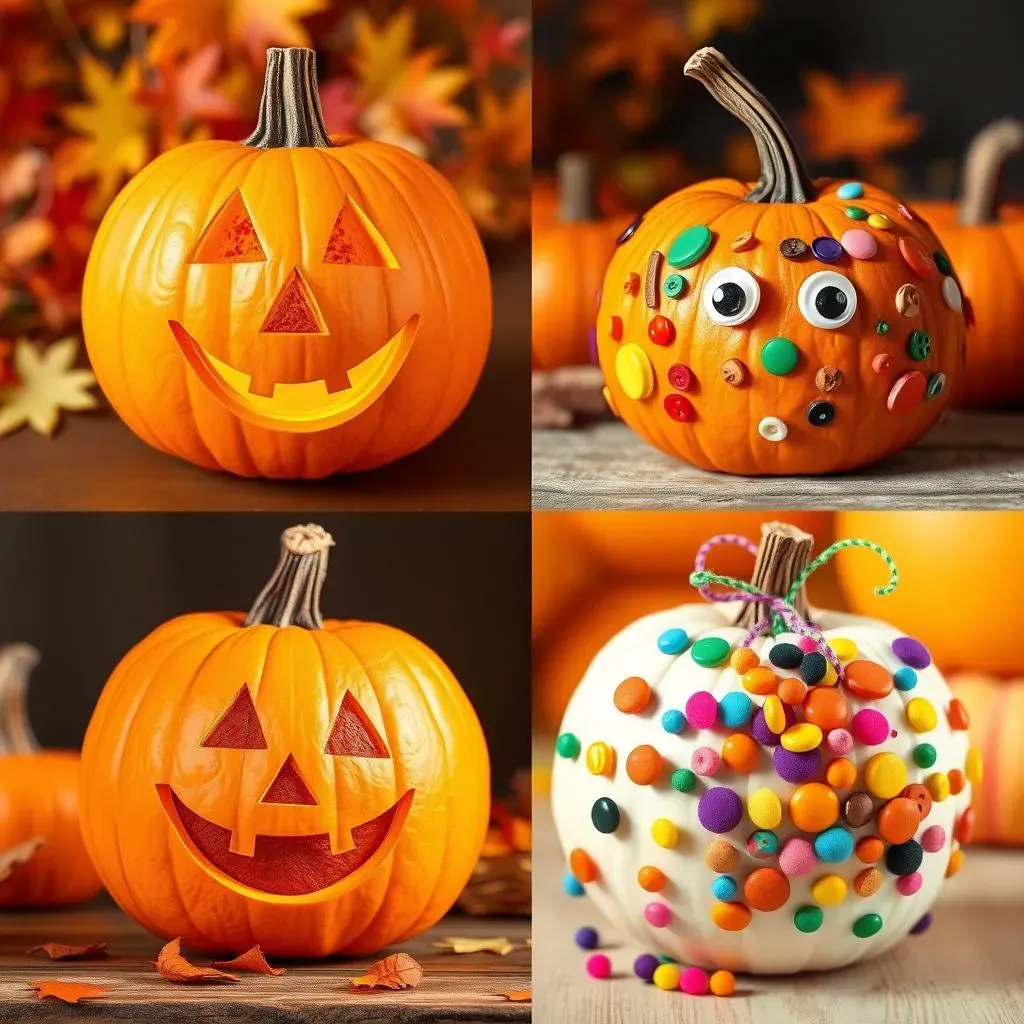
Let's be real, kids don't always have the patience (or the fine motor skills) for intricate carving. That's where super simple designs come in! Think big, bold shapes that are easy to cut out. Circles, squares, and triangles are your friends here. You can even use cookie cutters to create fun shapes like stars, hearts, or animals. The key is to keep it simple and let the kids take the lead. A little bit of imperfection just adds to the charm!
One of the cool ideas for carving a pumpkin is to let them draw the face on with a marker first. This gives them a chance to plan out their design and make any changes before you start cutting. Plus, it's a great way to get them involved in the process. And don't forget about safety! Always supervise kids when they're using carving tools, and consider using kid-friendly carving kits with duller blades.
No-Carve Fun: Painting and Decorating
Want to skip the carving altogether? No problem! There are tons of fun and creative ways to decorate a pumpkin without ever picking up a knife. Painting is a classic option, and it's a great way to let kids express their creativity. You can use acrylic paints, markers, or even glow-in-the-dark paint for a spooky effect. Let them paint their favorite characters, abstract designs, or even just silly faces. The possibilities are endless!
Another idea is to use craft supplies to decorate your pumpkin. Glue on googly eyes, pom-poms, glitter, or even yarn to create a unique and whimsical design. You can also use stencils to create patterns or add details. This is a great option for younger kids who might not be ready for carving. Remember, cool ideas for carving a pumpkin don't have to involve carving at all! It's all about having fun and letting your creativity shine.
For instance, last year my little cousin decorated her pumpkin with a bunch of colorful buttons and pipe cleaners. It was a total mess, but she had a blast, and her pumpkin was definitely one of a kind!
Activity | Age Group | Materials |
|---|---|---|
Simple Carving | 5+ (with supervision) | Pumpkin, kid-friendly carving tools, marker |
Painting | 3+ | Pumpkin, acrylic paints, brushes, markers |
Craft Decoration | 3+ | Pumpkin, glue, googly eyes, pom-poms, glitter, yarn |
Advanced Techniques for Cool Pumpkin Carving
Advanced Techniques for Cool Pumpkin Carving
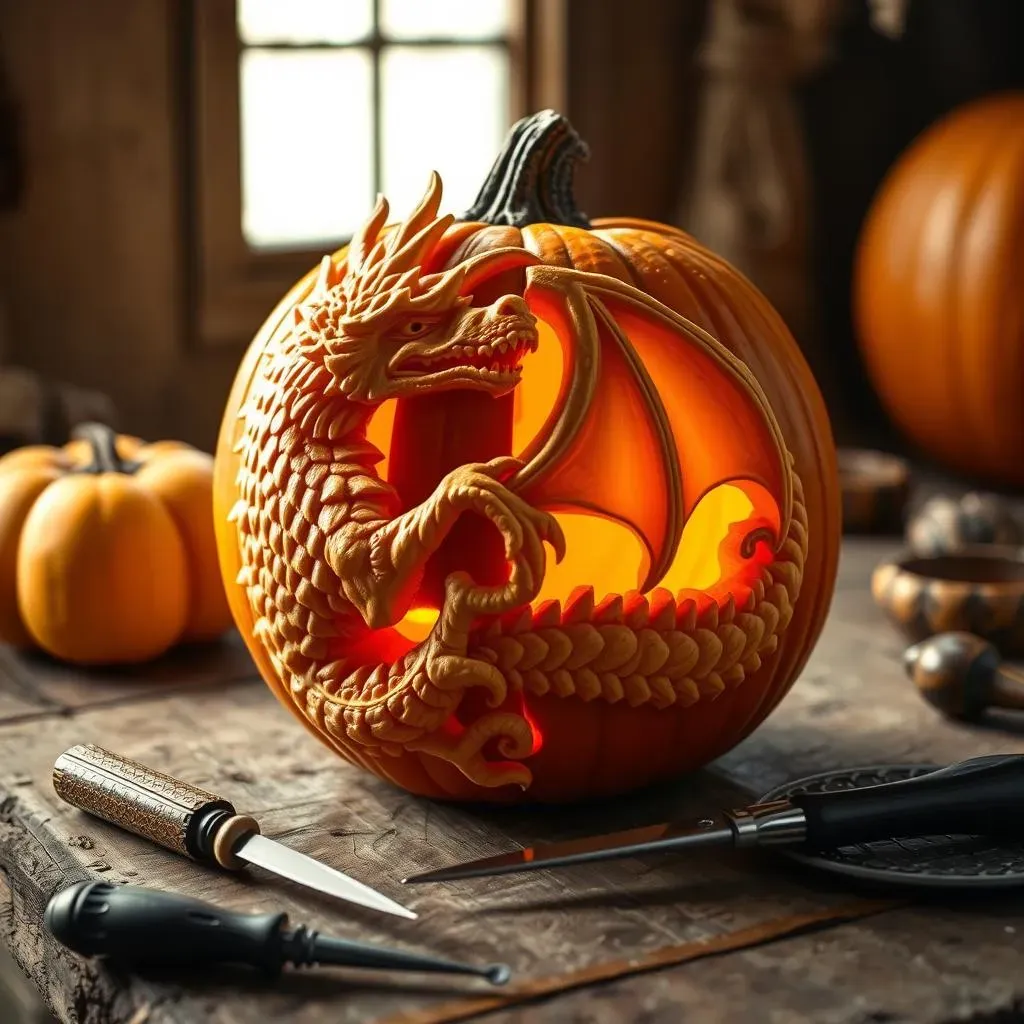
Ready to take your pumpkin carving skills to the next level? It's time to explore some advanced techniques for cool pumpkin carving that will truly set your creations apart. We're talking about intricate designs, realistic details, and effects that will make people stop and stare. This isn't your average jack-o'-lantern; this is pumpkin artistry!
One of the most impactful advanced techniques is relief carving. Instead of cutting all the way through the pumpkin, you'll carefully shave away layers of the surface to create depth and dimension. This allows you to create incredibly realistic details, like the wrinkles on a face or the feathers on a bird. It requires a steady hand and a good eye for detail, but the results are well worth the effort. Start with a detailed stencil and use a variety of gouges and loop tools to slowly remove the pumpkin flesh, working from the shallowest areas to the deepest. Remember, patience is key! It's better to remove too little than too much, as you can always go back and refine your work.
Technique | Description | Tools |
|---|---|---|
Relief Carving | Shaving away layers for depth | Gouges, loop tools, detail knives |
3D Carving | Creating protruding elements | Wire loops, sculpting tools |
Light Play | Using light to enhance the design | Drill, various sized bits |
Another advanced technique is 3D carving, where you actually create elements that protrude from the pumpkin's surface. This could involve carving separate pieces and attaching them to the pumpkin or carefully shaping the existing pumpkin flesh to create raised features. For example, you could carve a dragon and then create 3D scales that stand out from the pumpkin's surface. This technique requires a lot of planning and precision, but it can result in truly spectacular creations. Consider using wire loops and sculpting tools to shape the pumpkin flesh and create the desired 3D effect.
Making Your Cool Carved Pumpkin Last: Preservation Tips
Making Your Cool Carved Pumpkin Last: Preservation Tips
The Vinegar Bath: Your Pumpkin's Best Friend
so you've poured your heart and soul into creating an amazing pumpkin masterpiece, but now you're worried about it turning into a mushy mess before Halloween even arrives? Don't fret! There are ways to extend the life of your carved pumpkin and keep it looking fresh and spooky for longer. One of the easiest and most effective methods is the vinegar bath. That's right, plain old white vinegar is your pumpkin's best friend when it comes to fighting off mold and bacteria.
Simply mix a solution of one part vinegar to ten parts water in a large tub or container. Submerge your carved pumpkin in the solution for about 30 minutes, making sure that all the carved surfaces are fully immersed. The vinegar will help to kill any mold spores that are already present and prevent new ones from forming. After the bath, remove the pumpkin and let it air dry completely before displaying it. You can repeat this process every few days to keep your pumpkin looking its best. Trust me, this simple step can make a huge difference in how long your creation lasts! This is a perfect cool ideas for carving a pumpkin guide.
Hydration is Key: Keeping Your Pumpkin Moist
Just like us, pumpkins need hydration to stay healthy and vibrant. Once you've carved your pumpkin, it's essential to keep it from drying out, which can lead to shriveling and decay. One way to do this is to apply a thin layer of petroleum jelly or vegetable oil to all the carved surfaces. This will help to seal in moisture and prevent the pumpkin from drying out too quickly.
Another trick is to keep your pumpkin in a cool, humid environment. If you live in a dry climate, consider placing your pumpkin in a basement or garage, or even misting it with water regularly. You can also try wrapping it in plastic wrap when you're not displaying it to help retain moisture. Remember, a hydrated pumpkin is a happy pumpkin! This is one of the cool ideas for carving a pumpkin to keep it longer.
Combatting the Elements: Location, Location, Location
Where you display your carved pumpkin can have a significant impact on how long it lasts. Direct sunlight and extreme temperatures can accelerate the decay process, so it's best to keep your pumpkin in a cool, shaded location. Avoid placing it on a porch that gets direct sunlight during the day or in an area that's exposed to strong winds. If you live in an area with freezing temperatures, be sure to bring your pumpkin indoors at night to prevent it from freezing and cracking.
Additionally, consider elevating your pumpkin off the ground to improve air circulation and prevent moisture from accumulating underneath. You can use a small stand or even just a few pieces of wood to create a barrier between the pumpkin and the ground. By taking these simple precautions, you can help to protect your pumpkin from the elements and extend its lifespan. You should consider these cool ideas for carving a pumpkin before you start carving.
Preservation Method | Frequency | Benefits |
|---|---|---|
Vinegar Bath | Every 2-3 days | Kills mold and bacteria |
Petroleum Jelly/Oil | After each cleaning | Seals in moisture |
Cool, Shaded Location | Always | Prevents drying and overheating |
Your Coolest Pumpkin Awaits: Carving Creativity Unleashed
So, there you have it – a cauldron full of cool ideas for carving a pumpkin to ignite your Halloween spirit. Whether you decide to resurrect a classic design with a modern edge, conjure up a whimsical scene straight from your imagination, or tackle a more intricate carving challenge, remember that the most important ingredient is fun. Don't be afraid to experiment, get a little messy, and let your creativity run wild. After all, Halloween is the perfect time to embrace the spooky, the silly, and the spectacularly carved. Now go forth, grab a pumpkin, and make this Halloween your most creatively carved yet!