Table of Contents
October rolls around, and suddenly every porch you see boasts some intricate, perfectly carved jack-o'-lantern that looks like it took a week and a fine art degree to create. Meanwhile, your attempt usually ends with a sad, lopsided grin and maybe a missing tooth or two. You want something that looks impressive, something undeniably *cool*, but you also value your time, your fingers, and your sanity. You’re looking for a cool easy pumpkin carving idea, something that delivers impact without requiring professional-level skills or a mountain of specialized tools.
Tools & Prep for Your Cool Easy Pumpkin Carving Idea

Tools & Prep for Your Cool Easy Pumpkin Carving Idea
Alright, let's talk turkey, or rather, pumpkin guts. Before you even think about crafting a cool easy pumpkin carving idea, you need the right gear and a workspace that isn't your living room carpet (trust me on this). You don't need a fancy 50-piece carving kit that looks like it belongs in a surgeon's office. A sturdy serrated knife for cutting the lid, a large spoon or scoop for emptying the insides, and a few smaller, sharp tools are plenty. Those cheap kits with the flimsy plastic tools? They snap faster than a twig in a hurricane and are more likely to cause frustration than a masterpiece. A small, sharp paring knife or even a craft knife (with caution!) works better for detail. Prepping is key: cut a lid, preferably from the bottom so it sits flush, and scrape out *everything* – strings, seeds, the whole slimy mess. Get it clean; it makes carving much easier and helps prevent premature mold growth. This initial prep is crucial for any cool easy pumpkin carving idea you attempt.
Simple Stencils & Shapes: Quick Cool Easy Pumpkin Carving Ideas

Simple Stencils & Shapes: Quick Cool Easy Pumpkin Carving Ideas
Embrace the Power of Simple Shapes
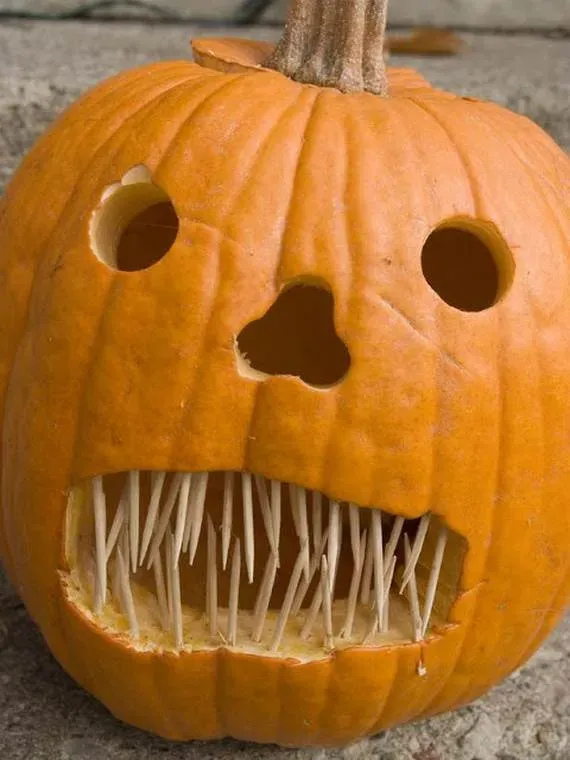
so you've got your clean pumpkin and your basic tools. Now for the fun part: making it look cool without wanting to throw it across the yard. The secret to a cool easy pumpkin carving idea often lies in simplicity. Forget trying to recreate the Mona Lisa. Think bold shapes. Classic triangles for eyes and a jagged mouth? Always a winner, and surprisingly expressive depending on their size and angle. Circles work great for eyes or polka dot patterns if you're feeling a bit whimsical. Stars, moons, simple geometric patterns – these are your friends. You can freehand them if you're confident, but even drawing them on with a marker first helps keep things symmetrical (or intentionally asymmetrical if that's your vibe). Cutting out large shapes is way less fiddly than tiny details and gives your pumpkin a graphic, modern look.
Stencils Aren't Cheating, They're Smart
Look, some people act like using a stencil is admitting defeat. I say it's working smart. If you want a specific design, especially something a bit more complex than basic shapes but still aiming for a cool easy pumpkin carving idea, stencils are the way to go. You can find thousands online, from classic spooky faces to pop culture icons. Print one out, tape it firmly to your pumpkin, and use a poker tool or even a sharp pencil to trace the design by making small holes along the lines. Once the pattern is transferred, remove the stencil and connect the dots with your carving tool. This method takes the guesswork out of drawing and lets you focus purely on the cutting, significantly reducing the chance of a catastrophic slip-up. It's a foolproof way to achieve a cleaner, more recognizable design.
- Start with dry-erase markers for drawing – easy to fix mistakes.
- Tape stencils down firmly, especially over curved surfaces.
- Use a poker tool or push pin to transfer stencil designs, keeping holes close together.
- Cut out the smallest sections first when carving stencils.
- Save the lid or bottom piece to practice your cuts before hitting the main pumpkin.
NoCarve Hacks: Even Easier Pumpkin Decoration Ideas

NoCarve Hacks: Even Easier Pumpkin Decoration Ideas
When Knives Feel Like Too Much Effort
Let's be honest, sometimes the thought of plunging a sharp object into a round, wobbly gourd just doesn't appeal. Maybe you've got little kids whose fingers you'd like to keep attached, or maybe you just had a long day and the idea of scraping slimy guts feels like a second job. This is where no-carve options shine. They are arguably the *easiest* path to a cool pumpkin display. Think beyond the knife. Paint is your friend here. Acrylic paints stick well to pumpkin surfaces. You can go classic black and white for a spooky silhouette, or bright, bold colors for something cheerful. Grab some paint pens or permanent markers for drawing intricate (or not-so-intricate) patterns, spiderwebs, or funny faces directly onto the skin. Washi tape, stickers, googly eyes – the craft store is suddenly your playground. These methods are quick, clean, and offer a ton of flexibility. You can change your mind halfway through without having to buy a new pumpkin.
Beyond Paint: Using Everyday Items for Flair
You don't even need fancy craft supplies to make a pumpkin look cool. Look around your house. Got old buttons? Glue them on to make eyes or a mouth. Spare nuts, bolts, or screws? They can create a cool, industrial-looking face or pattern. Yarn or string can become hair, spiderwebs, or wrapped patterns. Even plain old bandages can turn a pumpkin into a mummy. Hot glue is your best buddy for attaching things securely. You can cover a pumpkin entirely in thumbtacks for a spiky, slightly menacing look (just be careful where you put it!). Grab some fake spiders or plastic bugs and glue them crawling all over for instant creepiness. These no-carve methods allow for incredible creativity using stuff you likely already have, proving that a cool easy pumpkin carving idea doesn't always require carving at all.
- Use spray paint for a quick base coat (matte black or white looks sharp).
- Layer different colors or textures with paint.
- Experiment with glitter glue for some sparkle.
- Hot glue works best for attaching heavier items.
- Consider drip painting for an abstract, spooky effect.
Making Them Pop: Easy Ways to Add Flair to Your Cool Easy Pumpkin Carving Idea
Making Them Pop: Easy Ways to Add Flair to Your Cool Easy Pumpkin Carving Idea
Shedding Light: Making Your Carving Glow
You spent time on your cool easy pumpkin carving idea, scraping out those guts, maybe wrestling with a stencil. Don't let all that effort fade into the darkness! How you light your pumpkin makes a massive difference. Forget those cheap tea lights that flicker out in five minutes and are a fire hazard anyway. Grab some battery-operated LED candles or string lights. They last longer, provide a consistent glow, and you won't accidentally set your porch on fire. White lights give a classic spooky feel, while colored LEDs can add a fun, modern twist. You can even find flickering LED options that mimic a real flame without the danger. Pop a few inside for a brighter effect, especially if you've carved larger areas. The light catches the edges, highlighting your design and giving it that essential Halloween vibe.
Adding External Bling (The Non-Trashy Kind)
Lighting is one thing, but you can also add flair to the outside of your cool easy pumpkin carving idea. Think of it as accessorizing. If you carved a face, maybe add some fake spiderwebs around the edges or glue on some moss for a creepy, overgrown look. For a no-carve pumpkin, this is where you really go wild. Attach plastic spiders, bats, or other creepy crawlies. Drape gauzy fabric over it for a ghostly effect. You can use skewers to attach things like witch hats or spooky signs to the top. Even simple things like tying a ribbon around the stem or adding googly eyes to a painted design can elevate the look. These little touches take minimal effort but make your pumpkin stand out from the sad, plain ones down the street.
- Use battery-powered LED lights for safety and longevity.
- Consider different colored lights for varied effects.
- Glue fake spiderwebs or moss around carved openings.
- Attach plastic critters with hot glue for instant spookiness.
- Add a hat or sign using skewers inserted into the pumpkin top.
Your Cool Pumpkin, Achieved Easily
So there you have it. Getting a genuinely cool pumpkin on your doorstep doesn't require sacrificing an entire afternoon or risking a trip to the emergency room. By focusing on simple tools, smart techniques, and maybe a few no-carve cheats, you can bypass the frustration and get straight to the fun part. Forget competing with the neighborhood artist; your goal was a cool easy pumpkin carving idea, and with these approaches, you've got the tools to make it happen without the headache. Go ahead, light that candle (carefully, of course) and admire your handiwork.