Table of Contents
Halloween is creeping closer, and you know what that means: it's pumpkin carving season! Even if you're staring down the barrel of October 31st with a bare porch, there's still time to conjure up some spooky (or silly) magic. Carving a jack-o'-lantern is practically a Halloween rite of passage, and we're here to arm you with enough cool easy carving pumpkin ideas to make your porch the envy of the neighborhood.
Prep Like a Pro: Getting Ready for Your Cool Easy Carving Pumpkin Masterpiece
Prep Like a Pro: Getting Ready for Your Cool Easy Carving Pumpkin Masterpiece
Choosing Your Pumpkin Wisely
future pumpkin Picasso, first things first: you need the perfect canvas! Not all pumpkins are created equal when it comes to carving. You're looking for a pumpkin that's got a nice, smooth surface, is relatively free of blemishes (a few scratches are fine, character even!), and feels sturdy. Give it a gentle thump – you want to hear a hollow sound, which means it's ripe and ready to be gutted. Avoid pumpkins that feel soft or have mushy spots; those are signs of rot.
Consider the shape too! Are you envisioning a tall, slender ghost or a round, jolly jack-o'-lantern? The shape of your pumpkin will influence your design, so pick one that speaks to you. And don't be afraid to get a little weird! Some of the most interesting carvings come from oddly shaped pumpkins.
Pumpkin Characteristic | Ideal | Avoid |
|---|---|---|
Surface | Smooth, minimal blemishes | Soft spots, deep cuts |
Sound | Hollow thump | Dull thud |
Weight | Feels sturdy for its size | Feels light or mushy |
Setting Up Your Carving Station
Now that you've got your pumpkin, it's time to create a carving command center. Trust me, a little prep here will save you a whole lot of mess and frustration later. First, cover your work surface with newspaper or a disposable tablecloth. Pumpkin guts are sticky and can stain! Next, gather your tools. You'll need a carving knife (or a set of carving tools), a scoop or large spoon for removing the insides, a bowl for the seeds, and a damp cloth for wiping your hands.
Lighting is key! Make sure you have plenty of light so you can see what you're doing. A well-lit space will also help you avoid any accidental slips with the knife. And finally, consider putting on some tunes! Carving pumpkins should be a fun, festive activity, so crank up the Halloween playlist and get in the spirit!
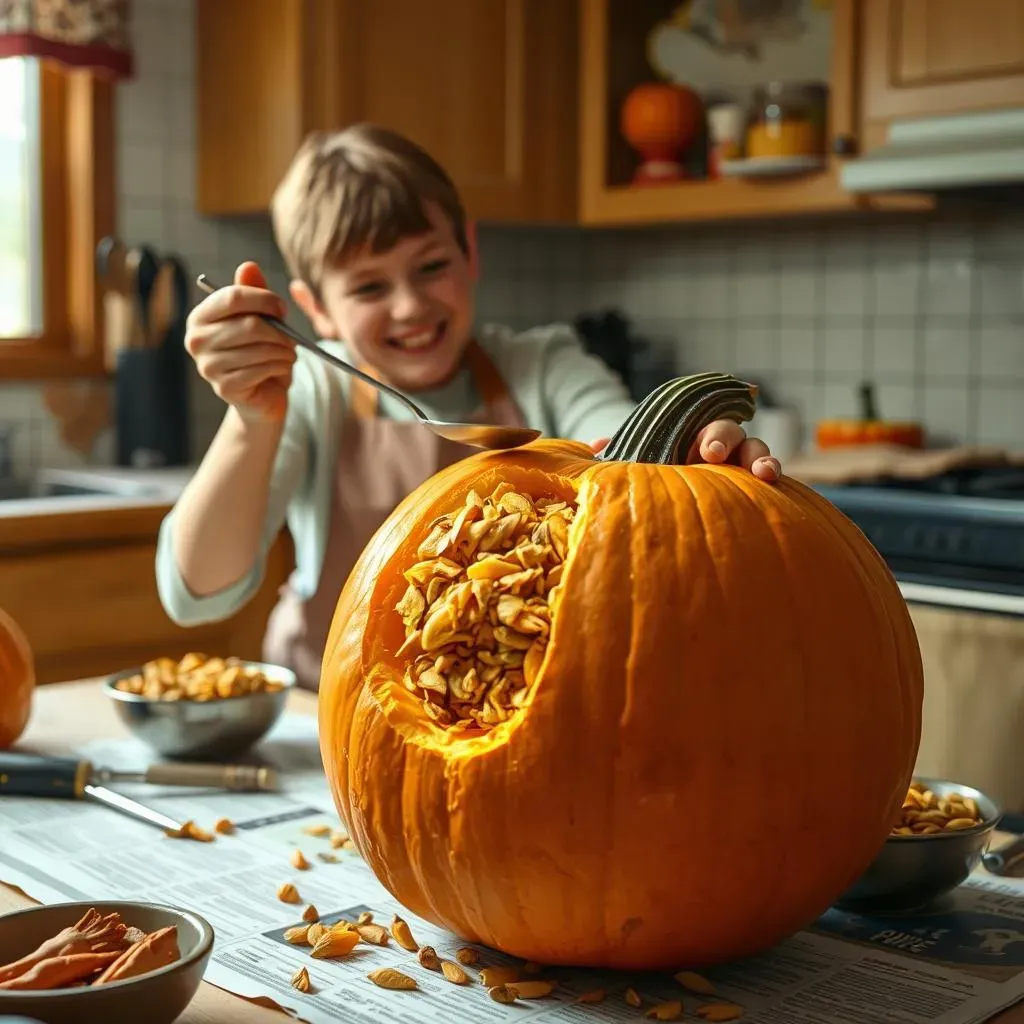
Gutting the Gourd: The Less-Than-Glamorous But Necessary Step
Alright, let's get down and dirty! Using your carving knife, carefully cut a large circle around the stem of the pumpkin. Angle the knife inward slightly, so the lid will sit snugly back in place. Once you've cut all the way around, gently pull the lid off. Now comes the fun part: scooping out the guts! Use your scoop or large spoon to scrape out all the seeds and stringy flesh from inside the pumpkin. Get it as clean as possible; this will make carving much easier.
Don't toss those seeds! Rinse them off, pat them dry, toss them with some olive oil and salt, and roast them in the oven for a delicious and healthy snack. Trust me, roasted pumpkin seeds are the perfect reward for all your hard work!
Unleash Your Inner Artist: Cool and Easy Pumpkin Carving Ideas for Beginners

Unleash Your Inner Artist: Cool and Easy Pumpkin Carving Ideas for Beginners
Simple Shapes, Big Impact
so you're a newbie to the pumpkin carving scene? No sweat! Start with simple shapes. Think circles, triangles, and squares. These basic forms can be combined to create surprisingly effective and spooky faces. A couple of big, round eyes and a jagged mouth? Classic jack-o'-lantern vibes! You can even use cookie cutters to trace shapes onto the pumpkin before you start carving. It's like pumpkin carving for dummies, but in the best way possible!
Don't underestimate the power of simplicity. Sometimes, less is more. A minimalist design can be just as striking as a complex one, especially when you're just starting out. Plus, simple designs are quicker to carve, which means you can get your pumpkin on display faster. Win-win!
Stencils are Your Friend
Feeling a little intimidated by freehand carving? Stencils to the rescue! You can find tons of free pumpkin carving stencils online. Just print one out, tape it to your pumpkin, and use a poking tool (or even a toothpick) to transfer the design onto the pumpkin's surface. Then, simply follow the dots with your carving knife. It's like connect-the-dots, but with a spooky twist!
Stencils are a great way to achieve more intricate designs without having to be a master artist. They also help ensure that your design is symmetrical and balanced. From bats and ghosts to cats and witches, there's a stencil out there for every Halloween theme. And if you're feeling extra creative, you can even design your own stencil!
Stencil Type | Difficulty | Best For |
|---|---|---|
Simple Shapes | Easy | Beginners, kids |
Cartoon Characters | Easy to Medium | Fun, playful designs |
Spooky Silhouettes | Medium | Classic Halloween themes |
Embrace the Power of the Drill
Who says you need a knife to carve a pumpkin? A drill can be a surprisingly effective carving tool, especially for creating patterns of small holes. You can use different sized drill bits to create varying levels of light and shadow. Try drilling a pattern of stars, polka dots, or even a simple word. It's a super easy and unique way to decorate your pumpkin!
Drilling is also a great option for kids, as it's generally safer than using a sharp knife. Just make sure to supervise them closely and use a low-speed setting on the drill. And remember to wear safety glasses to protect your eyes from flying pumpkin debris!
Level Up Your JackO'Lantern: Intermediate Cool Easy Carving Pumpkin Designs
Level Up Your JackO'Lantern: Intermediate Cool Easy Carving Pumpkin Designs
Diving into Deeper Designs
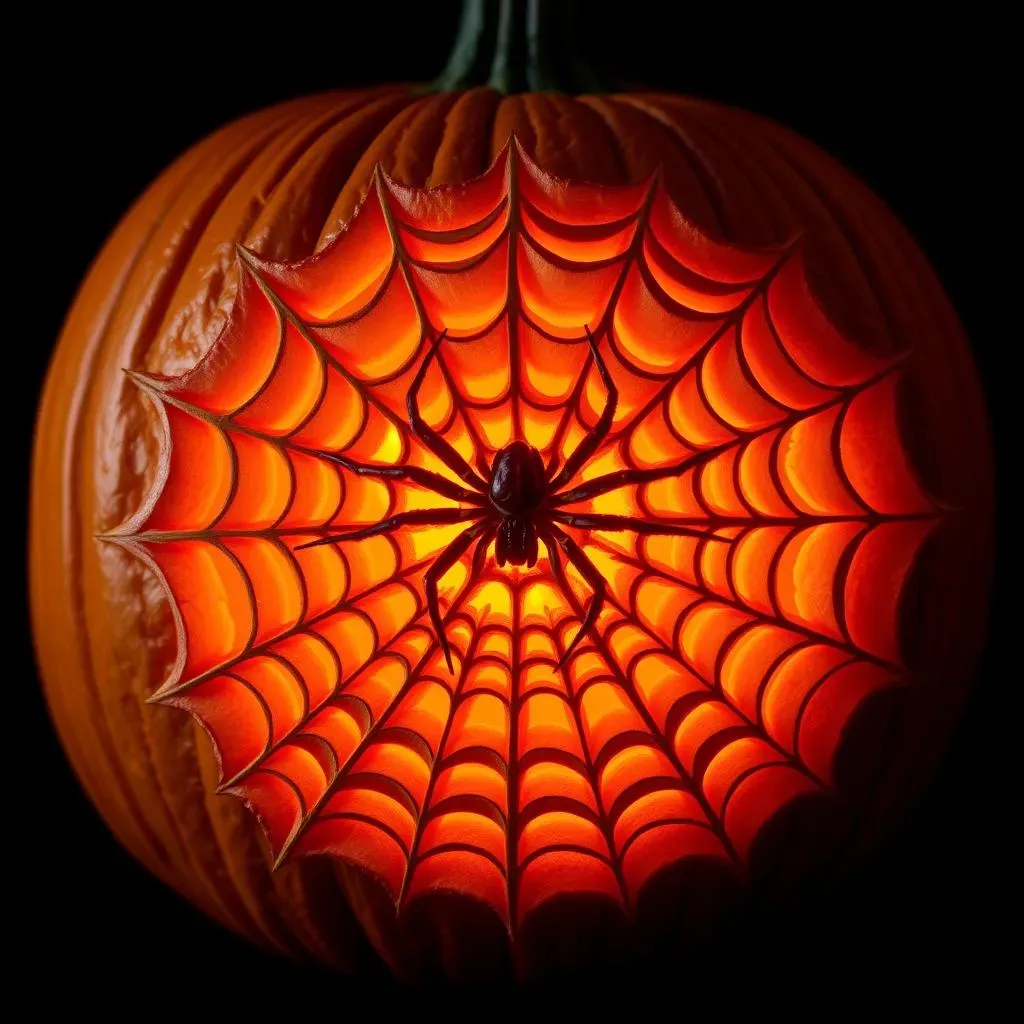
Alright, so you've mastered the basics. You can handle a stencil, you're not afraid of a little pumpkin guts, and you're ready to take your jack-o'-lantern game to the next level. Welcome to the intermediate zone! Here, we're talking about designs that require a little more precision, a little more patience, and a little more creativity. Think beyond simple faces and start exploring more complex patterns and themes. We're talking spooky forests, intricate spiderwebs, or even your favorite movie character (in pumpkin form, of course!).
The key to success at this level is planning. Don't just dive in and start hacking away at your pumpkin. Take the time to sketch out your design beforehand, paying attention to the details and how they'll translate onto the curved surface of the pumpkin. Consider using a combination of carving techniques, such as shallow cuts for shading and deeper cuts for bolder outlines. And don't be afraid to experiment! The best way to learn is by doing, so grab your tools and get creative!
Shading and Dimension: Adding Depth to Your Carvings
Want to make your jack-o'-lantern really pop? It's all about shading and dimension! Instead of just cutting all the way through the pumpkin skin, try making shallow cuts to create areas of light and shadow. The thinner the pumpkin skin, the more light will shine through. This technique is perfect for creating realistic details, such as wrinkles, fur, or feathers. You can also use different sized carving tools to create varying levels of depth.
Another trick is to use a spoon or scraper to thin out the pumpkin skin from the inside. This will allow more light to shine through in certain areas, creating a glowing effect. Just be careful not to scrape too much, or you'll end up with a hole! Shading and dimension can take your pumpkin carving from flat and boring to dynamic and eye-catching. It's like adding 3D to your gourd!
Technique | Description | Effect |
|---|---|---|
Shallow Cuts | Cutting partially through the pumpkin skin | Creates areas of light and shadow |
Thinning from Inside | Scraping the inside of the pumpkin skin | Allows more light to shine through |
Layered Carving | Carving multiple layers of detail | Adds depth and dimension |
Tool Time: Expanding Your Carving Arsenal
As you move into the intermediate level, it's time to upgrade your carving tools. That flimsy plastic knife that came with your pumpkin carving kit just isn't going to cut it (pun intended!). Invest in a set of proper carving tools, including different sized saws, gouges, and detail knives. These tools will give you more control and precision, allowing you to create more intricate designs.
Also, consider adding a wood-burning tool to your arsenal. A wood-burning tool can be used to create fine details and textures on the surface of the pumpkin. It's perfect for adding wrinkles, fur, or even lettering. Just be careful when using a wood-burning tool, as it can get very hot. And remember to always work in a well-ventilated area.
Beyond the Basic: Advanced and Unique Pumpkin Carving Ideas
Beyond the Basic: Advanced and Unique Pumpkin Carving Ideas
Pushing the Boundaries of Pumpkin Art
So, you've conquered the intermediate level and you're hungry for more? Excellent! Now we're entering the realm of true pumpkin artistry. Forget everything you thought you knew about jack-o'-lanterns. We're talking about designs that are so intricate, so creative, and so downright impressive that they'll stop trick-or-treaters in their tracks. This is where you unleash your inner sculptor and transform a humble gourd into a breathtaking work of art. Think multi-pumpkin displays, 3D carvings, and designs that incorporate power tools, lighting, and even special effects. Get ready to blow some minds!
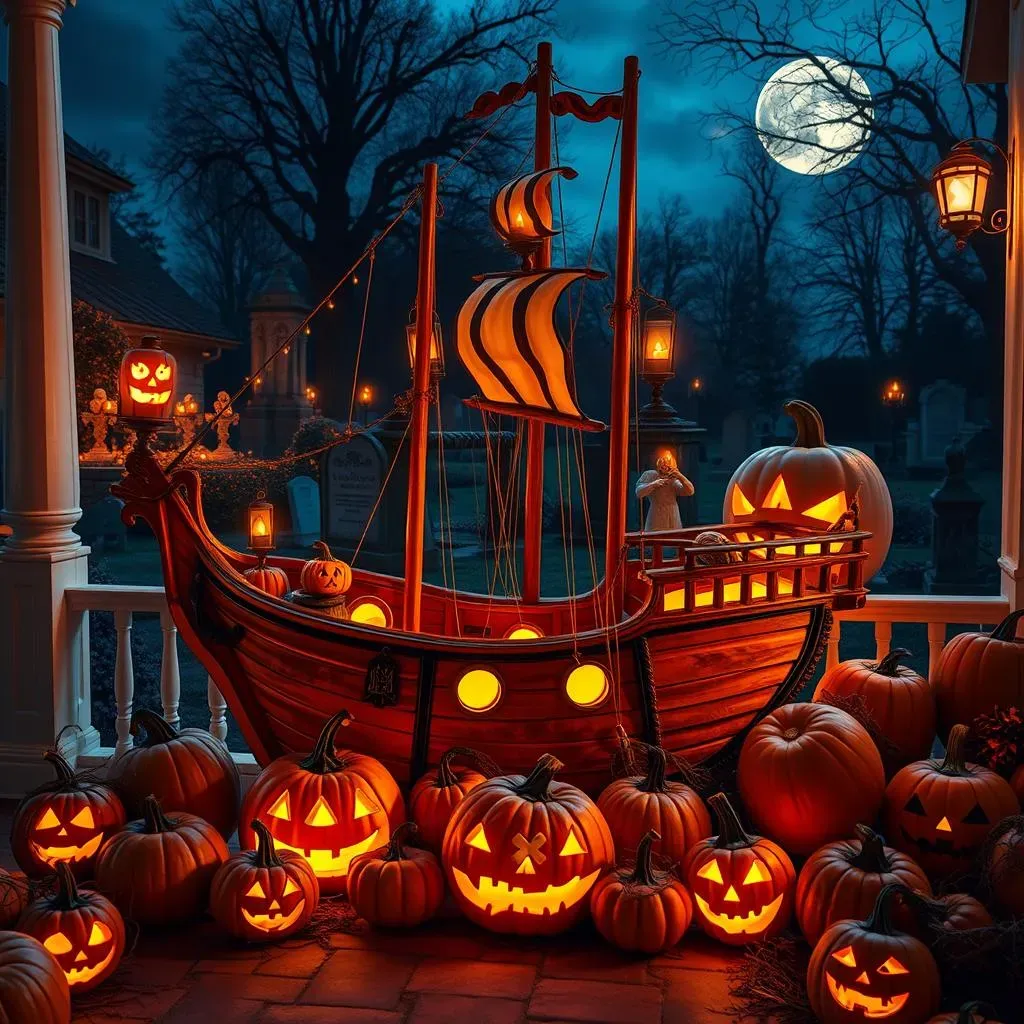
Multi-Pumpkin Masterpieces: Tell a Story with Gourds
Why limit yourself to just one pumpkin when you can create an entire scene? Multi-pumpkin displays are a fantastic way to tell a story or create a dynamic visual. Imagine a pirate ship sailing across your porch, with a large pumpkin serving as the hull and smaller pumpkins acting as the masts and sails. Or a spooky graveyard scene, with different sized pumpkins representing tombstones and ghoulish figures. The possibilities are endless!
When creating a multi-pumpkin display, think about the overall composition and how the different pumpkins will interact with each other. Use different sized pumpkins to create depth and perspective. And don't be afraid to get creative with the details! Add props like rope, fabric, or even small toys to enhance the scene.
Display Idea | Description | Difficulty |
|---|---|---|
Pirate Ship | Large pumpkin hull, smaller pumpkin masts | Medium to Advanced |
Graveyard Scene | Various sized tombstones, spooky figures | Medium to Advanced |
Enchanted Forest | Tall pumpkins as trees, smaller pumpkins as creatures | Advanced |
3D Carving: Making Your Pumpkin Pop
Want to take your pumpkin carving to the next dimension? Try 3D carving! This technique involves sculpting the pumpkin's surface to create raised and recessed areas, giving your design a three-dimensional effect. You can use a variety of tools for 3D carving, including gouges, chisels, and even clay sculpting tools. Start by sketching out your design on the pumpkin, then carefully remove small pieces of the pumpkin's skin to create the desired effect. Be patient and take your time; 3D carving requires a steady hand and a keen eye for detail.
3D carving is perfect for creating realistic portraits, animal sculptures, or even abstract designs. The key is to pay attention to the light and shadow, using the different depths to create a sense of depth and realism. And don't be afraid to experiment with different textures and finishes. You can use sandpaper to smooth out the surface of the pumpkin or a wood-burning tool to add fine details.
Light Up the Night with Your Cool Easy Carving Pumpkin Masterpiece
So, there you have it – a monstrously massive collection of cool easy carving pumpkin ideas to ignite your Halloween spirit. From the simplest spooky faces to the most intricate artistic expressions, remember that the most important ingredient is a dash of fun. Don't be afraid to experiment, get a little messy, and let your personality shine through each glowing grin. Now, go forth and transform those pumpkins into captivating beacons of Halloween cheer. Happy carving, and may your jack-o'-lanterns light up the night with spooky delight!