Table of Contents
Halloween is creeping closer, and what better way to celebrate than with some cool cat pumpkin carving ideas? For centuries, cats have been linked to Halloween, often seen as mystical companions of witches and symbols of the spooky season. Whether you believe in the folklore or just adore felines, incorporating cats into your Halloween décor is a must. Forget the generic Jack-o'-lantern; this year, let's get creative and carve some cool cat pumpkins that will make your neighbors purr with envy!
Essential Tools for Purrfect Cat Pumpkin Carving
Essential Tools for Purrfect Cat Pumpkin Carving
Gather Your Cat Pumpkin Carving Arsenal
Alright, let's talk tools! You can't carve a masterpiece without the right equipment, right? Forget that flimsy plastic knife that comes with the grocery store pumpkin carving kit. We're aiming for precision and purr-fection here! First up, you'll need a good quality pumpkin carving kit. Look for one with various sized saws for different levels of detail. A scoop is essential for getting all the pumpkin guts out (more on that later!), and a poker tool is great for transferring your stencil.
Don't underestimate the power of a good stencil! You can find tons of free cat pumpkin carving stencils online – from simple silhouettes to intricate portraits. Print them out, tape them to your pumpkin, and use the poker tool to transfer the design. If you're feeling artistic, you can even draw your own design directly onto the pumpkin. Just remember to keep it simple at first – you can always add more details later.
Beyond the Basics: Level Up Your Carving Game
so you've got the basics covered. Now, let's talk about taking your cat pumpkin carving to the next level. Consider investing in some clay sculpting tools. These are great for fine detailing and creating smooth edges. A Dremel tool with various attachments can also be a game-changer, especially for intricate designs and creating a cool glowing effect. I used a Dremel for my Cheshire Cat pumpkin last year, and it was a total showstopper!
And don't forget about lighting! A simple tea light is fine, but consider using an LED candle for a safer and longer-lasting glow. You can even find LED candles that flicker like real flames. For an extra touch of magic, try using colored LED lights to create a spooky ambiance. Just imagine a purple or green glow emanating from your cool cat pumpkin – meow-gical!
Tool | Use | Why You Need It |
|---|---|---|
Pumpkin Carving Kit | Carving various sized details | Essential for precision and control |
Scoop | Removing pumpkin guts | Makes the cleaning process easier |
Poker Tool | Transferring stencils | Ensures accurate design placement |
Clay Sculpting Tools | Fine detailing and smoothing edges | Adds a professional touch |
Dremel Tool | Intricate designs and glowing effects | Allows for advanced carving techniques |
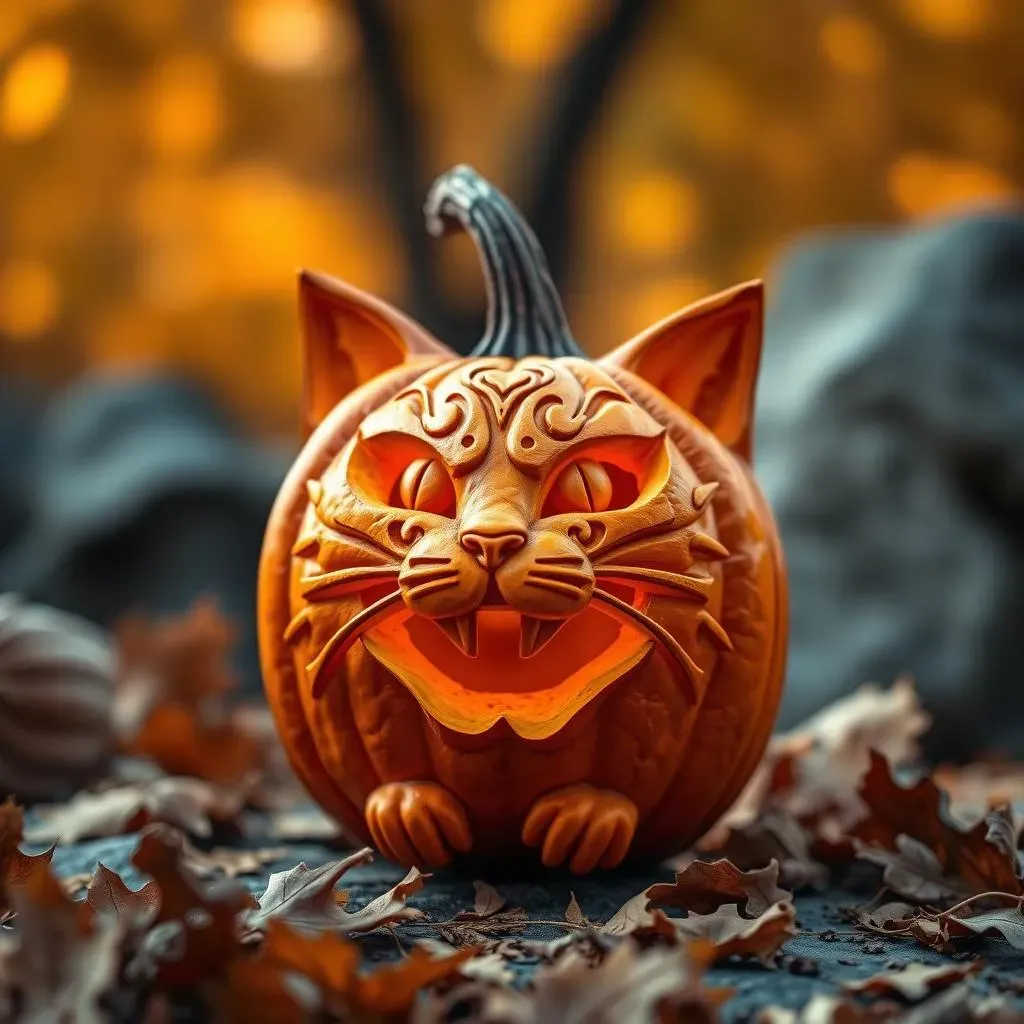
5 Cool Cat Pumpkin Carving Ideas to Try This Halloween
5 Cool Cat Pumpkin Carving Ideas to Try This Halloween
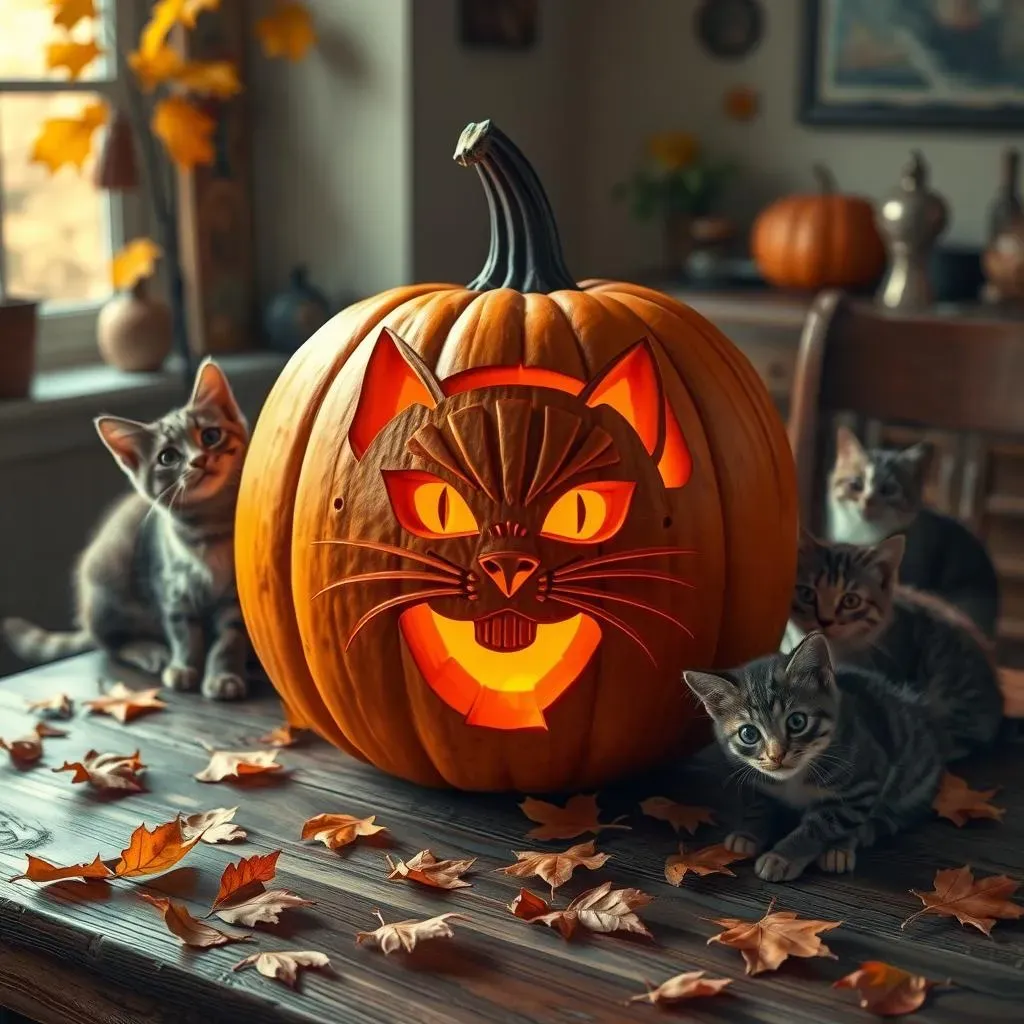
Classic Cat Silhouette Pumpkin
Let's kick things off with a timeless classic: the cat silhouette. This design is simple, elegant, and instantly recognizable. Start by finding a stencil of a cat in profile – think sleek and mysterious. Trace the outline onto your pumpkin and carefully carve away the areas around the silhouette. For an extra touch, try using a smaller saw to add some details to the cat's fur or whiskers. Place an LED candle inside, and watch your cool cat pumpkin cast a spooky shadow on your porch!
For a unique twist, consider using different sized pumpkins to create a cat family! A large pumpkin can be the mama cat, while smaller pumpkins become adorable kittens. Carve or paint different expressions on each cat to give them their own personalities. Arrange them together on your porch for a heartwarming and festive display. It's a purr-fect way to celebrate your love for cats this Halloween!
3D Cat Ears Pumpkin
Want to add some dimension to your cool cat pumpkin? Try creating 3D cat ears! This is a surprisingly easy technique that adds a lot of visual interest. Start by carving out the basic cat face on your pumpkin – eyes, nose, and mouth. Then, using a separate piece of pumpkin (you can use the top you cut off!), carve out two triangular shapes for the ears. Attach the ears to the top of the pumpkin using toothpicks or skewers. For extra stability, you can also use a bit of hot glue.
To really make those ears pop, consider painting them a different color than the rest of the pumpkin. Black ears on an orange pumpkin are a classic choice, but feel free to get creative with other colors like white, gray, or even pink! You can also add some details to the ears, such as stripes or spots, to match your favorite feline friend. This is a great way to personalize your cool cat pumpkin and make it truly unique.
Design Idea | Difficulty | Materials Needed |
|---|---|---|
Classic Cat Silhouette | Easy | Stencil, carving kit, LED candle |
3D Cat Ears | Medium | Pumpkin scraps, toothpicks, paint |
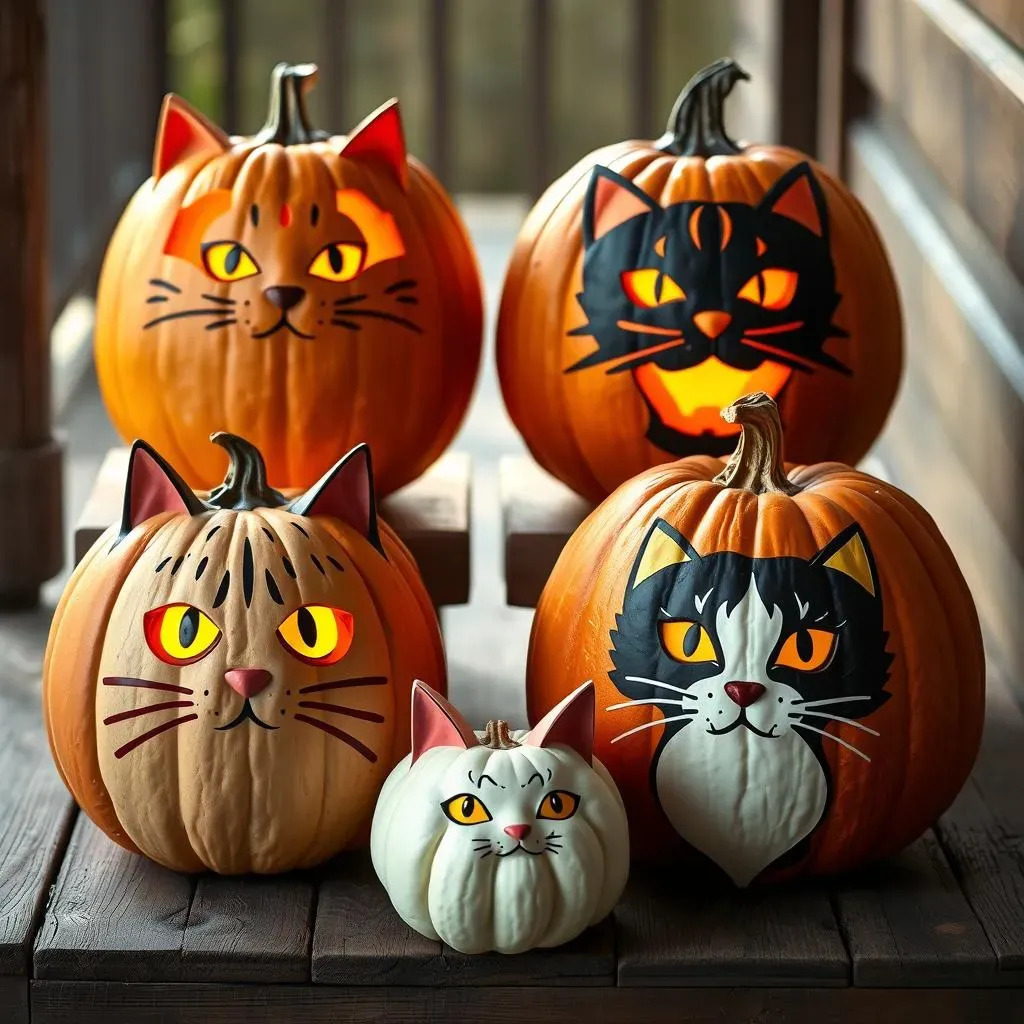
No-Carve Painted Cat Pumpkin
Not a fan of carving? No problem! You can still create a stunning cool cat pumpkin using paint. This is a great option for those who are short on time or who want to avoid the mess of carving. Simply choose your favorite cat design – a realistic portrait, a cartoonish character, or even an abstract pattern – and paint it directly onto the pumpkin. Acrylic paints work best, as they are durable and weather-resistant.
For a truly unique look, try using different painting techniques. You can create a watercolor effect by diluting the paint with water, or you can add texture by using a sponge or a dry brush. You can also embellish your painted cat pumpkin with glitter, sequins, or other decorative elements. The possibilities are endless! This is a fantastic way to express your creativity and create a cool cat pumpkin that is truly one-of-a-kind.
Simple & Spooky: Carving a Classic Cat Face Pumpkin
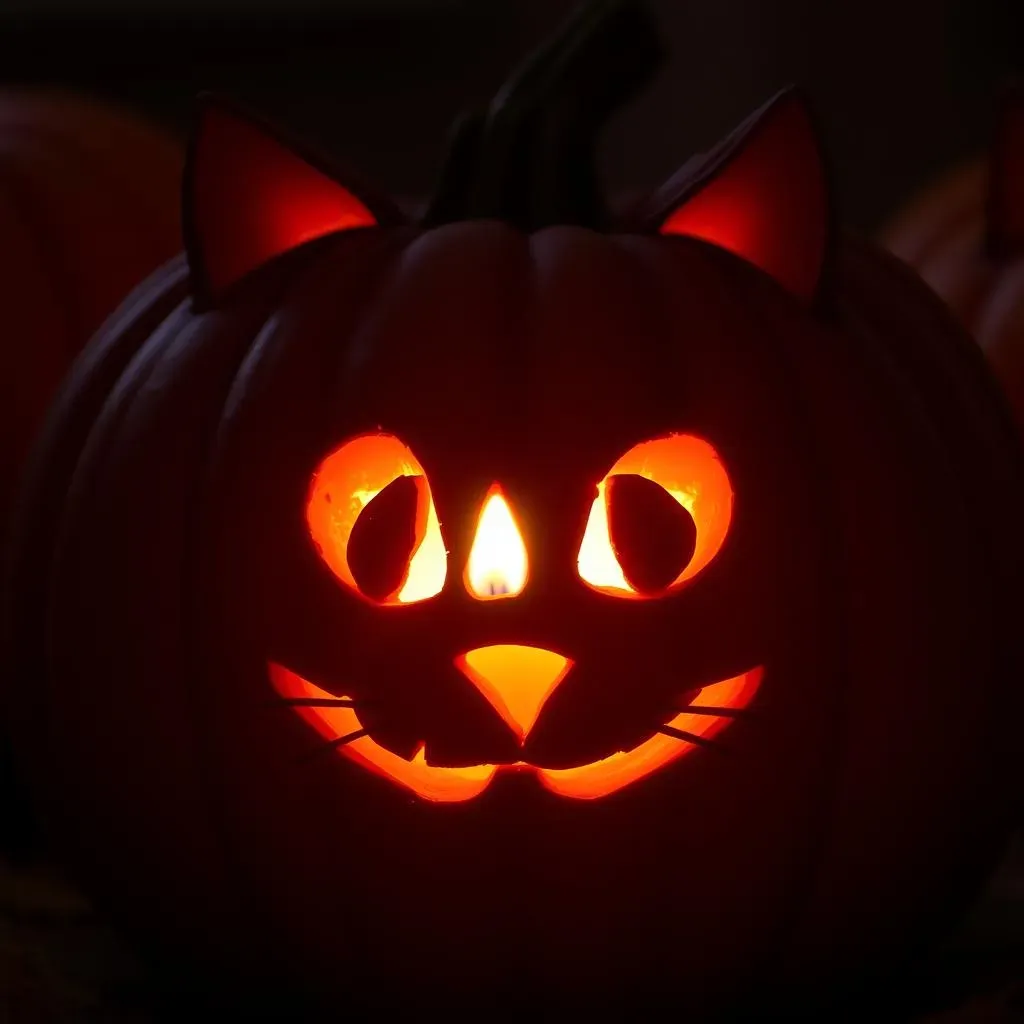
Simple & Spooky: Carving a Classic Cat Face Pumpkin
Unleash Your Inner Feline Artist
Alright, let's get down to the basics with a simple and spooky cat face pumpkin! This is where you transform that orange orb into a purr-fectly eerie masterpiece. First, grab your stencil – think classic cat features: pointy ears, wide eyes, and a mischievous grin. If you're feeling confident, sketch the design directly onto the pumpkin. Remember, simple is key! You can always add more detail later, but starting with a clean, basic outline will make the carving process much smoother.
Once your design is transferred, it's time to grab your carving tools. Start with the larger areas, like the eyes and mouth, using a sawing motion to carefully cut along the lines. For smaller details, like whiskers or the inner ears, switch to a smaller tool for more precision. Don't be afraid to take your time and make small, controlled cuts. It's better to be patient and avoid mistakes than to rush and end up with a mangled mess! And remember, safety first! Always carve away from yourself, and keep your fingers out of the path of the blade.
Now, let's talk about adding some spooky flair to your classic cat face pumpkin. Consider using different sized tools to create varying depths in your carving. This will add dimension and make your design pop. For example, you could carve the eyes all the way through the pumpkin, but only partially carve the whiskers to create a subtle shadow effect. You can also experiment with different shapes for the eyes – round, almond-shaped, or even slightly slanted for a more sinister look.
And don't forget about the power of lighting! A flickering LED candle can really bring your spooky cat face pumpkin to life. You can also try using colored lights to create a more dramatic effect. Imagine a red glow emanating from the eyes, or a green glow highlighting the mischievous grin. It's all about experimenting and having fun! So, unleash your inner feline artist and create a classic cat face pumpkin that will be the envy of all the trick-or-treaters.
Feature | Detail | Spooky Enhancement |
|---|---|---|
Eyes | Shape and size | Slanted eyes for a sinister look |
Whiskers | Depth of carving | Partially carved for shadow effect |
Lighting | Color and flicker | Red or green LED for dramatic effect |
Beyond the Carve: Painting Cool Cat Pumpkin Designs
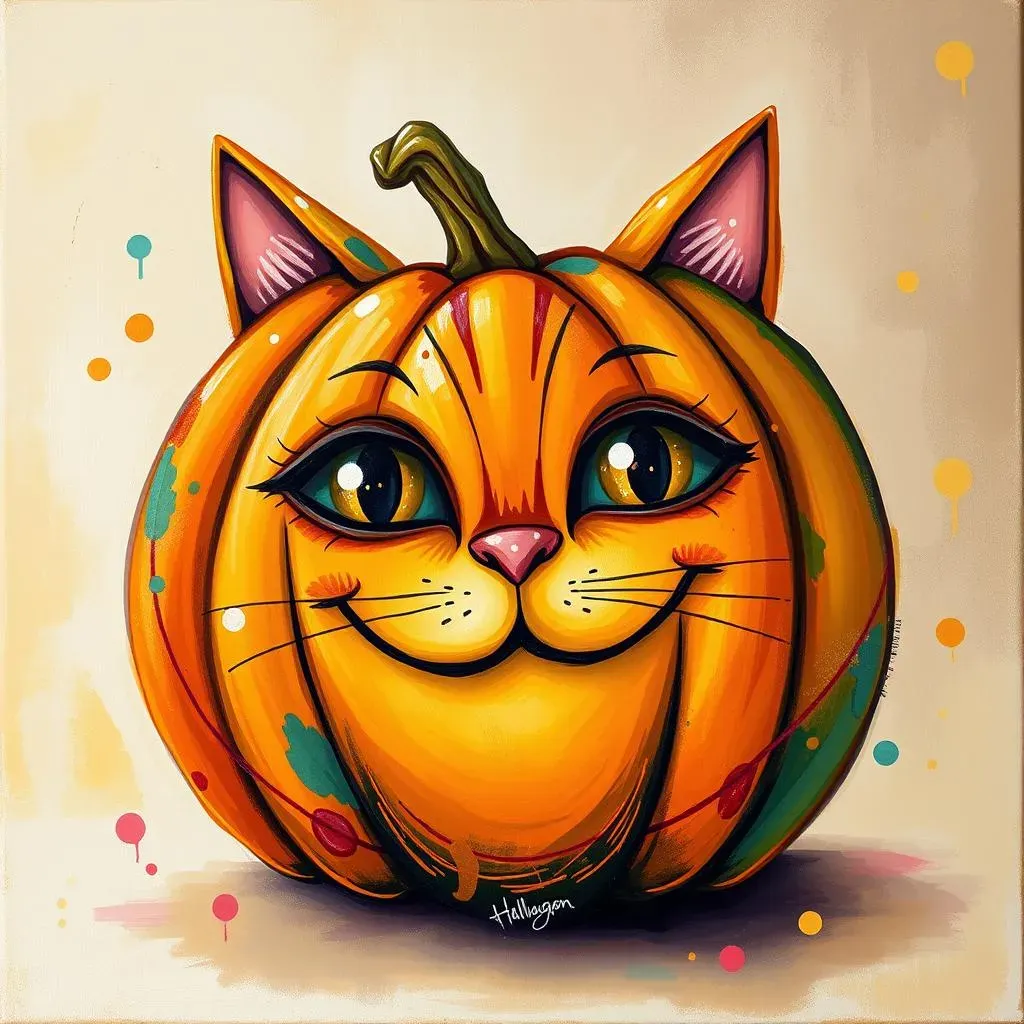
Beyond the Carve: Painting Cool Cat Pumpkin Designs
Alright, let's ditch the carving tools for a bit and dive into the world of painted cat pumpkins! This is where you can really let your creativity shine and create some truly unique designs. Forget about the limitations of carving – with paint, the possibilities are endless! You can create realistic portraits of your favorite feline friends, whimsical cartoon characters, or even abstract cat-themed masterpieces. The only limit is your imagination!
Before you start painting, it's important to prep your pumpkin properly. First, wipe it down with a damp cloth to remove any dirt or debris. Then, apply a base coat of white or light-colored paint. This will help the colors pop and prevent the orange pumpkin from showing through. Once the base coat is dry, you can start sketching your design onto the pumpkin with a pencil. Don't worry about making it perfect – you can always erase and adjust as needed. And remember, have fun with it! This is your chance to create a cool cat pumpkin that is truly one-of-a-kind.
Now, let's talk about paint! Acrylic paints are the best choice for painting pumpkins, as they are durable, weather-resistant, and come in a wide variety of colors. You'll also need a good set of paintbrushes in various sizes – from small detail brushes to larger brushes for filling in big areas. Don't be afraid to experiment with different painting techniques. You can create a smooth, even finish by using a soft brush and applying thin layers of paint. Or, you can add texture by using a sponge or a dry brush. You can also use stencils to create precise designs or use masking tape to create clean lines.
Once your painted cat pumpkin is complete, it's important to protect it from the elements. Apply a coat of clear sealant to help preserve the paint and prevent it from chipping or fading. You can find clear sealant at most craft stores. And there you have it – a stunning painted cat pumpkin that will be the envy of all your neighbors! So, ditch the carving tools and unleash your inner artist with some paint! It's a purr-fectly creative way to celebrate Halloween.
Technique | Description | Effect |
|---|---|---|
Base Coat | Applying a light-colored base before painting | Helps colors pop and prevents orange from showing |
Stenciling | Using stencils to create precise designs | Ensures clean and accurate shapes |
Texturing | Using sponges or dry brushes to add texture | Creates a more dynamic and interesting look |
Clear Sealant | Applying a clear coat to protect the paint | Preserves the paint and prevents chipping |
Cool Cat Pumpkin Carving: Safety Tips for You and Your Furry Friends
Cool Cat Pumpkin Carving: Safety Tips for You and Your Furry Friends
so you've got your cool cat pumpkin design all planned out, you've got your tools ready, and you're itching to get carving or painting. But hold on a second! Before you dive in, let's talk about safety – especially when it comes to our furry friends. Halloween is a fun time for us, but it can be a bit stressful and even dangerous for pets if we're not careful. So, let's make sure everyone has a safe and enjoyable Halloween season by following a few simple tips when carving your cool cat pumpkin.
First and foremost, keep your pets away from the carving area. Those sharp tools and small pieces of pumpkin can be a real hazard. Curious cats might be tempted to bat at the tools or nibble on the pumpkin scraps, which could lead to injuries or digestive upset. Designate a pet-free zone where they can relax and stay out of harm's way. This will not only protect your pets but also prevent them from getting in your way and potentially ruining your masterpiece!
Next, be mindful of your lighting choices. Real candles can be a fire hazard, especially if you have curious cats who like to jump on things. A wagging tail could easily knock over a lit candle, causing a fire or burns. Opt for flameless LED candles instead. They provide a realistic glow without the risk of fire. You can even find LED candles with timers, so you don't have to worry about turning them on and off every night. It's a simple switch that can make a big difference in terms of safety.
Finally, remember that while pumpkin is generally safe for pets in small amounts, it's not a meal replacement! If your pet does happen to sneak a bite of pumpkin, don't panic. But avoid letting them eat large quantities, as it could cause digestive upset. And definitely keep them away from any paints, glues, or other crafting materials you might be using to decorate your cool cat pumpkin. These materials can be toxic if ingested. By following these simple safety tips, you can ensure that both you and your furry friends have a happy and safe Halloween season!
Safety Tip | Description | Why It's Important |
|---|---|---|
Pet-Free Zone | Keep pets away from the carving area | Prevents injuries and accidents |
Flameless Candles | Use LED candles instead of real flames | Reduces the risk of fire |
Avoid Toxic Materials | Keep pets away from paints, glues, and other crafting materials | Prevents poisoning |
Cool Cat Pumpkin Carving: A Feline Finale
So, there you have it – five cool cat pumpkin carving ideas to elevate your Halloween game! From the simplicity of a classic carved cat face to the artistic flair of painted designs, there's a project here for every cat lover and pumpkin enthusiast. Remember to prioritize safety, keep those sharp tools away from curious paws, and opt for flameless candles to protect your furry friends. With a little creativity and these tips, you're all set to create a purr-fectly spooky Halloween display that will have the whole neighborhood talking. Happy carving, and have a meow-gical Halloween!