Table of Contents
Halloween is creeping closer, and what's a better way to celebrate than with a glowing jack-o'-lantern? You might think you're short on time, but fear not! There's still plenty of time to grab a pumpkin and get carving. Whether you're a total newbie or a seasoned pro, we've got a treasure trove of cool but simple pumpkin carving ideas to spark your creativity.
Essential Tools and Pumpkin Prep for Easy Carving
Essential Tools and Pumpkin Prep for Easy Carving
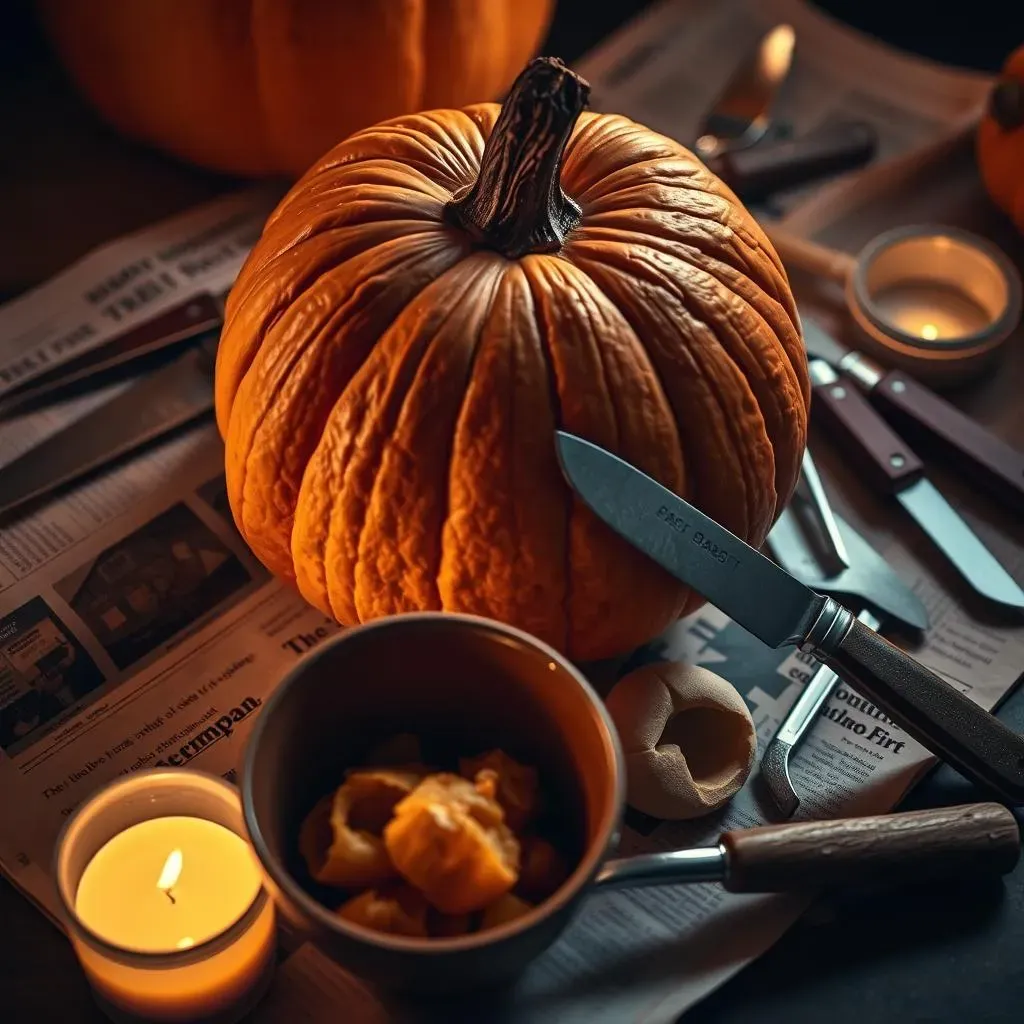
Alright, before we even think about carving, let's talk tools and prep. Trust me, having the right gear and a solid plan makes all the difference between a masterpiece and a mushy mess. First, you'll need a good carving kit. Those cheap plastic ones from the grocery store? They'll work in a pinch, but invest in a decent set with serrated knives and scoops for a smoother, easier experience. A sturdy spoon or ice cream scoop is essential for gutting the pumpkin, and don't forget a poking tool – an awl or even a thick nail works great for transferring patterns.
- Carving Kit: Serrated knives, scoops, pokes
- Sturdy Spoon: For gutting
- Awl or Nail: For pattern transfer
- Bowl: For pumpkin guts
- Newspapers or Drop Cloth: To protect your workspace
- Paper Towels: For cleanup
- Tape: To secure stencils
- Candle or LED Light: To illuminate your creation
Speaking of patterns, decide what you're carving before you start hacking away. Print out a stencil or freehand your design onto paper. Then, tape it securely to the pumpkin. Use your poking tool to transfer the design by creating small holes along the lines. Once your pattern is transferred, it's time to get messy! Cut a circle around the stem at an angle to create a lid. Scrape out all the pumpkin guts – seeds and stringy bits – until the inside walls are smooth. Trust me, a clean pumpkin is a happy pumpkin, and a happy pumpkin is easier to carve. With a bit of prep, you will be ready to bring your cool but simple pumpkin carving ideas to life!
Classic & Cool Pumpkin Carving Ideas for Beginners
Classic & Cool Pumpkin Carving Ideas for Beginners
Alright, you've got your pumpkin prepped and ready to go. Now for the fun part! If you're just starting out, don't feel like you need to create some elaborate masterpiece. Some of the most classic designs are also the easiest and look fantastic flickering on your porch. Think simple shapes: triangles for eyes, a square for a nose, and a jagged line for a mouth. You can mix and match these basic shapes to create different expressions – happy, sad, surprised, or even a little bit spooky. The key is to keep it simple and focus on clean lines. Remember, it's better to have a well-executed simple design than a poorly executed complex one!
Another great option for beginners is to use cookie cutters! Seriously, press your favorite Halloween-themed cookie cutters (think ghosts, bats, or stars) firmly into the pumpkin skin to create an outline. Then, simply trace the outline with your carving tools. This is a super easy way to get a clean, recognizable shape without having to freehand anything. Plus, it's a fun activity to do with kids! Who knows, maybe you'll even invent a new "classic" design. Don't forget to light it up with a candle or LED for that perfect Halloween glow.
Design Idea | Difficulty | Description |
|---|---|---|
Classic Jack-o'-Lantern Face | Easy | Triangles for eyes, square nose, jagged mouth. |
Ghost Cookie Cutter | Easy | Press a ghost-shaped cookie cutter into the pumpkin and trace. |
Starry Night | Easy | Use a star-shaped cookie cutter to create a pattern of stars. |
Unique & Simple Pumpkin Carving Ideas: Animals and Nature
Unique & Simple Pumpkin Carving Ideas: Animals and Nature
Owl Always Love You: Carving an Adorable Owl
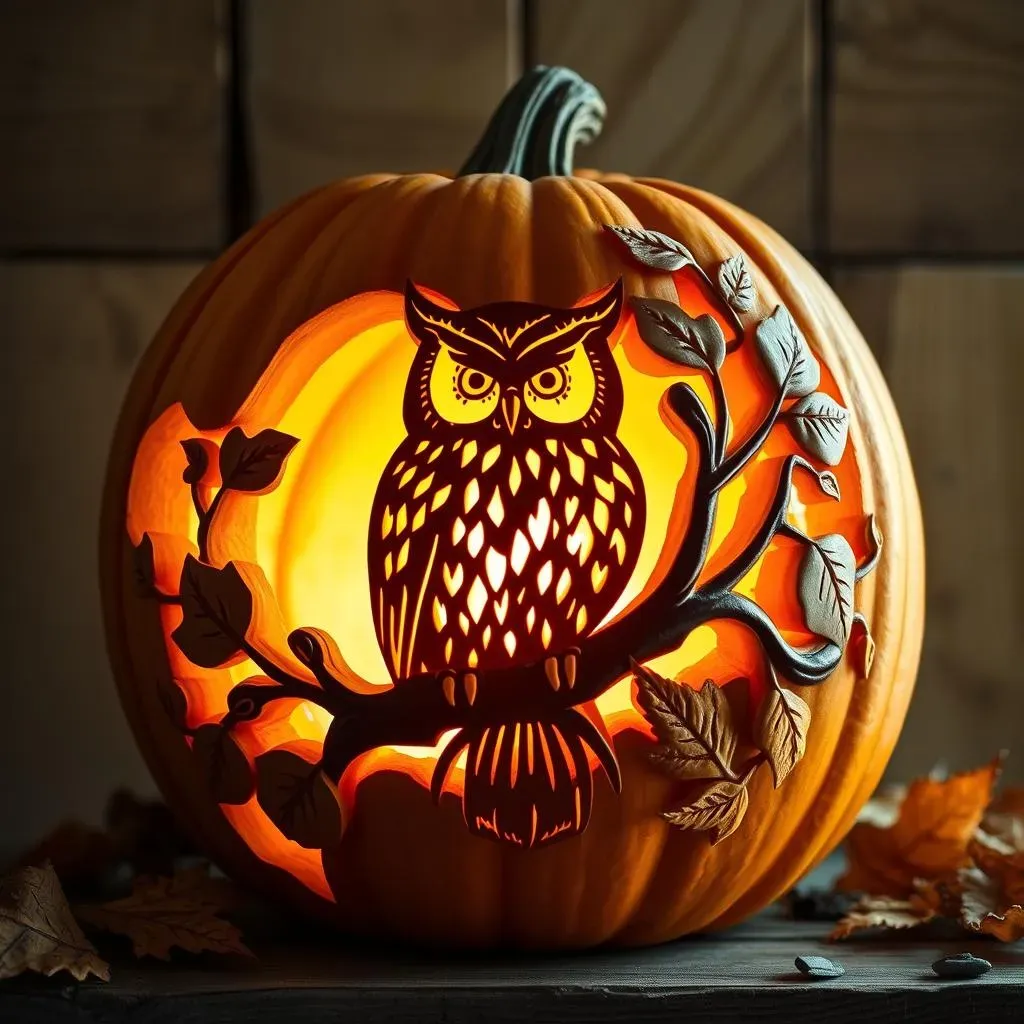
so you've mastered the classic jack-o'-lantern face. Now let's get a little more creative and tap into the animal kingdom. Carving an owl is surprisingly simple and creates a really striking effect. Start by finding a stencil of a stylized owl – there are tons online! Focus on big, round eyes and feathery details. The key here is to use different sized carving tools to create depth and texture. For the eyes, you can carve all the way through the pumpkin, or just lightly score the surface to let the light shine through softly. The feathers can be created by making small, shallow cuts in a V-shape.
Don't be afraid to get a little abstract with it! Maybe add some leaf details around the owl to create a natural scene. If you're feeling extra ambitious, you could even use a second, smaller pumpkin to create a 3D effect. Just attach the smaller pumpkin to the front of the larger one and carve the owl's face onto the smaller pumpkin. This adds a whole new dimension to your pumpkin carving and is sure to impress your neighbors!
Here are some inspiring ideas:
- Simple Owl Silhouette: Easy to trace and carve.
- Detailed Feathers: Use small tools for added texture.
- Leaf Accents: Carve or attach real leaves around the owl.
Nature's Beauty: Simple Leaf and Floral Designs
If animals aren't your thing, why not bring the beauty of nature to your pumpkin? Leaf and floral designs are elegant, easy to execute, and look stunning when illuminated. You can find stencils of various leaves – maple, oak, or even tropical leaves – or create your own simple floral patterns. The trick here is to focus on negative space. Instead of carving out the entire leaf or flower, carve around it to create a silhouette effect. This is not only easier but also creates a more visually interesting design.
For a more advanced technique, try layering different leaf and floral patterns to create a sense of depth. You can also incorporate other natural elements, like vines or branches, by attaching them to the pumpkin with glue or small pins. Imagine a pumpkin covered in delicate, glowing leaves – it's a simple yet sophisticated way to celebrate Halloween. Don't be afraid to experiment with different shapes and sizes to create a truly unique and natural jack-o'-lantern.
Design Idea | Difficulty | Description |
|---|---|---|
Maple Leaf Silhouette | Easy | Carve around the leaf to create a glowing outline. |
Simple Floral Pattern | Easy | Use basic shapes to create stylized flowers. |
Layered Leaves | Medium | Overlap different leaf stencils for added depth. |
Spooky & Cool Pumpkin Carving Ideas: Monsters and More

Spooky & Cool Pumpkin Carving Ideas: Monsters and More
Classic Monster Mash: Spooky Faces and Silhouettes
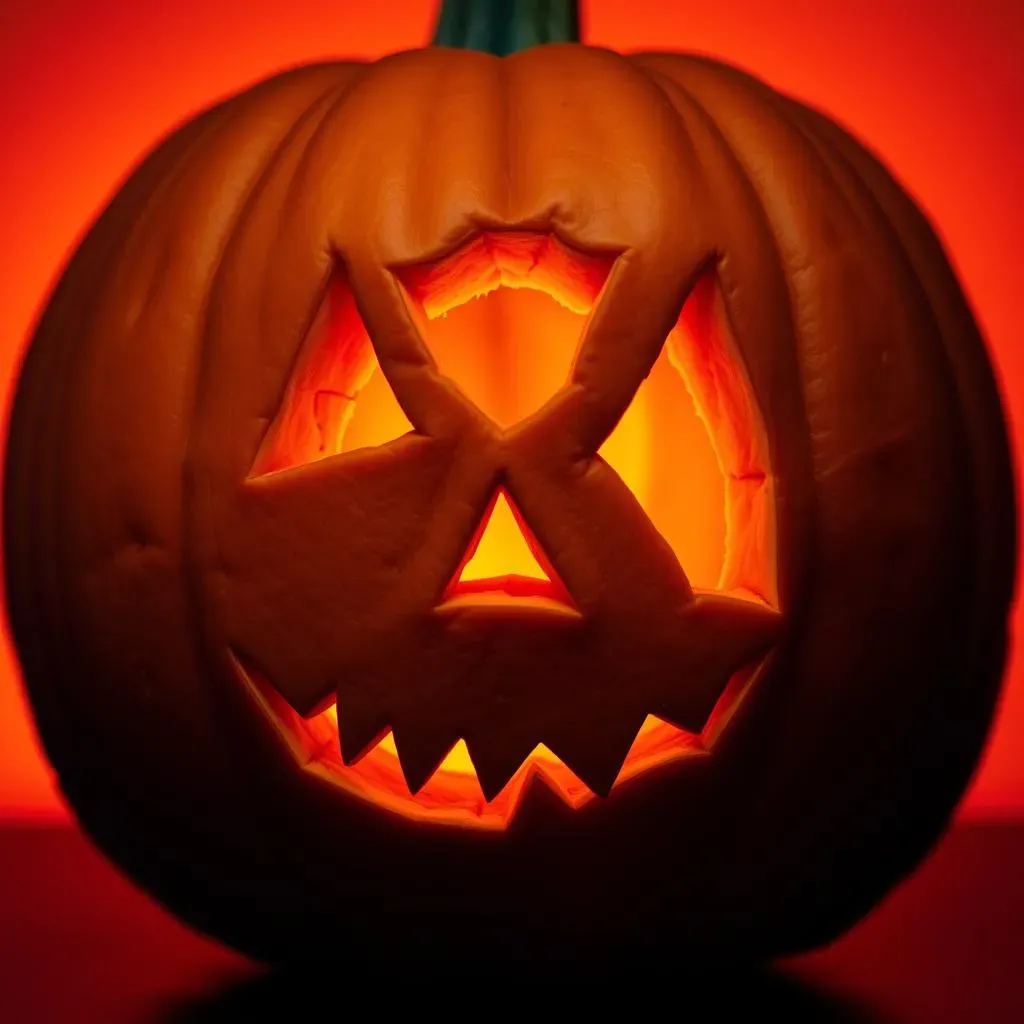
Alright, let's get spooky! No Halloween is complete without some classic monsters lurking on your porch. We're talking Frankenstein's monster, Dracula, ghosts, and witches – the whole gang! The key to a good monster carving is exaggeration. Think big, jagged teeth for Dracula, a square head and bolts for Frankenstein, and a long, pointy nose for a witch. Silhouettes are also a great way to create a spooky effect. A simple ghost or bat silhouette against a glowing pumpkin is both easy and effective. Don't be afraid to get creative with your monster mash – mix and match different elements to create your own unique creatures!
For an extra touch of creepiness, try using different carving depths to create shadows and highlights. You can also add accessories, like a witch's hat made from construction paper or googly eyes for a more cartoonish look. Remember, the goal is to have fun and create something that will make your neighbors jump (in a good way, of course!). Just imagine a whole row of spooky monster pumpkins lining your walkway – now that's a Halloween display!
Design Idea | Difficulty | Description |
|---|---|---|
Frankenstein's Monster | Medium | Square head, bolts, jagged stitches. |
Dracula | Medium | Big teeth, cape silhouette. |
Witch Silhouette | Easy | Pointy hat, long nose, broom. |
Beyond the Basics: Creative and Creepy Monster Designs
Want to take your monster carvings to the next level? Let's go beyond the basics and explore some more creative and creepy designs. How about a zombie bursting out of a pumpkin? Or a spider crawling across the surface? The possibilities are endless! One technique is to use multiple pumpkins to create a larger, more complex design. For example, you could use a smaller pumpkin as the zombie's head and attach it to a larger pumpkin body. You can also use sculpting tools to create 3D effects, like raised scars or bulging eyes.
Another fun idea is to incorporate other materials into your monster designs. Use fake cobwebs to create a creepy, abandoned look, or add glowing eyes using LED lights. You can even use dry ice to create a spooky fog effect! Just be sure to handle dry ice with care and follow safety precautions. With a little imagination and some creative techniques, you can transform your pumpkin into a truly terrifying work of art. Get ready to scare everyone who dares to approach your doorstep!
- Zombie Bursting Out: Use multiple pumpkins for a 3D effect.
- Spider Crawling Across: Add fake cobwebs for extra creepiness.
- Glowing Eyes: Use LED lights for a spooky effect.
Advanced Cool Pumpkin Carving Ideas: Step Up Your Carving Game
Advanced Cool Pumpkin Carving Ideas: Step Up Your Carving Game
Alright, so you've conquered the basics and even dabbled in some spooky monster designs. Now, are you ready to unleash your inner pumpkin Picasso? We're talking about taking your cool pumpkin carving ideas to a whole new level! This is where things get interesting, where precision meets artistry, and where your jack-o'-lantern becomes a true masterpiece. Forget the simple triangles and jagged lines; we're diving into intricate patterns, 3D sculpting, and using power tools to achieve effects you never thought possible on a humble pumpkin.
Think of it like this: you've been playing the guitar with basic chords, and now you're ready to shred a solo! It takes practice, patience, and a willingness to experiment, but the results are totally worth it. We'll explore advanced carving techniques, like using wood carving tools for finer details, creating stencils with intricate designs, and even incorporating lighting effects to make your pumpkin truly glow. So, grab your tools, clear your workspace, and let's get ready to transform those pumpkins into works of art that will leave your neighbors speechless!
Intricate Patterns and Designs: Precision Carving
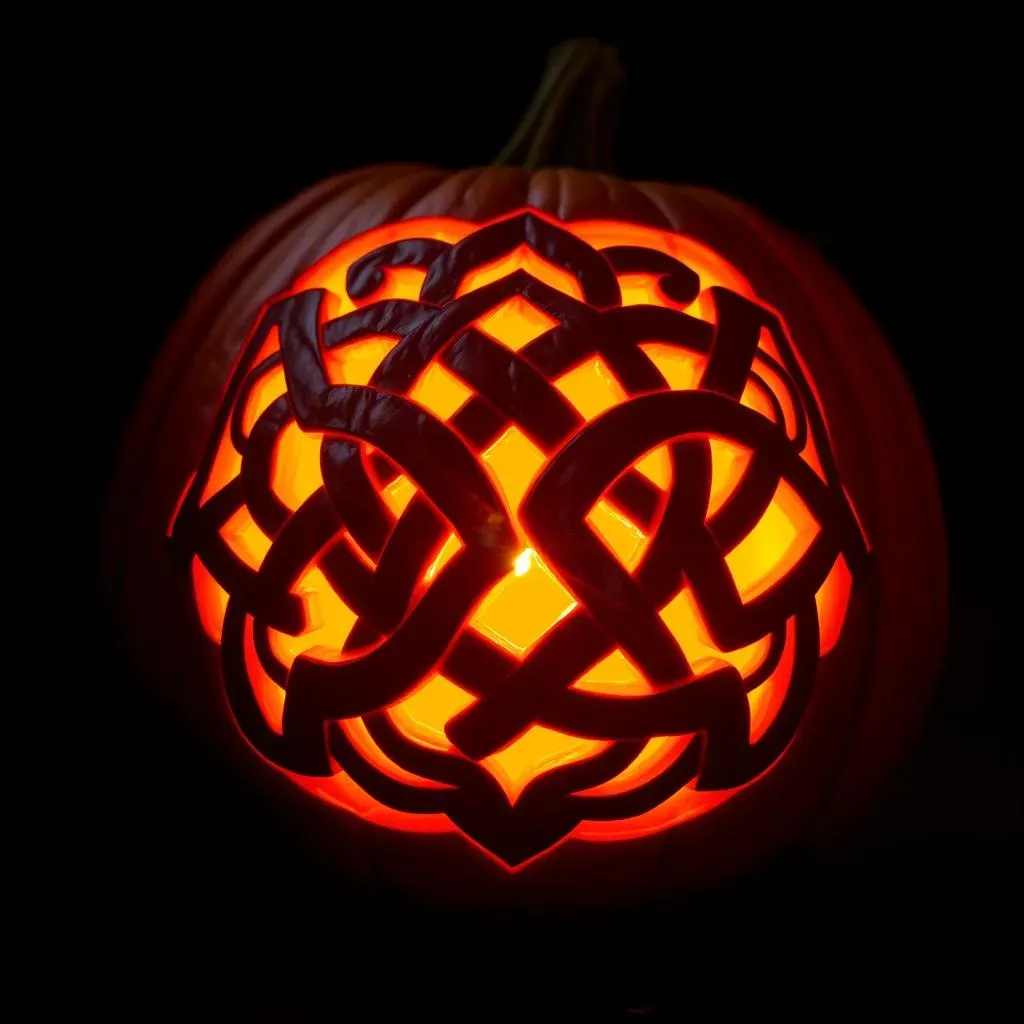
Ready to ditch the simple shapes and embrace the art of intricate patterns? This is where advanced carving really shines. Think Celtic knots, mandalas, or even portraits of your favorite characters. The key here is precision. You'll need a good set of wood carving tools with different sized gouges and knives to create fine details and varying depths. Start by transferring your design onto the pumpkin using a stencil or freehand drawing. Then, carefully carve along the lines, taking your time to create clean, crisp edges.
Don't be afraid to experiment with different carving depths to create shadows and highlights. You can also use a rotary tool with different attachments to create textures and patterns. Remember, practice makes perfect! Start with simpler patterns and gradually work your way up to more complex designs. With a little patience and a steady hand, you'll be amazed at the intricate masterpieces you can create.
Design Idea | Difficulty | Tools Needed |
|---|---|---|
Celtic Knot | Advanced | Wood carving tools, stencil |
Mandala | Advanced | Wood carving tools, rotary tool |
Portrait | Expert | Wood carving tools, stencil, photo reference |
3D Pumpkin Carving: Sculpting Your Masterpiece
Want to really wow your neighbors? Try your hand at 3D pumpkin carving! This technique involves sculpting the pumpkin's surface to create raised and recessed areas, giving your design a three-dimensional effect. You'll need a good set of sculpting tools, including loops, rasps, and knives. Start by sketching out your design on the pumpkin's surface. Then, carefully remove the outer layers of the pumpkin to create the raised areas. Use the sculpting tools to shape and refine the details.
One popular 3D technique is to create a bas-relief carving, where the design is raised slightly above the background. You can also create more dramatic effects by carving all the way through the pumpkin in certain areas. Remember to work slowly and carefully, removing small amounts of pumpkin at a time. With a little practice, you'll be able to create stunning 3D carvings that will amaze everyone who sees them.
- Bas-Relief Carving: Raised design on a flat background.
- Full 3D Carving: Sculpting the entire pumpkin surface.
- Layered Carving: Creating depth by carving different layers.
Light Up the Night with Your Cool Pumpkin Creation
So, there you have it – 110 cool but simple pumpkin carving ideas to transform your porch into a Halloween spectacle. From the ridiculously easy to the surprisingly intricate, there's a design here for every skill level and spooky sensibility. Don't be afraid to mix and match elements, tweak the patterns, and let your own creativity shine. The most important thing is to have fun and enjoy the process of bringing your pumpkin masterpiece to life. Now go forth, carve boldly, and let your jack-o'-lantern's glow light up the night!