Table of Contents
Halloween is creeping closer, and what's a better way to celebrate than with a creatively carved pumpkin? If the thought of intricate designs and hours of work makes you want to hide under a blanket, fear not! This year, we're ditching the pumpkin-carving anxiety and diving headfirst into the world of cool but easy pumpkin carving ideas. Forget the complicated patterns and specialized tools; we're talking about designs that are both achievable and seriously impressive, no matter your skill level.
Simple & Spooky: Cool Pumpkin Carving Ideas for Beginners
Simple & Spooky: Cool Pumpkin Carving Ideas for Beginners
Classic Jack-O'-Lantern with a Twist
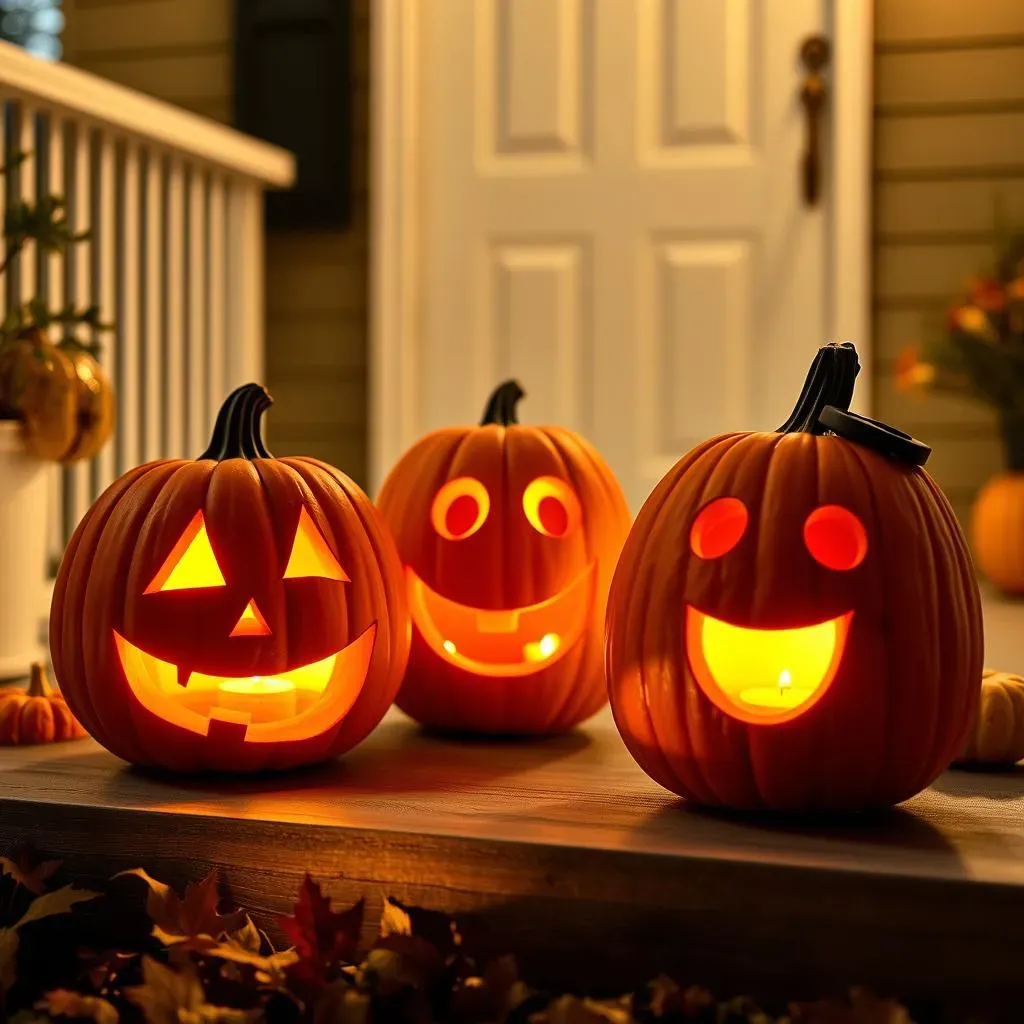
Let's start with the OG of pumpkin carving: the Jack-O'-Lantern. But, we're not talking about your grandma's triangle eyes and toothy grin. Instead, think about simple shapes with a bit of personality. Go for asymmetrical eyes, a zigzag mouth, or even add some goofy eyebrows. The key here is to keep the cuts clean and the design uncluttered. Remember, simple doesn't mean boring; it means approachable and fun!
To make it even easier, grab some free stencils online. There are tons of sites that offer beginner-friendly designs, from cute ghosts to silly monsters. Print out your chosen stencil, tape it to your pumpkin, and use a poking tool to transfer the design onto the surface. Then, just follow the dots with your carving tools. Boom! Instant spooky (but not too spooky) masterpiece.
Silly Faces and Friendly Ghosts
Want to steer clear of anything too scary? Opt for silly faces or friendly ghost designs. Think big, round eyes, wide smiles, and maybe even a tongue sticking out. These are especially great if you're carving with kids, as they can get creative with the expressions and features. Plus, who doesn't love a pumpkin that's more goofy than ghoulish?
Another fantastic option is to carve a simple ghost shape and then use paint or markers to add details like rosy cheeks, a cute little bow, or even some funky sunglasses. This is a great way to involve younger kids who might not be ready for sharp carving tools. The most important thing is to let your imagination run wild and create a pumpkin that makes you smile.
- Tip 1: Use battery-operated candles or fairy lights to illuminate your pumpkin for a safer and longer-lasting glow.
- Tip 2: Don't be afraid to experiment with different carving tools. A small paring knife or even a cookie cutter can work wonders for simple shapes.
- Tip 3: Save the pumpkin seeds! Roast them with some salt and spices for a delicious and healthy snack.
NoCarve Creations: Easy Pumpkin Decorating Ideas That Wow
NoCarve Creations: Easy Pumpkin Decorating Ideas That Wow
Paint It Pretty: Unleash Your Inner Artist
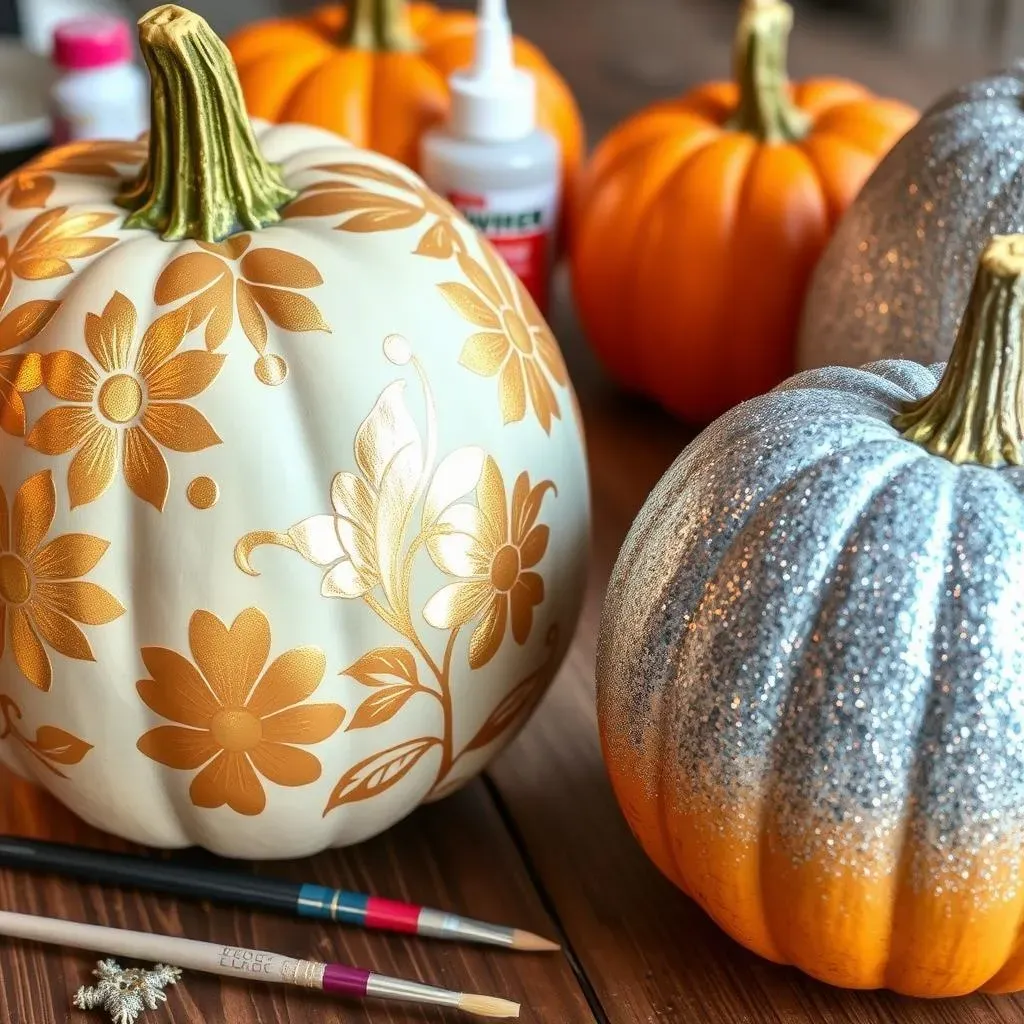
Alright, let's talk about the magic of paint! Forget the mess of carving; grab some acrylic paints and let your creativity flow. You can go for a classic look with simple polka dots or stripes, or you can get more adventurous with intricate patterns and designs. Think about painting a night sky with stars, a field of sunflowers, or even a portrait of your favorite Halloween character. The possibilities are endless!
For a truly eye-catching effect, try using metallic paints like gold, silver, or bronze. These will add a touch of elegance and sophistication to your pumpkin. Or, if you're feeling extra crafty, you can use stencils or masking tape to create geometric patterns or intricate designs. Just remember to let each layer of paint dry completely before adding the next one.
Glitter & Glam: Add Some Sparkle to Your Season
Who doesn't love a little sparkle? Glitter is the perfect way to add some glam to your no-carve pumpkin creations. Simply coat your pumpkin with glue and then sprinkle on your favorite glitter. You can use different colors and sizes of glitter to create a dazzling effect. Consider creating glitter ombre effect, or use glitter to highlight certain areas of your design, like the eyes or mouth.
For a more subtle sparkle, try using glitter glue or glitter paint. These are easy to apply and will give your pumpkin a subtle shimmer. You can also use glitter to create intricate patterns or designs. Just be sure to work in a well-ventilated area and protect your surfaces from glitter fallout. And remember, a little glitter goes a long way!
- Tip 1: Use craft glue for best results when applying glitter.
- Tip 2: Place newspaper down to catch the mess of any glitter.
- Tip 3: Seal the glitter with a clear coat of spray paint to prevent shedding.
Level Up Your Carving Game: Cool Pumpkin Carving Ideas with Stencils
Level Up Your Carving Game: Cool Pumpkin Carving Ideas with Stencils
Intricate Designs Made Easy: Stencils to the Rescue
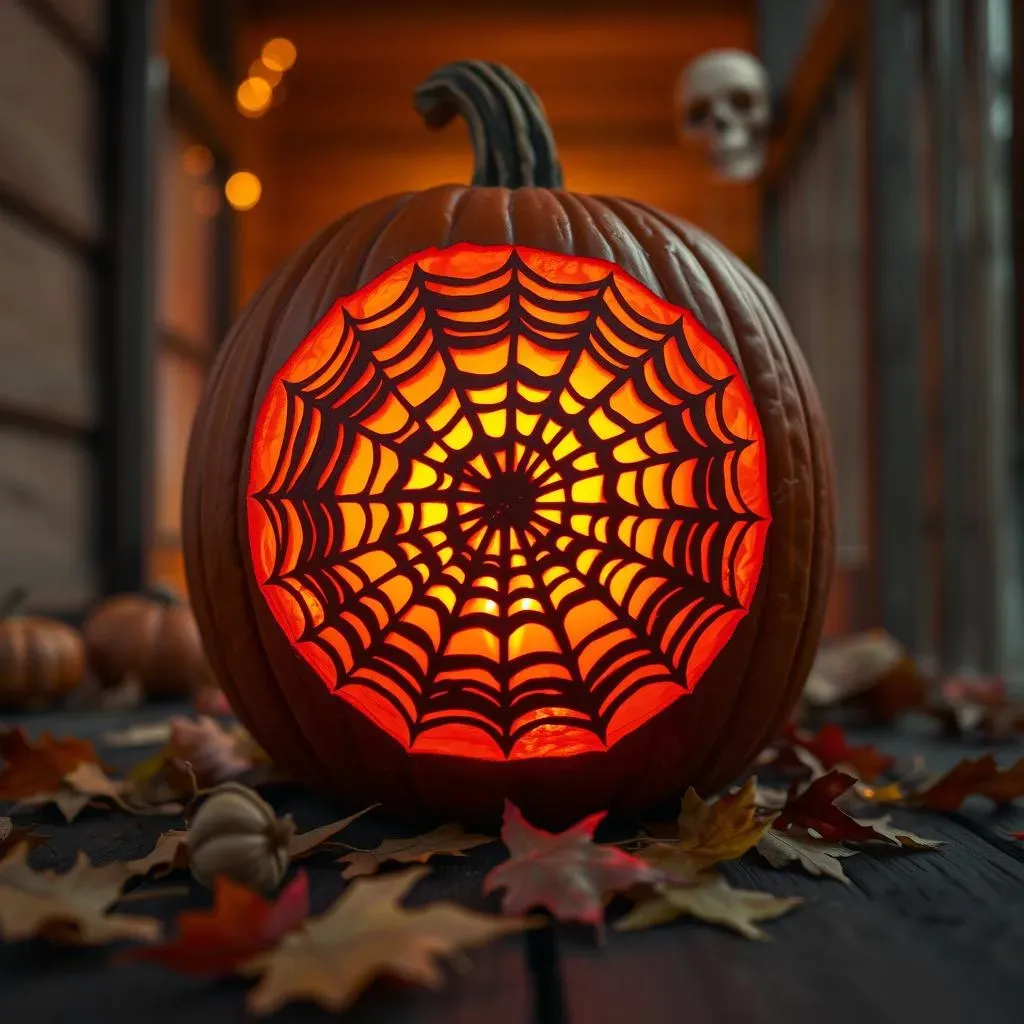
Ready to move beyond basic shapes? Stencils are your secret weapon! They allow you to achieve intricate designs without the freehand skills of a professional pumpkin artist. Think detailed spiderwebs, graceful bats in flight, or even a spooky haunted house scene. The possibilities are truly endless when you have a good stencil to guide you.
Finding the perfect stencil is easier than ever. A quick online search will reveal a treasure trove of free and paid options, catering to every skill level and aesthetic. Once you've chosen your stencil, print it out and secure it to your pumpkin with tape. Use a poking tool or tracing wheel to transfer the design onto the pumpkin's surface, creating a dotted outline that you can then follow with your carving tools.
Choosing the Right Stencil for Your Skill Level
Not all stencils are created equal. Some are designed for beginners, while others are better suited for experienced carvers. When selecting a stencil, consider the complexity of the design and the number of small details. If you're new to using stencils, start with a simpler design that features larger, more defined shapes. As you gain confidence, you can gradually move on to more intricate patterns.
Also, pay attention to the size of the stencil in relation to your pumpkin. A stencil that's too large or too small will be difficult to work with. Ideally, the stencil should fit comfortably on the flattest part of your pumpkin, leaving enough room around the edges for you to maneuver your carving tools. And remember, practice makes perfect! Don't be discouraged if your first attempt isn't flawless. The more you carve, the better you'll become.
Essential Tools and Techniques for Stencil Carving
To make the most of your stencil carving experience, it's essential to have the right tools and techniques. A good carving kit should include a variety of saws and knives in different sizes, as well as a poking tool or tracing wheel for transferring the design. You'll also want to have a scoop for removing the pumpkin guts, and a damp cloth for wiping away any excess pulp.
When carving with stencils, it's important to work slowly and carefully, following the dotted lines as closely as possible. Use short, controlled strokes, and avoid applying too much pressure. If you're working with a particularly intricate design, consider breaking it down into smaller sections. This will make the carving process more manageable and reduce the risk of making mistakes. And don't forget to illuminate your finished masterpiece with a battery-operated candle or LED light for a spooky and spectacular display!
- Tip 1: Use a citrus-scented cleaner to remove the stencil residue from the pumpkin.
- Tip 2: For intricate designs, use a thin, flexible carving knife.
- Tip 3: Store your carved pumpkin in a cool, dry place to prevent it from rotting too quickly.
Family Fun: Easy Pumpkin Carving Ideas for Kids of All Ages
Family Fun: Easy Pumpkin Carving Ideas for Kids of All Ages
Toddler-Friendly Pumpkin Decorating: Stickers, Paint, and More!
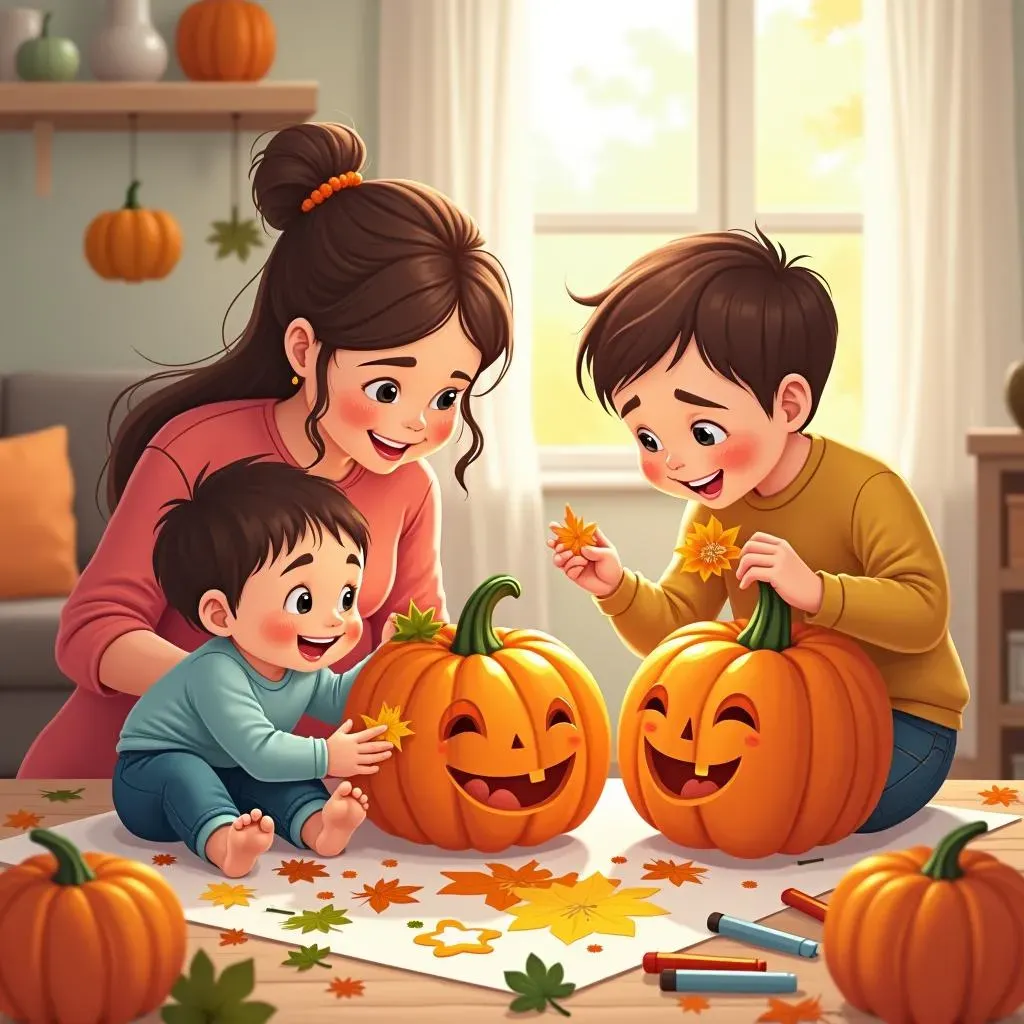
Let's be real: handing a toddler a sharp carving knife is a recipe for disaster (and probably a trip to the ER). But that doesn't mean they have to miss out on the pumpkin-decorating fun! Instead, focus on no-carve options that are safe and engaging for little hands. Think stickers, paint, markers, and even natural materials like leaves and twigs.
Set up a decorating station with a variety of supplies and let your toddler's creativity run wild. They can create silly faces with googly eyes and pipe cleaner noses, paint colorful patterns with finger paints, or even glue on leaves and twigs to make a nature-inspired masterpiece. The goal here is to let them explore their imagination and have fun without any sharp objects involved. And who knows, you might even end up with a pumpkin that's more abstract art than traditional Halloween decoration!
Preschool Power: Simple Carving with Adult Supervision
Preschoolers are a bit more coordinated than toddlers, but they still need close supervision when it comes to carving. This is a great age to introduce them to simple carving tools and techniques, but always make sure an adult is doing the actual cutting. Let your preschooler choose the design and help scoop out the pumpkin guts (they usually love that part!). Then, you can guide their hand as you carve simple shapes like circles, squares, or triangles.
Another fun idea is to use cookie cutters to create shapes on the pumpkin. Simply press the cookie cutter into the pumpkin's surface and then carve along the edges. This is a great way to create consistent shapes and designs, and it's also a lot safer than trying to carve freehand. Once the carving is done, let your preschooler decorate the pumpkin with paint, markers, or stickers. This is a fantastic way to encourage their creativity and make them feel like they're part of the process.
- Safety First: Always supervise children closely when using carving tools.
- Start Simple: Choose easy-to-carve designs with large, simple shapes.
- Make it Fun: Let kids choose the design and help with the decorating.
Beyond the JackO'Lantern: Unique & Cool Pumpkin Carving Ideas to Stand Out
Beyond the JackO'Lantern: Unique & Cool Pumpkin Carving Ideas to Stand Out
Embrace the Etch: Delicate Designs with Dremel Magic
Carving is cool, but etching? That's where the real artistry begins. Instead of cutting all the way through the pumpkin, etching involves using a tool like a Dremel to remove the outer layer of skin, revealing the lighter flesh underneath. This technique allows you to create incredibly detailed and delicate designs that are impossible to achieve with traditional carving. Think intricate floral patterns, detailed portraits, or even a miniature landscape scene.
The key to successful etching is to use a light touch and work slowly. Start by sketching your design onto the pumpkin's surface with a pencil. Then, using a fine-tipped Dremel bit, carefully trace the lines of your design, removing just enough of the outer skin to create the desired effect. Remember, you can always remove more, but you can't put it back! So, take your time and be patient. The results will be well worth the effort.
Pumpkin as Canvas: Painting Masterpieces for Halloween
Why limit yourself to carving when you can turn your pumpkin into a canvas? Painting pumpkins is a fantastic way to create unique and eye-catching designs that are sure to stand out from the crowd. You can use acrylic paints, watercolors, or even spray paint to create a wide range of effects, from bold and graphic designs to subtle and sophisticated artwork. Consider painting a starry night sky, a spooky forest scene, or even a portrait of your favorite monster.
Before you start painting, make sure to clean your pumpkin thoroughly and let it dry completely. Then, apply a base coat of white or light-colored paint to create a smooth surface for your design. Once the base coat is dry, you can start adding your details. Use fine-tipped brushes for intricate work and larger brushes for filling in larger areas. And don't be afraid to experiment with different painting techniques, like dry brushing, stippling, or even splattering.
- Tip 1: Use a sealant after painting to make your art last longer.
- Tip 2: Sketch your design on the pumpkin before painting.
- Tip 3: Use a variety of brushes for different effects.
Themed Pumpkins: Embrace Your Inner Nerd
let's get real, the coolest pumpkins are the ones that show off your personality. Are you a die-hard Star Wars fan? Carve or paint a Darth Vader pumpkin! Obsessed with Harry Potter? A Hogwarts crest would look amazing. Themed pumpkins are a fantastic way to showcase your interests and create a truly unique Halloween display. Think video game characters, favorite book covers, or even abstract designs inspired by your favorite artists.
The key to a successful themed pumpkin is to choose a design that you're passionate about and that you can execute well. Don't try to tackle something too complicated if you're a beginner. Start with a simpler design and gradually work your way up to more challenging projects. And remember, the most important thing is to have fun and let your creativity shine!
Theme | Design Ideas |
|---|---|
Video Games | Pac-Man, Minecraft Creeper, Legend of Zelda Triforce |
Movies | Star Wars characters, Disney villains, Horror movie icons |
Books | Book covers, Character portraits, Abstract designs |
Spooktacular Creations Await: Embrace Cool & Easy Pumpkin Carving!
So, there you have it – a treasure trove of cool but easy pumpkin carving ideas to transform your Halloween from drab to fab. Whether you opt for a classic spooky face, a no-carve masterpiece, or a stencil-guided design, the most important thing is to have fun and let your creativity shine. Grab your pumpkins, gather your tools (or not!), and get ready to create some unforgettable Halloween memories. Don't forget to share your spooky creations with us – we can't wait to see what you come up with!