Table of Contents
Halloween is creeping closer, and what better way to celebrate than with a jack-o'-lantern that truly captures the spirit of the season? Forget friendly smiles and goofy grins; this year, it's all about embracing the eerie with the best scary pumpkin carving ideas. Whether you're a seasoned pro with a full arsenal of carving tools or a beginner just dipping your toes into the pumpkin patch, we've got inspiration to make your porch the most haunted on the block.
Level Up Your Halloween: Scary Pumpkin Carving Ideas for All Skill Levels
Level Up Your Halloween: Scary Pumpkin Carving Ideas for All Skill Levels
#1: Beginner-Friendly Frights: Simple Shapes, Big Impact
So, you're new to the pumpkin carving game? No sweat! You can still create a seriously spooky jack-o'-lantern without needing to be a master artist. The key is to focus on simple shapes and bold designs. Think jagged teeth, wide, menacing eyes, and maybe a crooked nose. Stencils are your best friend here. You can find tons of free, printable stencils online that offer a variety of scary faces. Trace the stencil onto your pumpkin, and then carefully carve along the lines.
Don't underestimate the power of negative space! Sometimes, what you don't carve is just as important as what you do. Try carving out large, dark areas around the eyes or mouth to create a more intense and shadowy effect. Imperfection is your friend too! A slightly wobbly line or a jagged edge can actually add to the creepy charm of your pumpkin.
#2: Intermediate Terrors: Adding Depth and Dimension
Ready to take your carving skills to the next level? It's time to start experimenting with depth and dimension. Instead of just cutting all the way through the pumpkin skin, try varying the depth of your cuts to create a more three-dimensional effect. For example, you can shave away the outer layer of the pumpkin to create a lighter, more translucent area, while leaving other areas fully carved for a darker, more pronounced effect. This technique is perfect for creating shadows and highlights, adding a sense of realism to your scary design.
Consider using specialized carving tools, like gouges and saws, to achieve more precise and intricate details. These tools will allow you to create finer lines, smoother curves, and more complex shapes. Don't be afraid to experiment with different textures too! You can use a rasp or sandpaper to create a rough, weathered look, or use a clay sculpting tool to add fine details and textures to your design.
Skill Level | Techniques | Tools |
|---|---|---|
Beginner | Simple shapes, stencils, negative space | Carving knife, scoop |
Intermediate | Varying depths, shading, texture | Gouges, saws, rasps |
#3: Advanced Nightmares: 3D Carving and Beyond
For the truly dedicated carvers out there, 3D pumpkin carving is the ultimate challenge. This technique involves sculpting the pumpkin into a three-dimensional shape, creating a truly stunning and realistic effect. 3D carving requires a lot of patience, skill, and the right tools, but the results are well worth the effort. Think about carving a zombie emerging from the pumpkin, a grotesque monster with bulging eyes, or a realistic skull with intricate details.
Beyond 3D carving, you can also experiment with other advanced techniques, like using power tools to create intricate designs, adding special effects like lighting and sound, or even incorporating other materials into your carving. The possibilities are endless! The most important thing is to let your imagination run wild and push the boundaries of what's possible with pumpkin carving.
Remember, safety first! Always use caution when working with sharp tools, and wear gloves to protect your hands. And most importantly, have fun! Scary pumpkin carving is a great way to express your creativity and get into the Halloween spirit. So, grab a pumpkin, gather your tools, and prepare to unleash your inner artist!
From Ghoulish Grins to SpineChilling Scenes: Mastering Scary Pumpkin Carving
From Ghoulish Grins to SpineChilling Scenes: Mastering Scary Pumpkin Carving
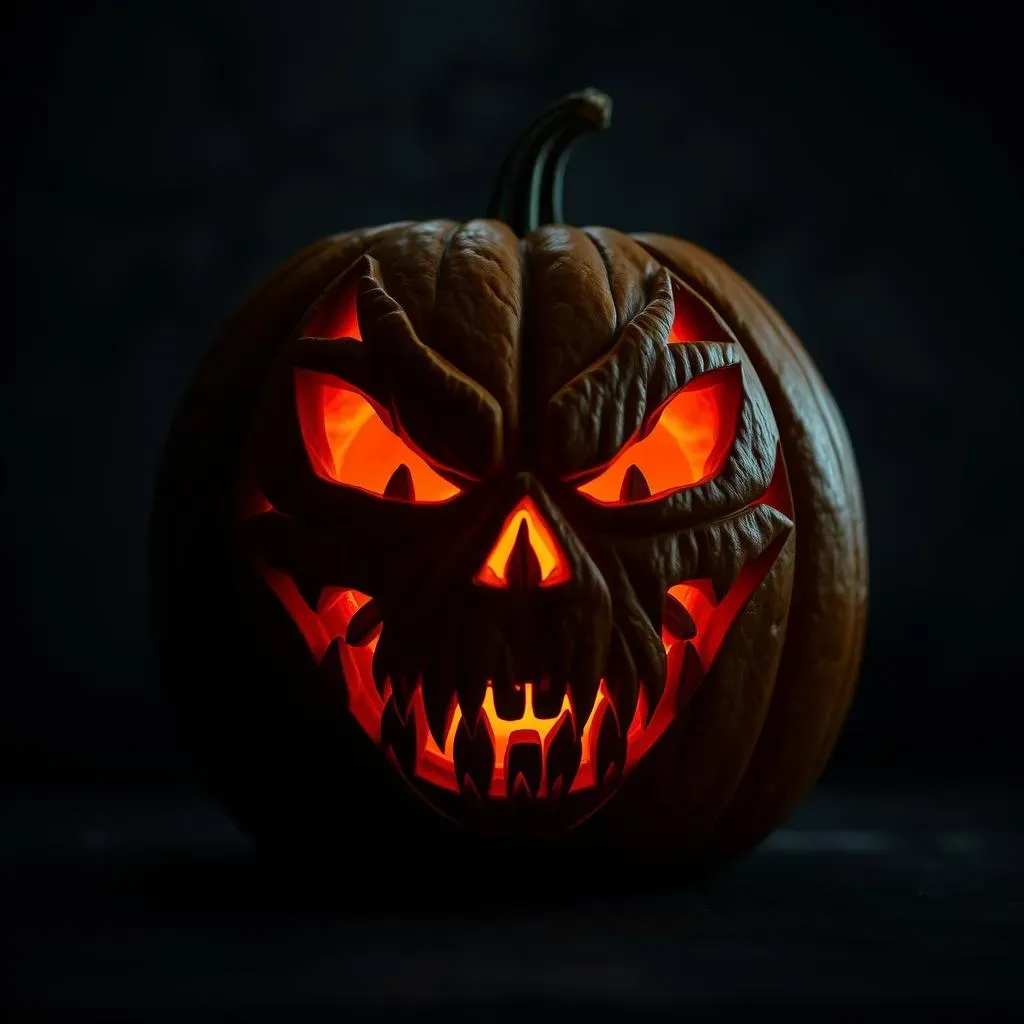
#1: The Anatomy of a Scary Face: Eyes, Mouth, and More
Alright, so you've got your pumpkin and your tools, now it's time to think about the face you want to create. When it comes to scary pumpkins, it's all about exaggerating features and playing with negative space. Let's start with the eyes. Forget those cute, round eyes – we're going for menacing! Think sharp angles, deep-set sockets, and maybe even a hint of crazy. Triangles and jagged shapes work wonders here. Consider carving out the entire eye socket and placing a flickering LED candle inside for an extra eerie glow.
Next up, the mouth. This is where you can really unleash your creativity. A wide, toothy grin is a classic, but don't be afraid to get experimental. Try carving out a gaping maw filled with jagged, uneven teeth. Or, go for a more subtle, sinister smile with thin, downturned lips. The key is to make it unsettling. And don't forget the nose! A crooked, bulbous nose can add a touch of grotesque humor to your scary pumpkin.
#2: Stencils vs. Freehand: Finding Your Comfort Zone
So, stencil or freehand? That is the question! Both approaches have their pros and cons, and the best choice for you will depend on your skill level and confidence. Stencils are a great option for beginners, as they provide a clear guide to follow. You can find tons of free stencils online, ranging from simple scary faces to more complex designs. Just print out your chosen stencil, tape it to your pumpkin, and trace the design with a poking tool or marker. Then, carefully carve along the lines.
On the other hand, freehand carving allows for more creativity and flexibility. If you're feeling confident, you can sketch your design directly onto the pumpkin and carve away. This approach allows you to customize your design and add your own personal touch. However, it also requires a bit more skill and experience. If you're new to freehand carving, start with a simple design and gradually work your way up to more complex creations.
Approach | Pros | Cons |
|---|---|---|
Stencils | Easy to use, provides a clear guide, great for beginners | Can be limiting, less creative freedom |
Freehand | More creative freedom, allows for customization, unique results | Requires more skill and experience, can be challenging for beginners |
#3: Lighting is Key: Bringing Your Creation to Life
Once you've carved your scary masterpiece, it's time to bring it to life with some spooky lighting. A traditional candle is always a good option, but be careful! Never leave a lit candle unattended, and make sure to place your pumpkin in a safe location away from flammable materials. For a safer and more convenient option, consider using LED candles or string lights. These come in a variety of colors and styles, allowing you to create a truly unique and eerie effect.
Experiment with different lighting techniques to see what works best for your design. Try placing a light inside the pumpkin and shining it outwards, or use an external light source to cast dramatic shadows. You can even use colored gels or filters to create a spooky atmosphere. The key is to play around and see what looks the most terrifying!
Tools and Tips for the Best Scary Pumpkin Carving: A StepbyStep Guide
Tools and Tips for the Best Scary Pumpkin Carving: A StepbyStep Guide
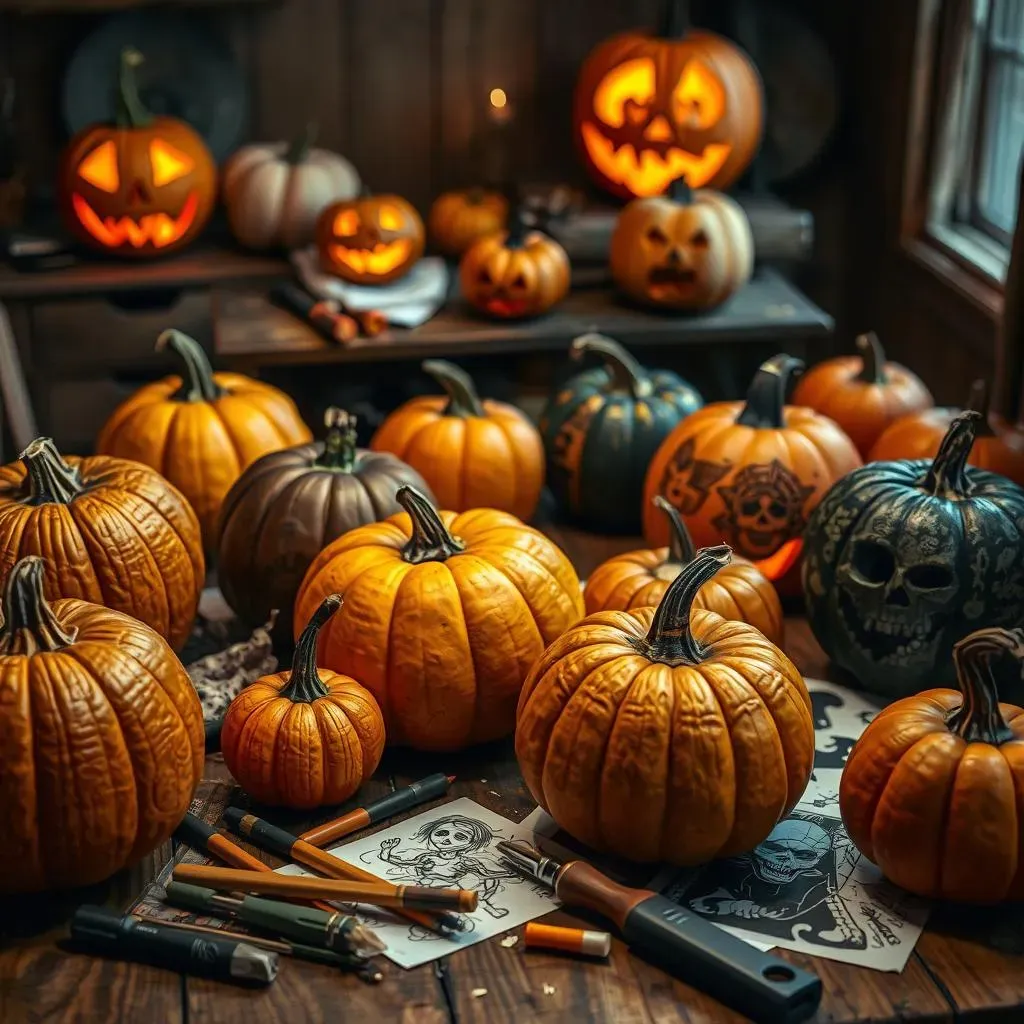
#1: Gathering Your Arsenal: Essential Carving Tools
Before you even think about plunging a knife into that pumpkin, you need to make sure you've got the right tools for the job. Forget that flimsy plastic knife that comes with the supermarket carving kit. We're going pro! A good carving kit should include a variety of saws, gouges, and knives, each designed for a specific purpose. A small, serrated saw is perfect for cutting out large sections of the pumpkin, while a set of gouges will allow you to create intricate details and textures. A sturdy carving knife is essential for making precise cuts and cleaning up edges.
Beyond the basic carving tools, there are a few other items that you'll find helpful. A scoop is essential for removing the pumpkin's guts and seeds. A poking tool or marker is useful for transferring stencils onto the pumpkin. And a damp cloth is great for wiping away excess pumpkin pulp and keeping your tools clean. Don't forget a good light source! You'll need plenty of light to see what you're doing, especially when working on intricate designs. A headlamp or adjustable work light is ideal.
#2: Pumpkin Prep 101: Selecting and Cleaning Your Canvas
Not all pumpkins are created equal! When selecting a pumpkin for carving, look for one that is firm, heavy for its size, and has a smooth, unblemished surface. Avoid pumpkins with soft spots, bruises, or cracks. The stem should be green and firmly attached. The shape of the pumpkin is also important. A round, symmetrical pumpkin is generally easier to carve than an oblong or asymmetrical one.
Once you've selected your pumpkin, it's time to clean it. Use a damp cloth to wipe away any dirt or debris. Then, cut a hole in the top or bottom of the pumpkin. The top is more traditional, but cutting a hole in the bottom can make it easier to place the pumpkin over a light source later on. Make sure the hole is large enough to fit your hand and carving tools inside. Now, it's time to scoop out the guts and seeds. Use a sturdy scoop to scrape the inside of the pumpkin clean. Remove as much of the stringy pulp as possible, as this can attract bacteria and cause the pumpkin to rot faster.
Step | Description |
|---|---|
1 | Select a firm, heavy pumpkin with a smooth surface. |
2 | Cut a hole in the top or bottom of the pumpkin. |
3 | Scoop out the guts and seeds, removing as much pulp as possible. |
#3: Carving Techniques: From Basic Cuts to Shading
Now for the fun part: carving! If you're using a stencil, tape it to your pumpkin and use a poking tool or marker to transfer the design. Then, carefully begin carving along the lines. Start with the smallest and most intricate details first, working your way up to the larger sections. Use a sawing motion to cut through the pumpkin skin, keeping the blade perpendicular to the surface. Avoid applying too much pressure, as this can cause the pumpkin to crack or break.
For more advanced carving, try experimenting with shading. This involves varying the depth of your cuts to create different levels of light and shadow. Use a gouge to shave away the outer layer of the pumpkin skin, creating a lighter, more translucent area. Leave other areas fully carved for a darker, more pronounced effect. You can also use a rasp or sandpaper to create texture and add depth to your design.
Remember to take your time and be patient. Carving a pumpkin can be a challenging but rewarding experience. Don't be afraid to make mistakes – they can often add to the charm of your scary creation!
Beyond the Basic JackO'Lantern: Creative and Unique Scary Pumpkin Carving Ideas
Beyond the Basic JackO'Lantern: Creative and Unique Scary Pumpkin Carving Ideas
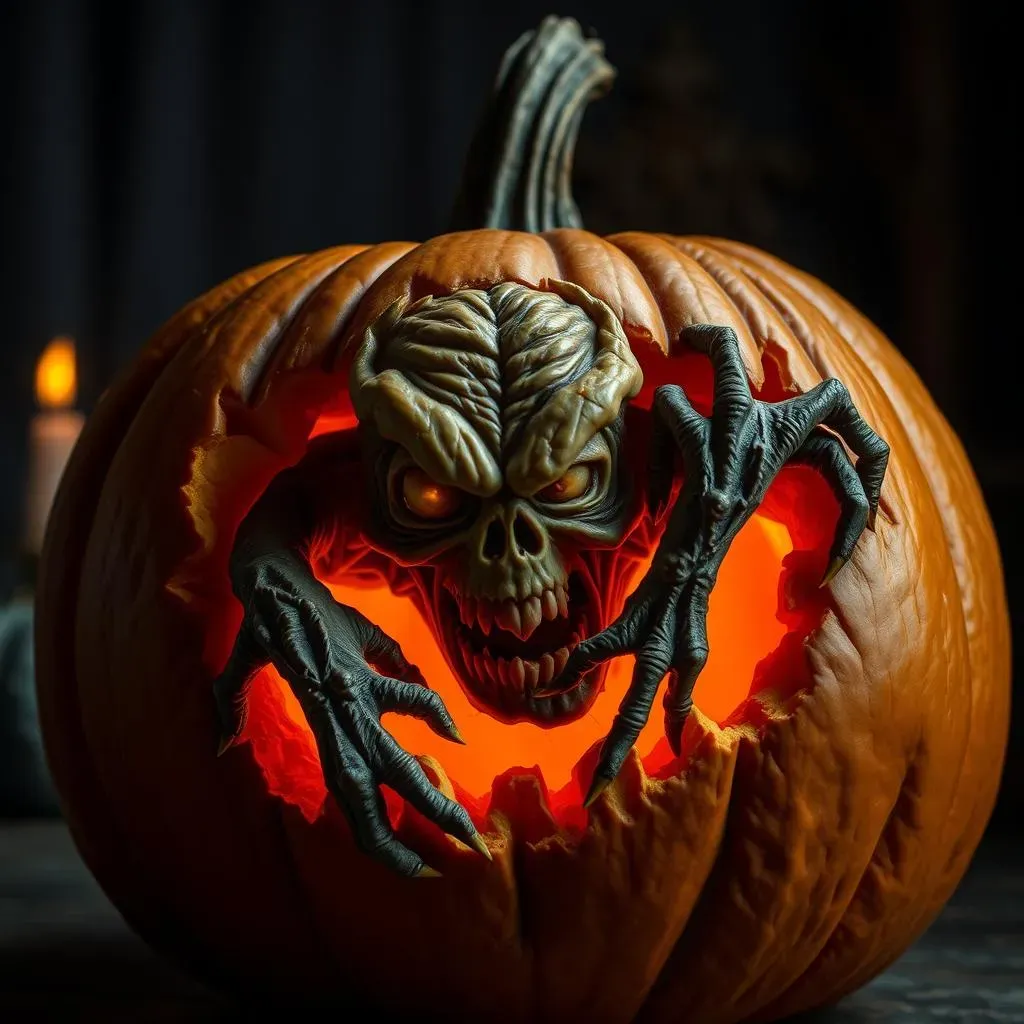
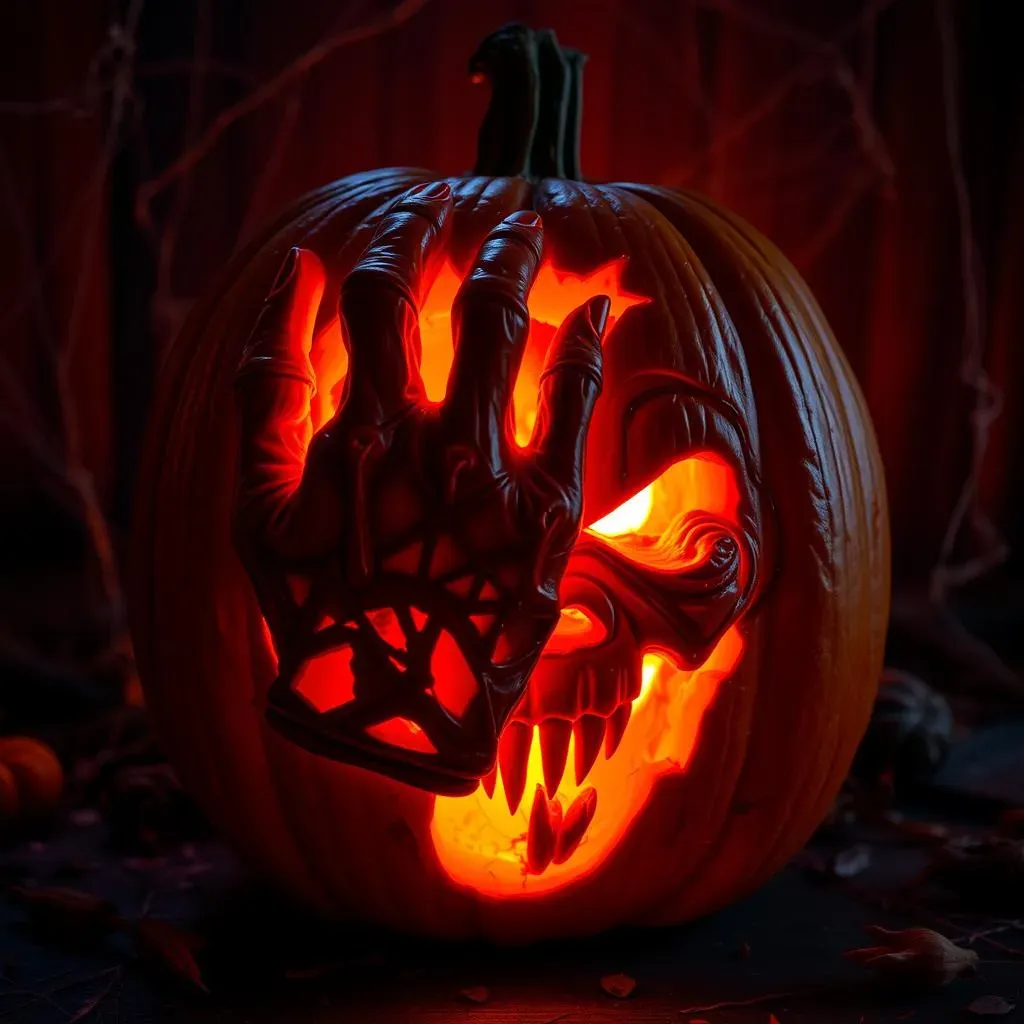
#1: Movie Monster Mashups: Carving Your Favorite Fiends
Forget the generic ghost face – let's get specific! Why not pay homage to your favorite horror movie monsters? Think Freddy Krueger's razor-gloved hand bursting from the pumpkin, Pennywise's sinister grin, or even a Xenomorph emerging from its egg. The key here is detail. Use reference photos to capture the essence of the character, paying close attention to their unique features. Don't be afraid to get gory! A little fake blood or some strategically placed cobwebs can really amp up the scare factor.
Consider the lighting too. For a Freddy Krueger pumpkin, use a red light to mimic the glow of the boiler room. For Pennywise, try a flickering white light to create a sense of unease. You can even incorporate sound effects! A small, battery-operated speaker playing creepy music or sound effects can really bring your movie monster pumpkin to life.
#2: Storytelling Pumpkins: Carving a Scene
Instead of just carving a face, why not carve an entire scene? Think about a spooky graveyard with tombstones and skeletal figures, a haunted house with bats flying overhead, or even a creepy forest with gnarled trees and lurking creatures. This approach requires a bit more planning and skill, but the results can be truly stunning. Start by sketching out your scene on paper, then transfer the design onto your pumpkin. Use different carving techniques to create depth and dimension, and don't be afraid to add props! Small plastic spiders, cobwebs, and even miniature tombstones can really enhance your storytelling pumpkin.
Consider the narrative you want to convey. Are you telling a tale of terror, or a more whimsical story with a spooky twist? The details you include will help to set the tone and create a more immersive experience for your viewers. Remember, it's all about the story!
Idea | Description | Extra Touches |
|---|---|---|
Graveyard Scene | Tombstones, skeletal figures, gnarled trees | Miniature tombstones, fake moss, glowing eyes |
Haunted House | Bats, crooked windows, eerie glow | Cobwebs, flickering lights, spooky sound effects |
#3: Abstract Horror: Geometric Shapes and Twisted Designs
If you're looking for something truly unique and unsettling, try experimenting with abstract horror. Instead of carving a recognizable face or scene, focus on creating a design that is both visually striking and deeply unsettling. Think geometric shapes, twisted lines, and chaotic patterns. The key here is to create a sense of unease and disorientation. Use sharp angles and jagged edges to create a sense of danger, and play with negative space to create a sense of mystery.
Consider using different carving depths to create a sense of depth and dimension. Shave away the outer layer of the pumpkin skin to create lighter areas, and leave other areas fully carved for darker, more pronounced effects. You can also experiment with different textures to add visual interest. Use a rasp or sandpaper to create a rough, weathered look, or use a clay sculpting tool to add fine details and textures to your design. The goal is to create a pumpkin that is both beautiful and terrifying, a true work of art.
Unleash Your Inner Ghoul: Mastering Scary Pumpkin Carving for a Haunting Halloween
So, there you have it – a treasure trove of inspiration and practical tips to help you conjure up the best scary pumpkin carving ideas this Halloween. From selecting the perfect gourd to mastering intricate carving techniques, you're now armed with the knowledge to transform an ordinary pumpkin into a terrifying masterpiece. Whether you opt for a classic ghoulish grin, a spine-chilling scene, or a unique monstrous creation, remember that the most important ingredient is your imagination. Embrace the eerie, unleash your inner ghoul, and let your creativity run wild. Happy carving, and may your Halloween be filled with frights, delights, and the satisfaction of creating a truly unforgettable spooky spectacle!