Table of Contents
Halloween is creeping closer, and what better way to celebrate the spooky season than with a Jack-o'-lantern that truly screams? Forget the friendly smiles and goofy grins; this year, we're diving headfirst into the realm of the frighteningly fantastic with the best pumpkin carving ideas scary enough to make your neighbors jump. Are you tired of the same old triangle eyes and toothy smile? Do you crave a pumpkin that embodies the true spirit of Halloween horror? Then you've come to the right place. This guide isn't just a collection of patterns; it's your roadmap to pumpkin-carving mastery. We'll explore techniques for creating truly terrifying textures, from gruesome gashes to menacing mouths. We'll delve into unique design ideas that go beyond the basic ghost, and equip you with the essential tools to bring your vision to life. So, grab your carving kit, unleash your inner artist, and prepare to transform ordinary pumpkins into extraordinary emblems of All Hallows' Eve. Get ready to discover the best pumpkin carving ideas scary enough to haunt your dreams!
Level Up Your JackO'Lantern Game: Scary Pumpkin Carving Ideas
Level Up Your JackO'Lantern Game: Scary Pumpkin Carving Ideas
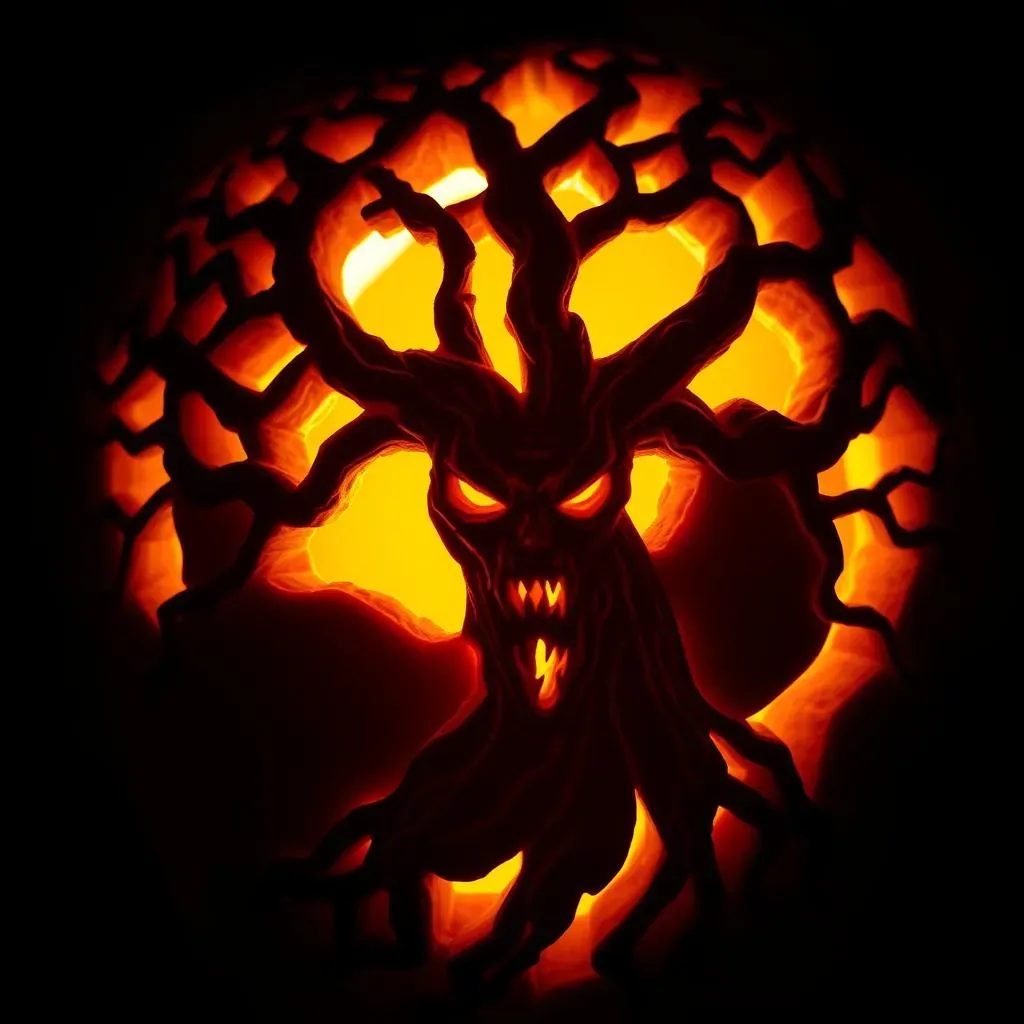
So, you're ready to ditch the cutesy pumpkins and embrace the eerie? Awesome! Leveling up your Jack-o'-lantern game is all about stepping outside the box and thinking beyond basic shapes. It's about transforming a simple gourd into a canvas for your darkest imaginings. Think about what truly scares you. Is it spiders? Clowns? Maybe a creepy, gnarled tree with menacing branches? Whatever it is, let that be your inspiration. We're not just carving pumpkins; we're crafting miniature masterpieces of horror. To truly level up your scary pumpkin carving ideas, consider the overall composition. What story do you want your pumpkin to tell? Is it a lurking monster peering out from the shadows? A zombie bursting from its grave? Start with a sketch, plan your attack, and get ready to unleash your inner ghoul!
From Ghoulish Grins to Terrifying Textures: Mastering Scary Pumpkin Carving
From Ghoulish Grins to Terrifying Textures: Mastering Scary Pumpkin Carving
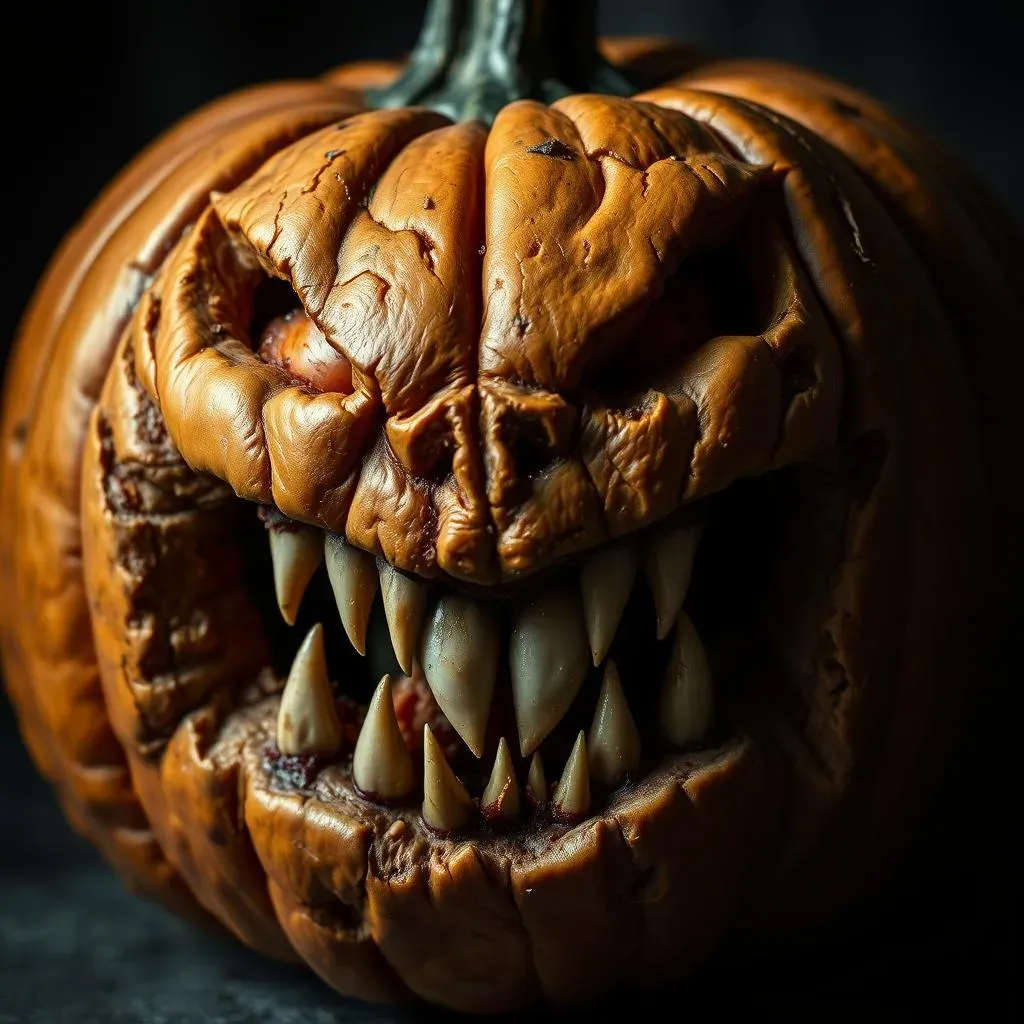
Alright, so you're ready to move beyond basic shapes and really nail that scary vibe? It's all about the details! Forget simple smiles; we're talking about ghoulish grins that send shivers down spines. Think jagged teeth, asymmetrical sneers, and unsettling downturned mouths. And don't stop there! Textures are key to elevating your scary pumpkin carving. A smooth, perfectly carved pumpkin is boring. We want gnarls, warts, scars – anything that adds a layer of grotesque realism. Experiment with different carving depths to create shadows and highlights that accentuate these textures. Use tools like gouges and loops to create deep crevices and rough surfaces. The more unsettling the texture, the scarier the pumpkin!
Want to add some extra creepiness? Try incorporating elements like exposed bone, rotting flesh, or even creepy crawlies into your design. These details will take your pumpkin from mildly spooky to truly terrifying. Mastering scary pumpkin carving is about embracing the macabre and pushing the boundaries of your creativity. Don't be afraid to experiment with different techniques and textures until you achieve the desired level of fright. Remember, the goal is to create a pumpkin that's so scary, it'll make the trick-or-treaters think twice before ringing your doorbell!
Here's a quick rundown on how to make those terrifying textures pop:
- Etching: Use a linoleum cutter or wood carving tool to remove the pumpkin skin, revealing the lighter flesh underneath. This is great for creating subtle details like wrinkles or scars.
- Gouging: Use a V-gouge or U-gouge to carve deep channels into the pumpkin. This is perfect for creating deep crevices and gashes.
- Stippling: Use a small, pointed tool to create a series of small dots on the pumpkin's surface. This will create a rough, textured look.
- Layering: Combine different carving depths and textures to create a multi-dimensional effect.
Also, consider the lighting! A strategically placed candle or LED light can enhance the shadows and highlights, making your scary pumpkin carving even more terrifying. Play around with different lighting angles to see what works best for your design.
Tools of Terror: Essential Gear for the Best Pumpkin Carving Scary Designs
Tools of Terror: Essential Gear for the Best Pumpkin Carving Scary Designs
The Starter Kit: Essential Pumpkin Carving Basics
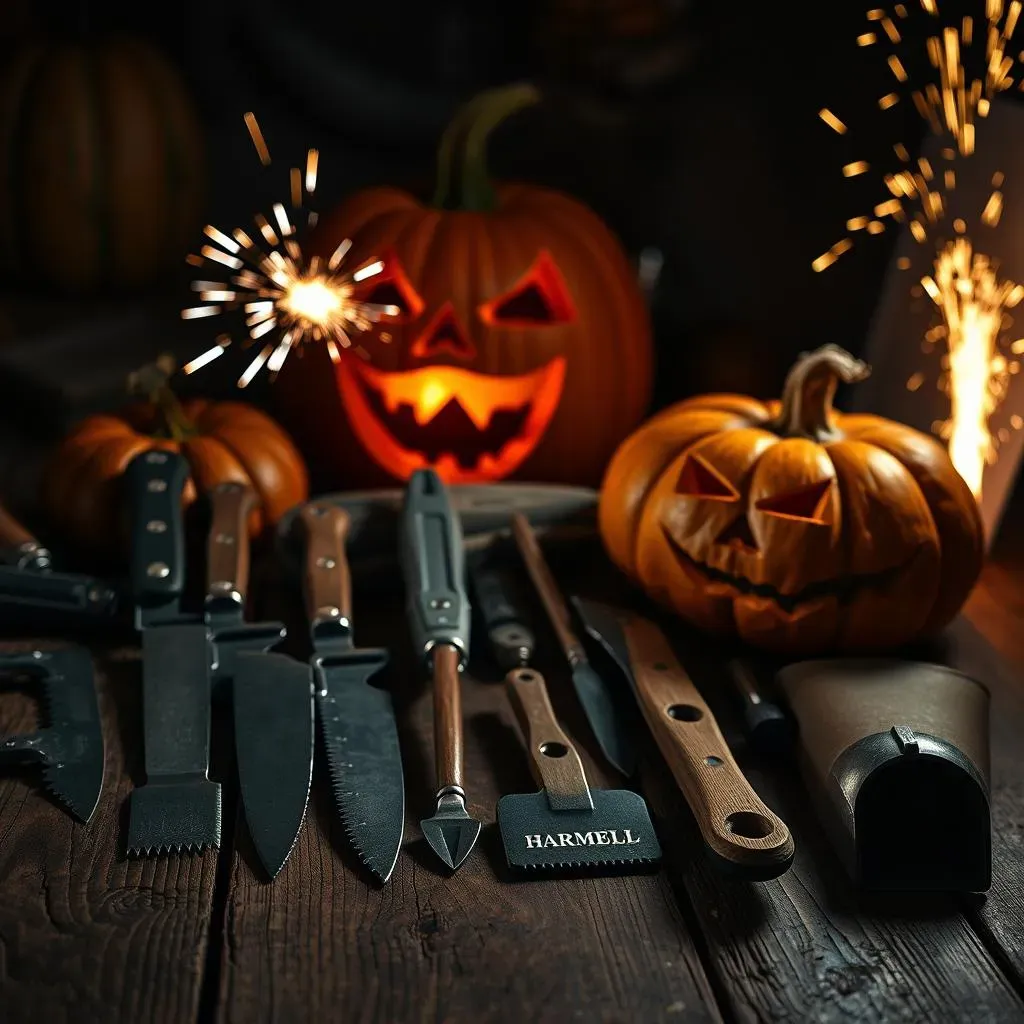
Alright, let's talk tools. You can't create a masterpiece of horror with just any old knife. You need the right equipment to bring your scary pumpkin carving ideas to life. First up, the essentials: a good carving knife, a scoop, and some stencils (if you're not feeling completely freehand). A serrated knife works well for sawing through the thick pumpkin skin, while smaller, more precise knives are perfect for detailing. Don't underestimate the importance of a sturdy scoop! You'll need it to gut the pumpkin and scrape the walls clean. Trust me, you don't want to skip this step – a clean pumpkin is a happy pumpkin (and easier to carve!).
When it comes to stencils, you can find tons of free templates online. Or, if you're feeling artistic, create your own! Just remember to keep it simple at first. Complex designs can be tricky to execute, especially when you're just starting out. Also, think about safety. Carving pumpkins can be dangerous, especially for kids. Always supervise children and make sure they're using age-appropriate tools. A dull knife is more dangerous than a sharp one, so keep your blades sharp and be careful!
Here are some essential tools for pumpkin carving:
- Serrated Knife: For cutting the lid and sawing through thick skin.
- Detail Knives: For carving intricate designs and textures.
- Scoop: For removing the pumpkin guts.
- Stencils: For transferring designs onto the pumpkin.
- Pencil or Marker: For tracing stencils or drawing freehand designs.
Beyond the Basics: Advanced Carving Arsenal
Ready to take your scary pumpkin carving to the next level? It's time to upgrade your arsenal with some advanced tools. We're talking about specialized carving kits with gouges, saws, and etching tools. These tools allow you to create more complex designs and textures, adding depth and realism to your scary pumpkins. A good set of gouges will let you carve deep channels and create dramatic shadows. Saws are great for cutting out intricate shapes, and etching tools are perfect for adding fine details like wrinkles or scars. But remember, with great power comes great responsibility. These tools are sharp, so handle them with care!
Another essential tool for advanced carving is a Dremel or rotary tool. These power tools can be used to carve, sand, and polish your pumpkin, creating incredibly detailed and realistic designs. However, they also require a bit of practice to master. Start with a low speed and use a light touch. It's always better to remove too little material than too much. And always wear safety glasses when using power tools!
Think about the effect you want to achieve. Do you want a smooth, polished finish? Or a rough, textured look? The right tools will help you achieve your desired effect. Don't be afraid to experiment with different tools and techniques until you find what works best for you. Also, consider investing in a good carving surface. A stable, non-slip surface will make carving easier and safer.
Here's a quick comparison of advanced carving tools:
Tool | Best For | Skill Level |
|---|---|---|
Gouges | Deep channels, dramatic shadows | Intermediate |
Saws | Intricate shapes, detailed cuts | Intermediate |
Etching Tools | Fine details, textures | Intermediate |
Dremel/Rotary Tool | Detailed carving, sanding, polishing | Advanced |
Safety First: Protecting Yourself from Pumpkin Peril
let's get real. Carving pumpkins can be fun, but it can also be dangerous if you're not careful. Safety should always be your top priority, especially if you're carving with kids. First and foremost, make sure you have a well-lit workspace. It's hard to carve accurately when you can't see what you're doing. Also, use a stable carving surface to prevent the pumpkin from slipping. And never, ever carve with a dull knife. A sharp knife is actually safer because it requires less force to cut through the pumpkin.
When using sharp tools, always cut away from yourself. And if you're working with kids, make sure they're using age-appropriate tools and are supervised at all times. Consider using pumpkin carving kits designed for kids, which typically include safer, less sharp tools. Another important safety tip is to take breaks. Carving pumpkins can be tiring, and it's easy to lose focus when you're tired. So, take a break every 30 minutes or so to stretch your hands and clear your head.
And finally, don't forget to protect your hands! Consider wearing gloves to prevent cuts and scrapes. Gardening gloves or disposable gloves work well. Remember, a safe carver is a happy carver! By following these safety tips, you can enjoy the fun of scary pumpkin carving without any unnecessary injuries.
Beyond the Basic Boo: Unique Scary Pumpkin Carving Ideas for Halloween
Beyond the Basic Boo: Unique Scary Pumpkin Carving Ideas for Halloween
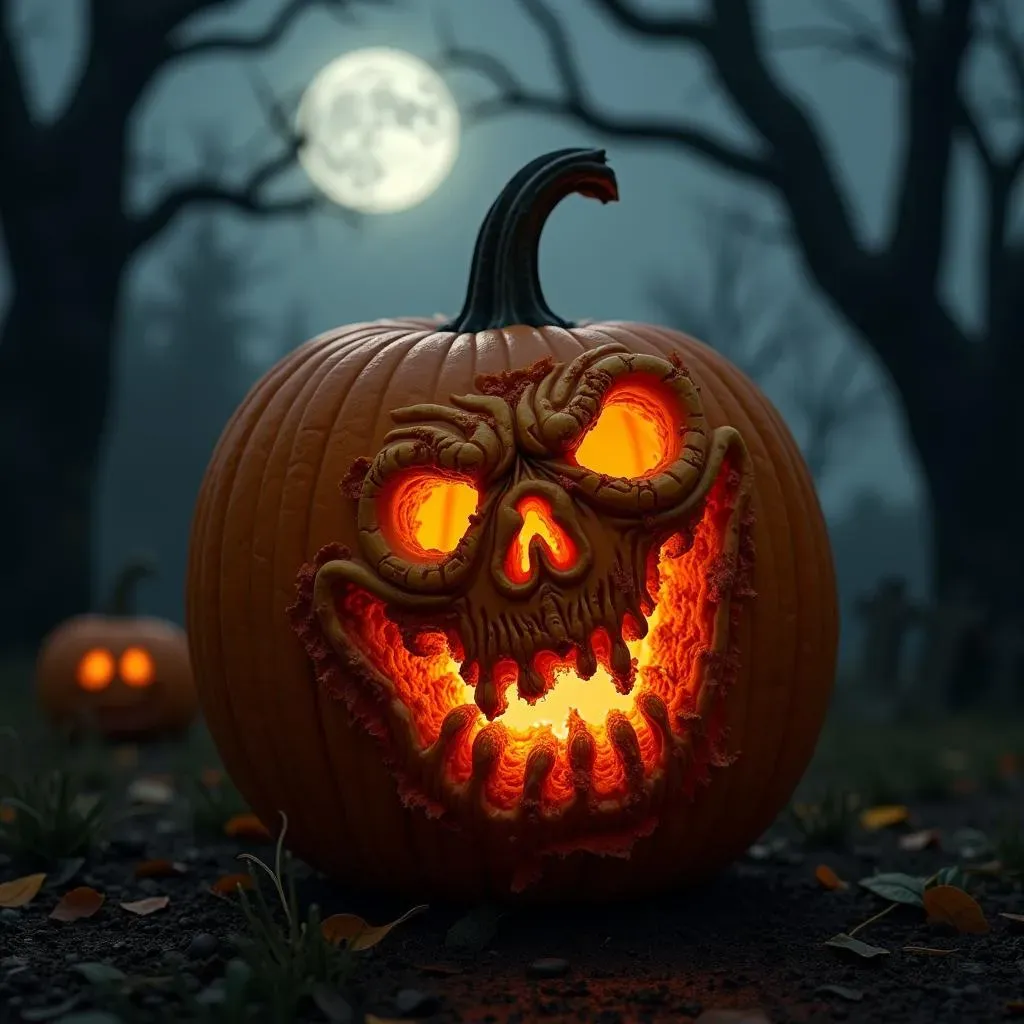
let's ditch the generic ghosts and grinning ghouls! If you're truly aiming for a spine-chilling spectacle this Halloween, it's time to explore some unique scary pumpkin carving ideas that go way beyond the basic "boo." Think outside the typical jack-o'-lantern template. How about a pumpkin carved to resemble a creepy, crawling spider, complete with spindly legs made from twigs? Or a grotesque zombie head, with rotting flesh meticulously etched into the surface? The possibilities are endless! Don't limit yourself to traditional Halloween monsters either. Draw inspiration from horror movies, urban legends, or even your own nightmares. The more original and unsettling your design, the more impactful it will be.
Consider incorporating elements of optical illusion to really mess with people's minds. Carve a design that appears to be three-dimensional, or create a pumpkin that seems to be staring directly at anyone who passes by. These subtle details can add a whole new level of creepiness to your creation. To get those creative juices flowing, start by brainstorming a list of things that genuinely scare you. Is it clowns? Dolls? Abandoned buildings? Once you have a list, start sketching out some ideas for how you can translate those fears into pumpkin form. And don't be afraid to experiment with different carving techniques and materials. You can use everything from power tools to kitchen utensils to achieve the desired effect.
Here are a few ideas to get you started:
- Cthulhu Pumpkin: Carve the iconic monster from H.P. Lovecraft's stories.
- Spiderweb Pumpkin: Create a intricate spiderweb design with a creepy spider lurking in the center.
- Screaming Skull Pumpkin: Carve a realistic skull with a gaping mouth and tormented expression.
- Evil Clown Pumpkin: Put a terrifying twist on the classic circus clown.
- Haunted House Pumpkin: Carve a miniature haunted house scene into your pumpkin.
Remember, the goal is to create a pumpkin that's both visually stunning and deeply unsettling. So, let your imagination run wild, and prepare to unleash a pumpkin carving masterpiece that will haunt the neighborhood for years to come!
Light Up the Night: Displaying Your Best Pumpkin Carving Scary Masterpieces
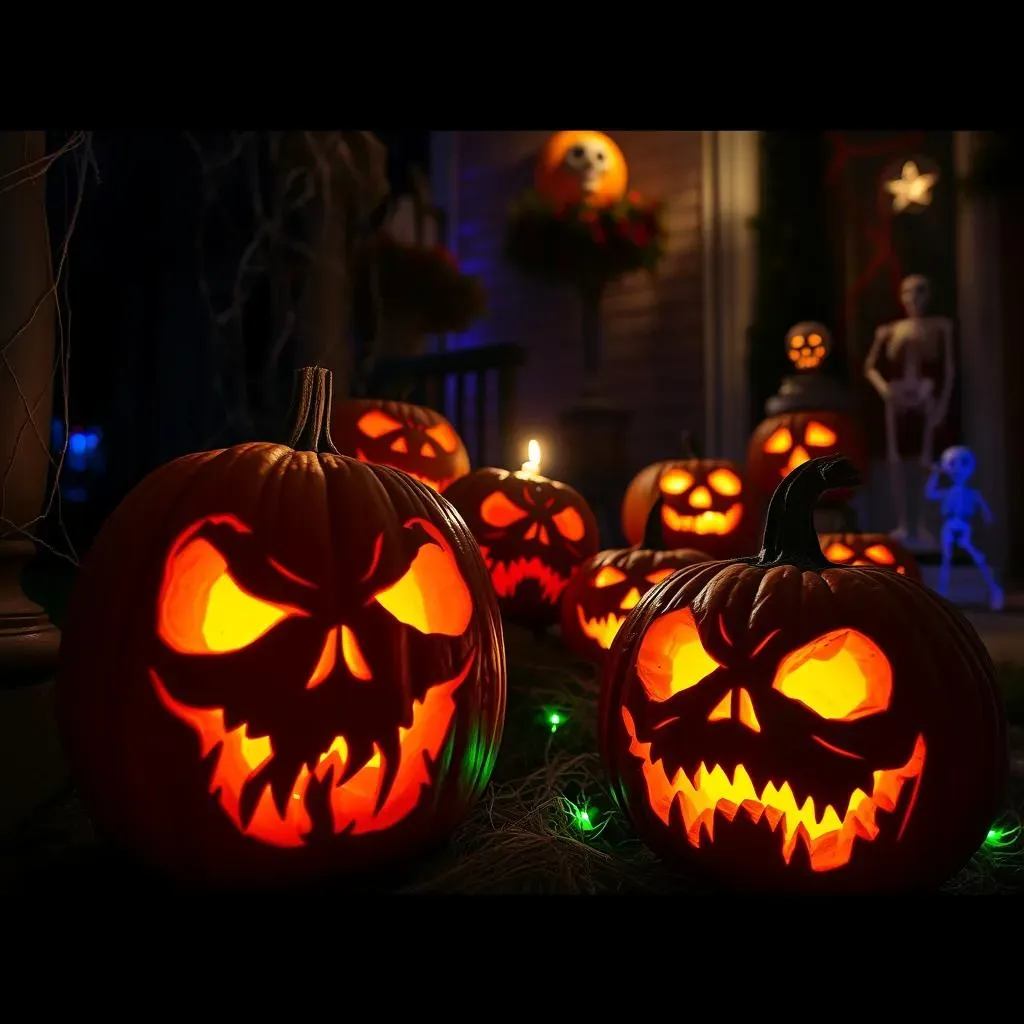
Light Up the Night: Displaying Your Best Pumpkin Carving Scary Masterpieces
Setting the Stage: Location, Location, Location
Alright, you've poured your heart and soul (and maybe a little pumpkin guts) into creating the best pumpkin carving scary masterpiece the world has ever seen. But what's the point of all that effort if nobody can appreciate your spooky creation? That's where display comes in! The first step is choosing the right location. Think about where your pumpkin will have the most impact. A well-lit porch is always a classic choice, but don't be afraid to get creative. Consider placing your pumpkin near a walkway or driveway, so it's visible to trick-or-treaters and passersby. Or, if you're feeling ambitious, create an entire Halloween display, complete with cobwebs, skeletons, and other spooky props.
Also, think about the backdrop. A plain wall can be a bit boring, so try adding some texture or color. A dark-colored sheet or piece of fabric can create a dramatic effect, while some strategically placed branches or foliage can add a touch of natural creepiness. And don't forget about safety! Make sure your pumpkin is placed on a stable surface, away from flammable materials. You don't want your masterpiece to accidentally set your house on fire!
Here are some location ideas for displaying your scary pumpkin:
- Front Porch: A classic choice, visible to trick-or-treaters and neighbors.
- Walkway: Line your walkway with multiple pumpkins for a spooky entrance.
- Window: Place your pumpkin in a window for indoor and outdoor viewing.
- Garden: Incorporate your pumpkin into your existing Halloween decorations.
- Halloween Party: Use your pumpkin as a centerpiece for your Halloween party.
The Art of Illumination: Candles vs. LEDs
Now that you've chosen the perfect location, it's time to light up the night! But what's the best way to illuminate your scary pumpkin carving? The age-old debate: candles versus LEDs. Candles offer a warm, flickering glow that can add a touch of authenticity to your display. However, they also pose a fire hazard and need to be monitored closely. LEDs, on the other hand, are much safer and can last for hours. They also come in a variety of colors, allowing you to create a unique and eye-catching effect. Ultimately, the choice is up to you, but I personally prefer LEDs for their safety and versatility. If you do choose to use candles, make sure they're placed in a sturdy candle holder and kept away from flammable materials. And never leave a lit candle unattended!
Want to add some extra flair to your lighting? Try using colored cellophane or gels to create a spooky ambiance. Red and orange are classic Halloween colors, but don't be afraid to experiment with other shades. You can also use spotlights to highlight specific features of your carving. A well-placed spotlight can accentuate the shadows and textures, making your pumpkin even more terrifying. And for the ultimate lighting effect, consider using a strobe light. A strobe light will create a flickering, disorienting effect that's sure to scare the pants off anyone who comes near your pumpkin!
Here's a quick comparison of candles and LEDs for pumpkin lighting:
Feature | Candles | LEDs |
|---|---|---|
Glow | Warm, flickering | Consistent, various colors |
Safety | Fire hazard, needs monitoring | Safe, long-lasting |
Versatility | Limited | Variety of colors and effects |
Protecting Your Masterpiece: Weatherproofing and Preservation
So, you've got your best pumpkin carving scary design perfectly lit and proudly displayed. But what happens when Mother Nature decides to throw a Halloween storm your way? Or when your pumpkin starts to rot and sag? Don't worry, there are ways to protect your masterpiece from the elements and prolong its lifespan. First, consider weatherproofing your pumpkin. A coat of clear acrylic spray can help protect it from rain and moisture. You can also try applying a layer of petroleum jelly to the carved surfaces to prevent them from drying out. And if you live in an area with high winds, make sure to secure your pumpkin to a stable surface to prevent it from blowing away.
To prevent your pumpkin from rotting, try applying a solution of bleach and water to the carved surfaces. This will kill any bacteria that are causing the pumpkin to decompose. You can also try storing your pumpkin in a cool, dry place when it's not on display. And finally, don't forget to check your pumpkin regularly for signs of decay. If you notice any soft spots or mold, remove them immediately to prevent the rot from spreading.
Here are some tips for preserving your scary pumpkin carving:
- Apply a coat of clear acrylic spray to protect from rain.
- Rub petroleum jelly on carved surfaces to prevent drying.
- Soak the pumpkin in a bleach and water solution to kill bacteria.
- Store the pumpkin in a cool, dry place when not on display.
- Check regularly for signs of decay and remove any soft spots or mold.
Embrace the Fright: Your Spooktacular Pumpkin Awaits
With a cauldron full of inspiration and a carving kit in hand, you're now ready to unleash your inner ghoul and create the scariest pumpkin on the block. Remember, the best pumpkin carving ideas scary designs aren't just about replicating a pattern; they're about channeling your creativity and embracing the spooky spirit of Halloween. Whether you choose a classic monster, a terrifying texture, or a unique, original design, your Jack-o'-lantern is sure to be a bone-chilling masterpiece. So go forth, carve boldly, and let your pumpkin's eerie glow light up the night!