Table of Contents
Ready to transform your pumpkin carving from simple jack-o'-lanterns to breathtaking works of art? This guide dives into the world of advanced pumpkin carving tools, equipping you with the knowledge and expertise to create truly stunning designs. Forget flimsy knives and basic scoops; we'll explore a range of specialized tools that unlock a new level of creativity and precision. Whether you're a seasoned carver looking to refine your technique or a beginner eager to tackle intricate patterns, this article will be your ultimate resource. We'll cover essential advanced pumpkin carving tools for intricate designs, demonstrating how to use these tools for various techniques. We'll also help you choose the right tools based on your skill level and budget, ensuring you make informed decisions. Finally, we'll provide essential tips for maintaining and caring for your advanced pumpkin carving tools, extending their lifespan and preserving their effectiveness. Prepare to elevate your Halloween celebrations with the power of advanced pumpkin carving tools – let's get carving!
Essential Advanced Pumpkin Carving Tools for Intricate Designs
Essential Advanced Pumpkin Carving Tools for Intricate Designs
Serrated Blades and Fine Detailing Tools
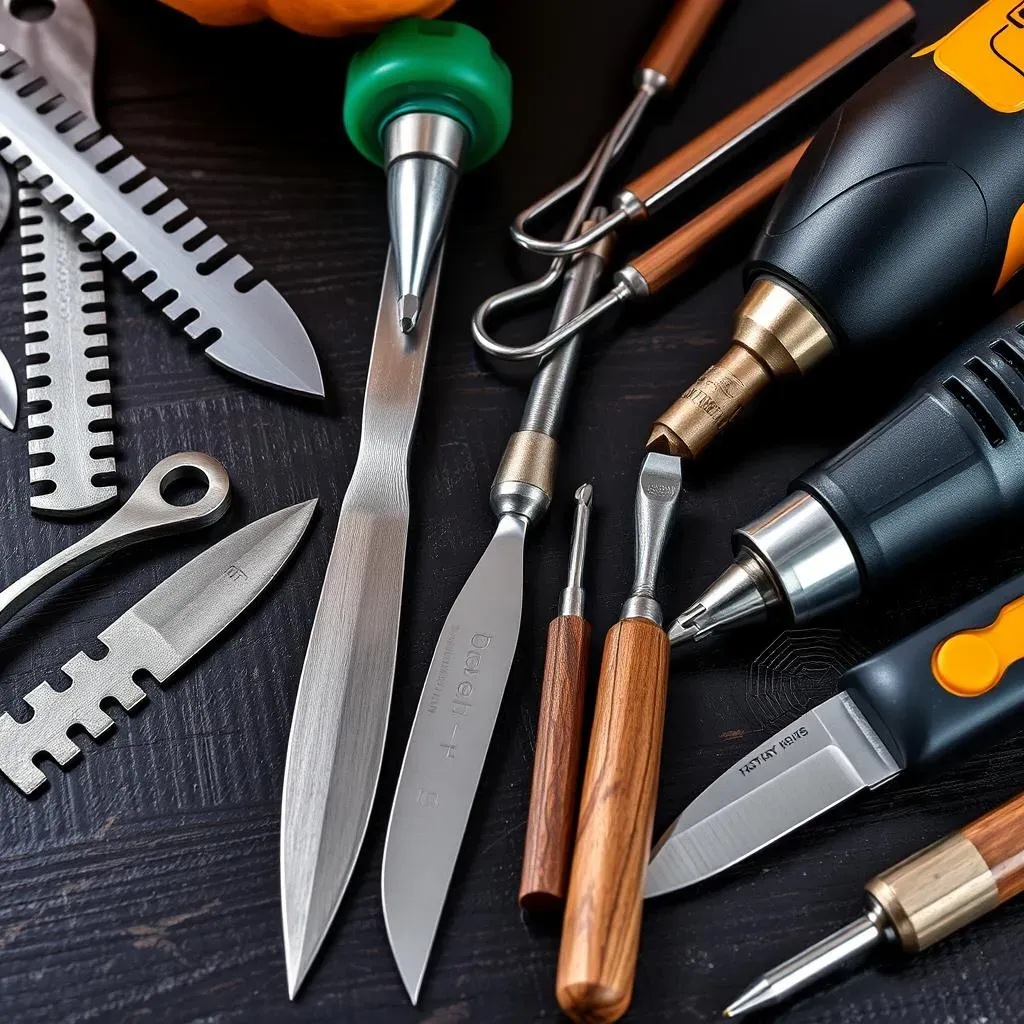
Let's start with the basics—but elevated! Forget those flimsy plastic knives from the supermarket. For intricate designs, you need sharp, durable serrated blades. These saws are your best friends for making clean, precise cuts through the tough pumpkin rind. Look for blades with varying tooth sizes; a smaller tooth count is ideal for smoother cuts, while larger teeth are better for quickly removing larger sections. A good quality saw will make all the difference, especially when you're working on detailed patterns. Consider adding a few different sizes to your toolkit for maximum versatility. This allows you to tackle both large areas and smaller, more delicate details with ease.
Beyond saws, consider adding specialized tools designed for fine detailing. These can include various gouges, chisels, and scrapers, each with unique shapes and sizes for different carving effects. A loop tool is excellent for removing pumpkin flesh quickly, especially when creating shading or depth in your design. For incredibly fine work, even dental picks or tiny wood carving tools can be incredibly useful. Remember, the right tools for the job make the job much easier! For more ideas on design, check out these intricate pumpkin carving patterns.
Tool Type | Purpose | Recommended Brands |
|---|---|---|
Serrated Blades | Cutting pumpkin rind | Various woodworking brands |
Loop Tools | Removing flesh, creating depth | Pumpkin carving kits |
Gouges/Chisels | Fine detail, shaping | Wood carving tool sets |
Power Tools for Precision and Efficiency
Now, let's talk power tools. While not strictly necessary for all projects, a Dremel or similar rotary tool can be a game-changer for achieving intricate details and consistent shading. The high-speed rotation allows for precise removal of pumpkin flesh, creating smooth curves, fine lines, and even three-dimensional effects that are simply impossible with hand tools alone. Different bits can create various effects, from fine etching to aggressive shaping. However, use caution! These tools can be powerful and easy to make mistakes with, so practice on a less important pumpkin first. A Dremel is a great tool for experienced carvers, but possibly too difficult for beginners.
Another fantastic power tool option is a small electric carving knife. These knives offer more control and precision than a hand-held knife, making them particularly useful for delicate work and detailed cuts. Their thin blades can create clean, sharp lines, ideal for transferring stencils or creating intricate patterns. They are easier to handle than a Dremel but still provide a significant boost in speed and efficiency. However, they still require some skill and practice, especially to maintain consistent depth and avoid accidental slips. For inspiration, check out these advanced Halloween pumpkin designs!
- Dremel rotary tool with various bits
- Electric carving knife
- Small electric drill (for creating holes)
Transferring Designs and Stencils
Even with the best tools, transferring your design accurately onto the pumpkin is crucial. While freehand carving has its appeal, stencils and transfer methods provide more control and precision, especially for complex designs. There are many ways to transfer patterns. You can use traditional tracing paper and a stylus, or even a pin to create tiny holes that guide your carving. For more complex designs, you might consider projector methods, which allow you to project your design directly onto the pumpkin's surface for easy tracing.
Regardless of your chosen method, ensure that your design is securely attached to the pumpkin before you start carving. This minimizes the risk of the stencil moving mid-cut and ruining your hard work. Take your time and double-check your work—it's better to be precise than to rush and make mistakes. Using a light box or a bright light behind the stencil can also help ensure that your pattern is clearly visible. For some tips on professional pumpkin carving, check out professional pumpkin carving tips.
Advanced Techniques Using Specialized Advanced Pumpkin Carving Tools
Creating Depth and Dimension
Let's move beyond surface-level carving! Using specialized tools, you can add incredible depth and dimension to your designs. Think layered carvings, where you remove pumpkin flesh at different levels to create shadows and highlights. This technique, often called "shading," involves using tools like loop tools, gouges, and even small scrapers to carefully remove pumpkin flesh in varying amounts. Areas with more flesh will appear darker, while thinner areas allow light to shine through more brightly, creating dramatic visual effects. This is where those power tools really shine! A Dremel can help you create consistent shading across large areas quickly, while smaller hand tools allow you to add fine detail and texture. For more advanced carving ideas, explore these advanced pumpkin carving ideas.
Experiment with different carving depths to achieve subtle gradations of light and shadow. Start with shallow cuts to remove a thin layer of pumpkin flesh, gradually increasing the depth in areas where you want a more dramatic effect. Remember to work slowly and carefully, as it's difficult to add flesh back once it's been removed! This is where a good eye for detail and a steady hand are essential. The most impressive pumpkins are often the ones where the most time has been taken to create subtle shading and depth.
- Loop tools
- Gouges
- Small scrapers
- Dremel rotary tool
Incorporating Intricate Patterns and Textures
Once you've mastered depth, it's time to explore intricate patterns and textures. This is where your collection of specialized tools truly comes into play. Think about using small chisels to create fine lines and geometric patterns. You can use tiny wood carving tools to add delicate details, or even create textured surfaces by carefully removing small sections of flesh. The possibilities are endless! Consider combining different techniques – for example, you could create a background texture with a loop tool and then add a detailed pattern with a small chisel. The key is to experiment and find what works best for you. For some intricate pattern ideas, check out these intricate pumpkin carving patterns.
Don't be afraid to try different tools and techniques to achieve the desired effect. Sometimes, the most interesting results come from unexpected combinations. For instance, you might use a Dremel to create a base design and then add finer details with hand tools. Or, you could use a small drill to create evenly spaced holes that form a unique pattern. The important thing is to have fun and let your creativity flow! The best pumpkin carvers are those who aren't afraid to experiment.
Tool | Effect |
|---|---|
Small chisels | Fine lines, geometric patterns |
Wood carving tools | Delicate details |
Loop tool | Textured surfaces |
3D Pumpkin Carving: Taking it to the Next Level
Ready for a real challenge? 3D pumpkin carving takes your skills to the next level. This involves creating pumpkins with designs that extend beyond the surface, creating three-dimensional elements that almost appear to pop out. This requires careful planning and precise execution, but the results are truly stunning. This technique often involves removing significant amounts of pumpkin flesh to create depth and structure for the 3D elements. It often requires a combination of tools, including saws for initial cuts, loop tools for removing flesh, and small chisels for fine detailing. You might even need specialized tools designed specifically for 3D pumpkin carving, such as those found in professional carving kits.
Remember, patience is key! 3D carving requires a high level of precision and attention to detail. Start with simpler 3D designs and gradually work your way up to more complex projects. It's also a good idea to practice on some smaller pumpkins before tackling a large one. But don't be afraid to experiment and push your creative boundaries—that's where the real magic happens! For even more inspiration, check out complex pumpkin carving designs to get your creative juices flowing.
Choosing the Right Advanced Pumpkin Carving Tools for Your Skill Level
Beginner-Friendly Advanced Pumpkin Carving Tools
Starting your advanced pumpkin carving journey? Don't feel overwhelmed! Begin with a basic, well-made serrated blade and a good quality scooper. These are the workhorses of any pumpkin carving project, regardless of skill level. A sturdy serrated blade makes clean cuts through the tough pumpkin skin, while a comfortable scooper quickly removes the seeds and pulp. Investing in quality here makes the initial stages much smoother and less frustrating. You can also pick up a few inexpensive tools like small chisels or gouges to practice creating simple patterns and textures. Don't worry about having every tool under the sun right away; focus on mastering the basics first.
For transferring designs, start with simple stencils. Tape them securely to the pumpkin and use a pin or awl to carefully prick holes along the lines of your design. This creates a dotted pattern that guides your carving. Avoid overly complex stencils at this stage—keep it simple and build confidence. Remember, practice makes perfect! And for some easy-to-follow instructions, check out these beginner-friendly techniques.
Tool | Purpose | Skill Level |
|---|---|---|
Serrated Blade | Cutting pumpkin rind | Beginner |
Scooper | Removing seeds and pulp | Beginner |
Small Chisels/Gouges | Simple patterns and textures | Beginner |
Intermediate Advanced Pumpkin Carving Tools and Techniques
As your skills progress, you might consider adding more specialized tools to your arsenal. A loop tool is fantastic for quickly removing flesh and creating subtle shading effects. This is a great step up from basic scooping and allows for more control over the depth and texture of your carving. You can also start experimenting with different types of serrated blades – some with finer teeth for detail work, others with coarser teeth for removing larger sections quickly. At this stage, you can also try more intricate stencils and potentially explore transferring patterns using tracing paper and a stylus.
Don't hesitate to experiment with different techniques, combining hand tools with more advanced methods. For instance, you could use a loop tool to create a base texture and then add finer details using a small chisel. The key is to build upon what you've already learned and gradually incorporate new tools and techniques into your workflow. For ideas on intermediate-level designs, check out these detailed pumpkin carving ideas.
- Loop tool
- Variety of serrated blades
- Tracing paper and stylus
- More intricate stencils
Advanced Pumpkin Carving Tools for Professionals
For those aiming for truly professional-level pumpkin carving, power tools become indispensable. A Dremel rotary tool with various bits opens up a world of possibilities, allowing for precise removal of flesh, creating incredibly detailed designs, and achieving consistent shading. Electric carving knives also offer exceptional control and speed for intricate cuts. These tools are not essential for everyone, but they significantly enhance speed and precision for complex projects. At this level, you'll likely also have a wide range of specialized hand tools, including various chisels, gouges, and scrapers, each chosen for its unique capabilities.
Advanced carvers often use projector methods to transfer designs, ensuring accuracy and efficiency. They might also use specialized lighting techniques to highlight their carvings' depth and detail. Mastering 3D pumpkin carving techniques will also be a focus, demanding precision, planning, and a deep understanding of light and shadow. This is where years of practice and experimentation truly pay off. For inspiration and ideas on advanced designs, check out professional-level carving designs.
Maintaining and Caring for Your Advanced Pumpkin Carving Tools
Cleaning and Storage
Cleaning your tools after each use is crucial for maintaining their sharpness and extending their lifespan. For most tools, a simple wipe-down with a damp cloth is sufficient. However, for tools that have come into contact with pumpkin guts, a more thorough cleaning may be necessary. You can use warm soapy water to remove any stubborn residue. Make sure to dry your tools completely before storing them to prevent rust and corrosion. For power tools, always unplug them before cleaning and refer to the manufacturer's instructions for specific cleaning recommendations. Proper cleaning will keep your tools in top condition.
Proper storage is just as important as cleaning. Keep your tools in a dry, safe place away from extreme temperatures and humidity. Consider using a tool roll or case to protect your tools from damage and keep them organized. Sharp tools should be stored separately from other tools to prevent accidental cuts or damage. For power tools, ensure they are stored safely and securely, following the manufacturer's recommendations. Taking care of your tools is an investment in the longevity and quality of your pumpkin carving work. For more tips on advanced tools, check out our guide on advanced pumpkin carving tools.
- Wipe down with a damp cloth after each use.
- Wash with warm, soapy water if needed.
- Dry tools completely before storing.
- Store in a dry, safe place.
- Use a tool roll or case for organization and protection.
Sharpening and Maintenance
Even the sharpest tools will eventually dull with use. Regular sharpening is essential for maintaining precision and preventing accidental slips. For serrated blades, you can use a sharpening steel or a honing rod to restore their edge. For chisels and gouges, you may need to use a sharpening stone or file. If you're unsure how to sharpen your tools, consult a professional or watch some online tutorials. A dull tool is not only less effective, but it can also be more dangerous.
For power tools like Dremels, proper maintenance is crucial. Always refer to the manufacturer's instructions for recommended maintenance procedures. This may include things like replacing worn bits, cleaning the tool's vents, and lubricating moving parts. Regular maintenance will keep your power tools running smoothly and prevent costly repairs. Regular maintenance ensures that your tools are always ready for your next pumpkin carving masterpiece. For more detailed instructions, check out our page on advanced pumpkin carving instructions.
Tool Type | Sharpening Method |
|---|---|
Serrated Blades | Sharpening steel or honing rod |
Chisels and Gouges | Sharpening stone or file |
Power Tools | Refer to manufacturer's instructions |