Table of Contents
Ready to transform your pumpkin carving from simple jack-o'-lanterns to breathtaking works of art? This article is your guide to the exciting world of advanced pumpkin carving projects. Forget basic triangle eyes and jagged grins; we're diving into intricate designs, professional techniques, and stunning inspiration to elevate your Halloween creations. Whether you're a seasoned carver looking for new challenges or a beginner ready to take your skills to the next level, we've got you covered. We'll explore the essential tools and techniques that professional pumpkin carvers use, show you how to create stunningly detailed designs, and provide plenty of inspiration to ignite your creativity. Prepare to be amazed by the possibilities as we unlock the secrets to achieving truly impressive advanced pumpkin carving projects. Get ready to unleash your inner artist and create jack-o'-lanterns that will leave everyone speechless this Halloween!
Mastering Advanced Pumpkin Carving Techniques
Mastering Advanced Pumpkin Carving Techniques
Precision Cutting and Detail Work
Let's talk precision! Advanced pumpkin carving isn't just about hacking away; it's about meticulous detail. Think incredibly fine lines, intricate patterns, and three-dimensional elements. You'll need sharp tools, a steady hand, and a good deal of patience. Start by practicing on smaller pumpkins before tackling a large, complex design. This helps you get a feel for your tools and develop your technique. For inspiration, check out some intricate pumpkin carving patterns online. They're amazing!
A good tip is to use different sized tools for different parts of the design. A smaller carving tool will allow you to create those fine details, while a larger tool can be used for removing larger sections of pumpkin flesh. Remember, less is more sometimes. Start with a lighter touch and gradually increase the depth of your cuts as needed. It's easier to take more pumpkin away than to put it back!
Tool | Use |
|---|---|
X-Acto Knife | Fine details, intricate cuts |
Serrated Knife | Larger cuts, initial shaping |
Pumpkin Carving Saw | Precise sawing and shaping |
Utilizing Templates and Stencils
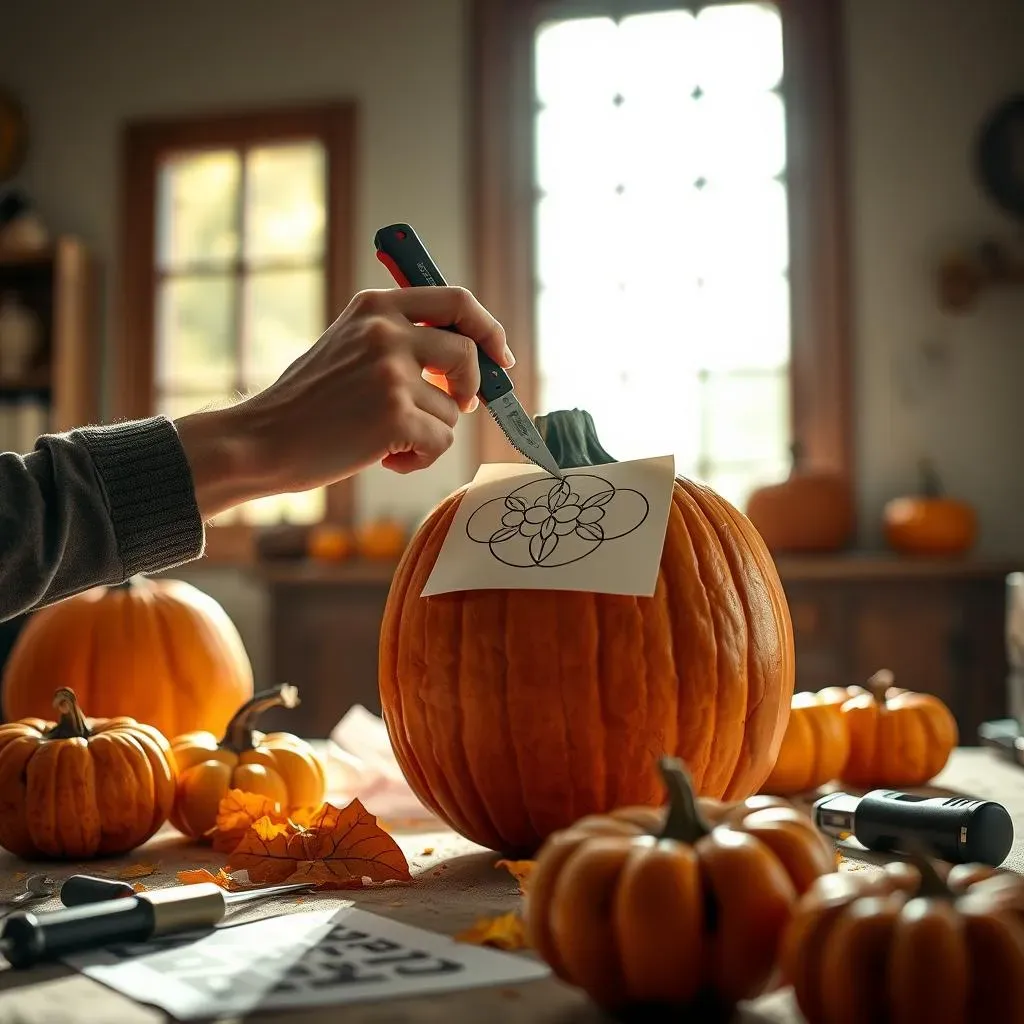
Templates and stencils are your best friends when it comes to advanced pumpkin carving. They provide a guide for complex designs, ensuring accuracy and consistency. You can find countless free templates online, or even create your own using a design program and a printer. But don't be afraid to get creative! You can adapt existing templates or combine elements from different designs to create something truly unique. To explore different design options, consider browsing through some complex pumpkin carving stencils.
Once you have your stencil, carefully transfer the design onto your pumpkin. Use a pin or a fine-tipped marker to lightly trace the outline. Then, slowly and carefully begin carving, following the lines of your stencil. Remember to take your time and focus on accuracy. A well-executed stencil will make a huge difference in the final look of your pumpkin. For more in-depth instructions, you might find helpful guides on advanced pumpkin carving instructions.
- Use a light source to help you see the stencil lines clearly.
- Tape the stencil securely to the pumpkin to prevent it from shifting.
- Practice on scrap pumpkin before carving the final piece.
Stunning Advanced Pumpkin Carving Designs & Inspiration
Stunning Advanced Pumpkin Carving Designs & Inspiration
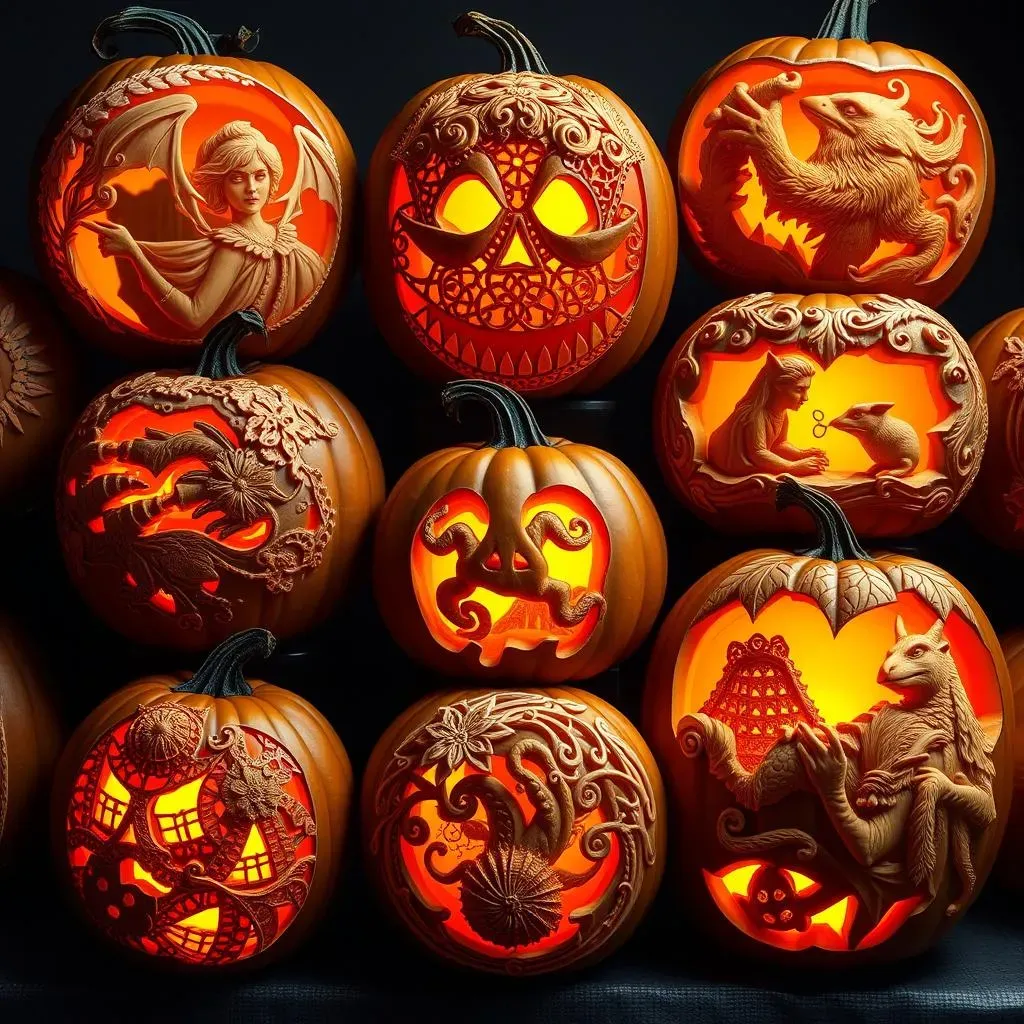
Intricate Patterns and Textures
Let's get inspired! Forget simple faces; think breathtaking detail. Imagine intricate lace patterns, swirling vines, or even realistic portraits carved into your pumpkin's surface. The possibilities are truly endless. Check out some examples of intricate pumpkin carving designs online for some mind-blowing ideas. You might even find a design that speaks directly to your artistic soul. Don't be afraid to experiment with different textures too – a combination of smooth curves and sharply defined lines can create truly stunning visual effects.
Think about using different carving techniques to add depth and dimension to your design. For example, you can use a combination of shallow and deep cuts to create shadows and highlights, giving your design a three-dimensional look. You can also experiment with different types of tools to achieve various textures. A variety of tools are available to help you achieve a professional finish.
- Consider the overall shape and size of your pumpkin when choosing a design.
- Sketch your design on paper first before transferring it to the pumpkin.
- Use a variety of carving tools to create different textures and depths.
3D Carving and Layering
Ready to take it up a notch? 3D pumpkin carving is where things get really exciting. This involves carving multiple layers to create depth and dimension, resulting in incredibly realistic or fantastical scenes. Think detailed landscapes, spooky haunted houses, or even miniature characters peeking out from your pumpkin. For some truly awe-inspiring ideas, look at advanced Halloween pumpkin designs online. The level of detail you can achieve is simply amazing.
One approach is to create a base layer with your main design elements. Then, carefully carve additional layers to add details and depth. This takes patience and precision, but the results are well worth the effort. Remember to use a strong light source to illuminate your work and ensure you’re carving accurately. Using stencils and templates can help you keep your design consistent across layers, especially for complex designs. For more detailed techniques, explore detailed pumpkin carving techniques.
Layer | Technique | Effect |
|---|---|---|
Base | Shallow cuts | Defines main shapes |
Mid-layer | Medium cuts | Adds details and depth |
Top layer | Deep cuts | Creates highlights and shadows |
Beyond the Basic: Creative Themes and Concepts
Let's explore the endless possibilities! Don't limit yourself to traditional Halloween themes. Think outside the box and incorporate your own unique style and creativity. How about a detailed portrait of your favorite character, a stunning natural landscape, or even an abstract design? Look to art, nature, and your own imagination for inspiration. For some seriously out-there ideas, look for advanced pumpkin carving ideas online; you'll be surprised at what you find.
Consider using different materials to enhance your design. Add LED lights for a glowing effect, paint details for a vibrant finish, or even incorporate other decorative elements. The key is to let your imagination run wild and create something truly unique. Remember, the best advanced pumpkin carving projects are those that reflect your personality and passion. Don't be afraid to experiment and push your creative boundaries. The more you practice, the better you'll become.
Essential Tools & Tips for Advanced Pumpkin Carving Projects
Essential Tools for the Job
Let's be honest, you can't carve a masterpiece with a butter knife. Advanced pumpkin carving demands the right tools. Forget those flimsy kits; we're talking professional-grade equipment. A good set of carving tools is an investment, but one that will pay off in the quality of your work. You'll need a variety of tools to handle different tasks, from fine detail work to larger cuts. A solid X-Acto knife is a must for intricate details, while a serrated knife or pumpkin carving saw is perfect for making larger cuts and shaping the pumpkin. Don't forget a good quality scoop for gutting the pumpkin efficiently. For a closer look at the tools, check out our guide to advanced pumpkin carving tools.
Beyond the basics, consider adding specialized tools to your arsenal. A small drill can be incredibly useful for creating small holes or patterns, while a ribbon tool can help you to create smooth curves and intricate designs. And don’t forget about safety! Always wear safety glasses when using sharp tools, and be sure to work on a stable surface.
- X-Acto knives (various sizes)
- Serrated knives
- Pumpkin carving saws
- Gouges and ribbon tools
- Small drill
- Pumpkin scoop
- Safety glasses
Preparing Your Pumpkin
Choosing the right pumpkin is half the battle. Look for a pumpkin that's firm, without any soft spots or bruises. A larger pumpkin gives you more surface area to work with, allowing for more intricate designs. Before you start carving, make sure to thoroughly clean your pumpkin to remove any dirt or debris. A clean surface will make it easier to transfer your design and prevent any accidental slips.
Once you've cleaned your pumpkin, carefully cut a hole at the top or bottom – your choice, but the bottom can be easier for lighting. Then, scoop out the inside, making sure to leave enough pumpkin flesh to maintain the structural integrity of your design. This is crucial, especially for complex designs or 3D carvings. Remember, a stable base is essential for preventing your masterpiece from collapsing. For more tips on pumpkin preparation, look at our detailed pumpkin carving techniques guide.
Step | Action | Tip |
|---|---|---|
1 | Choose a firm pumpkin | Avoid pumpkins with soft spots |
2 | Clean the pumpkin thoroughly | Remove dirt and debris |
3 | Cut a hole | Top or bottom, your preference |
4 | Scoop the inside | Leave enough flesh for structure |
Lighting Your Masterpiece
The right lighting can make or break your advanced pumpkin carving project. Candles are traditional, but they pose fire risks and don't always provide enough light for intricate designs. LED tea lights or battery-operated lights are a safer and more effective alternative, offering a consistent glow without the risk of fire. Place the light source inside the pumpkin and adjust its position to highlight the details of your carving.
Consider using multiple light sources for larger or more complex designs to ensure even illumination. Experiment with different types of lighting to achieve the desired effect. A warm, amber glow can create a cozy atmosphere, while a brighter white light can make the details of your carving pop. For some creative lighting ideas, check out our post on advanced Halloween pumpkin designs.