Table of Contents
Ready to elevate your pumpkin carving game from simple jack-o'-lanterns to breathtaking masterpieces? This article provides advanced pumpkin carving instructions for creating truly intricate and stunning designs. Forget basic triangle eyes and jagged smiles; we're diving into techniques that will transform your pumpkins into works of art. We'll cover everything from selecting the perfect pumpkin and assembling the right tools to mastering precise carving techniques and transferring complex patterns. Learn how to create incredibly detailed designs, achieve professional-level precision, and preserve your creations longer. Whether you're a seasoned carver looking to refine your skills or a beginner ready for a challenge, these advanced pumpkin carving instructions will guide you step-by-step, helping you unleash your creativity and transform ordinary pumpkins into extraordinary Halloween decorations. Prepare to be amazed by what you can achieve!
Advanced Pumpkin Carving Techniques: Tools and Preparation
Advanced Pumpkin Carving Techniques: Tools and Preparation
Choosing Your Tools
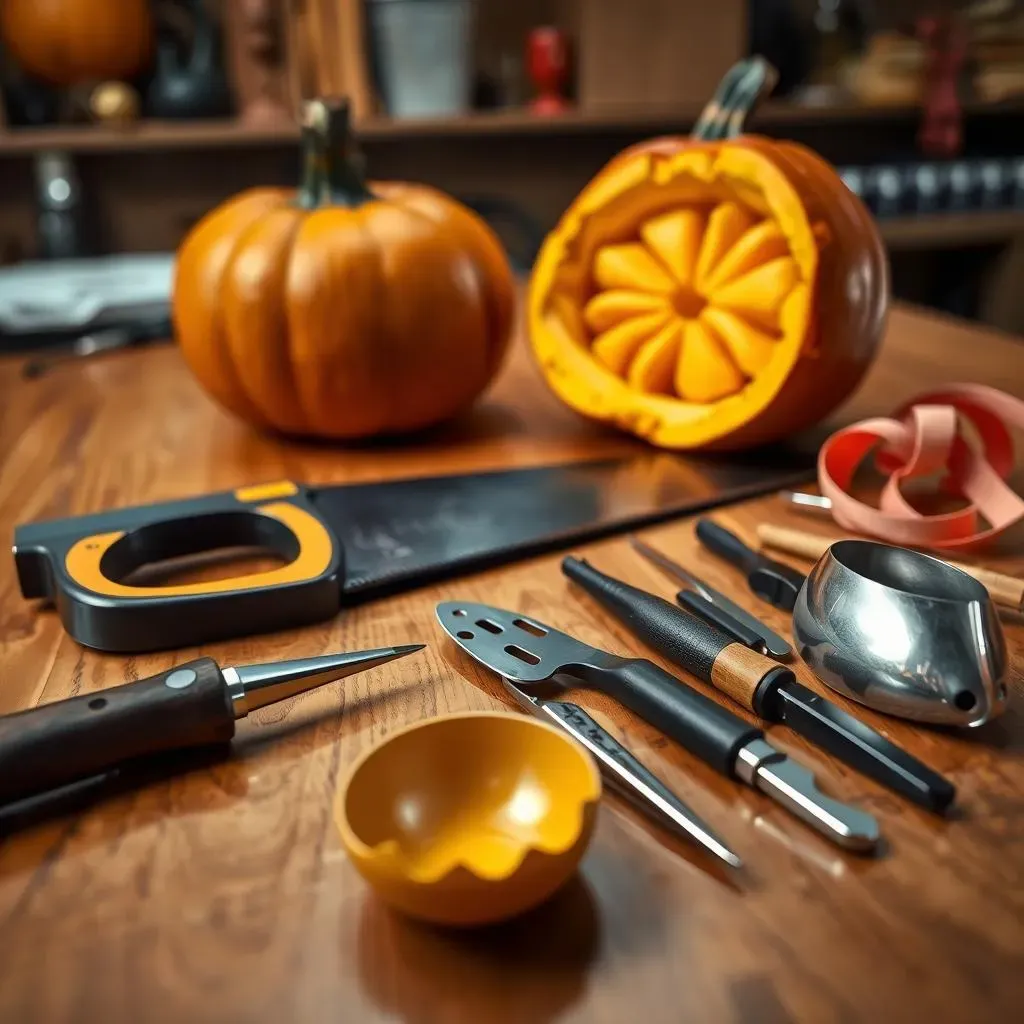
Before you even think about picking a pumpkin, gather your arsenal! You'll need more than just a flimsy kitchen knife for advanced carving. A good quality pumpkin carving saw set is essential; look for ones with replaceable blades for longevity. These saws are designed for precise cuts, unlike regular knives which can easily slip and ruin your design. For intricate details, a set of small carving tools, like those used for clay sculpting, will be invaluable – you can find these at most craft stores. Don't forget a sturdy scoop for gutting the pumpkin and a few different sized ribbon tools for removing large sections of pumpkin skin quickly and efficiently. For transferring patterns, you'll need a good quality push pin or fine-tipped needle. Finally, a well-lit workspace is key!
Don't underestimate the importance of sharp tools! Dull tools are more likely to slip, causing uneven cuts and potentially injuring you. Replacing blades regularly is essential, especially with the saws. Think of it as an investment in your pumpkin carving masterpiece! For inspiration on the best tools available, check out our guide on advanced pumpkin carving tools.
Tool | Purpose | Where to Find |
|---|---|---|
Pumpkin Carving Saw Set | Precise cutting of intricate designs | Craft stores, online retailers |
Small Carving Tools | Intricate details and fine work | Craft stores, online retailers |
Pumpkin Scoop | Quickly removing the pumpkin's insides | Craft stores, grocery stores (around Halloween) |
Pumpkin Selection: The Foundation of Your Masterpiece
Now, let's talk pumpkins! Selecting the right pumpkin is crucial. Avoid pumpkins with bruises, soft spots, or deep grooves – these imperfections can make carving difficult and impact the final result. Look for a pumpkin with a smooth, even surface and a firm, solid feel. Larger pumpkins provide more space for complex designs, but remember that they'll also take longer to carve. A good rule of thumb is to choose a pumpkin that's heavy for its size; this indicates a healthy, well-hydrated pumpkin that will last longer. Consider the design you have in mind before selecting your pumpkin to ensure it's appropriately sized. For some great ideas, take a look at our advanced pumpkin carving ideas post.
Before you start carving, thoroughly wash and dry your pumpkin. This removes dirt and debris, making it easier to see your pattern and preventing it from getting smudged. It also helps to clean the pumpkin's surface before you start carving; this will make the pattern transfer easier and will improve the final result. For tips on how to select the perfect pumpkin, check out our article on professional pumpkin carving tips.
- Choose a pumpkin with a smooth, even surface.
- Select a pumpkin that is firm and heavy for its size.
- Consider the size of your design when choosing a pumpkin.
- Thoroughly wash and dry the pumpkin before carving.
Advanced Pumpkin Carving Designs & Pattern Transfer
Advanced Pumpkin Carving Designs & Pattern Transfer
Choosing Your Design: Inspiration and Complexity
Now for the fun part: choosing your design! The internet is a treasure trove of inspiration. Pinterest, Instagram, and even dedicated pumpkin carving websites are brimming with ideas, from spooky skulls and haunted houses to intricate portraits and fantastical creatures. Don't be afraid to think outside the box – the more creative, the better! Consider your skill level when selecting a design. Beginners might want to start with simpler patterns before tackling complex designs. For a wealth of ideas, check out our page dedicated to advanced pumpkin carving ideas.
Once you've found your perfect design, consider the level of detail. Intricate patterns require more time and precision, so factor that into your planning. Remember, the beauty of advanced pumpkin carving lies in the detail. Don't be afraid to challenge yourself, but also don't be afraid to scale back a design if it's too complex for your skill level. For more complex stencil designs, take a look at our guide to complex pumpkin carving stencils.
- Browse online for inspiration.
- Choose a design appropriate for your skill level.
- Consider the level of detail in the design.
- Don't be afraid to modify a design to suit your needs.
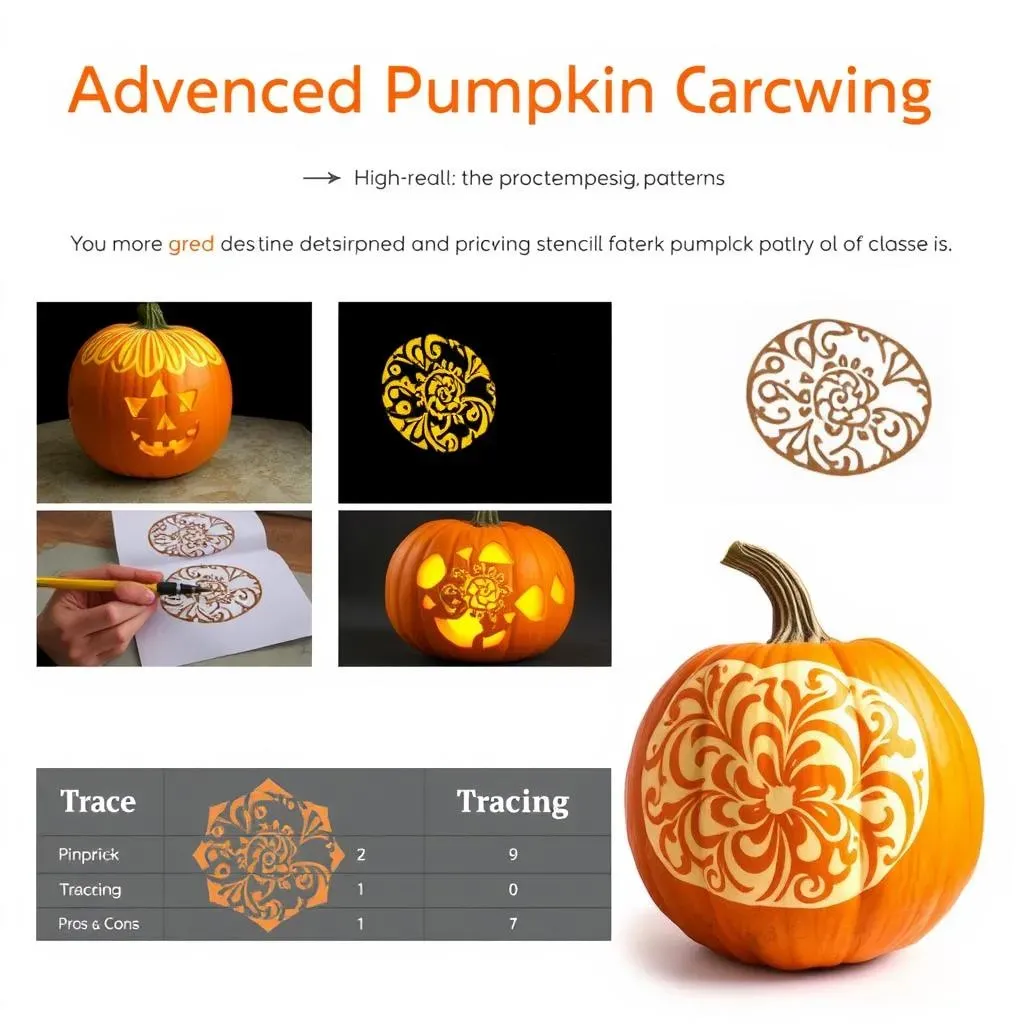
Transferring Your Pattern: Precision and Accuracy
With your design selected, it's time to transfer it onto your pumpkin. There are several methods. One popular approach is to print your design and use a push pin or fine-tipped needle to carefully poke holes along the lines of the pattern, creating a dotted outline on the pumpkin's surface. This method works well for intricate designs but needs a steady hand. Another option is to use masking tape to secure the printout directly onto the pumpkin and carefully trace the outline with a pen or marker. This second method is less precise but faster for larger patterns.
Regardless of the method you choose, take your time! Accuracy is key to a successful carving. Use a bright light source to ensure you can clearly see the lines, and don't rush the process. If you're using the pinprick method, make sure the holes are small and evenly spaced. If you're tracing, use a light hand to avoid smudging the pattern. Once the pattern is transferred, you can remove the printout and start carving. For more detailed instructions on pattern transfer, see our guide to detailed pumpkin carving techniques.
Method | Pros | Cons |
|---|---|---|
Pinprick | Accurate, suitable for intricate designs | Time-consuming, requires steady hand |
Tracing | Quick, easy for larger designs | Less precise, potential for smudging |
Advanced Pumpkin Carving: Finishing, Lighting & Preservation
Advanced Pumpkin Carving: Finishing, Lighting & Preservation
Cleaning and Detailing Your Creation
Once the carving is complete, it's time for the finishing touches! Carefully remove any remaining pumpkin bits from inside the carved sections. Use a small brush or cotton swab to clean out any dust or debris. For particularly fine details, consider using a small, pointed tool to clean out any leftover pumpkin pulp or fibers. A little attention to detail here can make a big difference in the final look of your masterpiece. For additional tips on cleaning and detailing, check out our guide on detailed pumpkin carving techniques.
If you want to add extra flair, consider using paint or markers to highlight certain areas or add additional details. Black paint can be used to enhance shadows and add depth, while metallic paints can create stunning accents. Remember to let any paint dry completely before handling or lighting your pumpkin. For inspiration on adding extra details and using paint, explore our gallery of advanced Halloween pumpkin designs.
- Remove any remaining pumpkin bits.
- Clean out dust and debris with a brush or swab.
- Use small tools for fine detailing.
- Consider using paint or markers to enhance your design.
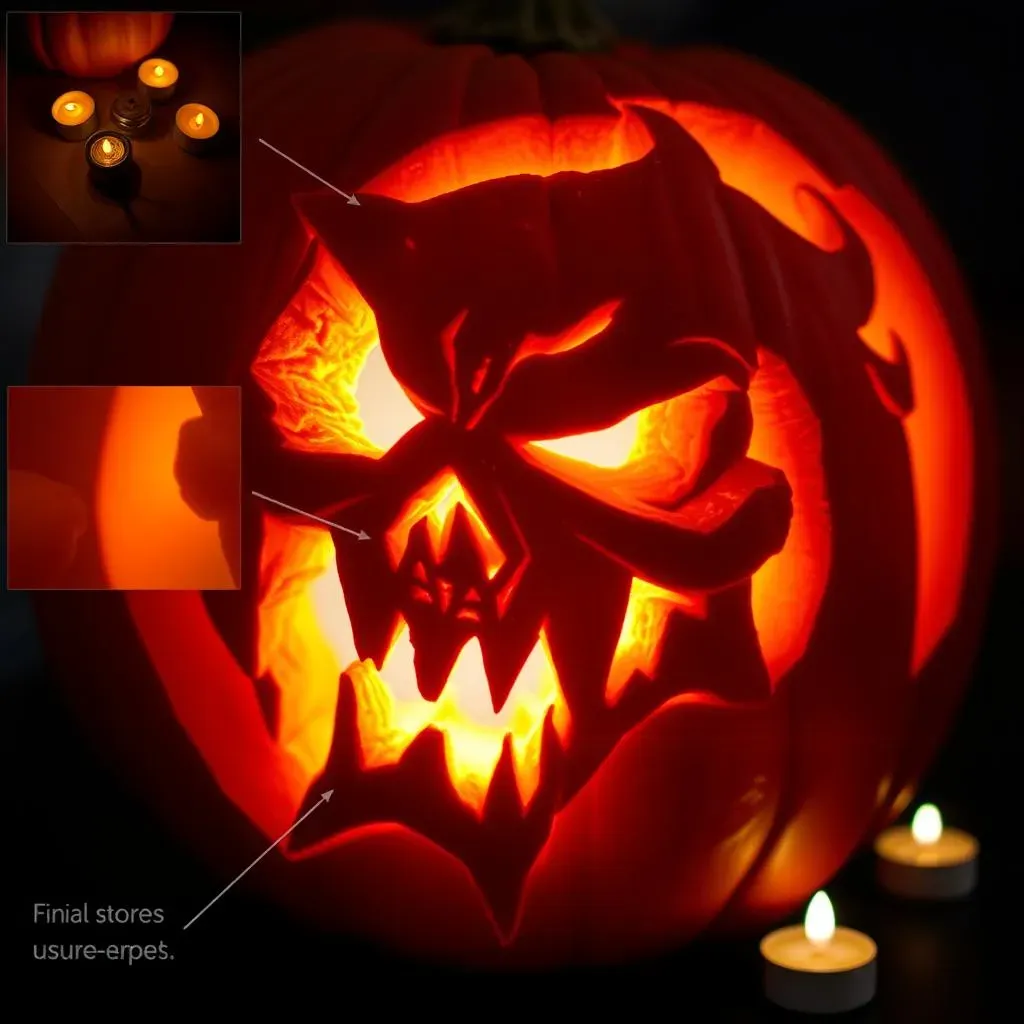
Illuminating Your Masterpiece: Choosing the Right Light Source
Now comes the moment of truth: lighting your pumpkin! While traditional candles create a classic ambiance, they pose a fire hazard and tend to melt the pumpkin from the inside out. LED lights are a safer and more efficient alternative, offering longer-lasting illumination and a variety of colors to match your design. Consider battery-operated tea lights for a simple and safe option. For a more dramatic effect, you could even use a small projector to cast images onto the inside of the pumpkin, creating an interactive display. For some creative lighting ideas, see our post on professional pumpkin carving ideas.
The placement of your light source is also important. For larger pumpkins, you might need multiple lights to ensure even illumination. Experiment with different positions to find the most flattering angle and highlight the intricate details of your carving. For pumpkins displayed outdoors, consider using weatherproof lights to protect them from the elements. Remember, the right lighting can truly transform your pumpkin from a simple carving into a captivating display. For more advanced lighting techniques, check out our guide to advanced pumpkin carving tips and tricks.
Light Source | Pros | Cons |
|---|---|---|
LED Lights | Safe, long-lasting, variety of colors | Can be more expensive than candles |
Candles | Classic ambiance, inexpensive | Fire hazard, melts pumpkin |