Table of Contents
Ready to ditch the basic triangle eyes and carve something truly spectacular this Halloween? This article is your guide to unlocking the world of advanced pumpkin carving ideas. Forget simple stencils; we're diving into intricate designs, professional techniques, and creative projects that will transform your pumpkin from a simple jack-o'-lantern into a work of art. We'll explore the essential tools and materials you'll need to master advanced pumpkin carving, offering step-by-step instructions and expert tips to help you avoid common mistakes. Get ready to be amazed by the stunning advanced pumpkin carving designs we'll showcase, providing inspiration for your own unique creations. Whether you're a seasoned carver or a curious beginner, this comprehensive guide will equip you with the knowledge and confidence to create truly unforgettable jack-o'-lanterns this Halloween. Prepare to unleash your creativity and impress everyone with your incredible pumpkin-carving skills! Let's get started on these advanced pumpkin carving ideas!
Mastering Advanced Pumpkin Carving Techniques
Mastering Advanced Pumpkin Carving Techniques
Precision Cutting Techniques
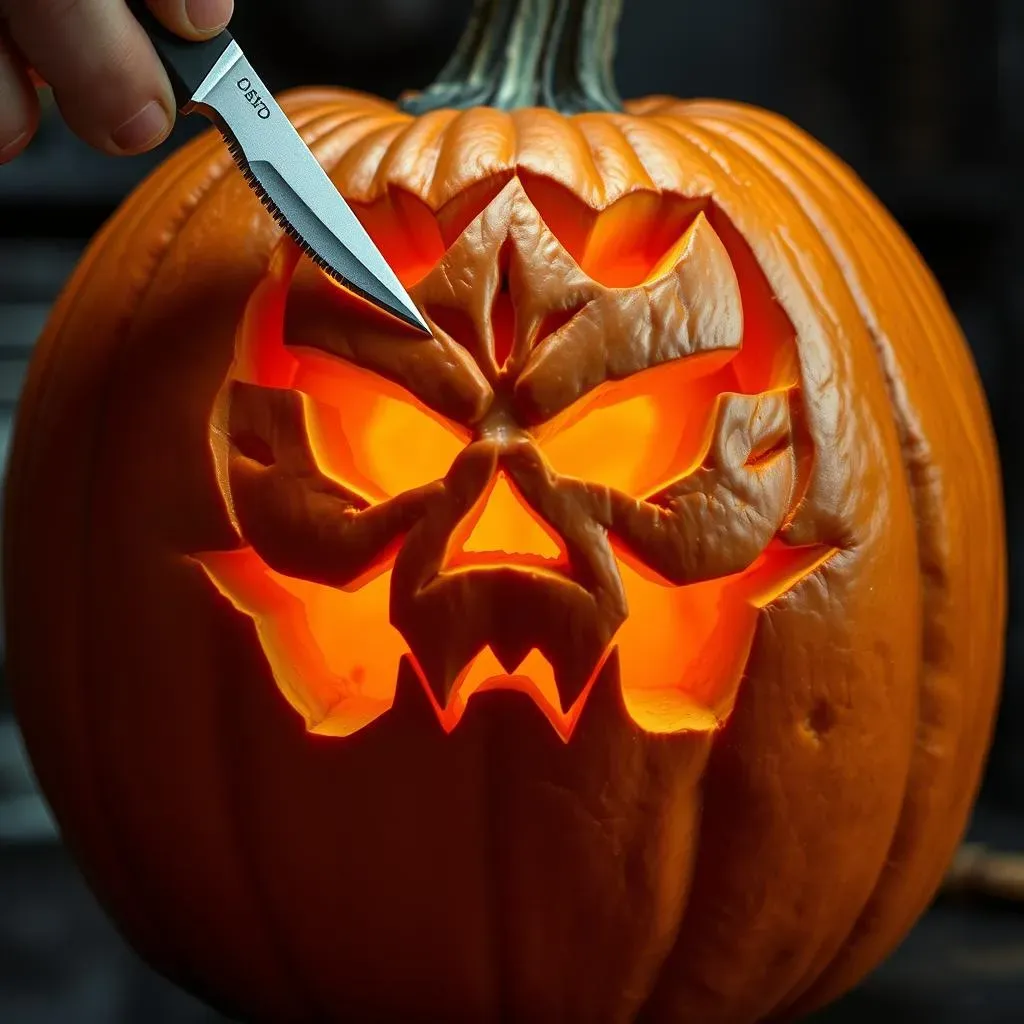
Let's talk about precision. Forget those wobbly, amateurish cuts. Advanced pumpkin carving demands control. Start with sharp tools – a good X-Acto knife is your best friend. Practice making clean, consistent cuts on scrap pumpkin pieces before tackling your masterpiece. Think of it like practicing scales on a violin before playing a concerto! Mastering these basic cuts will open up a world of possibilities for intricate designs.
For those really fine details, consider using different sized tools. A smaller blade is perfect for delicate work, while a larger one is great for removing larger sections of pumpkin flesh. Don't be afraid to experiment! And remember, patience is key. Take your time and focus on accuracy; rushing will lead to mistakes. Check out these professional pumpkin carving tips for more guidance.
Tool | Use | Tip |
|---|---|---|
X-Acto Knife | Intricate details, outlining | Use a fresh blade for best results |
Small Saw | Removing large sections, creating curves | Go slowly to avoid cracks |
Spoon/Scoop | Gutting the pumpkin | Leave 1-1.5 inch walls for stability |
Creating Depth and Dimension
Depth is what separates a good carving from a great one. Instead of just cutting flat shapes, experiment with layering and different depths of cuts. Think about creating shadows and highlights to add realism to your design. For example, if you're carving a face, you can create deeper cuts for the eye sockets and mouth to make them more dramatic. This adds a three-dimensional effect that significantly improves the overall look of your creation. It’s all about light and shadow, my friend!
Consider using different carving techniques to add texture and interest. You could try creating a layered effect by carving multiple levels of detail, or you could use a technique called "skinning" to remove thin layers of pumpkin skin, creating a more delicate look. These advanced techniques add a level of sophistication that will make your carvings stand out from the crowd. Explore some detailed pumpkin carving techniques to see some examples.
- Use a variety of tools for different depths
- Experiment with layering to create shadows
- Try skinning for delicate details
Transferring Complex Designs
Transferring intricate designs onto your pumpkin can be tricky. Forget simple stencils! For complex designs, consider using a projector to trace your image onto the pumpkin. Alternatively, you can print your design onto transfer paper and carefully adhere it to the pumpkin. This will ensure accuracy and help you avoid mistakes. Remember to carefully adjust the brightness and contrast of your projected image to ensure it’s visible on the pumpkin’s surface.
Once your design is transferred, carefully outline it with your X-Acto knife before beginning to carve. This step is crucial for creating clean lines and preventing accidental slips. Take your time and make sure you’re happy with the outline before you start removing any pumpkin flesh. This meticulous approach will help you create a truly stunning carving. For more complex stencils, check out these complex pumpkin carving stencils.
Stunning Advanced Pumpkin Carving Designs: Inspiration and Ideas
Stunning Advanced Pumpkin Carving Designs: Inspiration and Ideas
Let's get inspired! Forget those predictable jack-o'-lanterns. We're talking about designs that'll make jaws drop. Think intricate lace patterns, realistic portraits (yes, really!), or even 3D scenes carved right into the pumpkin's flesh. The possibilities are as endless as your imagination. Want some ideas to get your creative juices flowing? How about a spooky haunted mansion complete with tiny bats? Or maybe a majestic dragon, scales and all? Don't be afraid to think outside the pumpkin patch!
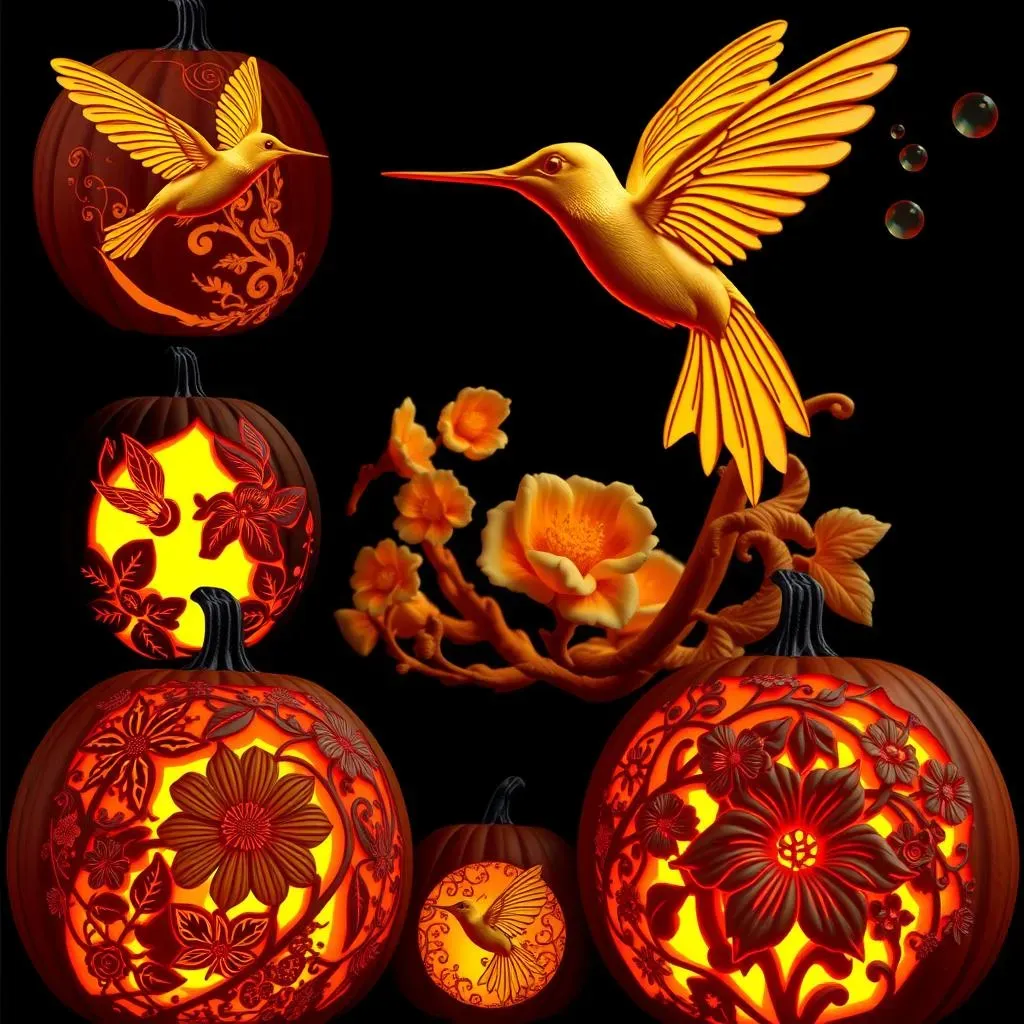
One amazing idea is to incorporate elements from nature. Imagine carving a detailed hummingbird, its wings seemingly mid-flight. Or perhaps a delicate flower with intricate petals. These nature-inspired designs can add a touch of elegance and sophistication to your Halloween display. Need some more ideas? Check out these intricate pumpkin carving patterns for some inspiration.
- Realistic portraits
- Intricate lace patterns
- 3D scenes
- Nature-inspired designs (hummingbirds, flowers)
- Geometric patterns
Another popular trend is incorporating pop culture references. Think iconic movie characters, superheroes, or even your favorite video game characters. These designs add a fun and playful element to your Halloween decor, and are sure to spark conversations with your guests. Remember that even complex designs can be broken down into smaller, manageable sections. Start with the outlines, then focus on adding details gradually. This will make the entire process much less daunting.
Don't forget about the power of lighting! A strategically placed light source can dramatically enhance the effect of your advanced pumpkin carving designs. Experiment with different types of lights to achieve the desired look. A warm, flickering candlelight can create a spooky atmosphere, while a bright LED light can highlight intricate details. For more advanced designs, consider using multiple lights to create a more dramatic effect. For some advanced Halloween designs, see these advanced Halloween pumpkin designs.
Design Type | Difficulty | Lighting Suggestion |
|---|---|---|
Realistic Portrait | Advanced | Bright LED |
Intricate Lace | Advanced | Warm Candlelight |
3D Scene | Expert | Multiple Lights |
Essential Tools and Materials for Advanced Pumpkin Carving
Essential Tools and Materials for Advanced Pumpkin Carving
Essential Carving Tools
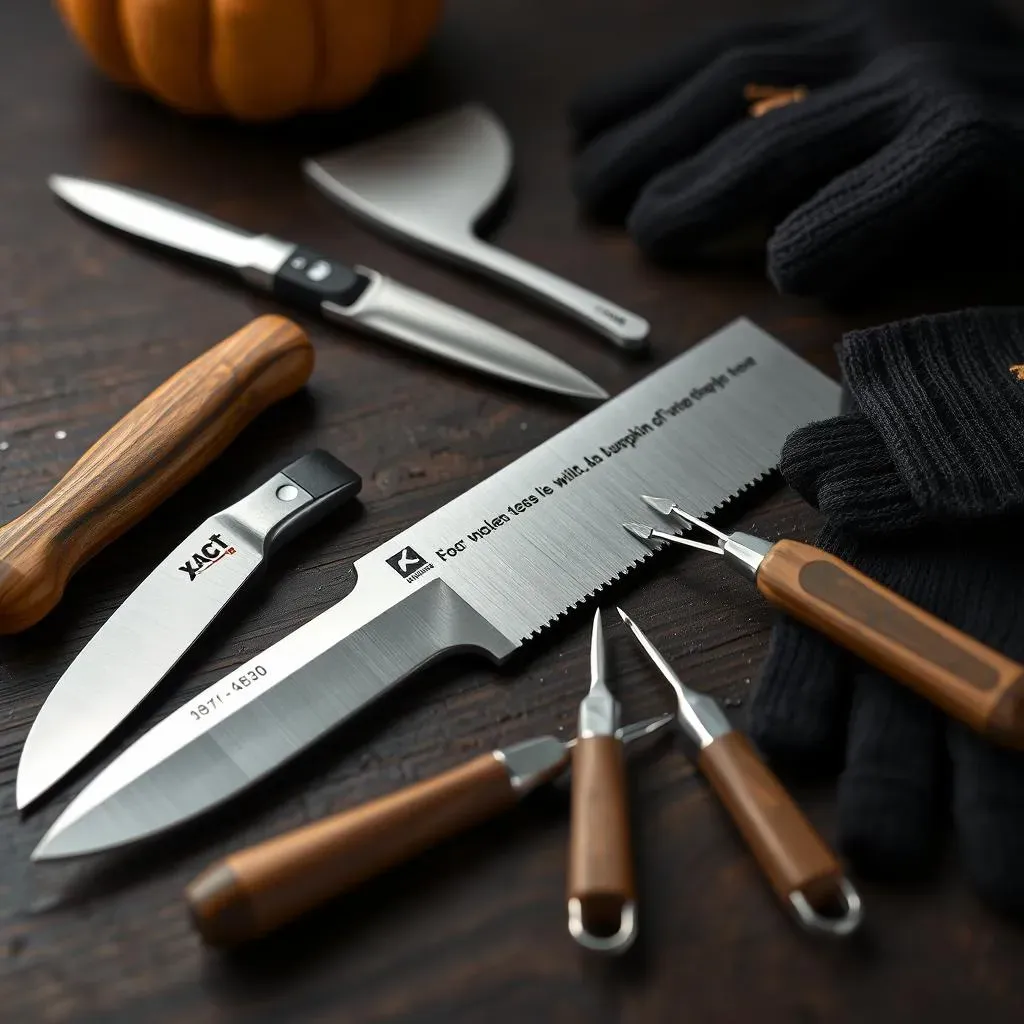
Let's talk tools! Forget that rusty butter knife you’ve been using. Advanced pumpkin carving demands precision instruments. A good quality X-Acto knife set is a must-have – different blade sizes are crucial for various levels of detail. You'll need smaller blades for intricate work and larger ones for removing bigger chunks of pumpkin. A small saw is incredibly helpful for creating curves and removing larger sections of pumpkin. Don’t forget a sturdy pumpkin scoop or spoon for gutting; you want to leave about an inch of pumpkin wall thickness for stability. And always, *always*, have extra blades on hand!
Beyond the basics, consider investing in specialized tools. A variety of gouges, for example, allows you to create different textures and depths. Ribbon tools are fantastic for removing thin layers of pumpkin skin, creating a more refined, almost painted effect. These aren't strictly necessary, but they significantly expand your creative possibilities. Finally, don't forget a good pair of comfortable gloves to protect your hands from accidental cuts. For more advanced tool selection, check out these advanced pumpkin carving tools.
Tool | Purpose | Importance |
|---|---|---|
X-Acto Knife Set | Precision cutting, detail work | Essential |
Small Saw | Removing large sections, curves | Highly Recommended |
Pumpkin Scoop | Gutting the pumpkin | Essential |
Gouges | Creating texture and depth | Recommended for advanced designs |
Ribbon Tools | Removing thin layers of skin | Recommended for advanced designs |
Transferring Your Design: Precision is Key
Getting your design onto the pumpkin is half the battle. Forget flimsy stencils! For complex designs, a projector is invaluable. Project your image onto the pumpkin, adjust the focus and brightness, and trace the outline with a marker. Alternatively, high-quality transfer paper works wonders; just print your design, carefully adhere it, and trace. Whichever method you choose, take your time! A rushed transfer leads to a messy final product. This initial step is where precision truly shines.
Once you have your design transferred, double-check everything before you start carving. Make any necessary adjustments to the outline. You'll want to create a clean, crisp outline with your X-Acto knife before you start removing any pumpkin flesh. This helps maintain accuracy and prevent any accidental slips. Remember, a well-defined outline is the foundation of a stunning carving. For some inspiration, check out these complex pumpkin carving designs – note the clean outlines.
- Projector for complex designs
- High-quality transfer paper
- Sharpie or similar marker for tracing
- Take your time and double-check before carving
Lighting Your Masterpiece
The final touch? Lighting! Don't underestimate the power of illumination. A simple tea light can work for basic designs, but for advanced carvings, you'll want brighter, more controlled lighting. LED tea lights are a great option; they're bright, safe, and long-lasting. For even more dramatic effects, consider using battery-operated string lights or even fiber optic lighting. These options offer flexibility and allow you to highlight specific details within your design.
Experiment with different light colors to enhance the mood. Warm-toned lights create a cozy, inviting atmosphere, while cooler lights can give your carving a more eerie, spooky vibe. Consider placing your lit pumpkin in a strategic location to maximize its impact. A dark background will make your carving pop, while a reflective surface can create interesting shadows and highlights. For inspiration on lighting, check out these detailed pumpkin carving ideas – notice how the lighting enhances the carvings.
Beyond the Basics: Advanced Pumpkin Carving Projects and Tips
Creating Multi-Layered Designs
Let's push the boundaries! Simple stencils are so last year. Advanced carving is all about depth and dimension. Think about creating multi-layered designs. Imagine a haunted house scene with a foreground, mid-ground, and background, each carved at a different depth to create a sense of perspective. This adds incredible realism and visual interest. It's like creating a miniature diorama inside your pumpkin!
To achieve this, you'll need to plan your design carefully. Sketch out your scene, considering the placement of each element and how the different layers will interact. You might want to use a projector to help transfer the design accurately. Remember, patience is key. Take your time and focus on creating clean, precise cuts. For more ideas on complex designs, check out these complex pumpkin carving designs.
- Plan your design carefully
- Use a projector for accurate transfer
- Focus on clean, precise cuts
- Experiment with different depths
Incorporating Different Materials
Why limit yourself to just pumpkin? Advanced pumpkin carving opens up a world of creative possibilities. Think about incorporating other materials to enhance your designs. For instance, you could add small, intricately carved wooden pieces to create architectural details in a haunted house scene. Or, you could use colored glass beads or gems to add sparkle and shine to your creation. The possibilities are endless!
Remember to consider the overall aesthetic of your design when selecting additional materials. You want the added elements to complement your carving, not detract from it. Experiment with different textures and colors to create a visually stunning effect. For example, you could use metallic paints to add highlights or shadows to your carving. Don’t be afraid to experiment and see what works best for you! For some extra inspiration, check out these advanced pumpkin carving ideas.
Material | Use | Effect |
|---|---|---|
Wood | Architectural details | Adds texture and realism |
Glass Beads | Sparkle and shine | Adds visual interest |
Metallic Paints | Highlights and shadows | Enhances depth and dimension |
Advanced Lighting Techniques
Lighting is everything! A well-lit pumpkin can transform a good carving into a masterpiece. Forget simple tea lights; explore advanced lighting techniques to enhance your designs. Consider using fiber optic lights to create a glowing effect from within the pumpkin. This adds a magical, ethereal quality to your creation. You could even use multiple light sources to create different moods and highlight specific details.
Experiment with different colored lights to create dramatic effects. A warm, amber light can create a cozy, inviting atmosphere, while a cool, blue light can add a chilling, spooky vibe. Consider using translucent materials, like colored cellophane, to diffuse the light and create a softer, more atmospheric glow. Don't be afraid to experiment and see what works best for your design. For even more advanced techniques, check out these detailed pumpkin carving techniques.